


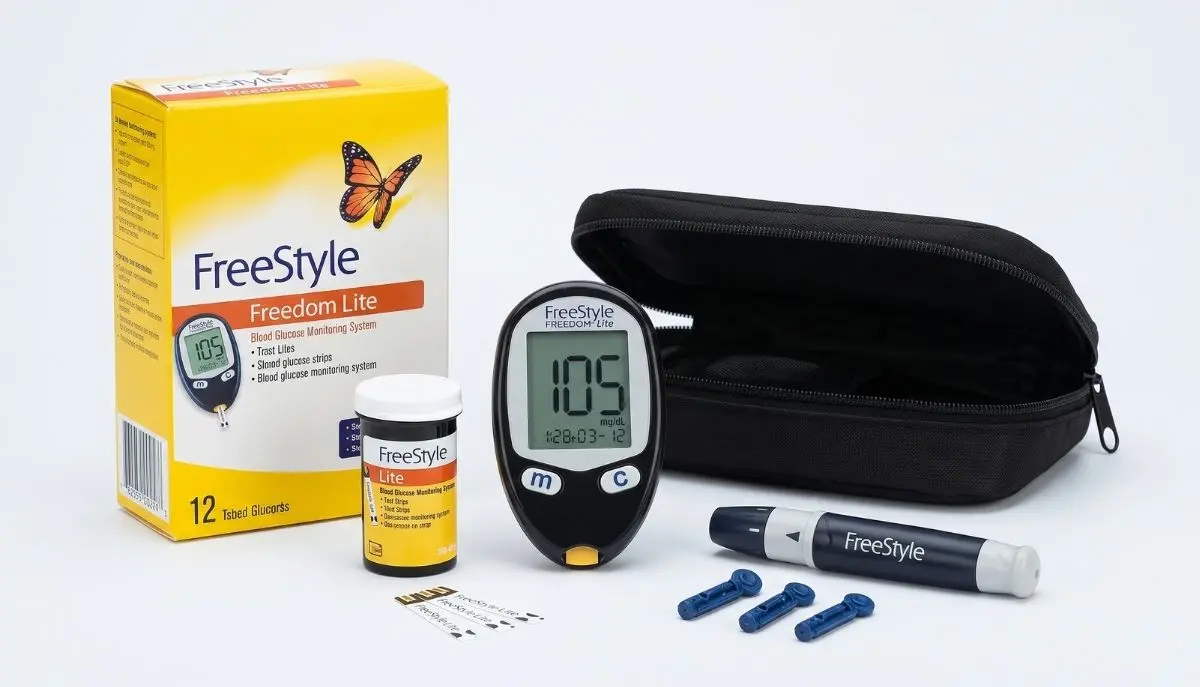
How to Use FreeStyle Freedom Lite Blood Glucose Monitoring System
Learning how to check your blood glucose at home can feel confusing when you are doing it for the first time. You may wonder where to place the test strip, how much blood is needed, which finger to use, what the numbers mean, and what to do if the meter displays an unexpected result.
The good news is that once you understand the routine, checking blood glucose with a meter can become a simple part of everyday diabetes care.
The FreeStyle Freedom Lite Blood Glucose Monitoring System is a blood glucose meter designed to help people with diabetes monitor glucose using a small blood sample. Abbott provides specific instructions for the FreeStyle Freedom Lite meter, and the manufacturer recommends using the meter with the appropriate FreeStyle Lite test strips and FreeStyle control solution.
This guide explains how to use FreeStyle Freedom Lite blood glucose monitoring system in straightforward language. It covers preparation, meter setup, test-strip handling, lancing, collecting a blood sample, obtaining a reading, reviewing stored results, control-solution testing, cleaning, troubleshooting, safety precautions, and common mistakes.
The goal is not simply to explain which button to press. It is to help you build a testing routine that is comfortable, consistent, and easier to understand.
Important medical disclaimer: This article is for general educational purposes and does not replace the instructions supplied with your meter, test strips, or lancing device, or advice from your doctor, pharmacist, diabetes educator, or other qualified healthcare professional. Follow the instructions for your specific FreeStyle Freedom Lite system and your individual diabetes-care plan.
How to Use FreeStyle Freedom Lite Blood Glucose Monitoring System
If you need the short version, the usual testing process looks like this:
- Gather the FreeStyle Freedom Lite meter, FreeStyle Lite test strip, lancing device, and a new lancet.
- Wash your hands with soap and warm water.
- Dry your hands completely.
- Remove one test strip from its container and close the container promptly.
- Insert the test strip into the meter.
- Check the meter’s startup/system-check display.
- Wait for the blood-drop symbol indicating that the meter is ready.
- Use the lancing device to obtain a blood sample.
- Touch the blood sample to the appropriate sample area on the test strip.
- Allow the meter to process the sample.
- Read and record the displayed glucose result.
- Remove the used strip and dispose of it safely.
- Dispose of the used lancet appropriately.
- Store the meter and remaining supplies according to the manufacturer’s instructions.
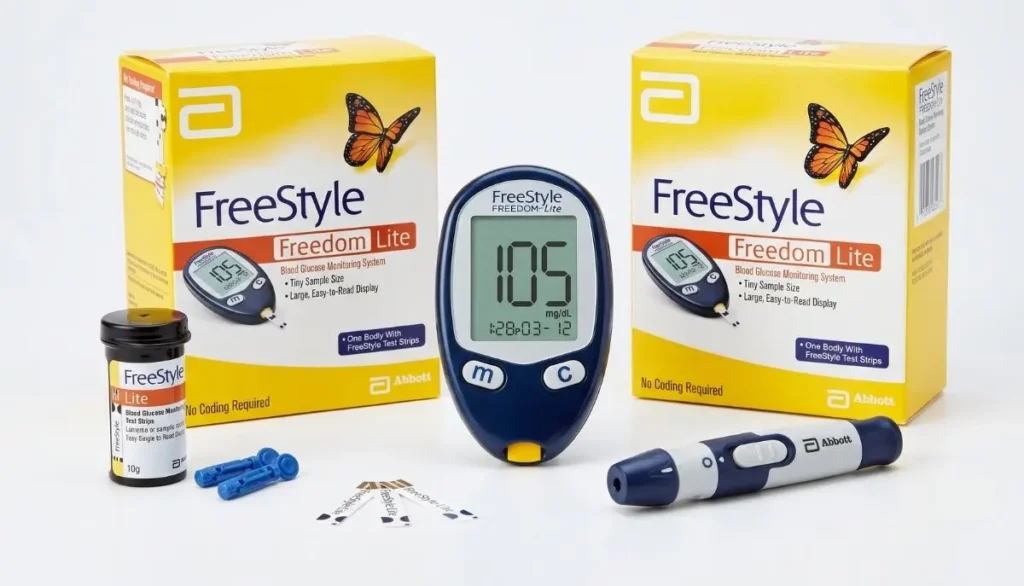
Abbott’s documentation describes the FreeStyle Freedom Lite as an in-vitro blood glucose monitoring system and specifies compatible FreeStyle Lite test strips and FreeStyle control solution.
The exact procedure should always be checked against the owner’s booklet supplied with your particular device.
What Is the FreeStyle Freedom Lite Blood Glucose Monitoring System?
The FreeStyle Freedom Lite is a blood glucose monitoring system used to measure glucose in a blood sample.
Unlike a continuous glucose monitor (CGM), which uses a sensor to provide ongoing glucose information, a traditional blood glucose meter requires you to obtain a blood sample and test it using a disposable strip.
The basic system includes several important components:
- FreeStyle Freedom Lite meter
- FreeStyle Lite test strips
- Lancing device
- Lancets
- FreeStyle control solution
- Carrying case and related supplies, depending on the package
The meter contains the electronics that analyze the blood sample. The test strip provides the surface where the blood sample is applied.
The lancing device helps obtain the small blood sample needed for testing.
The lancet is the sterile, single-use component used with the lancing device.
Understanding these parts makes the process less intimidating. You do not need to memorize everything at once. Once you have performed a few tests correctly, the routine generally becomes much more familiar.
Why Learning the Correct Testing Technique Matters
A glucose meter gives you a number, but that number is only useful when the test is performed correctly.
Something as simple as testing with unwashed hands can potentially affect the result. Food, drinks, or other substances on your fingers may contaminate the sample.
The CDC recommends washing your hands with soap and warm water and drying them well before testing. It also recommends tracking results and disposing of used lancets and strips appropriately.
The FDA similarly emphasizes correct handwashing, compatible test strips, proper storage, and following the manufacturer’s instructions.
This is why good technique is not about being overly careful. It is about making your readings more useful.
Before You Start: Gather Everything You Need
Before beginning your test, place your supplies somewhere clean and convenient.
You will generally need:
1. FreeStyle Freedom Lite meter
This is the electronic device that displays and stores your blood glucose results.
2. FreeStyle Lite test strip
The test strip is inserted into the meter and receives the blood sample.
3. Lancing device
This device helps you obtain a blood sample.
4. New lancet
A new sterile lancet should be used according to the manufacturer’s instructions.
5. Tissue or cotton
This can be useful after testing.
6. Appropriate disposal container
Used lancets should be disposed of safely according to local requirements and your healthcare professional’s recommendations.
7. Your glucose log, if you use one
Although the meter can store results, maintaining notes can help you recognize patterns.
You may also want to keep your diabetes medication plan nearby if your healthcare professional has instructed you to take action based on certain glucose readings.
Step 1: Wash and Dry Your Hands
This is one of the most important steps in learning how to use FreeStyle Freedom Lite blood glucose monitoring system.
Wash your hands thoroughly with soap and warm water.
Then dry them completely.
Do not skip the drying step.
Water left on your fingers can dilute the blood sample. More importantly, substances such as food residue or sugar can potentially affect a glucose reading.
The CDC specifically recommends washing and drying your hands before each blood glucose test.
If your hands are cold, you may have difficulty getting enough blood. Warming your hands before washing them may help improve circulation to your fingertips.
A simple routine
Think:
Wash → Dry → Test
This three-step habit can make your testing routine more consistent.
Step 2: Prepare a New Lancet
Use your lancing device according to its instructions.
A typical preparation process involves:
- Removing the cap from the lancing device.
- Inserting a new sterile lancet.
- Removing the lancet’s protective cover as instructed.
- Replacing the cap.
- Adjusting the depth if your lancing device provides different depth settings.
- Preparing or cocking the device according to its instructions.
The correct depth varies from person to person.
If the setting is too shallow, you may not obtain enough blood.
If it is unnecessarily deep, the fingerstick may be more uncomfortable than it needs to be.
Start with the setting recommended by the lancing-device instructions and adjust only as needed.
Step 3: Prepare the FreeStyle Lite Test Strip
Remove one test strip from its container.
Close the container promptly if your strips are supplied in a vial.
Test strips are sensitive medical supplies and should be stored according to their manufacturer’s instructions. Heat, humidity, moisture, and improper storage can affect test-strip performance.
Before using a strip, check that:
- It is intended for the FreeStyle Freedom Lite meter.
- It is not damaged.
- It has been stored properly.
- It is within the applicable expiration/use period.
- The strip container has been properly closed.
Do not assume that a test strip from another glucose meter will work simply because it physically looks similar.
Abbott specifically states that the FreeStyle Freedom Lite meter should be used with FreeStyle Lite test strips and FreeStyle control solution. Other products can produce inaccurate results.
Step 4: Insert the Test Strip Into the Meter
Insert the test strip into the meter as directed in the owner’s booklet.
The meter powers on when the strip is inserted.
When the meter starts, pay attention to the display.
The FreeStyle Freedom Lite documentation describes a system-check screen that appears when the meter turns on. You should verify that the display matches the expected screen described in the manual. If it does not, the manufacturer advises not using the meter until the issue is addressed.
This quick check is easy to overlook, but it is part of using the device correctly.
Step 5: Wait for the Blood-Drop Symbol
After inserting the test strip, the meter will indicate when it is ready for the blood sample.
Look for the blood-drop symbol or other testing prompt described in your owner’s booklet.
Do not apply blood before the meter is ready.
Waiting for the correct prompt helps ensure that the testing sequence starts properly.
Step 6: Choose the Testing Site
The FreeStyle Freedom Lite system supports blood glucose testing from certain approved sites, including the fingers and, depending on the system instructions, alternative sites such as the hand, forearm, upper arm, thigh, and calf.
However, alternative-site testing is not appropriate in every situation.
The manufacturer’s instructions warn that fingertip testing is recommended when testing for hypoglycemia or when someone has hypoglycemia unawareness.
The FDA also explains that alternative-site readings can be less reliable when glucose is changing rapidly, such as after eating, after insulin, during exercise, or when a person is ill or under stress.
When in doubt, use your fingertip
If:
- You think your glucose may be low
- You feel symptoms that could indicate hypoglycemia
- Your reading does not match how you feel
- Your glucose may be changing quickly
follow the manufacturer’s instructions and use a fingertip sample when appropriate.
If you are unsure whether alternative-site testing is right for you, speak with your healthcare professional.
Step 7: Use the Lancing Device
Place the prepared lancing device against the selected testing area.
If testing your finger, many people find the side of the fingertip more comfortable than repeatedly using the center.
Press the release button according to your lancing device instructions.
A small blood drop should form.
Avoid repeatedly squeezing your finger forcefully.
The FDA notes that squeezing the finger can affect the sample and recommends allowing blood to flow rather than aggressively squeezing the fingertip.
If you do not get enough blood:
- Make sure your hands are warm.
- Confirm that they were completely dry.
- Review the lancing-device depth setting.
- Try another approved finger or site if appropriate.
- Follow your lancing-device instructions.
Do not repeatedly puncture the same area unnecessarily.
Step 8: Apply Blood to the Test Strip
Once the meter indicates that it is ready, bring the blood sample to the appropriate sample area of the FreeStyle Lite test strip.
Allow the strip to draw in the blood as designed.
Do not smear blood across the strip.
The FreeStyle Freedom Lite system is designed to use a small blood sample. Abbott documentation describes a tiny sample requirement for the system.
The important point is to provide the amount and application method specified by the manufacturer’s instructions.
Do not add additional blood simply because you are uncertain.
If the meter indicates that the sample was insufficient or an error occurs, follow the troubleshooting instructions and, when necessary, repeat the test with a new strip.
Step 9: Wait for the Blood Glucose Result
After the blood sample is accepted, the meter processes it.
The result should appear on the screen after the testing sequence is complete.
The result may be displayed in the unit configured for your meter, such as mg/dL.
Do not immediately panic if a number looks different from what you expected.
One reading is a piece of information, not your entire health story.
However, unexpected or concerning readings should be taken seriously and managed according to your healthcare professional’s instructions.
Step 10: Record Your Result
Even though the meter can store readings, maintaining a simple record can be useful.
You may record:
- Date
- Time
- Blood glucose result
- Before or after meal
- Medication or insulin, if relevant to your care plan
- Exercise
- Illness or stress
- Any unusual circumstances
For example:
| Time | Situation | Glucose | Notes |
| 7:30 AM | Before breakfast | 112 mg/dL | Slept normally |
| 1:00 PM | Before lunch | 128 mg/dL | Normal lunch planned |
| 8:00 PM | After dinner | 154 mg/dL | 2-hour reading |
Your healthcare professional can help you decide what information is most useful.
The CDC recommends tracking blood glucose results because patterns can help you and your healthcare team understand how food, medication, physical activity, and other factors affect your glucose.
Step 11: Remove the Used Test Strip
After completing the test, remove the used strip from the meter.
Dispose of it appropriately.
Do not save used strips for another test.
Test strips are designed for their intended single-use testing procedure.
Step 12: Dispose of the Lancet Safely
Remove and dispose of the used lancet according to your local requirements and your healthcare professional’s recommendations.
Never leave used lancets where children, pets, or other people could accidentally come into contact with them.
Most importantly, never share lancets or fingerstick devices with another person.
The CDC specifically advises not sharing blood glucose monitoring equipment, especially lancets.
How to Set Up the FreeStyle Freedom Lite Meter
Before routine testing, you should become familiar with the meter’s settings.
The FreeStyle Freedom Lite owner’s booklet includes settings for items such as sound, time, date, and reminder alarms.
A correct date and time are important because stored glucose results become much more useful when you know exactly when they were obtained.
Setting the Sound
The meter provides sound options.
Depending on your model and instructions, you can adjust the sound level or choose a quieter setting.
The owner’s booklet explains how to use the meter’s buttons to move through the available sound settings and save your selection.
If you have difficulty hearing the meter, consider discussing the device’s features with your healthcare professional or supplier.
Setting the Date and Time
Accurate date and time settings help organize your stored glucose results.
If the time or date is incorrect, your historical readings may be difficult to interpret.
Use the meter’s setup instructions to configure:
- Time format
- Hour
- Minutes
- Date format
- Year
- Month
- Day
The exact button sequence should be followed from the owner’s booklet supplied with your meter.
Understanding the FreeStyle Freedom Lite Buttons
The meter includes buttons used to navigate settings and stored results.
The owner’s booklet identifies controls such as:
- M button for meter modes and memory-related functions
- C button for configuration and scrolling functions
- Test strip port for inserting the test strip
- Display for showing glucose readings and other information
- Data port for compatible data-management functions
You do not need to memorize every function immediately.
Start by becoming comfortable with the basic routine:
Insert strip → obtain blood → apply blood → read result → remove strip.
How to Review Stored Blood Glucose Results
One useful feature of the FreeStyle Freedom Lite system is its ability to retain previous test results.
The meter’s memory can help you review your testing history.
The owner’s information describes memory functions that allow users to review previous results and associated dates/times.
Reviewing your history can help you notice patterns such as:
- Morning readings consistently higher than expected
- Different results before and after meals
- Changes during exercise
- Changes during illness
- Repeated low readings
- Repeated high readings
However, do not independently change insulin or other diabetes medications simply because you see a pattern.
Medication adjustments should be discussed with your healthcare professional.
What Do Blood Glucose Numbers Mean?
One of the hardest parts of learning how to use FreeStyle Freedom Lite blood glucose monitoring system is understanding what the number means.
The meter gives you a measurement.
Your healthcare professional helps determine what that measurement means for you.
There is no single target range that is appropriate for every person.
Your goals may depend on:
- Type of diabetes
- Age
- Medications
- Pregnancy status
- Other health conditions
- Risk of hypoglycemia
- Your doctor’s treatment plan
The CDC notes that target ranges can differ between people and recommends following the individualized range provided by your healthcare professional.
For many nonpregnant adults with diabetes, the CDC lists common targets of 80–130 mg/dL before meals and below 180 mg/dL one to two hours after starting a meal, but these are general targets and are not a substitute for individualized medical advice.
What If Your Reading Seems Too High?
First, stay calm.
If a result is unexpectedly high:
- Consider whether your hands were properly washed and dried.
- Check that the test strip was appropriate and stored correctly.
- Consider whether the result matches how you feel.
- Repeat the test with a new strip if appropriate.
- Follow the instructions provided by your healthcare professional for high glucose.
- Seek medical advice when the result remains concerning or is accompanied by symptoms.
A glucose meter is a tool for monitoring—not a substitute for professional evaluation.
If you have been given a specific sick-day or high-glucose plan, follow that plan.
What If Your Reading Seems Too Low?
Low blood glucose can require prompt attention.
If you believe you may have hypoglycemia, follow the treatment plan given to you by your healthcare professional.
The FreeStyle Freedom Lite documentation specifically recommends fingertip testing when testing for low blood glucose or when someone has hypoglycemia unawareness.
If the reading seems inconsistent with your symptoms, repeat testing according to your meter instructions and seek appropriate medical guidance.
If you experience severe symptoms such as loss of consciousness, seizure, severe confusion, or inability to safely treat yourself, emergency medical assistance may be necessary.
Why Your Blood Glucose Reading Can Change
Blood glucose is not a fixed number.
It can change because of:
Food
Carbohydrates can raise blood glucose after eating.
Physical activity
Exercise can affect glucose levels, sometimes lowering them.
Medication
Insulin and other diabetes medications can change glucose levels.
Stress
Physical or emotional stress may influence blood glucose.
Illness
Infections and other illnesses can alter glucose levels.
Sleep
Poor sleep or changes in your normal schedule may influence glucose management.
Timing
A reading before breakfast is not directly comparable with a reading taken shortly after a meal.
This is why keeping context alongside your numbers can be helpful.
Common Mistake: Testing With Dirty Hands
This is one of the simplest mistakes to prevent.
Suppose you eat fruit and immediately perform a fingerstick without washing your hands.
Sugar residue on your fingers could contaminate the sample.
The result might not reflect your actual blood glucose level.
The solution is simple:
Wash. Dry. Test.
The CDC and FDA both emphasize proper handwashing before blood glucose testing.
Common Mistake: Using the Wrong Test Strip
A test strip may look like another brand’s strip, but that does not mean it is compatible.
For the FreeStyle Freedom Lite system, use the test strips specified by Abbott for that meter.
Abbott specifically warns that other test strips or control solutions can produce inaccurate results.
Common Mistake: Using Expired or Damaged Strips
Do not use test strips that are expired, damaged, or improperly stored.
The FDA advises checking test-strip packaging and avoiding damaged or expired strips.
If your strips have been exposed to excessive heat, humidity, moisture, or other unsuitable conditions, check the manufacturer’s instructions before relying on them.
Common Mistake: Leaving the Test Strip Container Open
If your strips are supplied in a vial, close the container promptly after removing a strip.
Moisture and humidity can affect test strips.
The CDC and FDA both recommend appropriate test-strip storage and keeping containers closed.
A good habit is:
Open → Remove one strip → Close immediately.
Common Mistake: Not Getting Enough Blood
Sometimes a person gets a very small blood drop and tries to spread it over the test strip.
That can lead to testing problems.
Instead:
- Warm your hands if they are cold.
- Use the lancing device correctly.
- Make sure the puncture depth is appropriate.
- Allow a suitable drop to form.
- Follow the test strip instructions.
Do not excessively squeeze the finger.
The FDA notes that insufficient blood can affect accuracy and advises following the meter’s specific instructions for sample size.
Common Mistake: Testing the Same Finger Repeatedly
Repeatedly using the same spot can make your fingertips sore.
Consider rotating among suitable fingers.
Using the side of the fingertip can also be more comfortable for many people.
If you experience persistent pain, swelling, redness, or other concerns at testing sites, discuss them with your healthcare professional.
Common Mistake: Testing an Alternative Site at the Wrong Time
Alternative-site testing may sound appealing because it can reduce discomfort.
However, it is not appropriate in every circumstance.
Blood glucose may change rapidly after:
- Eating
- Exercise
- Insulin
- Illness
- Stress
The FDA recommends fingertip testing in situations where glucose may be changing rapidly or when a low glucose level is suspected.
Always follow your FreeStyle Freedom Lite instructions and your healthcare professional’s advice regarding alternative sites.
Common Mistake: Changing Medication Based on One Reading
This is an important safety point.
A glucose meter gives you information, but medication decisions should be based on your healthcare plan.
Do not change insulin or other medication doses simply because one result is higher or lower than expected unless your healthcare professional has already provided a specific adjustment plan.
The FDA notes that glucose-monitoring results can be used with healthcare professionals to help guide diabetes management.
How to Perform a Control Solution Test
Control solution testing can help determine whether the meter and test strips are operating properly.
The FDA recommends considering control-solution testing when opening a new container of strips, periodically during use, after dropping the meter, or when you receive unusual results that do not match how you feel.
For the FreeStyle Freedom Lite system, use the FreeStyle control solution specified for the meter.
The basic concept is:
- Prepare the meter.
- Insert an appropriate test strip.
- Use control solution instead of blood.
- Apply it according to the test-strip instructions.
- Compare the displayed result with the acceptable range printed on the test-strip container or provided instructions.
Do not compare a control-solution result with your personal blood glucose target.
It should instead be compared with the control range supplied for that specific strip lot or product.
If the control result falls outside the expected range, do not assume your blood glucose results are reliable until you investigate the issue according to the manufacturer’s troubleshooting instructions.
When Should You Perform a Control Test?
Consider checking the meter with control solution when:
- You open a new container of test strips.
- You suspect the strips may be damaged.
- You drop the meter.
- The results seem unusually high or low.
- Your result does not match how you feel.
- You suspect the meter or strips may not be functioning properly.
The FDA specifically recommends control-solution checks in several of these situations.
How to Care for Your FreeStyle Freedom Lite Meter
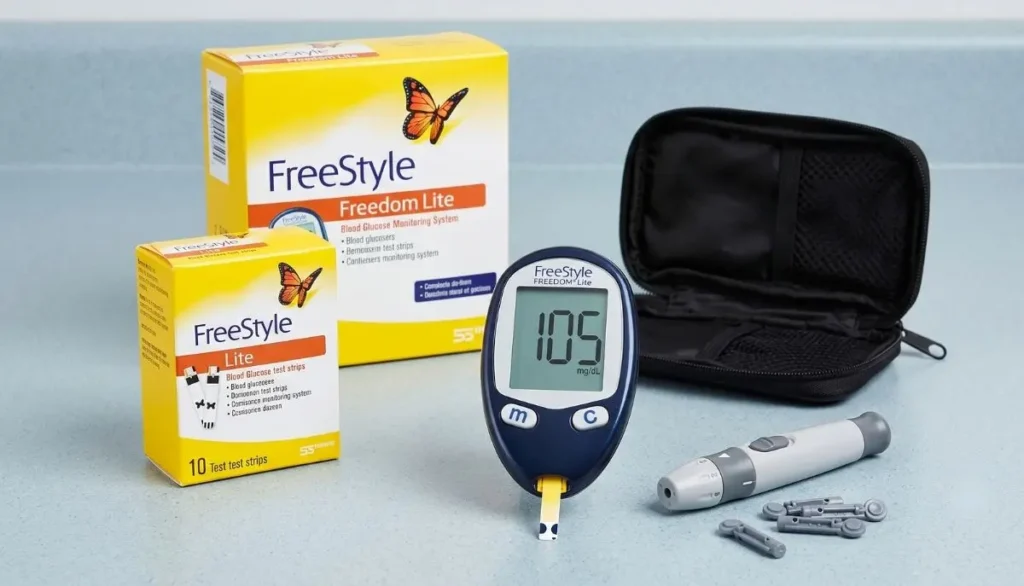
Taking care of your meter can help preserve its functionality.
Keep it clean
Follow the cleaning instructions provided by the manufacturer.
Do not use cleaning products that could damage the meter.
Keep it dry
Avoid exposing the meter to unnecessary moisture.
Protect it from extreme temperatures
Glucose meters and test strips can be affected by environmental conditions.
Store supplies properly
Keep test strips in their appropriate container and close the container as instructed.
Keep supplies together
A carrying case can make it easier to keep the meter, lancing device, lancets, and strips organized.
How to Store FreeStyle Lite Test Strips
Test-strip storage deserves special attention.
Avoid:
- Excessive humidity
- Extreme temperatures
- Direct environmental exposure
- Damaged containers
- Open containers left for long periods
The FDA explains that improper storage of meters and test strips can reduce reliability, and the CDC warns that moisture, humidity, and extreme temperatures can damage strips.
Always follow the storage conditions supplied with your particular strips.
Can the FreeStyle Freedom Lite Be Used for Diagnosis?
A home blood glucose meter should not be treated as a standalone diagnostic tool.
The FreeStyle Freedom Lite documentation states that the system is intended to assist with monitoring diabetes control and is not intended for diagnosis or screening of diabetes.
If you believe you may have diabetes or prediabetes, speak with a qualified healthcare professional.
A healthcare professional can determine which laboratory tests and clinical evaluation are appropriate.
FreeStyle Freedom Lite vs. a Continuous Glucose Monitor
The FreeStyle Freedom Lite is a traditional blood glucose meter.
A CGM works differently.
A traditional meter:
- Requires a blood sample
- Uses a test strip
- Provides a glucose reading at the time of testing
- Can be used as directed for individual blood glucose checks
A CGM:
- Uses a wearable sensor
- Measures glucose from interstitial fluid
- Provides ongoing glucose information
- May display trends and alerts
These are different technologies.
Neither should be used outside its intended instructions.
If you use a CGM and also need a blood glucose meter, follow the instructions provided for your particular devices.
How Often Should You Check Your Blood Glucose?
There is no universal testing schedule for everyone.
How often you test may depend on:
- Type of diabetes
- Medication
- Insulin use
- Pregnancy
- Recent changes in treatment
- History of low blood glucose
- Your healthcare professional’s recommendations
The CDC recommends following the testing schedule provided by your healthcare professional.
Some people may need several tests per day, while others may have a different schedule.
Do not copy another person’s testing schedule without professional guidance.
Before-Meal Testing
A healthcare professional may ask you to test before meals.
This can provide information about your glucose level before food affects it.
If your healthcare professional has given you specific pre-meal targets, use those targets.
After-Meal Testing
Some people are instructed to check glucose after meals.
The timing matters.
A reading taken 30 minutes after eating is not directly comparable with one taken two hours after eating.
When recording a post-meal result, note the timing so that your healthcare professional can interpret the information correctly.
Testing During Illness
Illness can affect blood glucose.
If you have diabetes and become sick, your healthcare professional may recommend checking glucose more frequently.
Your healthcare team may also give you a sick-day plan covering:
- Blood glucose monitoring
- Medication
- Hydration
- Food
- Ketone testing when appropriate
- When to seek medical attention
Follow the plan provided specifically for you.
What Does “HI” or “LO” Mean?
Some glucose meters may display special messages when glucose is outside the meter’s measurable range.
The FDA notes that glucose meters can display messages such as “LO” or “HI” when a glucose value is beyond the range the meter can measure.
Do not guess what the message means.
Check the FreeStyle Freedom Lite owner’s booklet for the appropriate interpretation and action.
If you receive an unexpected extreme reading, follow your healthcare professional’s instructions and seek urgent medical help if symptoms are severe.
What If the Reading Does Not Match How You Feel?
This situation deserves attention.
For example, you may feel symptoms of low blood glucose while a reading appears normal.
Or you may feel completely fine while receiving an unexpectedly high reading.
When the result and your symptoms do not agree:
- Wash and dry your hands again.
- Repeat the test with a new strip when appropriate.
- Use a fingertip sample if recommended.
- Check that your strips are correct and properly stored.
- Follow your healthcare professional’s instructions.
- Seek medical advice if the discrepancy continues.
The FDA specifically advises attention to situations in which meter results do not agree with how you feel.
Why Fingerstick Testing Can Still Be Valuable
Modern diabetes care includes many technologies, but traditional blood glucose meters remain useful.
A meter can provide a direct blood glucose measurement when you need one.
It can also help people understand how their glucose responds to:
- Meals
- Exercise
- Medication
- Sleep
- Daily routines
The most important thing is not simply owning a meter.
It is learning how to use it consistently and correctly.
Tips for a More Comfortable Fingerstick
If testing your fingers is uncomfortable, try these general techniques:
Warm your hands
Cold fingers can make it harder to obtain blood.
Use the side of the fingertip
Many people find this more comfortable.
Rotate fingers
Avoid repeatedly puncturing the same location.
Use the minimum effective lancing depth
A deeper puncture is not automatically better.
Do not squeeze aggressively
Let the blood form naturally.
Keep your equipment organized
When supplies are easy to find, testing may feel less stressful.
Building a Simple Daily Testing Routine
A routine can make diabetes management feel less overwhelming.
For example:
Morning
Wash hands, test according to your prescribed schedule, record the result, and continue with your normal morning routine.
Before meals
Test if your healthcare professional has instructed you to do so.
After meals
Test at the prescribed time when required.
Evening
Review your readings if appropriate and prepare supplies for the next day.
The exact schedule should come from your healthcare professional.
The important idea is consistency.
A Simple Blood Glucose Testing Checklist
Before testing, ask:
- Do I have my meter?
- Do I have the correct FreeStyle Lite test strips?
- Is my lancet ready?
- Are my hands clean?
- Are my hands completely dry?
- Is the test strip container closed after removing a strip?
- Is the meter ready?
- Am I using the correct testing site?
- Do I know what to do with the result?
This small checklist can be especially helpful when you are learning.
How Family Members Can Help
If you are helping an older adult, child, or family member with diabetes, learn the testing process alongside them.
The CDC recommends that another person also learn how to use the meter in case the person with diabetes becomes unable to perform the test independently.
A helpful caregiver can assist with:
- Organizing supplies
- Checking strip expiration
- Recording results
- Remembering appointments
- Recognizing unusual readings
- Communicating concerns to healthcare professionals
However, each person should have their own appropriate monitoring equipment.
Never share fingerstick devices or lancets between people.
Blood Glucose Meter Safety
Safety should always come before convenience.
Remember these rules:
- Never share your meter if your manufacturer or healthcare guidance indicates it is intended for single-person use.
- Never share lancets.
- Use a new lancet as directed.
- Dispose of used lancets safely.
- Keep small components away from children.
- Use only compatible test strips.
- Store supplies properly.
- Follow the manufacturer’s instructions.
- Ask your healthcare professional when you are uncertain.
The FDA and CDC emphasize avoiding sharing blood glucose monitoring equipment and maintaining appropriate testing practices.
What Can Affect Blood Glucose Meter Accuracy?
A glucose reading can be influenced by more than the meter itself.
Potential factors include:
- Dirty hands
- Wet hands
- Incorrect test strips
- Expired or damaged strips
- Improper strip storage
- Extreme temperatures
- Extreme humidity
- Incorrect testing technique
- Insufficient blood sample
- Certain medical conditions
- Certain medications or substances
The FDA notes that conditions such as severe dehydration, anemia, extreme hematocrit, and certain medications or supplements can affect glucose results.
If you have a medical condition or take medications that might interfere with glucose testing, ask your healthcare professional about it.
What If the Meter Gives an Error?
Do not immediately assume that the meter is broken.
First, check the relevant troubleshooting instructions.
Possible causes can include:
- Test strip not inserted correctly
- Problem with the strip
- Insufficient sample
- Incorrect testing procedure
- Environmental conditions
- Meter malfunction
Use the exact error code and troubleshooting section in your FreeStyle Freedom Lite owner’s booklet.
If you cannot resolve the problem, contact the appropriate manufacturer support service or your healthcare professional.
How to Improve Your Testing Technique
The best way to become confident with a blood glucose meter is practice.
Ask your diabetes educator, nurse, pharmacist, doctor, or other qualified healthcare professional to watch you perform a complete test.
They can check:
- Handwashing.
- Test-strip handling.
- Lancing technique.
- Blood-sample collection.
- Blood application.
- Result interpretation.
- Disposal.
- Record keeping.
The FDA recommends having an experienced glucose-meter user or healthcare professional help you learn proper testing technique.
A five-minute demonstration can eliminate many common mistakes.
Taking Your Meter to Medical Appointments
Bring your meter to appointments when your healthcare professional recommends it.
Your healthcare team may be able to:
- Review your stored results
- Compare meter readings with laboratory measurements
- Observe your testing technique
- Identify potential problems
- Help interpret patterns
- Adjust your diabetes management plan when clinically appropriate
The FDA recommends taking your meter to appointments so your healthcare provider can check your technique and compare readings when appropriate.
A Practical Example of a Testing Routine
Imagine that Maria has been instructed by her healthcare professional to check her glucose before breakfast.
She gets up in the morning and gathers:
- FreeStyle Freedom Lite meter
- FreeStyle Lite test strip
- Lancing device
- Lancet
- Tissue
She washes her hands with soap and warm water and dries them thoroughly.
She removes one test strip and closes the container.
She inserts the strip into the meter.
The meter starts and performs its system check.
Once the blood-drop prompt appears, Maria prepares her lancing device.
She obtains a small blood drop from the side of her fingertip.
She touches the blood to the appropriate area of the test strip.
The meter processes the sample and displays the result.
Maria records the number along with the date and time.
She removes the used strip and disposes of it appropriately.
She disposes of the used lancet according to her local safety instructions.
The entire process becomes routine.
That is the goal—not perfection, but a repeatable and reliable habit.
A Beginner-Friendly FreeStyle Freedom Lite Routine
If all the technical information feels overwhelming, remember this simple sequence:
Prepare
Get your meter, strip, lancet, and lancing device.
Clean
Wash and dry your hands.
Insert
Put the FreeStyle Lite test strip into the meter.
Check
Make sure the meter display and testing prompt are normal.
Prick
Use the lancing device.
Apply
Let the blood enter the test strip as instructed.
Read
Wait for the meter to display your glucose result.
Record
Write down the result if appropriate.
Dispose
Safely dispose of the used strip and lancet.
Repeat
Follow your healthcare professional’s schedule.
That is the foundation of how to use FreeStyle Freedom Lite blood glucose monitoring system.
How Alfa Healthcare Supply Inc. Can Help
Choosing and using the right medical supplies can make everyday health routines feel less stressful.
Alfa Healthcare Supply Inc. provides healthcare and medical supply products for individuals, families, caregivers, and healthcare needs.
If you are looking for blood glucose monitoring supplies, diabetic supplies, durable medical equipment, or other home healthcare products, a knowledgeable medical supply provider can help you understand available products and identify supplies that match your needs.
For product availability, compatibility, or specific medical-device questions, always verify the product information and follow the manufacturer’s instructions.
Why Correct Blood Glucose Monitoring Is About More Than Numbers
It is easy to look at a glucose meter and see only a number.
But behind every reading is a person.
Maybe you are checking your glucose before going to work.
Maybe you are learning how to test after a new diabetes diagnosis.
Maybe you are a parent helping someone you love.
Maybe you have been monitoring your glucose for years and simply want your routine to be easier.
Whatever your situation, the purpose of a glucose meter is to give you useful information that can support better diabetes management.
The number itself does not define you.
It is information that can be interpreted in context.
Your healthcare professional can help you understand patterns, identify concerns, and determine what actions are appropriate.
Final Tips for Using FreeStyle Freedom Lite
Before finishing your testing routine, remember these practical tips:
- Read the manufacturer’s instructions before first use.
- Use only compatible FreeStyle Lite test strips.
- Wash and dry your hands before testing.
- Keep test strips protected from moisture and unsuitable temperatures.
- Check strip expiration and condition.
- Use a suitable blood sample.
- Avoid aggressive squeezing.
- Use fingertip testing when low glucose is suspected or when glucose may be changing rapidly.
- Never share lancets.
- Dispose of used lancets and strips safely.
- Keep your meter clean according to manufacturer instructions.
- Perform control-solution tests when appropriate.
- Record your readings and relevant circumstances.
- Take your meter to healthcare appointments when useful.
- Do not change medication without an appropriate healthcare plan.
- Ask a healthcare professional to observe your technique if you are unsure.
These habits can make home blood glucose monitoring safer, more consistent, and easier to manage.
Conclusion: How to Use FreeStyle Freedom Lite Blood Glucose Monitoring System With Confidence
Learning how to use FreeStyle Freedom Lite blood glucose monitoring system does not have to be intimidating.
The basic process is straightforward: prepare your supplies, wash and dry your hands, insert the correct test strip, obtain a blood sample, apply it correctly, wait for the reading, record the result, and dispose of used materials safely.
The more important lesson is consistency.
Correct technique helps make your readings more useful. Proper storage protects your test strips. Regular record keeping can reveal patterns. And professional guidance helps you understand what those patterns mean for your individual diabetes-care plan.
The FreeStyle Freedom Lite owner’s information should remain your primary reference for device-specific operation. Abbott provides official user manuals for the FreeStyle Freedom Lite and other blood glucose monitoring systems.
For general blood glucose monitoring, the CDC and FDA also emphasize clean hands, correct supplies, appropriate testing technique, safe disposal, proper storage, and individualized glucose targets.
If you are new to glucose testing, give yourself time to become comfortable. The first few tests may feel unfamiliar. With practice, the process can become a small, manageable part of your daily routine.
And remember: when you have questions about a glucose result, medication, testing frequency, symptoms, or your diabetes treatment plan, your healthcare professional is the right person to guide you.
Frequently Asked Questions About How to Use FreeStyle Freedom Lite Blood Glucose Monitoring System
1. How do I use the FreeStyle Freedom Lite meter?
Start by washing and drying your hands. Prepare a new FreeStyle Lite test strip and insert it into the meter. Wait for the meter to indicate that it is ready for blood. Use the lancing device to obtain an appropriate blood sample and apply it to the test strip. Wait for the result, record it if appropriate, then safely dispose of the used strip and lancet.
Always follow the owner’s booklet for your specific meter.
2. Which test strips should I use with FreeStyle Freedom Lite?
Use the FreeStyle Lite test strips specified for the FreeStyle Freedom Lite meter.
Abbott states that using other test strips and control solutions can produce inaccurate results.
3. Do I need to wash my hands before testing?
Yes.
Wash your hands with soap and warm water and dry them thoroughly before testing.
Food or sugar residue can affect a blood glucose result.
4. Can I use an alternative site instead of my fingertip?
The FreeStyle Freedom Lite system supports certain alternative testing sites according to its instructions. However, alternative-site testing is not appropriate in every situation.
Fingertip testing is especially important when you suspect low glucose or when glucose may be changing rapidly.
Ask your healthcare professional whether alternative-site testing is appropriate for you.
5. Why should I dry my hands before testing?
Water can interfere with obtaining a suitable sample and can dilute blood.
More importantly, clean and dry hands reduce the chance that food or other substances on your skin will affect the result.
6. Why am I not getting enough blood?
Possible reasons include cold hands, insufficient lancing depth, or technique.
Warm your hands, check the lancing-device setting, and follow the manufacturer’s instructions.
Do not excessively squeeze the finger.
7. Can I reuse a lancet?
Follow the manufacturer’s and your healthcare professional’s instructions regarding lancet use. A new sterile lancet is the safest routine approach for individual testing.
Never share a lancet with another person.
8. Can I share my FreeStyle Freedom Lite meter?
Do not share blood glucose monitoring equipment when it is intended for single-person use.
The FDA and CDC emphasize that sharing fingerstick equipment can create a risk of bloodborne infection.
9. What should I do if my result looks wrong?
First, consider whether your hands were clean and dry and whether the strip was correct and properly stored.
Repeat the test with a new strip if appropriate.
If the result continues to be unexpected, contact your healthcare professional or follow your diabetes-care plan.
10. Should I change my insulin dose based on the meter result?
Only if your healthcare professional has provided you with a specific dosing plan.
Do not independently change insulin or other medications based on one unexpected reading.
11. What does a HI or LO message mean?
Such messages may indicate that the glucose level is outside the meter’s measurable range.
Check the FreeStyle Freedom Lite owner’s booklet for the exact meaning and recommended action.
If the reading is accompanied by serious symptoms, seek urgent medical assistance.
12. How often should I check my blood glucose?
Your healthcare professional should determine your testing schedule.
It can vary depending on diabetes type, medications, insulin use, pregnancy, health status, and other factors.
13. Does the FreeStyle Freedom Lite diagnose diabetes?
No.
The system is intended to assist with blood glucose monitoring and is not intended to diagnose or screen for diabetes.
14. Why should I record my glucose readings?
Recording results can help identify patterns and give your healthcare professional useful information.
You may also record meals, exercise, medications, stress, illness, or other factors when relevant.
15. Should I use control solution?
Control-solution testing can help check whether the meter and strips are operating properly.
The FDA recommends considering control-solution testing when opening a new strip container, periodically during use, after dropping a meter, or when readings appear unusual.
Follow the FreeStyle Freedom Lite instructions for the correct control-solution procedure.
Medical Disclaimer
This article is intended for general educational and informational purposes only. It is not a substitute for professional medical advice, diagnosis, treatment, or the official instructions supplied with the FreeStyle Freedom Lite Blood Glucose Monitoring System and FreeStyle Lite test strips.
Always follow the manufacturer’s current instructions for your specific device and consult your physician, pharmacist, diabetes educator, or other qualified healthcare professional for personalized guidance. Do not change insulin, diabetes medication, diet, or treatment based solely on information in this article.
If you experience a medical emergency, severe symptoms of high or low blood glucose, loss of consciousness, seizure, severe confusion, difficulty breathing, or another urgent condition, seek emergency medical care.