


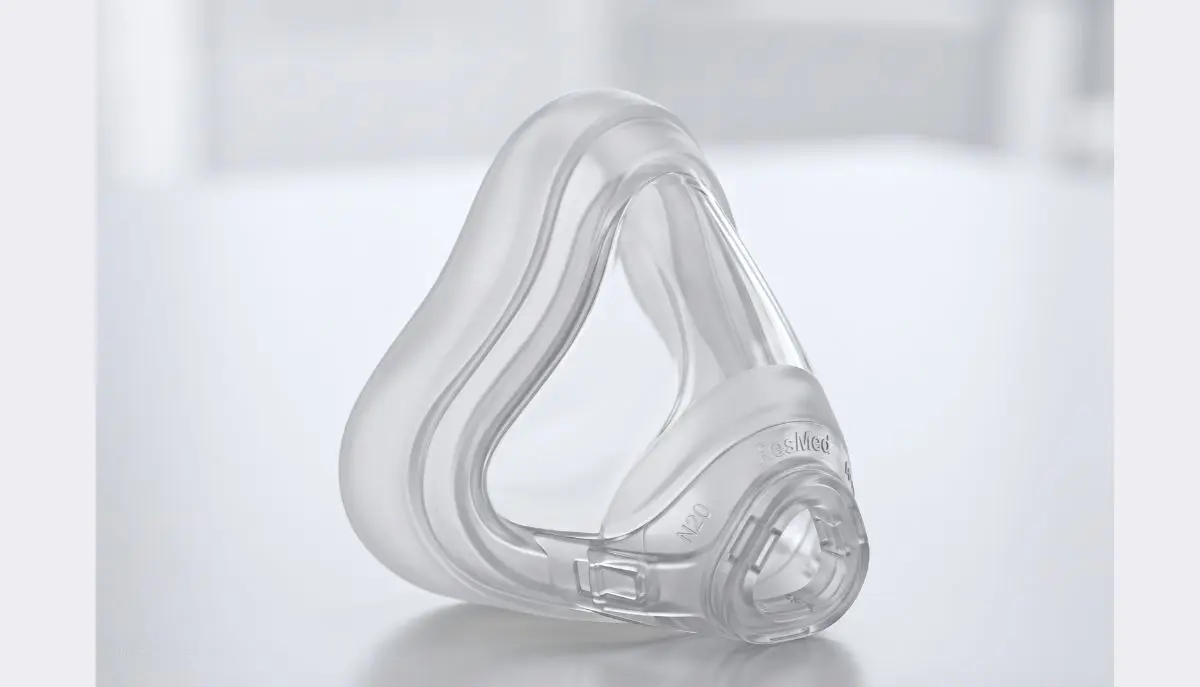
How to Change ResMed AirFit N20 Cushion:
It can be a valuable tool to incorporate into your nightly routine of sleeping if you use a CPAP machine to sleep with every night. When your mask cushion becomes worn out, loose, or uncomfortable, however, it can impact the seal of the mask around your nose. Fortunately, changing the cushion for a ResMed AirFit N20 nasal mask is an easy process if done properly.
When wondering how to change ResMed AirFit N20 cushion, you don’t necessarily have to change the entire mask. If the remaining mask components are still good, you can replace the old mask silicone cushion with another compatible cushion while retaining the rest of the mask.
It’s easy to get confused at first at Alfa Healthcare Supply Inc. about keeping CPAP equipment working. This guide will include how to replace the mask, cleaning instructions, common issues, and methods to help maintain comfort of the mask.
What is the ResMed AirFit N20 Cushion?
The ResMed AirFit N20 mask is a nasal mask that is designed to cover the nose and provide the prescribed positive airway pressure during sleep. It is equipped with an InfinitySeal silicone cushion that is meant to fit comfortably on various facial shapes.
Cushion refers to the softness of the mask that is in contact with your face. It is also significant in forming a seal and assisting to reduce air leakage while using CPAP therapy.
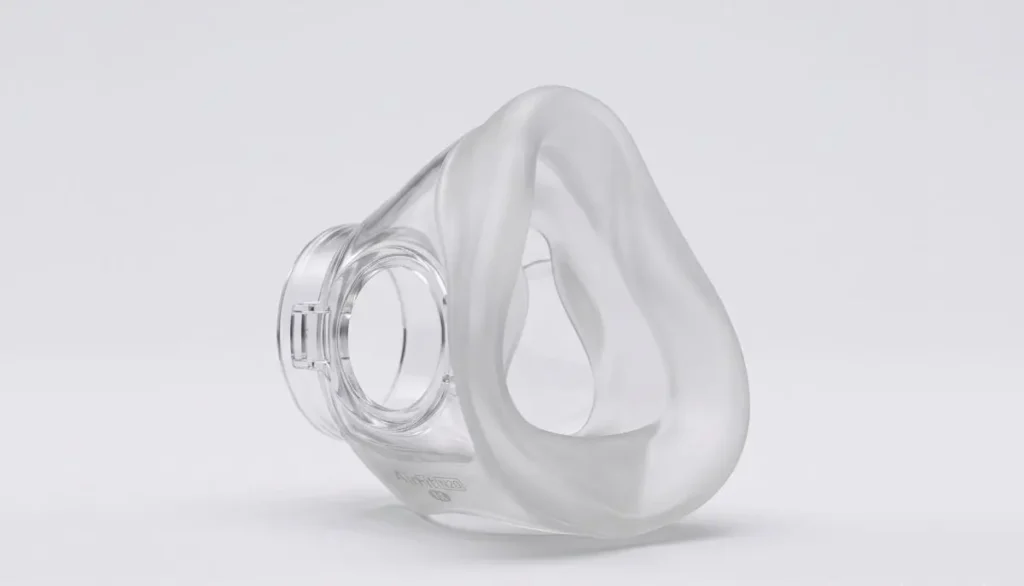
As time goes on, the cushion may become less like new due to natural skin oils, regular use and cleaning. A worn cushion can be replaced to maintain comfort and performance.
ResMed’s product information indicates the cushion AirFit N20 comes in Small, Medium and Large sizes. Appropriate replacement size is important for proper fit.
When Should You Change Your ResMed AirFit N20 Cushion?
Before learning how to change ResMed AirFit N20 cushion, it helps to know when replacement may be necessary.
Look for these common signs:
- Visible wear: The silicone appears damaged, stretched, cloudy, or deteriorated.
- Frequent air leaks: Air escapes around your nose even after you adjust the mask correctly.
- Reduced comfort: The cushion no longer feels as soft or comfortable against your skin.
- Fit problems: The cushion does not sit evenly on your face.
- Persistent hygiene concerns: The cushion remains dirty or develops buildup that cannot be removed with proper cleaning.
A cushion does not always need replacement just because it has been used for a certain number of days. Its condition, your equipment supplier’s replacement schedule, and your insurance coverage may all affect when you receive a new one.
If your mask continues to leak after replacing the cushion, consult your equipment supplier or sleep-care professional.
What You Need Before Replacing the Cushion
Gather these items before starting:
- A compatible ResMed AirFit N20 replacement cushion.
- A clean, dry work surface.
- Your existing mask frame and headgear.
- Mild soap and clean water if you plan to clean the mask components.
Make sure you have the correct cushion for your mask model. The AirFit N20 and AirTouch N20 are different cushion systems, even though they share a similar name. Confirm compatibility before ordering a replacement.
You should also check the cushion size. A Small, Medium, or Large cushion that does not match your needs may cause discomfort or air leaks.
How to Change ResMed AirFit N20 Cushion: Step-by-Step Instructions
Follow these steps to replace the cushion safely and correctly.
Step 1: Turn Off Your CPAP Machine
Turn off your CPAP machine before taking off the mask parts. Remove mask tubing as necessary to allow for comfortable working.
Position the mask on a clear surface, where the mask’s small components will not be lost.
If you are new to the CPAP equipment, spend a few seconds examining how the cushion, frame and headgear, and elbow work together. This will assist in the reassembling process.
Step 2: Remove the Mask Elbow
Elbow attaches the mask to the CPAP tubing.
If the tubing is disconnected from the elbow, disconnect it first, depending on your set up. Then untie the elbow from the mask frame following the manufacturer’s instructions.
Position elbow on a clean and safe area.
By removing this component, you can have easier and more convenient access to the frame of the mask and replace the cushion with ease.
Step 3: Release the Headgear if Needed
Unless you’re replacing the entire cushion, it’s not necessary to remove all the straps of the headgear. Loosening or removing straps however can make it easier to handle the frame.
Unfasten the headgear tabs on the top and unfasten the straps from the frame (if needed). The lower magnet clips will stay on unless they need to be removed for cleaning or maintenance.
Be careful when handling straps. Don’t rip the fabric or extend the fastening tabs.
Step 4: Remove the Old Cushion
The primary point to learn on changing ResMed AirFit N20 cushion.
Grasp the mask frame by its sides. Carefully slide the out-of-date cushion out from the frame until it pulls away.
Do not push or pull the cushion or use sharp objects. The cushion should pull off the frame at a controlled pressure.
Remove and then check the frame for any visible dirt, damage or residue. If there is any crack or damage on the frame, consult your equipment supplier before reusing it.
Step 5: Clean the Mask Frame if Necessary
To clean the frame, if necessary, follow the directions included in your particular ResMed user guide.
ResMed says the washable AirFit N20 parts are compatible with cleaning using warm water and a mild, liquid detergent, then rinsing them off and drying them in the air, away from direct sun.
When installing the new cushion, do not do so when the parts are damp. The mask may not be clean due to soap residue, moisture or dirt.
Do not use any chemicals or cleaning techniques not recommended by the manufacturer.
Step 6: Check the New Cushion
Before installation, examine the replacement cushion.
Make sure it is the correct model and size. Look for any visible damage, deformation, or defects.
If the cushion appears damaged or does not match your mask, do not force it into place. Contact the seller or equipment supplier for help confirming compatibility.
Step 7: Install the New Cushion
Place the new cushion over the mask frame.
Carefully place the cushion into the frame. The AirFit N20 frame is designed to facilitate the proper placement of the cushion into the frame.
Press along the edges to flatten the cushion. Ensure that there are no folds, twists or protruding parts out of frame.
A cushion should fit snugly and not be too hard to put in place.
Step 8: Reattach the Elbow and Headgear
Reconnect the elbow to the mask frame and attach it per manufacturer’s instructions.
Without headgear put the upper straps through the correct frame hole and fold the fasteners back in. Ensure the ResMed logo is facing the outside and up when placing the headgear.
Make sure the strap isn’t twisted and the magnetic clips are in place.
Step 9: Put on the Mask and Check the Fit
Place the mask over your nose and position the headgear comfortably.
Attach the magnetic clips to their corresponding connection points. Adjust the upper and lower straps gradually until the mask feels stable.
Avoid tightening the straps too much. Excessive tension can cause discomfort and may interfere with a good seal.
Connect the mask to your CPAP tubing and switch on your machine according to your normal therapy routine. Check for obvious air leaks and follow the machine’s fitting or leak-check instructions, if available.
If the cushion repeatedly slips, folds, or leaks, remove the mask, reposition it, and try again. Persistent problems may require a different cushion size or professional fitting assistance.
Tips for Getting a Better Seal After Cushion Replacement
Knowing how to change ResMed AirFit N20 cushion is only part of maintaining comfortable CPAP therapy. Correct fitting also matters.
Consider these practical tips:
- Fit the mask before bedtime: Give yourself a few minutes to adjust the cushion while you are awake.
- Keep your face clean: Skin oils, moisturizers, and makeup can interfere with the seal.
- Avoid overtightening: The mask should feel secure without pressing painfully against your skin.
- Check the cushion position: Make sure it sits evenly around your nose.
- Inspect the frame: A damaged frame can prevent even a new cushion from fitting properly.
- Follow your prescribed therapy: Do not change pressure settings to compensate for a mask leak without consulting your healthcare professional.
Small adjustments can make a noticeable difference in comfort. If you cannot achieve a stable seal, ask your CPAP supplier or sleep-care professional to assess the fit.
How to Clean and Maintain Your AirFit N20 Cushion
Regular cleaning helps remove skin oils and residue that may build up during nightly use.
For the silicone AirFit N20 cushion, follow the manufacturer’s cleaning instructions. In general, compatible washable components should be cleaned with warm water and mild liquid detergent, rinsed thoroughly, and allowed to air-dry away from direct sunlight.
Here are a few maintenance habits to follow:
- Clean the cushion regularly according to the user guide.
- Inspect it for tears, deformation, and other signs of wear.
- Keep the mask away from excessive heat and direct sunlight.
- Avoid unapproved cleaning chemicals or devices.
- Make sure the cushion is completely dry before using it again.
Do not confuse the silicone AirFit N20 cushion with the memory-foam cushion used by the AirTouch N20. Their care instructions differ. Always follow the guide for your exact mask model.
Common Mistakes to Avoid
When learning how to change ResMed AirFit N20 cushion, avoid these common mistakes.
Choosing the wrong cushion size: A cushion that is too small or too large may cause pressure, discomfort, or leaks.
Forcing the cushion into the frame: Align it correctly and use gentle pressure rather than forcing the parts together.
Ignoring visible damage: Replace a cushion that shows signs of deterioration instead of continuing to use it.
Using harsh cleaning products: Strong chemicals can damage mask materials or leave unwanted residue.
Overtightening the headgear: More pressure does not always mean a better seal.
Assuming every N20 cushion is identical: Confirm the exact model and compatibility before purchasing a replacement.
Where to Find a Replacement ResMed AirFit N20 Cushion
If your current cushion is worn or damaged, replacing that component may be more practical than purchasing an entire mask, provided the frame and other parts remain in good condition.
Alfa Healthcare Supply Inc. offers medical supply products for patients and caregivers. You can visit the official website to explore available products and contact the supplier about the replacement cushion you need.
Visit: https://alfahealthcaresupplyinc.com/
Before ordering, confirm the following details:
- The replacement is compatible with the ResMed AirFit N20.
- The selected size is correct for your mask.
- The product listing matches the specific component you need.
- Any prescription, insurance, or supplier requirements are addressed.
If you are unsure which cushion to select, ask your equipment supplier for assistance.
Final Thoughts
Learning how to change ResMed AirFit N20 cushion can make routine CPAP maintenance easier and help you keep your equipment in good condition. The process involves removing the old cushion, checking and cleaning the frame when necessary, fitting the compatible replacement, and checking the mask seal before therapy.
Remember that a comfortable mask should fit securely without excessive pressure. Regular cleaning, timely replacement, and correct sizing can help support your prescribed CPAP routine.
For additional information about medical supplies and replacement components, visit Alfa Healthcare Supply Inc. at https://alfahealthcaresupplyinc.com/ and confirm product compatibility before ordering.
Frequently Asked Questions
1. How often should I change my ResMed AirFit N20 cushion?
The replacement interval depends on the cushion’s condition, your usage, and the replacement schedule recommended by your equipment supplier or insurer. Inspect it regularly and replace it when worn, damaged, or unable to maintain a reliable seal.
2. Can I replace the cushion without buying a new mask?
Yes. If your existing AirFit N20 frame, headgear, and elbow are in good condition, you can generally replace the cushion separately with a compatible replacement.
3. How do I know which AirFit N20 cushion size I need?
The AirFit N20 cushion comes in Small, Medium, and Large. Check the size you currently use and refer to ResMed’s sizing guidance. If the mask causes persistent discomfort or leaks, ask your supplier for a fitting assessment.
4. Why is my mask leaking after I replace the cushion?
The cushion may not be fully seated, may be folded, or may be the wrong size. Check its position, inspect the frame, and adjust the headgear gently. If leaks continue, seek advice from your CPAP supplier or healthcare professional.
5. Can I wash the new cushion before using it?
Follow the cleaning directions supplied with your cushion and mask. For washable AirFit N20 silicone components, use the manufacturer’s recommended method and rinse thoroughly before allowing the parts to dry.
6. Is the AirFit N20 cushion the same as the AirTouch N20 cushion?
No. The masks use different cushion materials and have different care requirements. Verify the model before ordering or cleaning a replacement.
7. Do I need tools to replace the cushion?
No special tools are normally required. The cushion is designed to separate from the frame and be reinstalled by hand. Avoid sharp objects or excessive force.
8. What should I do if the new cushion does not fit?
Stop and check the model, size, and orientation. Do not force an incompatible cushion into the frame. Contact your supplier or consult the official ResMed user guide.
Medical information note: This article provides general equipment-maintenance guidance and does not replace the manufacturer’s instructions or advice from your healthcare professional. Always follow the official user guide for your exact mask model.