


Introduction: How Many FreeStyle Libre 3 Sensors in a Box?
If you are starting continuous glucose monitoring (CGM), one of the simplest questions can sometimes be surprisingly confusing: how many FreeStyle Libre 3 sensors in a box?
If you have searched online, visited a pharmacy, checked an insurance prescription, or looked at a medical supply website, you may have seen quantities such as one sensor, two sensors, or even a 28-day or 30-day supply. That can make it difficult to understand exactly what you are buying.
For the original FreeStyle Libre 3 Sensor, the important point is that one individual sensor package contains one sensor. Abbott’s prescribing information for the U.S. described the FreeStyle Libre 3 prescription as 2 sensors per month, which generally represents approximately 28 days of sensor coverage because each original FreeStyle Libre 3 sensor was designed for up to 14 days of wear.
There is an important distinction here:
One sensor package is not necessarily the same thing as a monthly supply.
A monthly prescription could contain two individual sensor packages, with one sensor in each package.
At Alfa Healthcare Supply Inc., we understand why this question matters. When a glucose sensor becomes part of your everyday routine, knowing how many sensors you are receiving helps you plan your supplies, understand your prescription, and avoid surprises when it is time to replace a sensor.
This guide explains the answer in simple language and also covers sensor quantity, wear time, packaging, monthly supply, FreeStyle Libre 3 versus FreeStyle Libre 3 Plus, purchasing considerations, insurance, storage, and common questions.
How Many FreeStyle Libre 3 Sensors Are in a Box?
The short answer is:
The original FreeStyle Libre 3 Sensor is supplied as one sensor per individual sensor package.
Abbott’s U.S. prescribing information listed 2 FreeStyle Libre 3 sensors per month for a typical pharmacy prescription.
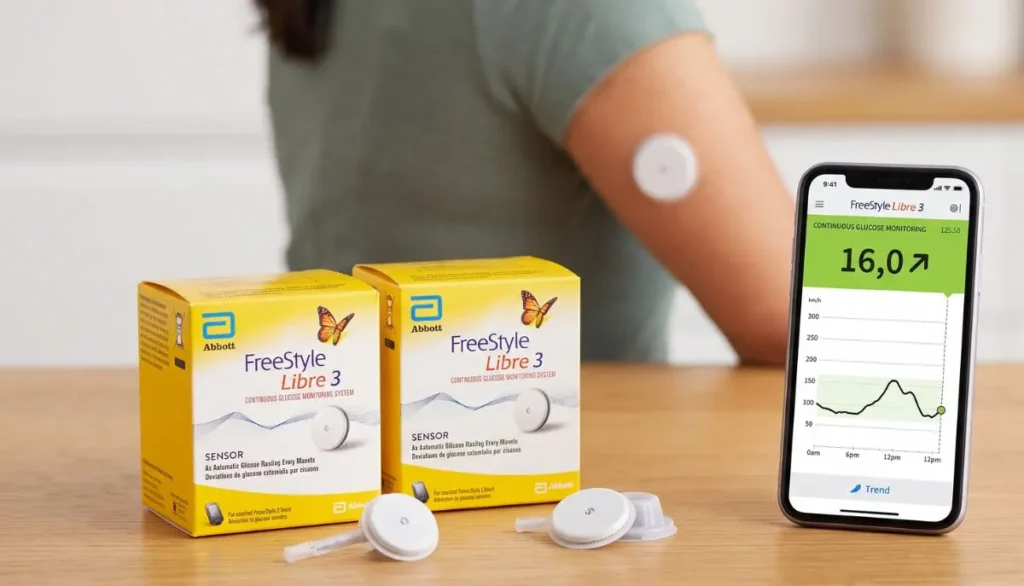
This means you should not automatically assume that a single FreeStyle Libre 3 sensor package contains two sensors.
A simple way to understand it is:
| Supply | Number of Sensors |
| 1 individual FreeStyle Libre 3 sensor package | 1 sensor |
| Typical 28-day supply | 2 sensors |
| 1 sensor wear period | Up to 14 days |
| 2 sensors | Approximately 28 days |
Abbott documentation confirms that the original FreeStyle Libre 3 sensor was designed for a 14-day wear period.
So if someone tells you that a prescription is for two FreeStyle Libre 3 sensors per month, that does not necessarily mean there are two sensors inside one individual box.
The prescription quantity and the physical packaging are two different things.
Why Is There Confusion About FreeStyle Libre 3 Box Quantity?
There are several reasons people become confused about FreeStyle Libre 3 packaging.
First, different FreeStyle Libre products have different packaging configurations.
Second, pharmacies and insurance companies often describe supplies by the number of sensors rather than by the number of physical packages.
Third, some websites may advertise a two-pack, which means the seller has grouped two individual sensors together for sale.
Fourth, the word “box” may mean different things depending on the seller.
For example, a website could list:
- FreeStyle Libre 3 Sensor
- FreeStyle Libre 3 Sensor 2-Pack
- FreeStyle Libre 3 monthly supply
- FreeStyle Libre 3 starter package
These descriptions are not necessarily describing the same physical package.
That is why it is better to look at the actual product description and quantity instead of assuming that every FreeStyle Libre product box contains the same number of sensors.
What is a FreeStyle Libre 3 Sensor?
The FreeStyle Libre 3 is a continuous glucose monitoring system designed to help people monitor glucose levels using a small wearable sensor.
The sensor measures glucose in interstitial fluid and communicates glucose information to a compatible app or reader.
Abbott describes the FreeStyle Libre 3 sensor as a small, discreet CGM sensor. Abbott’s materials also describe the original FreeStyle Libre 3 sensor as having a wear duration of up to 14 days.
Instead of manually checking glucose every time with a traditional blood glucose meter, a CGM can provide ongoing glucose information.
For many people, this can make glucose monitoring more convenient.
A sensor can become part of everyday activities such as:
- Working
- Sleeping
- Eating
- Exercising
- Traveling
- Spending time with family
- Following a diabetes care plan
However, a CGM does not replace professional medical care. Your healthcare provider should determine whether a CGM is appropriate for you and how you should respond to glucose information.
One Sensor Does Not Mean One Month
This is one of the most important points to understand.
The original FreeStyle Libre 3 sensor was designed for up to 14 days of wear.
Because a month is longer than 14 days, a person using one sensor continuously would generally need more than one sensor during a month.
For example:
Sensor 1: Days 1–14
Sensor 2: Days 15–28
That gives approximately 28 days of monitoring.
This is why Abbott’s U.S. prescribing information described a quantity of 2 sensors per month for the original FreeStyle Libre 3 system.
So when you see “2 sensors per month,” think about it as a supply quantity rather than automatically thinking “two sensors inside one box.”
How Long Did the Original FreeStyle Libre 3 Sensor Last?
The original FreeStyle Libre 3 sensor was designed for up to 14 days of use.
After the sensor reached the end of its approved wear period, the user would remove the old sensor and apply a new sensor according to the manufacturer’s instructions.
This is different from the FreeStyle Libre 3 reader.
The sensor is a disposable wearable component.
The reader, when used, is a reusable device.
The smartphone app is software used with compatible devices.
Understanding these differences can help prevent confusion when purchasing supplies.
How Many Sensors Do You Need for 28 Days?
For the original FreeStyle Libre 3 sensor, a typical 28-day period required 2 sensors.
The calculation is straightforward:
14 days per sensor × 2 sensors = 28 days
This is one reason prescriptions and insurance quantities are commonly expressed as two sensors for approximately one month.
Abbott’s U.S. prescribing materials specifically listed 2 sensors/month for the original FreeStyle Libre 3 system.
Keep in mind that insurance benefit periods can use different definitions of a “month,” such as 28 days, 30 days, or a plan-specific refill period.
Therefore, your insurance company’s quantity limit may not exactly match the number of calendar days in a month.
How Many FreeStyle Libre 3 Sensors Do You Need for 90 Days?
If you are using the original FreeStyle Libre 3 sensor continuously and each sensor lasts its full 14-day period:
90 days ÷ 14 days = approximately 6.4 sensors
In practical supply planning, six sensors provide:
6 × 14 days = 84 days
Therefore, a typical three-month prescription quantity may be based on 6 sensors, depending on the prescription, payer rules, and dispensing practices.
Insurance plans can have their own quantity and refill requirements, so always confirm the actual quantity with your pharmacy, insurer, healthcare provider, or DME supplier.
For example, a payer policy published by Cigna in 2026 identifies the original FreeStyle Libre 3 Sensor as 1 sensor per box and describes a quantity limit of 2 sensors per 28 days.
That is a useful example of why “box” and “monthly quantity” should not be treated as identical terms.
FreeStyle Libre 3 Box vs. Two-Pack
Another source of confusion is the phrase two-pack.
A two-pack is generally a sales configuration containing two individual sensors.
For example, a retailer may sell:
FreeStyle Libre 3 Sensor — 1 sensor
or:
FreeStyle Libre 3 Sensors — 2-pack
The second listing does not necessarily mean Abbott originally packaged two sensors together in a single individual sensor package.
Instead, it can mean that the retailer is selling two sensor units together.
This is particularly important when comparing prices.
If one website lists a price for one sensor and another website lists a price for two sensors, the second price will naturally appear higher.
Always compare:
- Price per sensor
- Number of sensors included
- Shipping
- Insurance eligibility
- Prescription requirements
- Product availability
- Expiration information
- Whether the product is the original FreeStyle Libre 3 or FreeStyle Libre 3 Plus
What Comes With a FreeStyle Libre 3 Sensor?
An individual FreeStyle Libre 3 sensor package is intended to provide the sensor and the components needed to apply it according to the manufacturer’s instructions.
Abbott’s getting-started documentation states that the sensor applicator contains one FreeStyle Libre 3 Sensor.
This is important because the applicator itself should not be mistaken for an additional sensor.
In simple terms:
One applicator = one sensor application.
You should follow the manufacturer’s instructions for application and use.
Do not attempt to reuse a disposable sensor or applicator unless the manufacturer specifically states that a component is reusable.
Does the FreeStyle Libre 3 Box Include a Reader?
No, you should not assume that a FreeStyle Libre 3 sensor package includes a reader.
The sensor and reader are separate components.
Abbott’s materials describe the FreeStyle Libre 3 system as working with a compatible smartphone app or reader.
If you are purchasing sensors, check the product listing carefully.
A listing for:
FreeStyle Libre 3 Sensor
is different from:
FreeStyle Libre 3 Reader
and different again from:
FreeStyle Libre starter kit
A starter kit may contain multiple components, while an individual sensor package is intended for the sensor itself.
Can You Buy Two FreeStyle Libre 3 Sensors Together?
Yes, sellers may offer two sensors together as a two-pack.
This is consistent with the common two-sensor monthly quantity used for the original FreeStyle Libre 3 system in U.S. prescribing information.
However, the actual availability of the original FreeStyle Libre 3 has changed.
This brings us to an important 2025–2026 update.
Important 2026 Update: FreeStyle Libre 3 Was Discontinued in the U.S.
If you are searching for how many FreeStyle Libre 3 sensors in a box today, it is important to distinguish the original FreeStyle Libre 3 from the newer FreeStyle Libre 3 Plus.
Abbott announced that the original FreeStyle Libre 3 and FreeStyle Libre 2 sensors would be discontinued in the U.S., with the transition to FreeStyle Libre 3 Plus and FreeStyle Libre 2 Plus. Abbott’s provider information states that the original FreeStyle Libre 3 and FreeStyle Libre 2 sensors were scheduled to be discontinued on September 30, 2025.
Abbott’s current FAQ also states that the company decided to discontinue the FreeStyle Libre 3 sensor following the introduction of the FreeStyle Libre 3 Plus sensor.
This means that someone shopping in 2026 may see fewer original FreeStyle Libre 3 products and more FreeStyle Libre 3 Plus products.
That distinction matters.
FreeStyle Libre 3 vs. FreeStyle Libre 3 Plus
The original FreeStyle Libre 3 and FreeStyle Libre 3 Plus are not simply different names for the same product.
There are important differences.
According to Abbott’s safety information:
Original FreeStyle Libre 3
- Designed for up to 14 days of wear
- Approved for children age 4 and older under the referenced U.S. labeling
- Not intended for use with automated insulin dosing systems under that labeling
- Has specific vitamin C interference considerations
FreeStyle Libre 3 Plus
- Designed for up to 15 days of wear
- Approved for children age 2 and older under the referenced U.S. labeling
- Can be used with compatible automated insulin dosing systems
- Has different vitamin C interference information
Because these products have different labeling, do not substitute one for the other based only on appearance.
If your prescription says FreeStyle Libre 3 Plus, make sure you receive the Plus version.
How Many FreeStyle Libre 3 Plus Sensors Are in a Box?
The FreeStyle Libre 3 Plus should be considered separately from the original FreeStyle Libre 3.
Current Abbott U.S. provider information describes 2 FreeStyle Libre 3 Plus sensors as a 30-day supply, with monthly filling.
However, this does not mean every physical box necessarily contains two sensors.
A 2026 Cigna quantity-management policy identifies the FreeStyle Libre 3 Plus Sensor as 1 sensor per box and lists 2 sensors per 30 days.
Therefore, the safest way to understand the quantity is:
1 individual sensor box = 1 sensor
Typical monthly supply = 2 sensors
The exact packaging you receive can depend on the supplier and market.
Why the Number of Sensors Matters
Knowing how many sensors you have is more than a shopping question.
It can help you plan your diabetes supplies.
Imagine that you receive a package and expect two sensors but discover that it contains only one.
If you misunderstand the quantity, you might think you have a full month’s supply when you actually have only one sensor.
This can create problems when the current sensor reaches the end of its wear period.
Before ordering, check:
- Product name
- Sensor model
- Quantity
- Number of boxes
- Wear duration
- Prescription quantity
- Insurance coverage
- Expiration date
- Supplier information
These simple checks can save time and reduce confusion.
How to Read a FreeStyle Libre Sensor Product Listing
When shopping for a CGM sensor, do not look only at the product title.
Read the complete product description.
For example, look for wording such as:
Quantity: 1 sensor
or:
Quantity: 2 sensors
or:
Pack of 2
Also check whether the product is:
FreeStyle Libre 3
or:
FreeStyle Libre 3 Plus
This distinction is particularly important because of the transition away from the original FreeStyle Libre 3 in the U.S.
A product listing that says “Libre 3” should be checked carefully for the exact product version.
Buying FreeStyle Libre 3 Sensors Through a Medical Supply Store
A medical supply store or DME supplier can be helpful when you have questions about product availability, prescriptions, documentation, or insurance.
Abbott states that FreeStyle Libre sensors and readers may be available through participating retail pharmacies and certain DME suppliers.
At Alfa Healthcare Supply Inc., our focus is on helping patients and caregivers find appropriate medical supplies and understand what they are ordering.
For people searching for diabetes supplies in New York, Alfa Healthcare Supply serves patients and caregivers across areas including Queens, Long Island, Brooklyn, the Bronx, Westchester, Manhattan, and other parts of New York.
You can explore the diabetes supply section of the Alfa Healthcare Supply website to see currently listed products.
Because product availability can change, always verify the exact sensor model and quantity before placing an order.
Insurance and FreeStyle Libre Sensor Quantity
Insurance coverage can affect how many sensors you can receive at one time.
A prescription might specify two sensors per month, while an insurance plan may establish its own quantity limits and refill timing.
Medicare and commercial insurance plans can also have different eligibility and documentation requirements.
Abbott’s provider materials specifically note that Medicare and other payer criteria may apply.
Your coverage may depend on factors such as:
- Insurance plan
- Diagnosis
- Prescription
- Medical necessity documentation
- Insulin use
- Prior authorization
- DME versus pharmacy benefit
- Quantity limits
Do not assume that the retail cash price, insurance price, and DME price will be identical.
If you have insurance, ask your supplier or pharmacy how the product will be billed before ordering.
Pharmacy vs. DME Supplier
FreeStyle Libre products may be distributed through different channels.
A patient may receive a CGM through:
- Retail pharmacy
- Mail-order pharmacy
- DME supplier
- Other participating healthcare suppliers
Abbott states that participating pharmacies and certain DME suppliers may provide FreeStyle Libre sensors and readers.
The correct channel can depend on your insurance plan.
For Medicare beneficiaries, DME requirements may apply.
For commercial insurance, pharmacy benefits may sometimes be used.
Because payer policies change, check with your insurer and healthcare provider rather than relying on an old prescription or website article.
What Should You Do If You Receive the Wrong Quantity?
Suppose you ordered two sensors but your shipment contains only one.
Do not immediately assume that the supplier made an error.
First check:
- Your order confirmation
- Product description
- Invoice
- Prescription quantity
- Shipping documentation
- Number of individual boxes
If the order clearly states two sensors and you received one, contact the supplier promptly.
Keep the packaging and shipping information available.
If insurance was used, you may also want to check how the claim was processed.
Keeping accurate records can make it easier for the supplier to investigate.
What If a Sensor Stops Working Early?
A sensor may sometimes need to be replaced before the expected wear period because of issues such as adhesive failure, insertion problems, signal loss, or connectivity problems.
A 2026 Cigna policy specifically identifies these types of situations when discussing possible quantity-limit exceptions.
If your sensor stops working unexpectedly, follow the manufacturer’s support instructions.
Abbott also provides sensor support resources for people experiencing sensor problems.
Do not simply assume that an early failure means you should permanently change your treatment routine.
Contact the appropriate manufacturer support team, supplier, pharmacist, or healthcare professional when needed.
What If the Package Is Damaged?
Check the packaging before opening the product.
Abbott’s product instructions include warnings not to use a product if the package is damaged or the sterile barrier system has been compromised.
If you receive a damaged package:
- Do not use it.
- Photograph the packaging if appropriate.
- Keep the shipping box.
- Contact the supplier.
- Follow Abbott’s instructions if manufacturer support is required.
This is especially important for medical devices.
Check the Expiration Date
When purchasing CGM sensors, expiration information matters.
Do not purchase a sensor solely because the price looks attractive.
Check the expiration date and make sure you have enough time to use the product according to its labeling.
If you are ordering multiple sensors at once, ask the supplier about the expiration dates if this information is not visible before purchase.
Proper storage and handling should also follow the manufacturer’s instructions.
Can You Store FreeStyle Libre Sensors for Later?
Medical devices should be stored according to the manufacturer’s instructions.
Do not expose sensors to conditions outside the recommended storage requirements.
When purchasing multiple sensors, think about how many you realistically need and how long you will keep them before use.
Having a small supply available can be useful, but purchasing a large quantity without checking expiration dates can create unnecessary problems.
Is One FreeStyle Libre 3 Sensor Enough for a Month?
No.
The original FreeStyle Libre 3 sensor was designed for up to 14 days of wear.
Therefore, one sensor would not normally cover a full 28-day period.
Two sensors provide approximately:
14 days + 14 days = 28 days
For the FreeStyle Libre 3 Plus, the intended wear period is up to 15 days, and Abbott’s current U.S. provider information describes two sensors as a 30-day supply.
This difference is another reason to confirm which Libre sensor you are using.
Is FreeStyle Libre 3 the Same as FreeStyle Libre 2?
No.
FreeStyle Libre 2 and FreeStyle Libre 3 are different products.
They have different sensor designs, apps, compatibility information, and labeling.
Abbott documentation states that FreeStyle Libre 2 and FreeStyle Libre 3 apps and sensors are not interchangeable.
This means you should not order a Libre 2 sensor simply because it looks similar to a Libre 3 sensor.
Always check your prescription and device compatibility.
Is FreeStyle Libre 3 the Same as FreeStyle Libre 3 Plus?
No.
They are related products, but they have different specifications.
The original FreeStyle Libre 3 was designed for up to 14 days.
FreeStyle Libre 3 Plus is designed for up to 15 days. Abbott also lists differences in age eligibility and compatibility with compatible automated insulin dosing systems.
If your healthcare provider prescribed FreeStyle Libre 3 Plus, make sure you receive the Plus sensor.
Common Mistakes When Buying FreeStyle Libre 3 Sensors
Here are some mistakes that can easily happen.
Mistake 1: Assuming Every Box Contains Two Sensors
The original FreeStyle Libre 3 individual sensor package is one sensor.
A monthly prescription may contain two sensors.
Those are different things.
Mistake 2: Confusing a Two-Pack With One Box
Some retailers sell two individual sensors together as a two-pack.
Always check the quantity.
Mistake 3: Ordering the Wrong Libre Version
Libre 2, Libre 3, Libre 2 Plus, and Libre 3 Plus are not automatically interchangeable.
Mistake 4: Looking Only at Price
A lower advertised price may apply to one sensor rather than two.
Compare the price per sensor.
Mistake 5: Ignoring Insurance Rules
Your insurance plan may have specific quantity or refill requirements.
Mistake 6: Buying an Old Product Without Checking Availability
The original FreeStyle Libre 3 was discontinued in the U.S. in 2025, so current availability may differ from older articles and listings.
A Simple Example for Patients
Let’s say a patient uses the original FreeStyle Libre 3 sensor.
The patient starts:
Sensor 1 → Day 1
The sensor is designed for up to 14 days.
Then:
Sensor 2 → Day 15
Sensor 2 provides another approximately 14 days.
Together:
2 sensors = approximately 28 days
Now compare that with a 30-day month.
There can be a small difference between the sensor supply period and the calendar month.
This is why prescription quantities and insurance refill dates may not always line up perfectly with the first and last day of a calendar month.
For the FreeStyle Libre 3 Plus, two sensors are currently described by Abbott as a 30-day supply because each sensor is designed for up to 15 days.
Why the FreeStyle Libre Sensor Size Matters
One reason the FreeStyle Libre system has attracted attention is its small sensor design.
Abbott describes the FreeStyle Libre 3 sensor as approximately the size of two stacked U.S. pennies.
The small design is intended to make the sensor relatively discreet when worn.
For many people, comfort and convenience matter just as much as the number of sensors in a package.
However, individual experiences can vary.
If you experience irritation, discomfort, repeated sensor problems, or other concerns, talk with your healthcare professional and follow the manufacturer’s instructions.
Where Is the FreeStyle Libre 3 Sensor Worn?
For the original FreeStyle Libre 3, Abbott’s instructions specify the back of the upper arm as the application site under the applicable labeling.
Alfa Healthcare Supply’s educational guide also explains the importance of following the approved placement instructions and avoiding areas such as scars, moles, stretch marks, lumps, and locations close to insulin injection sites.
Do not select a sensor location simply because another person uses it.
Different products can have different approved application sites.
Always follow the instructions for your specific sensor.
Does a FreeStyle Libre 3 Sensor Need Fingersticks?
A CGM can reduce the need for routine fingerstick testing for many users, but there are circumstances where a blood glucose meter may still be needed.
Abbott’s safety information advises that if sensor glucose readings or alarms do not match symptoms or expectations, a fingerstick glucose measurement should be used for treatment decisions.
This is an important safety point.
Do not ignore symptoms simply because a CGM displays a number that looks reassuring.
Likewise, do not make major treatment changes without following your healthcare provider’s instructions.
FreeStyle Libre 3 Sensors and Diabetes Management
A CGM is a monitoring tool.
It can provide information about glucose patterns and trends, but diabetes management is broader than simply looking at sensor numbers.
Your care plan may include:
- Medication
- Insulin
- Food choices
- Physical activity
- Sleep
- Regular medical visits
- Blood glucose testing when appropriate
- CGM data review
Your healthcare provider can help you understand how your glucose information fits into your overall treatment plan.
Why Patients Ask “How Many FreeStyle Libre 3 Sensors in a Box?”
At first, the question may sound like a simple shopping question.
But behind it are practical concerns:
Will I have enough sensors?
How often will I need to reorder?
How much will my insurance cover?
Is this a 28-day supply?
Does this package contain one or two sensors?
Is this the original Libre 3 or Libre 3 Plus?
These are reasonable questions.
A clear understanding of packaging can make ordering medical supplies much easier.
FreeStyle Libre 3 Sensor Quantity Checklist
Before purchasing or accepting a shipment, check this list:
1. Confirm the exact product
Look for:
FreeStyle Libre 3
or
FreeStyle Libre 3 Plus
Do not rely on a generic “Libre sensor” description.
2. Check the number of sensors
Look for:
1 sensor
or:
2 sensors
3. Check the number of packages
Two individual boxes may mean two sensors.
4. Confirm the wear period
Original FreeStyle Libre 3:
Up to 14 days
FreeStyle Libre 3 Plus:
Up to 15 days
5. Check prescription requirements
Some products require a prescription depending on the product, location, and purchasing channel.
6. Check insurance requirements
Coverage and quantity limits vary.
7. Check expiration
Make sure the product is within its labeled expiration period.
FreeStyle Libre 3 Sensors at Alfa Healthcare Supply Inc.
Alfa Healthcare Supply Inc. is a medical supply provider serving patients and caregivers in New York.
The company offers diabetes-related medical supplies and lists FreeStyle Libre products among its diabetic supply offerings.
When looking for a FreeStyle Libre sensor, it is important to confirm the exact product currently available because Abbott has transitioned from the original FreeStyle Libre 3 sensor to newer products in the U.S.
If you are searching for a FreeStyle Libre sensor, check the product name and quantity before ordering.
For questions about insurance, prescription requirements, or product availability, contacting the supplier directly can help you confirm the current details.
Final Thoughts: How Many FreeStyle Libre 3 Sensors in a Box?
So, how many FreeStyle Libre 3 sensors in a box?
For the original FreeStyle Libre 3, the straightforward answer is:
One sensor per individual sensor package.
Because each original sensor was designed for up to 14 days, a typical monthly prescription was two sensors, providing approximately 28 days of sensor coverage. Abbott’s U.S. prescribing materials documented this two-sensor monthly quantity.
However, there is an important current update for anyone shopping in 2026: Abbott discontinued the original FreeStyle Libre 3 sensor in the U.S. and transitioned patients toward the FreeStyle Libre 3 Plus sensor.
The newer FreeStyle Libre 3 Plus sensor is designed for up to 15 days, and Abbott currently describes two sensors as a 30-day supply in its U.S. provider materials.
The best habit is therefore simple: check the exact sensor name, quantity, package description, and prescription before ordering.
At Alfa Healthcare Supply Inc., we understand that medical supplies are part of someone’s daily routine—not simply another product in a shopping cart. Taking a few moments to confirm what is inside the package can help make your CGM supply planning easier and more predictable.
If you are unsure whether you need the original FreeStyle Libre 3, FreeStyle Libre 3 Plus, a reader, or another diabetes supply, speak with your healthcare provider or medical supply provider before making a change.
Alfa Healthcare Supply Inc. is committed to helping patients and caregivers access medical supplies with clear information and practical support.
Frequently Asked Questions
How many FreeStyle Libre 3 sensors are in a box?
The original FreeStyle Libre 3 is supplied as one sensor per individual sensor package. Abbott’s U.S. prescribing information commonly described a monthly quantity of two sensors.
How many FreeStyle Libre 3 sensors do I need for a month?
The original FreeStyle Libre 3 was designed for up to 14 days per sensor, so two sensors provide approximately 28 days.
Does one FreeStyle Libre 3 box contain two sensors?
An individual original FreeStyle Libre 3 sensor package contains one sensor. Some retailers may sell two individual sensors together as a two-pack, so check the product description.
How long does one FreeStyle Libre 3 sensor last?
The original FreeStyle Libre 3 sensor was designed for up to 14 days of wear.
How many sensors are in a 90-day supply?
For the original 14-day sensor, six sensors provide 84 days. Actual prescription quantities and insurance rules can vary.
Does the FreeStyle Libre 3 box include a reader?
Do not assume that it does. The sensor and reader are separate components.
Is FreeStyle Libre 3 still available in the U.S.?
Abbott announced the discontinuation of the original FreeStyle Libre 3 sensor in the U.S. and transition toward FreeStyle Libre 3 Plus.
How many FreeStyle Libre 3 Plus sensors are needed for 30 days?
Abbott’s current U.S. provider information describes two FreeStyle Libre 3 Plus sensors as a 30-day supply.
Is FreeStyle Libre 3 Plus the same as FreeStyle Libre 3?
No. The Plus version has different labeling and specifications, including a 15-day wear period compared with the original sensor’s 14-day wear period.
Can I use a FreeStyle Libre 3 sensor with a FreeStyle Libre 2 system?
Do not assume compatibility. Abbott states that FreeStyle Libre 2 and FreeStyle Libre 3 apps and sensors are not interchangeable.
What should I do if my sensor stops working early?
Follow Abbott’s sensor support instructions and contact the manufacturer or supplier when appropriate. Do not change your diabetes treatment solely because a sensor has failed.
What if the sensor package is damaged?
Do not use a product if its packaging or sterile barrier is compromised. Contact your supplier for assistance.
Can I buy FreeStyle Libre sensors from a DME supplier?
Abbott states that FreeStyle Libre sensors and readers are available through participating retail pharmacies and certain DME suppliers.
What is FreeStyle Libre 3 Reader Device?
If you are searching for “what is FreeStyle Libre 3 reader device,” you may already know that continuous glucose monitoring (CGM) can make checking glucose easier. But you may still wonder what the reader actually does, how it works with a sensor, whether you need a smartphone, what information it displays, and where you can get one.
The FreeStyle Libre 3 Reader is a handheld device designed to receive glucose information from a compatible FreeStyle Libre 3 sensor. Instead of relying only on a smartphone, the reader gives users another way to view glucose readings and receive certain alerts. Abbott describes the reader as handheld, lightweight, and equipped with a backlit color touchscreen. It can also store approximately 90 days of glucose history and notes. For people who prefer a dedicated medical device, do not want to depend on a smartphone, or need an alternative way to view CGM information, understanding the reader can be helpful.
This guide from Alfa Healthcare Supply Inc. explains the FreeStyle Libre 3 Reader in simple language, including what it is, how it works, its important features, how it differs from traditional glucose meters, who may use it, and important considerations before purchasing.
Important: The FreeStyle Libre system is a prescription medical device in the United States. Always follow the current Abbott instructions and your healthcare professional’s guidance for using the system and making treatment decisions.
What is FreeStyle Libre 3 Reader Device?
The FreeStyle Libre 3 Reader is a handheld glucose-reading device that works with a compatible FreeStyle Libre 3 sensor.
The sensor is worn on the body and measures glucose continuously. Once the sensor is active, glucose information can be transmitted to a compatible reader. Abbott explains that the FreeStyle Libre 3 Reader receives glucose readings through streaming from the sensor and can provide glucose alarms.
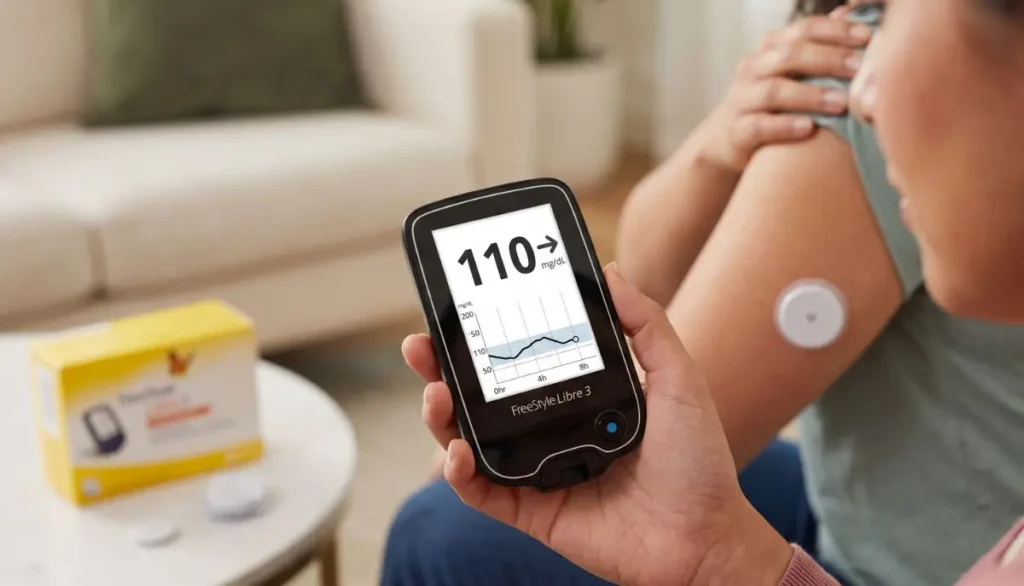
In simple terms:
Sensor → measures glucose → sends information → FreeStyle Libre 3 Reader → displays glucose information
This means the reader acts as a dedicated screen for the CGM system.
Rather than carrying out a traditional fingerstick every time you want to see a glucose value, the CGM system is designed to provide ongoing glucose information through the sensor and compatible reading device.
The reader is different from the sensor itself.
The sensor
The sensor is the small wearable component placed on the body. It collects glucose information continuously.
The reader
The reader is the handheld device used to view information received from the sensor.
The app
The FreeStyle Libre system can also work with compatible smartphones and the Libre app. Abbott currently states that the FreeStyle Libre 3 system includes the Libre 3 Plus sensor, Libre 3 sensor, Libre 3 app, Libre app, and Libre 3 reader.
How does the FreeStyle Libre 3 Reader Work?
The process is easier to understand when you break it into a few basic steps.
1. A compatible sensor is applied
The sensor is placed according to Abbott’s instructions. It continuously collects glucose information.
2. The sensor communicates with the reader
After the sensor is started and active, glucose readings can be streamed to the FreeStyle Libre 3 Reader.
One major difference from the FreeStyle Libre 2 reader is that the FreeStyle Libre 3 system can automatically send real-time readings to the reader without requiring a scan once the sensor is active.
3. The reader displays glucose information
You can use the reader’s touchscreen to see your glucose information and understand the direction of your glucose trend.
4. Alerts may notify you
Depending on the system settings and circumstances, the reader can provide glucose alarms. Abbott notes that alarms need to be enabled and that the sensor must remain within the applicable communication range of the reading device.
5. Information can be stored
The reader can store approximately 90 days of glucose history and notes entered about activities such as eating, exercising, or taking insulin.
This historical information can be useful when reviewing patterns with a healthcare professional.
Why Would Someone Use a FreeStyle Libre 3 Reader?
Smartphones are convenient, but they are not the right choice for everyone.
A dedicated reader can be useful for someone who wants a separate device specifically for glucose monitoring.
For example, some people may prefer:
- A dedicated medical device
- A handheld touchscreen
- Less dependence on a smartphone
- A separate device for glucose monitoring
- Access to glucose information through a compatible reader
- Stored glucose history
- Glucose alarm functionality
For some families, a dedicated reader may also make diabetes management easier because the CGM reading device is separate from everyday phone activities.
The important point is that the reader is not simply another version of a traditional blood glucose meter. It is part of a continuous glucose monitoring system.
FreeStyle Libre 3 Reader vs. Traditional Glucose Meter
It is easy to confuse a CGM reader with a traditional blood glucose meter.
They work differently.
Traditional blood glucose meter
A traditional meter generally requires:
- A blood sample
- A test strip
- A lancing device
- A small blood drop
- The meter to analyze the sample
The result represents the glucose level measured from that particular blood sample.
FreeStyle Libre 3 system
A CGM uses a sensor worn on the body to continuously collect glucose information. The information can then be displayed through a compatible reader or smartphone.
Abbott describes CGM systems as pairing a wearable sensor with an app or reader to provide glucose information continuously.
That gives the user a different type of information: not simply one individual glucose test, but an ongoing picture of glucose changes.
What Can You See on the FreeStyle Libre 3 Reader?
The reader is designed to make glucose information easy to view.
Depending on the system status and information available, the reader can provide glucose readings and trend information.
The reader can also provide alarms when configured and applicable.
One advantage of CGM technology is that glucose information can help users recognize patterns rather than looking at isolated readings.
For example, a person may be able to notice how glucose changes around:
- Meals
- Physical activity
- Exercise
- Insulin
- Daily routines
- Sleep
- Other individual factors
However, the reader should not replace professional medical advice.
Glucose information needs to be interpreted in the context of your individual treatment plan.
Does the FreeStyle Libre 3 Reader Need a Smartphone?
No, the FreeStyle Libre 3 Reader is designed as a dedicated reader.
This is one of the reasons people may look for the reader when considering a FreeStyle Libre CGM system.
The FreeStyle Libre ecosystem also includes smartphone applications, but the reader provides a separate way to view glucose information.
Abbott notes that the apps have specific smartphone and operating-system compatibility requirements.
If you are considering using a smartphone instead of the reader, it is important to check Abbott’s current compatibility information rather than assuming every phone will work.
Does the FreeStyle Libre 3 Reader Automatically Receive Readings?
Yes, the FreeStyle Libre 3 system is designed for automatic glucose transmission when the compatible sensor and reader are operating as intended.
Abbott specifically identifies automatic real-time readings as a feature of the FreeStyle Libre 3 system.
This is different from the older FreeStyle Libre 2 reader experience.
With the FreeStyle Libre 2 system, users generally needed to scan the sensor to obtain readings.
With the FreeStyle Libre 3 system, compatible readings are automatically streamed to the reader once the sensor is active.
That distinction is important when deciding which type of glucose-monitoring device fits your needs.
FreeStyle Libre 3 Reader Features
The reader includes several features intended to support everyday glucose monitoring.
1. Handheld design
The FreeStyle Libre 3 Reader is designed to be carried and used as a dedicated glucose-reading device.
2. Color touchscreen
Abbott describes the reader as having a backlit color touchscreen.
A touchscreen can make navigating glucose information more straightforward than using multiple physical buttons.
3. Real-time glucose information
The reader receives glucose information from the compatible sensor.
This allows users to view glucose information without repeatedly performing traditional fingerstick tests simply to obtain a reading.
4. Glucose alarms
The system can provide alarms for certain glucose conditions when alarms are enabled and the system is being used within the applicable communication requirements.
5. Approximately 90 days of stored information
Abbott’s product information states that the reader can store approximately 90 days of glucose history and notes.
This can be useful when looking at longer-term patterns.
6. Built-in blood glucose meter
An important feature of the FreeStyle Libre 3 Reader is its built-in meter for blood glucose testing.
However, this does not mean you can perform a traditional blood glucose test without additional supplies.
Abbott states that the built-in meter requires FreeStyle Precision Neo blood glucose test strips, control solution, a lancing device, and lancets, which are not included with the reader kit.
Can the FreeStyle Libre 3 Reader Test Blood Sugar?
Yes, the reader includes a built-in blood glucose meter.
However, the CGM sensor and the built-in blood glucose meter are two different functions.
The CGM sensor provides glucose information through the continuous monitoring system.
The built-in meter can be used with the appropriate blood glucose test strips and other required supplies.
Abbott explains that FreeStyle Precision Neo test strips, control solution, a lancing device, and lancets are needed for the built-in meter and are obtained separately.
Therefore, when purchasing or using a reader, it is important to understand exactly which supplies are included and which need to be purchased separately.
How Long Does the FreeStyle Libre 3 Reader Store Glucose Data?
The FreeStyle Libre 3 Reader can store approximately 90 days of glucose history and notes, according to Abbott’s product information.
Having historical information can be helpful when discussing glucose patterns with a healthcare professional.
For example, instead of remembering what happened several weeks ago, stored information can provide a record of glucose patterns and notes.
However, stored data should be considered a monitoring resource—not a substitute for professional interpretation.
FreeStyle Libre 3 Reader and Glucose Trends
One of the most useful aspects of CGM technology is that it can show more than a single number.
Imagine checking a traditional meter and seeing:
Glucose: 120 mg/dL
That tells you the glucose level at that moment.
A CGM can provide additional information about where glucose is going.
For example, glucose may be:
- Rising
- Falling
- Relatively stable
Trend information can provide additional context.
This can be especially helpful when discussing patterns with a healthcare professional.
However, users should follow their prescribed treatment plan and should not make treatment decisions solely from assumptions about trend information.
Who May Need a FreeStyle Libre 3 Reader?
The appropriate device depends on the individual’s medical needs, prescription, insurance coverage, compatible sensor, and healthcare professional’s recommendations.
People who may consider a reader include individuals who:
- Use a compatible FreeStyle Libre CGM system
- Prefer a dedicated reader rather than relying on a smartphone
- Want a handheld touchscreen
- Need access to glucose information through a reader
- Want glucose alarm functionality
- Want to review stored glucose history
- Need an alternative to using a smartphone for CGM readings
Your healthcare professional can help determine whether the system is appropriate for you.
Is the FreeStyle Libre 3 Reader Prescription Only?
In the United States, the FreeStyle Libre 3 system is a prescription medical device.
Abbott’s safety information states that federal law restricts the device to sale by or on the order of a physician.
Therefore, consumers should not treat the FreeStyle Libre 3 Reader like an ordinary electronics product.
A prescription and applicable payer requirements may apply.
Coverage also depends on the individual’s insurance plan and eligibility.
Where Can You Buy a FreeStyle Libre 3 Reader?
Abbott states that the FreeStyle Libre 3 Reader can be purchased through participating durable medical equipment suppliers and retail pharmacies. Product availability may vary.
For customers looking for diabetes supplies, Alfa Healthcare Supply Inc. provides medical supply products and serves customers in New York.
Before purchasing, it is a good idea to confirm:
- Whether the reader is currently available
- Whether you have the appropriate prescription
- Whether your insurance covers the device
- Whether the reader is compatible with your prescribed sensor
- Which supplies are included
- Whether additional test strips are required
- Current manufacturer instructions
- Current product availability
Because medical-device availability can change, checking the supplier’s current inventory and product information is important.
FreeStyle Libre 3 Reader and Insurance
Insurance coverage can vary significantly.
Some patients may have coverage through Medicare or commercial insurance, while others may have different eligibility requirements or out-of-pocket costs.
Abbott specifically notes that Medicare and other payer criteria may apply.
Do not assume that a CGM reader will automatically be covered simply because you have insurance.
Before ordering, consider contacting:
- Your insurance company
- Your healthcare provider
- The DME supplier
- The manufacturer when necessary
Ask about:
- Prescription requirements
- Eligibility
- Coverage
- Deductibles
- Copayments
- Prior authorization
- Participating suppliers
- Replacement policies
What Comes With a FreeStyle Libre 3 Reader?
The exact contents can depend on the product package and supplier.
It is important not to assume that every supply needed for the complete monitoring process comes inside the reader package.
For example, Abbott’s product information specifically says that supplies needed for the reader’s built-in blood glucose meter—including test strips, control solution, a lancing device, and lancets—are not included in the reader kit.
Before purchasing, check the current package contents.
This small step can prevent an unpleasant surprise when you are ready to begin testing.
Is the FreeStyle Libre 3 Reader Easy to Use?
The reader is designed around a touchscreen interface, and Abbott provides a quick-start guide, quick-reference guide, and user manual.
Still, every medical device requires proper setup.
If you are new to CGM technology, take time to:
- Read the user manual
- Understand sensor application
- Learn how to start the sensor
- Review alarm settings
- Understand what different notifications mean
- Learn when a fingerstick may be required
- Ask your healthcare professional questions
A few minutes spent learning the device can make daily use much more comfortable.
What Should You Do If the Reader Shows an Unexpected Reading?
Do not ignore symptoms simply because the reader shows a number that appears normal.
Abbott’s safety information explains that fingersticks are required when glucose readings or alarms do not match symptoms or when the system displays the appropriate blood glucose symbol.
If you experience symptoms that concern you:
- Pay attention to how you feel.
- Follow your healthcare professional’s instructions.
- Use a blood glucose meter when instructed or when the system indicates it.
- Contact your healthcare professional when necessary.
The reader is an important monitoring tool, but it should be used as part of your overall diabetes-management plan.
FreeStyle Libre 3 Reader vs. Smartphone
Many users wonder whether they should use a reader or smartphone.
There is no single answer for every person.
FreeStyle Libre 3 Reader
A reader may be attractive if you prefer:
- A dedicated device
- A touchscreen specifically for glucose monitoring
- Less reliance on a smartphone
- A separate medical device for CGM use
Smartphone
The Libre app may be attractive if you prefer:
- Using a device you already carry
- App-based glucose information
- Digital sharing features
- Smartphone-based access
Abbott notes that app compatibility depends on the smartphone model and operating system.
The important thing is to confirm current compatibility rather than choosing based only on the phone’s brand.
Can Family Members See FreeStyle Libre Data?
Depending on the system, compatible Libre applications can support data sharing with caregivers and healthcare professionals.
Abbott describes features that allow users to share glucose data with loved ones through LibreLinkUp and provide information to healthcare professionals through LibreView.
However, sharing functionality depends on compatible devices, applications, internet connectivity, account setup, and other requirements.
If sharing is important to your diabetes-management routine, review the current Abbott instructions before relying on it.
What Is the Difference Between FreeStyle Libre 3 Sensor and Reader?
This is one of the most common points of confusion.
FreeStyle Libre 3 Sensor
The sensor is worn on the body.
Its job is to collect glucose information.
FreeStyle Libre 3 Reader
The reader is the handheld device.
Its job is to receive and display glucose information from the compatible sensor and provide applicable alarms and other reader functions.
Think of the sensor as the measurement component and the reader as the display and monitoring component.
You need the compatible system components to work together according to the manufacturer’s instructions.
Is the FreeStyle Libre 3 Reader the Same as the FreeStyle Libre 3 Plus Sensor?
No.
These are separate components.
The FreeStyle Libre 3 Reader is the handheld reading device.
The FreeStyle Libre 3 Plus sensor is the newer sensor option in Abbott’s current FreeStyle Libre 3 system.
Abbott’s current U.S. website states that the FreeStyle Libre 3 system includes the Libre 3 Plus sensor, Libre 3 sensor, Libre 3 app, Libre app, and Libre 3 reader.
Abbott also currently states that the FreeStyle Libre 3 sensor is being discontinued and encourages users to discuss moving to the FreeStyle Libre 3 Plus sensor with their doctor.
This is particularly important if you are searching for older FreeStyle Libre 3 products.
Always verify current availability and compatibility before ordering.
FreeStyle Libre 3 Reader and the Newer Libre App
The FreeStyle Libre software ecosystem is changing.
Abbott’s current support page says the FreeStyle Libre 3 app will be phased out and recommends transitioning to the Libre app with the next sensor. This does not mean you should make changes without checking the manufacturer’s instructions.
If you currently use the FreeStyle Libre 3 app, review Abbott’s latest transition guidance and confirm your smartphone’s compatibility with the current Libre app.
Is FreeStyle Libre 3 a Continuous Glucose Monitor?
Yes.
The FreeStyle Libre 3 system is a continuous glucose monitoring system, commonly called a CGM.
A CGM uses a wearable sensor and a compatible reader or smartphone to provide glucose information.
Abbott explains that CGM systems pair a small sensor worn on the back of the upper arm with an app or reader.
This approach is different from checking glucose only occasionally with a conventional blood glucose meter.
Benefits of Using a Dedicated CGM Reader
For some people, having a dedicated reader provides peace of mind.
Your smartphone might have:
- Low battery
- Notifications
- Personal apps
- Work messages
- Calls
- Storage limitations
- Compatibility issues
A dedicated reader keeps glucose monitoring separate.
It can be especially convenient for someone who wants a device whose primary purpose is viewing glucose information.
The right choice depends on personal preference, medical needs, device compatibility, and healthcare guidance.
Things to Consider Before Buying a FreeStyle Libre 3 Reader
Before purchasing a reader, ask yourself a few practical questions.
Do I have a prescription?
The FreeStyle Libre system is prescription-only in the United States.
Which sensor am I using?
Reader and sensor compatibility matters.
Is the product currently available?
The FreeStyle Libre product line is evolving, and Abbott currently identifies the Libre 3 sensor as being discontinued in favor of the Libre 3 Plus sensor.
Will insurance pay for it?
Check your plan rather than assuming coverage.
Do I need additional testing supplies?
If you want to use the reader’s built-in blood glucose meter, the necessary test strips and related supplies are purchased separately.
Is my smartphone compatible if I want to use the app?
Check Abbott’s current compatibility list.
These questions can make the purchasing process much smoother.
Why Buying From a Medical Supply Supplier Can Be Helpful
A medical supply supplier can be useful when you need more than simply a product shipped to your door.
Customers often have practical questions about:
- Product availability
- Prescription requirements
- Insurance
- Replacement supplies
- Diabetes-management products
- CGM accessories
- Other DME products
At Alfa Healthcare Supply Inc., customers can explore a range of diabetes and medical supply products.
The company’s website can be used to review currently available products and contact the supplier for product-related questions.
Tips for Getting Started With a FreeStyle Libre 3 Reader
If you have been prescribed the system, these simple habits can make getting started easier.
Read the current instructions
Medical-device instructions can change. Always use the latest manufacturer documentation.
Confirm sensor compatibility
Do not assume that every Libre sensor works with every Libre reader.
Keep the reader charged
A dedicated device is only useful when it has sufficient battery power.
Learn the alarms
Understanding what an alarm means before you need it can make the experience less stressful.
Keep backup supplies available
If your healthcare plan calls for fingerstick testing, keep the appropriate meter and supplies available.
Pay attention to symptoms
Do not rely blindly on a device reading when it does not match how you feel.
Ask questions
If you are unsure about sensor application, readings, alarms, or treatment decisions, ask your healthcare professional or manufacturer support.
Final Thoughts: Understanding the FreeStyle Libre 3 Reader
So, what is FreeStyle Libre 3 Reader device?
In simple terms, it is a dedicated handheld device that receives and displays glucose information from a compatible FreeStyle Libre 3 sensor.
It is more than a simple glucose meter. The reader is part of a continuous glucose monitoring system and can provide ongoing glucose information, applicable alarms, stored history, and a built-in blood glucose meter when used with the required supplies.
For someone who prefers not to depend entirely on a smartphone, a dedicated reader can be a practical option.
At the same time, the FreeStyle Libre product line continues to evolve. Abbott’s current information highlights the Libre 3 Plus sensor and says the FreeStyle Libre 3 sensor is being discontinued, so anyone purchasing or replacing equipment should verify current sensor, reader, app, and compatibility information before ordering.
If you are looking for diabetes supplies or want to check current availability, you can visit Alfa Healthcare Supply Inc. and review its diabetes supply options.
Frequently Asked Questions About the FreeStyle Libre 3 Reader
What is FreeStyle Libre 3 Reader device?
The FreeStyle Libre 3 Reader is a handheld device designed to receive and display glucose information from a compatible FreeStyle Libre 3 sensor. It has a backlit color touchscreen, can provide glucose alarms, and can store approximately 90 days of glucose history and notes.
Does the FreeStyle Libre 3 Reader need a smartphone?
No. The reader is a dedicated handheld reading device. The FreeStyle Libre system also offers smartphone-based options, but smartphone compatibility requirements apply.
Does the FreeStyle Libre 3 Reader require scanning?
The FreeStyle Libre 3 system automatically streams glucose readings to a compatible reader after the sensor is active, so routine scanning is not required in the same way it was with the FreeStyle Libre 2 system.
Can the reader check blood glucose?
Yes. The FreeStyle Libre 3 Reader includes a built-in blood glucose meter. However, separate FreeStyle Precision Neo test strips, control solution, a lancing device, and lancets are required.
How much glucose history can the reader store?
Abbott states that the reader can store approximately 90 days of glucose history and notes.
Where can I purchase the FreeStyle Libre 3 Reader?
Abbott states that the reader can be purchased through participating DME suppliers and retail pharmacies, although availability may vary.
Is the FreeStyle Libre 3 Reader prescription-only?
In the United States, the FreeStyle Libre 3 system is restricted to sale by or on the order of a physician.
Can the reader provide alarms?
Yes. The FreeStyle Libre 3 Reader can provide applicable glucose alarms when the alarm settings are enabled and system requirements are met.
Is the FreeStyle Libre 3 Reader a CGM sensor?
No. The reader and sensor are different components. The sensor collects glucose information, while the reader displays information received from the compatible sensor.
Is the FreeStyle Libre 3 Reader still available?
Availability can change. Abbott’s current support information says the FreeStyle Libre 3 sensor is being discontinued and directs users toward the FreeStyle Libre 3 Plus sensor. The reader remains listed as part of the FreeStyle Libre 3 system.
Does insurance cover the FreeStyle Libre 3 Reader?
Coverage depends on the patient’s insurance plan and applicable eligibility requirements. Medicare and other payer criteria may apply.
Can I use the reader for treatment decisions?
The reader provides glucose information, but users should follow their healthcare professional’s treatment instructions. Abbott advises reviewing the complete safety information and using additional blood glucose testing when indicated.
Medical disclaimer: This article is for general educational purposes and is not a substitute for medical advice, diagnosis, or treatment. Always follow the current manufacturer’s instructions and your healthcare professional’s recommendations for CGM use, glucose testing, and treatment decisions.
FreeStyle Lite Blood Glucose Monitoring System
Managing blood glucose can become an important part of everyday life for people with diabetes. Whether you are checking your blood sugar once a day or several times according to your healthcare professional’s instructions, having a blood glucose meter that is simple to understand can make the routine feel easier.
The FreeStyle Lite blood glucose monitoring system is a traditional blood glucose meter system designed to measure glucose from a small blood sample. The system uses compatible FreeStyle Lite test strips and is designed around a small blood sample requirement, quick testing, and straightforward operation.
For someone who is new to blood glucose monitoring, terms such as “test strip,” “lancing device,” “blood sample,” “coding,” and “control solution” can initially sound complicated. In reality, the basic testing process is quite simple once you understand what each component does.
This guide explains what the freestyle lite blood glucose monitoring system is, how it works, what supplies you need, how testing generally works, how to handle test strips, common mistakes to avoid, and what to consider when purchasing the system and replacement strips.
Alfa Healthcare Supply Inc. lists the FreeStyle Lite Blood Glucose Monitoring System among its diabetic supplies. The current Alfa product listing should be checked for the latest availability and pricing.
Medical information notice: This article is for general educational purposes. It does not replace the instructions supplied with your specific meter, test strips, or lancing device, or the advice of your doctor, pharmacist, diabetes educator, or other qualified healthcare professional. Always follow the current manufacturer’s instructions and your individual diabetes-care plan.
What is the FreeStyle Lite Blood Glucose Monitoring System?
The FreeStyle Lite blood glucose monitoring system is a blood glucose monitoring device manufactured by Abbott Diabetes Care.
Unlike a continuous glucose monitor (CGM), the FreeStyle Lite system is a traditional blood glucose meter. It requires a small blood sample for each test.
The meter analyzes the blood sample and displays a glucose reading on the screen.
The FDA currently lists the FreeStyle Lite Blood Glucose Monitoring System as an over-the-counter blood glucose testing system, with Abbott Diabetes Care Inc. identified in the device listing. The FDA record also identifies the system under the blood glucose testing device classification.
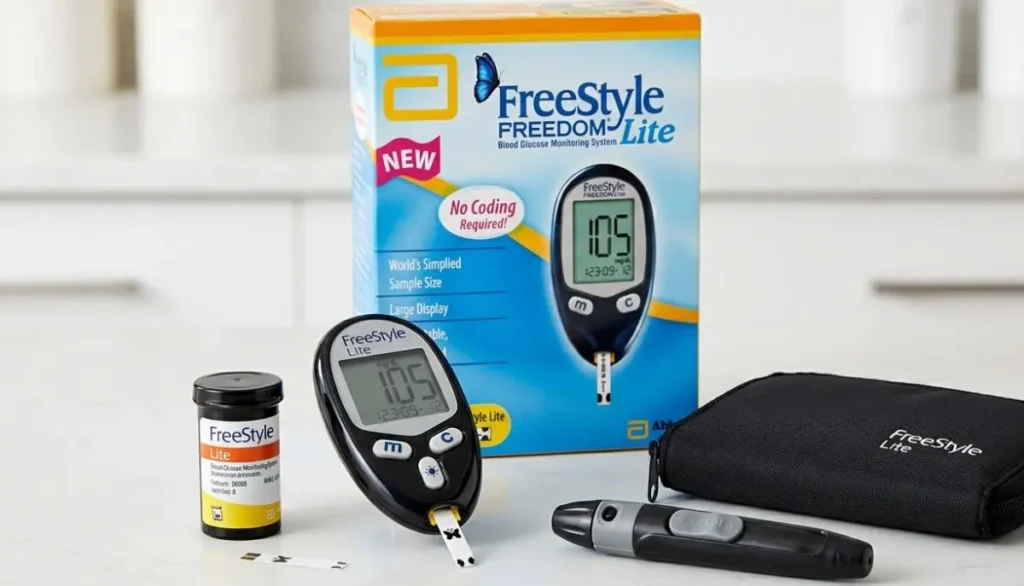
This is important because the FreeStyle Lite system and FreeStyle Libre systems are different types of glucose monitoring technology.
A FreeStyle Lite meter uses a blood sample and test strip.
A CGM such as FreeStyle Libre uses a sensor to measure glucose in interstitial fluid.
So, if you are searching for the freestyle lite blood glucose monitoring system, you are looking for a blood glucose meter rather than a continuous glucose monitoring sensor.
How Does the FreeStyle Lite Blood Glucose Monitoring System Work?
The system uses several components that work together.
The basic setup includes:
- FreeStyle Lite blood glucose meter
- FreeStyle Lite blood glucose test strips
- Lancing device
- Sterile lancets
- Appropriate control solution when required
- Other accessories depending on the package
The test strip is an important part of the system.
When a small blood sample is applied to the test strip, the meter analyzes the sample and calculates the glucose concentration.
FDA documentation describes the FreeStyle Lite system as using coulometric biosensor technology to quantitatively measure glucose in whole blood. The FDA documentation also identifies a 0.3 µL sample volume and an average measurement time of about five seconds for the system described in its regulatory documentation.
You do not need to understand the chemistry behind the meter to use it.
For everyday use, the basic idea is:
Blood sample → test strip → meter analyzes sample → glucose result appears on screen.
That simple process is what makes a traditional blood glucose meter useful for routine monitoring.
Why People Look for a Simple Blood Glucose Meter
Blood glucose testing can become a regular part of life.
For some people, the process may happen before meals, after meals, before exercise, at bedtime, or at other times recommended by their healthcare professional.
When testing happens regularly, convenience matters.
People may prefer a system that:
- Requires only a small blood sample
- Does not require manual coding
- Provides a result quickly
- Uses clearly designed test strips
- Is easy to carry
- Can be incorporated into a daily routine
The FreeStyle Lite system was designed around several of these practical considerations.
FDA documentation reports a 0.3 µL sample volume, an average measurement time of approximately five seconds, and no calibration/coding requirement for the documented system.
Key Features of the FreeStyle Lite Blood Glucose Monitoring System
Understanding the major features can help you decide whether this type of blood glucose meter fits your testing routine.
1. Small Blood Sample
One of the notable features of the FreeStyle Lite system is its small blood sample requirement.
The documented sample volume is approximately 0.3 microliters (µL).
That is a very small amount of blood.
For someone who tests regularly, a smaller sample requirement may make the testing process feel more manageable.
Remember, however, that the lancing device still makes a small puncture in the skin. A small sample requirement does not mean that blood glucose testing is completely painless.
Using the lancing device correctly and following the manufacturer’s instructions can help create a consistent testing routine.
2. Approximately Five-Second Testing
Nobody wants to wait a long time for a blood glucose result.
FDA documentation for the FreeStyle Lite system identifies an average measurement time of approximately five seconds.
A short testing time can be helpful when blood glucose testing is part of a busy daily schedule.
For example, imagine getting ready for work in the morning.
You may already be thinking about breakfast, medications, transportation, school, appointments, or other responsibilities.
A quick meter reading can fit more naturally into that routine.
3. No Manual Coding
Older blood glucose meters sometimes required users to enter a code or calibrate the meter for a particular batch of test strips.
The documented FreeStyle Lite system does not require manual calibration/coding.
This can simplify the testing process.
There are fewer setup steps to remember before each test.
Even small conveniences can matter when glucose testing is something you do regularly.
4. Compatible FreeStyle Lite Test Strips
The meter is designed to work with the appropriate FreeStyle Lite test strips.
This point is extremely important.
Not every glucose test strip is compatible with every glucose meter.
Abbott’s instructions state that the FreeStyle Lite meter should be used with FreeStyle Lite test strips and the appropriate FreeStyle control solution. Using incompatible supplies may result in inaccurate readings.
Therefore, always verify the exact meter and test-strip compatibility before purchasing replacement supplies.
5. Multiple Approved Testing Areas
Abbott documentation for the FreeStyle Lite system identifies testing from several areas, including the fingers, forearm, upper arm, hand, thigh, and calf.
However, alternative-site testing is not appropriate for every situation.
Abbott’s instructions specifically recommend finger testing when testing for possible hypoglycemia or when a person has hypoglycemia unawareness.
This is one reason it is important to read the instructions for your specific meter and discuss testing-site choices with your healthcare professional.
What Comes With a FreeStyle Lite Blood Glucose Monitoring System?
The exact contents can vary by package and seller, so always check the product listing before ordering.
A blood glucose monitoring setup generally involves:
Blood Glucose Meter
This is the electronic device that analyzes the blood sample.
Test Strips
The test strip receives the blood sample and works with the meter to produce a glucose reading.
Lancing Device
The lancing device is used to obtain a small blood sample.
Lancets
A lancet is a sterile, pointed component used with the lancing device.
Control Solution
Control solution can be used to check whether the meter and test strips are working together properly under the conditions specified by the manufacturer.
Depending on the package, some of these supplies may be included while others may need to be purchased separately.
Always check the exact product contents before ordering.
FreeStyle Lite Blood Glucose Monitoring System vs. FreeStyle Libre
This is one of the most common points of confusion.
Both products use the FreeStyle name, but they are different technologies.
FreeStyle Lite
The FreeStyle Lite system is a traditional blood glucose monitoring system.
You obtain a blood sample and apply it to a compatible test strip.
The meter then provides a blood glucose result.
FreeStyle Libre
FreeStyle Libre is a continuous glucose monitoring technology that uses a sensor to measure glucose in interstitial fluid.
That means the testing experience is different.
A traditional blood glucose meter requires a blood sample each time you test.
A CGM uses a sensor worn on the body to collect glucose information.
Neither description should be confused with the other.
If you are searching for the freestyle lite blood glucose monitoring system, make sure you are specifically looking for a traditional blood glucose meter and compatible test strips.
How to Use the FreeStyle Lite Blood Glucose Monitoring System
The exact instructions supplied with your particular system should always take priority.
However, understanding the general process can make the first test less intimidating.
Step 1: Prepare Your Supplies
Before testing, gather:
- FreeStyle Lite meter
- Compatible FreeStyle Lite test strip
- Lancing device
- New lancet
- Tissue or cotton if needed
- Sharps container
Having everything nearby helps prevent interruptions.
Step 2: Wash and Dry Your Hands
Clean hands are an important part of blood glucose testing.
Wash your hands with soap and water and dry them thoroughly.
Food residue, sugar, lotion, moisture, and other substances on the skin can potentially affect a glucose sample.
Do not begin testing with wet hands.
Step 3: Prepare the Lancing Device
Follow the instructions supplied with your lancing device.
Use a fresh sterile lancet according to the manufacturer’s directions.
Never share a lancing device or lancet with another person.
If you regularly have difficulty obtaining an adequate blood sample, speak with your healthcare professional about your technique.
Step 4: Remove One Test Strip
Take one FreeStyle Lite test strip from its original container.
Close the container promptly after removing the strip.
Protecting test strips from moisture and other environmental conditions is important.
Abbott instructions recommend keeping FreeStyle Lite test strips in their original container and keeping the container tightly closed when not removing a strip.
Step 5: Insert the Test Strip
Insert the test strip into the appropriate port of the meter according to the manufacturer’s instructions.
Do not force the strip.
The meter should indicate that it is ready for a blood sample.
Step 6: Obtain the Blood Sample
Use the lancing device as directed.
A small blood drop is generally sufficient for a system designed around a 0.3 µL sample requirement.
Avoid unnecessary repeated punctures.
If you have difficulty getting enough blood, review the manufacturer’s instructions or ask a healthcare professional for help.
Step 7: Apply the Blood to the Strip
Follow the instructions for the specific FreeStyle Lite test strip.
Apply the blood sample to the designated area of the strip.
The strip and meter work together to analyze the sample.
Step 8: Wait for the Result
The meter analyzes the blood sample.
The documented FreeStyle Lite system has an average measurement time of approximately five seconds.
The glucose result then appears on the meter.
Step 9: Record the Result if Recommended
Some people keep a glucose log.
Depending on your diabetes-care plan, you may record:
- Date
- Time
- Blood glucose reading
- Meals
- Medication or insulin
- Exercise
- Symptoms
- Other relevant information
A record can help you and your healthcare professional recognize patterns.
How Accurate Is the FreeStyle Lite Blood Glucose Monitoring System?
Accuracy is one of the first questions people often ask about a glucose meter.
The FreeStyle Lite system has undergone FDA regulatory review. The FDA’s records identify the device as an over-the-counter blood glucose testing system, with the original 510(k) submission receiving a substantially equivalent determination.
However, no glucose meter should be treated as completely independent of user technique.
The quality of a glucose result can be affected by factors such as:
- Incorrect test-strip storage
- Expired test strips
- Incorrect or insufficient blood sample
- Dirty or wet hands
- Incompatible test strips
- Incorrect meter use
- Environmental conditions
- Problems with the meter or supplies
That is why proper technique matters.
If your meter result seems unusual, do not automatically assume that the meter is wrong.
Review your testing process and follow the instructions for your system.
If the result does not match your symptoms or expectations, follow your healthcare professional’s instructions regarding repeat testing and medical care.
Why Test Strip Storage Matters
Test strips are sensitive medical supplies.
They should be handled according to the manufacturer’s instructions.
A common mistake is leaving the test-strip container open.
Moisture and environmental exposure can affect test-strip performance.
For this reason:
- Keep strips in their original container.
- Close the container promptly.
- Do not transfer strips to another container.
- Check the expiration date.
- Do not use visibly damaged strips.
- Follow the storage temperature and humidity requirements in the current instructions.
These habits are simple, but they can help protect the reliability of your testing routine.
What Are FreeStyle Lite Blood Glucose Test Strips?
FreeStyle Lite test strips are disposable strips designed for compatible FreeStyle Lite blood glucose meters.
The strips are an essential part of the monitoring system.
Without compatible test strips, the meter cannot perform the normal blood glucose test.
Alfa Healthcare Supply currently lists FreeStyle Lite Blood Glucose Test Strips 50 Count as a diabetic-supply product. The product information notes the small sample requirement and compatibility with FreeStyle Lite meters.
When buying replacement strips, always confirm:
- The exact name of your meter.
- The exact test-strip name.
- Compatibility.
- Package quantity.
- Expiration information.
- Current product availability.
What Does “50 Count” Mean?
A 50-count package contains 50 individual test strips.
How long those strips last depends on how often you test.
For example:
| Testing frequency | Approximate number of days from 50 strips |
| 1 test per day | 50 days |
| 2 tests per day | 25 days |
| 3 tests per day | 16–17 days |
| 4 tests per day | 12–13 days |
| 5 tests per day | 10 days |
These are simple mathematical estimates.
Your actual testing schedule should be based on your healthcare professional’s recommendations.
Some people need to test more frequently than others.
Do not change your testing schedule simply to make a box of strips last longer.
Common Mistakes When Using a Blood Glucose Meter
Even a simple meter can produce confusing results if the testing process is not followed correctly.
Mistake 1: Using the Wrong Test Strip
Never assume that all FreeStyle-branded test strips are interchangeable.
Check compatibility.
Mistake 2: Using Expired Strips
Always check the expiration date printed on the package.
Do not use expired strips.
Mistake 3: Leaving the Strip Container Open
Close the container after removing a strip.
This helps protect the remaining strips from environmental exposure.
Mistake 4: Testing With Wet Hands
Water can dilute the blood sample.
Always wash and thoroughly dry your hands.
Mistake 5: Testing With Dirty Hands
Food or other substances on the skin may interfere with the sample.
Clean hands are an important part of reliable testing.
Mistake 6: Reusing Test Strips
Test strips are designed for single use.
Do not reuse them.
Mistake 7: Sharing Lancets
Lancets and lancing devices should not be shared.
Use appropriate infection-control practices.
Mistake 8: Ignoring Unexpected Results
A surprising number deserves attention.
If a result is significantly different from what you expected, follow the instructions for your system and your healthcare professional’s recommendations.
If you have symptoms of a serious glucose problem or feel acutely unwell, seek appropriate medical care.
Who May Use the FreeStyle Lite Blood Glucose Monitoring System?
The FreeStyle Lite system may be used by people who need a traditional blood glucose meter and have a compatible testing setup.
It may appeal to people who want:
- A compact blood glucose testing system
- A small blood sample requirement
- Quick results
- No manual coding
- A familiar fingerstick-style testing routine
- Compatible replacement test strips
However, choosing a glucose meter is an individual decision.
Your healthcare professional can help determine which type of monitoring system is appropriate for your needs.
Is FreeStyle Lite a Continuous Glucose Monitor?
No.
The FreeStyle Lite system is not a continuous glucose monitor.
It is a blood glucose monitoring system.
This means the user obtains a blood sample for each individual test.
A CGM, on the other hand, uses a sensor to collect glucose information over time.
This difference matters when searching online.
Someone looking for “FreeStyle Lite meter” is generally looking for a blood glucose meter.
Someone looking for “FreeStyle Libre sensor” is generally looking for a CGM product.
The names may sound similar, but the technology and testing process are different.
FreeStyle Lite for Everyday Diabetes Care
For many people, diabetes care is not about one big moment.
It is about small routines repeated day after day.
Checking glucose.
Taking medication.
Planning meals.
Staying active.
Keeping supplies available.
Going to appointments.
Talking with healthcare professionals.
A blood glucose meter becomes one part of that larger routine.
The purpose of testing is not simply to collect numbers. Blood glucose results can provide information that may help a person and their healthcare team understand glucose patterns and manage diabetes according to an individualized care plan.
That is why consistent technique matters.
If you test under similar conditions and follow your healthcare professional’s recommendations, your glucose records can become more useful for discussions about your diabetes care.
FreeStyle Lite Blood Glucose Monitoring System at Alfa Healthcare Supply
If you are looking for the freestyle lite blood glucose monitoring system, Alfa Healthcare Supply Inc. lists the product among its diabetic supplies.
The current Alfa product listing shows the FreeStyle Lite Blood Glucose Monitoring System as a product available through its online medical supply store. Product availability and pricing can change, so customers should check the current product page before ordering.
Alfa Healthcare Supply focuses on medical and DME supplies and provides diabetic products alongside other healthcare categories.
For replacement testing needs, Alfa also lists FreeStyle Lite Blood Glucose Test Strips 50 Count.
This can be convenient for customers who need both the meter and compatible testing supplies.
When ordering, make sure the test strips match your exact meter.
What Should You Check Before Buying?
Before purchasing a freestyle lite blood glucose monitoring system, consider these practical points.
1. Meter Compatibility
If you already have FreeStyle Lite strips, confirm that they are compatible with the meter you are purchasing.
2. Test Strip Availability
A meter is only useful if you can obtain the correct replacement strips.
Check the availability of compatible strips.
3. Package Contents
Do not assume that every package contains the same accessories.
Read the product description carefully.
4. Pricing
Medical supply prices can change.
Check the current product listing before placing an order.
5. Expiration Dates
When purchasing test strips, pay attention to expiration information.
6. Your Healthcare Plan
Your healthcare professional may recommend a specific glucose monitoring method based on your individual circumstances.
Can the FreeStyle Lite System Replace a Doctor’s Advice?
No.
A glucose meter provides information.
It does not diagnose your overall health condition, replace your healthcare professional, or independently determine your diabetes treatment.
Your glucose readings should be understood in the context of your medical history and diabetes-care plan.
Do not make major changes to insulin, medication, diet, or other treatment solely because of an isolated meter reading unless your healthcare professional has given you a plan for doing so.
What If Your Reading Seems Wrong?
Sometimes a result may not match what you expected.
For example, perhaps you feel normal but the number is unexpectedly high.
Or perhaps you feel symptoms that do not seem consistent with the reading.
When this happens, review the basics:
- Were your hands clean and dry?
- Was the test strip expired?
- Was the test strip stored correctly?
- Was the correct test strip used?
- Was enough blood applied?
- Was the meter used according to the instructions?
- Is the result consistent with other readings?
Follow the troubleshooting instructions supplied with your meter.
If the result remains concerning or does not match your symptoms, contact your healthcare professional.
For potentially serious symptoms, seek appropriate medical attention rather than relying only on a home glucose meter.
Understanding the Difference Between a Number and a Pattern
One glucose result is a snapshot.
A series of results can show a pattern.
For example, someone may notice that their readings consistently change around:
- Breakfast
- Dinner
- Exercise
- Medication times
- Illness
- Stress
- Sleep
- Other daily routines
This is why keeping a glucose record can be useful when recommended by your healthcare professional.
The purpose is not to become obsessed with individual numbers.
Instead, the goal is to provide useful information that can support conversations about your diabetes management.
How to Keep Your Testing Routine Simple
A complicated routine can become difficult to maintain.
A few simple habits may help.
Keep Your Supplies Together
Store your meter, test strips, and lancing supplies in an organized location.
Check Your Supplies Regularly
Do not wait until you have only one strip left before checking whether you need another box.
Protect Your Test Strips
Keep them in their original container and follow storage instructions.
Carry Supplies When Appropriate
If your healthcare plan requires testing away from home, make sure you have the supplies you need.
Keep Your Results Organized
Use the meter’s available memory or a glucose log according to your needs.
FreeStyle Lite Blood Glucose Monitoring System: Important Safety Considerations
Blood glucose testing involves a lancet and blood, so basic safety is important.
Always:
- Use sterile lancets appropriately.
- Follow the lancing-device instructions.
- Do not share lancets.
- Do not share personal blood glucose testing equipment.
- Dispose of used lancets according to local sharps-disposal requirements.
- Keep supplies away from children and pets.
- Follow the manufacturer’s cleaning instructions for the meter.
- Use only compatible test strips and control solution.
If you are uncertain about any part of the testing process, ask your healthcare professional or pharmacist for guidance.
Frequently Asked Questions About the FreeStyle Lite Blood Glucose Monitoring System
What is the FreeStyle Lite blood glucose monitoring system?
The FreeStyle Lite blood glucose monitoring system is a traditional blood glucose meter system designed to measure glucose from a small blood sample using compatible FreeStyle Lite test strips. FDA records identify it as an over-the-counter blood glucose testing system.
How much blood does the FreeStyle Lite system need?
FDA documentation identifies a sample volume of approximately 0.3 µL for the FreeStyle Lite system.
How fast does the FreeStyle Lite meter give a result?
The documented system has an average measurement time of approximately five seconds.
Does FreeStyle Lite require coding?
The documented FreeStyle Lite system does not require manual calibration or coding.
Is FreeStyle Lite the same as FreeStyle Libre?
No. FreeStyle Lite is a blood glucose meter that requires a blood sample and test strip. FreeStyle Libre is a separate glucose-monitoring technology using a sensor.
What test strips does the FreeStyle Lite meter use?
The FreeStyle Lite meter is designed to use compatible FreeStyle Lite blood glucose test strips. Abbott documentation warns against using incompatible test strips because they may result in inaccurate readings.
Can I use another FreeStyle test strip?
Do not assume that another FreeStyle-branded test strip is compatible. Check the exact meter and test-strip specifications before use.
How many test strips are in a 50-count box?
A 50-count package contains 50 individual test strips.
How long will 50 test strips last?
It depends on how often you test. At one test per day, 50 strips could last about 50 days. At four tests per day, they could last about 12–13 days. Your healthcare professional’s recommended testing schedule should determine how frequently you test.
Can I reuse a FreeStyle Lite test strip?
No. Test strips are intended for single use.
How should FreeStyle Lite test strips be stored?
Follow the current manufacturer instructions. Abbott documentation recommends keeping the strips in their original container and closing the container after removing a strip.
Can the FreeStyle Lite system test blood from areas other than the finger?
Abbott documentation identifies several testing areas, including the forearm, upper arm, hand, thigh, calf, and fingers. However, testing-site recommendations can depend on the situation. Abbott specifically recommends finger testing when testing for possible hypoglycemia or when a person has hypoglycemia unawareness.
What should I do if my blood glucose reading seems unusual?
Review your testing technique, including hand cleanliness, strip expiration, strip storage, compatibility, and sample application. Follow the meter’s instructions and contact your healthcare professional when appropriate.
Is the FreeStyle Lite meter a CGM?
No. It is a blood glucose meter that requires a blood sample for each test.
Where can I buy a FreeStyle Lite Blood Glucose Monitoring System?
Alfa Healthcare Supply Inc. currently lists the FreeStyle Lite Blood Glucose Monitoring System in its diabetic supplies collection. Check the current product page for availability and pricing.
Where can I buy FreeStyle Lite test strips?
Alfa Healthcare Supply Inc. currently lists FreeStyle Lite Blood Glucose Test Strips 50 Count.
FreeStyle Lite Blood Glucose Test Strips Pack of 50:
Managing blood glucose can become a regular part of life for people with diabetes. Whether you test once a day or several times throughout the day, having dependable test strips available when you need them can make your routine much easier.
The FreeStyle Lite blood glucose test strips pack of 50 is designed for use with compatible FreeStyle Lite blood glucose meters. For people who already use a FreeStyle Lite system, a 50-count pack can be a practical way to keep testing supplies available without purchasing a new meter every time more strips are needed.
At Alfa Healthcare Supply Inc., we understand that medical supplies are not simply products sitting on a shelf. They are part of someone’s everyday health routine. A person may need to check their blood glucose before a meal, after physical activity, at bedtime, or whenever their healthcare professional recommends testing. Having the correct test strips available can help make that routine more convenient.
This guide explains what FreeStyle Lite blood glucose test strips pack of 50 means, how the strips work, how to store them, how to use them correctly, who may find them useful, and what to consider before purchasing.
Important: Always use blood glucose test strips according to the instructions supplied with your specific meter and test strips. Product availability, packaging, compatibility, and labeling can vary by market and may change over time.
What are FreeStyle Lite Blood Glucose Test Strips?
FreeStyle Lite test strips are disposable strips designed to work with compatible FreeStyle Lite blood glucose meters.
The basic testing process is simple:
- Insert a compatible test strip into the meter.
- Obtain a small blood sample using an appropriate lancing device.
- Apply the blood sample to the test strip’s designated sample area.
- Allow the meter to process the sample.
- Read the blood glucose result shown on the meter.
The test strip is the part of the system that receives the blood sample and works with the meter to produce a glucose measurement.
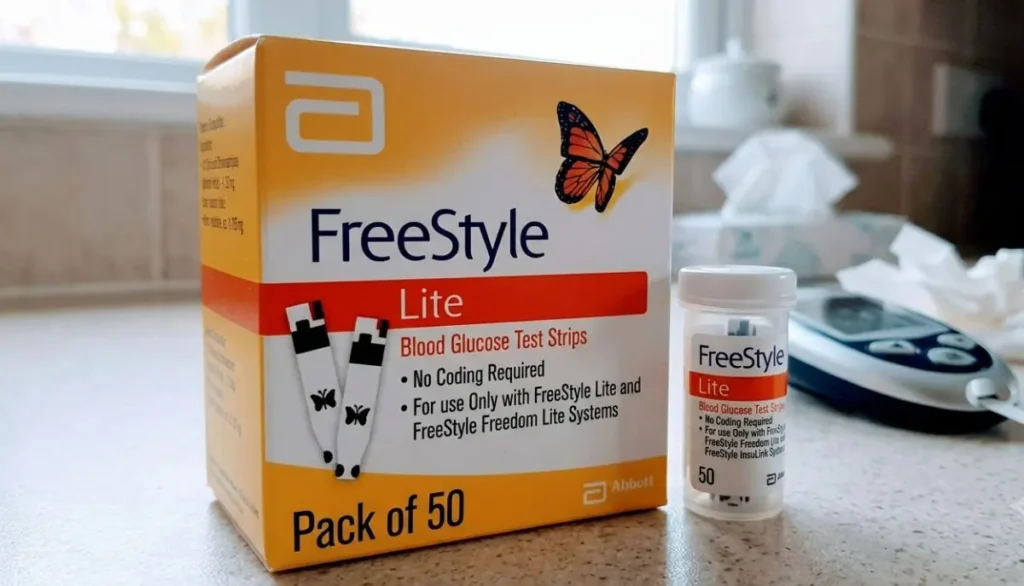
Abbott’s instructions specifically state that FreeStyle Lite meters should be used with FreeStyle Lite test strips. Using an incompatible strip can result in inaccurate results.
This is why checking compatibility before ordering is important.
What Does “FreeStyle Lite Blood Glucose Test Strips Pack of 50” Mean?
The phrase freestyle lite blood glucose test strips pack of 50 refers to a package containing 50 individual blood glucose test strips.
Each strip is intended for a single test. After a strip has been used, it should be discarded rather than reused. Abbott’s instructions state that FreeStyle Lite test strips may be used only once.
A 50-count package can be useful for people who want to keep a regular supply of strips at home.
For example, if someone tests once per day, 50 strips could represent approximately 50 testing opportunities. If someone tests twice daily, the same number of strips represents approximately 25 days of testing.
Actual testing frequency depends on the person’s diabetes management plan and recommendations from their healthcare professional.
Why Having the Right Test Strips Matters
A blood glucose meter is only useful when it has compatible supplies.
Imagine reaching for your meter before breakfast and discovering that you have run out of test strips. It can interrupt your routine and create unnecessary stress.
Keeping an appropriate supply of compatible strips can help avoid that situation.
The FreeStyle Lite blood glucose test strips pack of 50 can be considered by people who already use a compatible FreeStyle Lite meter and need replacement strips for ongoing testing.
It is important to remember that test strips are not universal. Different meters can require different test strips, even when the products look similar.
Before purchasing, check:
- Your exact meter model
- The test strip name
- Package labeling
- Expiration information
- Storage instructions
- Your healthcare professional’s recommendations when applicable
Key Features of FreeStyle Lite Test Strips
Depending on the specific market and product packaging, important characteristics of the FreeStyle Lite system may include the following.
Designed for Compatible FreeStyle Lite Meters
FreeStyle Lite test strips are made for compatible FreeStyle Lite blood glucose meters.
This is one of the most important things to check before purchasing. The strip should match the meter you actually use.
Abbott’s instructions caution that using other test strips with a FreeStyle Lite meter can produce inaccurate results.
Small Blood Sample
The FreeStyle Lite system was designed around a small blood sample.
For many people, reducing the amount of blood required can make routine testing feel easier. However, the required sample and testing procedure should always be followed according to the current instructions supplied with the product.
Single-Use Design
Each test strip is intended for one test.
Do not wash, clean, or reuse a test strip after testing.
A used strip should be discarded appropriately according to local recommendations.
Convenient 50-Count Pack
A 50-count package provides multiple strips in one purchase.
This can be helpful for people who test regularly and want to maintain a supply at home.
How Do FreeStyle Lite Test Strips Work?
Blood glucose test strips are designed to interact with a small blood sample.
When the sample is applied to the appropriate part of the strip, the meter analyzes the sample and calculates a glucose result.
The exact technology is built into the test strip and meter system, so users do not need to perform a chemical calculation themselves.
From the user’s perspective, the process is straightforward:
Prepare → Insert → Obtain sample → Apply blood → Wait for result → Record or respond according to your care plan.
The meter and test strip work together as a system.
How to Use FreeStyle Lite Blood Glucose Test Strips
Always follow the current instructions included with your meter and test strips. The following is a general overview rather than a replacement for the manufacturer’s instructions.
Step 1: Wash and Dry Your Hands
Start with clean hands.
Wash your hands with soap and water and dry them thoroughly before testing. This can help reduce contamination and avoid substances on the skin interfering with the sample.
Avoid testing with wet fingers.
Step 2: Prepare Your Meter
Have your FreeStyle Lite meter and a compatible test strip ready.
Check the strip container before opening it.
If the packaging or strip appears damaged, wet, contaminated, or otherwise unsuitable, do not use it.
Step 3: Remove One Test Strip
Take out one strip when you are ready to test.
Close the container promptly if the strips are supplied in a vial or container that requires resealing.
Moisture and environmental conditions can affect test strips, so proper storage is important.
Step 4: Insert the Test Strip Correctly
Insert the test strip into the compatible meter according to the meter instructions.
Abbott’s instructions indicate that the printed side should be positioned correctly and that the strip should be fully inserted.
Wait for the meter to indicate that it is ready for the blood sample.
Step 5: Obtain a Blood Sample
Use your lancing device according to its instructions.
The appropriate testing site and lancing technique may depend on your individual situation.
If you are testing because you suspect low blood glucose or have reduced awareness of hypoglycemia, follow your healthcare professional’s guidance regarding the appropriate testing site. Abbott’s instructions include specific guidance regarding finger testing in these circumstances.
Step 6: Apply the Blood Sample
Apply the blood to the designated sample area on the test strip.
Do not smear blood across the strip.
Abbott’s instructions specifically caution against pressing the strip against the testing site or scraping blood onto the strip.
Step 7: Wait for the Meter Result
Allow the meter to complete the test.
Do not remove the strip prematurely unless the meter’s instructions tell you to do so.
Step 8: Dispose of the Used Strip
After the test, remove and dispose of the used strip appropriately.
Never reuse a test strip.
How Much Blood Is Needed?
One reason people choose blood glucose systems designed around small samples is convenience.
A smaller sample can make routine testing easier for some users, especially people who test frequently.
However, the most important point is not simply producing a large drop of blood. The sample needs to be sufficient and applied correctly to the designated area.
If the meter reports an error because there was not enough blood, follow the manufacturer’s troubleshooting instructions.
Abbott’s FreeStyle Lite documentation explains that, under certain circumstances, additional blood may be applied to the same sample area for up to 60 seconds from the first application. If the test does not work, the instructions advise repeating the test with a new strip and an adequate blood sample.
Always follow the instructions for your specific product version.
FreeStyle Lite Test Strip Storage
Proper storage is one of the easiest things you can do to protect your testing supplies.
According to Abbott’s FreeStyle Lite instructions, test strips should be stored in a cool, dry location within the temperature range specified in the product instructions. The cited instructions specify storage between 4°C and 30°C (40°F and 86°F) and an operating range of 4°C to 40°C (40°F to 104°F).
Storage requirements can differ by product market and updated packaging, so always check the instructions supplied with your particular product.
Keep Test Strips Away From Moisture
Do not store test strips in places where they may become damp.
A bathroom with frequent steam may not be the best location.
Keep the Container Closed
If your strips come in a vial or container, close it promptly after removing a strip.
Avoid Excessive Heat
Do not leave test strips in a hot car, near a heater, or in another location where temperatures may exceed the manufacturer’s recommended range.
Check the Expiration Date
Do not use expired test strips.
Check the expiration information before testing, especially if you have had a package stored for a long period.
How Long Does a Pack of 50 Last?
There is no single answer because testing frequency differs from person to person.
Here is a simple example:
| Testing Frequency | Approximate Number of Days for 50 Strips |
| 1 test per day | 50 days |
| 2 tests per day | 25 days |
| 3 tests per day | About 16 days |
| 4 tests per day | About 12 days |
| 5 tests per day | About 10 days |
These are simple calculations, not recommendations for how often someone should test.
Your healthcare professional should determine the testing schedule that is appropriate for your diabetes management plan.
If you test more frequently, you may need to purchase replacement strips sooner.
Who May Use FreeStyle Lite Blood Glucose Test Strips?
The freestyle lite blood glucose test strips pack of 50 may be relevant to people who already use a compatible FreeStyle Lite blood glucose meter and need replacement strips.
They may be useful for:
- People managing diabetes at home
- Caregivers helping someone monitor blood glucose
- People who regularly use a compatible FreeStyle Lite meter
- Individuals who want a multi-strip package for routine testing
- Households maintaining a supply of diabetes testing products
The correct product depends on the individual’s meter and care plan.
If you are unsure whether these strips are right for your meter, check the meter model and product packaging or speak with a qualified healthcare professional.
FreeStyle Lite Test Strips vs. Continuous Glucose Monitoring
It is useful to understand that traditional blood glucose testing and continuous glucose monitoring are different approaches.
A blood glucose meter generally requires a blood sample and test strip for an individual measurement.
A continuous glucose monitoring system, by comparison, uses a sensor to collect glucose information over time.
Abbott markets several different glucose-monitoring technologies, and product availability varies by market.
Neither product category should automatically be treated as interchangeable.
Someone who uses a FreeStyle Lite meter needs the appropriate compatible test strips. Someone using a CGM may still need a blood glucose meter in certain situations, depending on the system’s instructions and their healthcare plan.
For example, Abbott’s safety information for FreeStyle Libre systems advises checking glucose with a blood glucose meter when readings do not match symptoms or when the system indicates that a blood glucose check is needed.
Why Some People Prefer Traditional Blood Glucose Testing
Technology has changed quickly in diabetes care, but blood glucose meters remain familiar to many people.
A traditional meter can be useful when:
- You already have a compatible meter.
- You prefer fingerstick testing.
- Your healthcare professional recommends blood glucose monitoring.
- You need a blood glucose measurement to confirm a reading under certain circumstances.
- You want a backup monitoring method.
For some people, the familiarity of a meter and test strip provides comfort.
The best monitoring approach depends on personal circumstances, medical needs, device compatibility, and professional guidance.
How to Avoid Common Testing Mistakes
Small mistakes can affect the testing process.
Here are some common issues to avoid.
Using the Wrong Test Strip
Do not assume that every FreeStyle-branded strip works with every FreeStyle meter.
Check compatibility carefully.
Using Expired Strips
Expiration dates exist for a reason.
Do not use expired strips.
Leaving the Container Open
Exposure to environmental conditions can affect test strips.
Close the container promptly according to the manufacturer’s instructions.
Testing With Wet Hands
Water or other substances on the fingers can affect the sample.
Wash and dry your hands thoroughly before testing.
Applying Too Little Blood
An insufficient sample may cause an error or prevent the meter from producing a result.
Follow the manufacturer’s instructions for obtaining and applying an adequate sample.
Applying Blood to the Wrong Part of the Strip
Use only the designated sample area.
Abbott’s instructions specifically warn against applying blood to the wrong side or location of the FreeStyle Lite strip.
Reusing a Strip
Test strips are disposable.
Use a new strip for every test.
What If the Meter Gives an Error?
An error message does not necessarily mean there is something wrong with your health.
It can sometimes be related to the meter, strip, blood sample, insertion, timing, or other testing conditions.
Abbott’s troubleshooting documentation lists possible causes such as:
- Incorrect strip insertion
- Insufficient blood sample
- Defective test strip
- Battery problems
- Meter or strip problems
- Applying blood after the meter has timed out
If you receive an error:
- Read the error message.
- Check the manufacturer’s instructions.
- Use a new test strip if instructed.
- Repeat the test when appropriate.
- Contact the manufacturer’s customer support if the problem continues.
- Speak with your healthcare professional if you have concerns about your glucose level.
Do not ignore serious symptoms simply because a meter produces an error.
What If Your Result Does Not Match How You Feel?
Blood glucose readings should always be interpreted in context.
If your result seems very different from your symptoms or expectations, follow the instructions provided with your meter and speak with your healthcare professional when appropriate.
Do not make major medication changes based solely on an unexpected reading unless your healthcare professional has already provided you with a specific plan for doing so.
If you experience symptoms of severe low or high blood glucose, seek appropriate medical attention.
How to Keep Your Diabetes Testing Routine Simple
A testing routine does not have to be complicated.
Consider keeping your supplies together in one convenient location.
A basic setup may include:
- Compatible blood glucose meter
- FreeStyle Lite test strips
- Lancing device
- Lancets
- Alcohol prep supplies when appropriate
- A sharps disposal container for used lancets
- Glucose log or digital record
Keeping everything together can reduce the chance of discovering that an important supply is missing when you need it.
Why a 50-Count Pack Can Be Convenient
A freestyle lite blood glucose test strips pack of 50 gives users multiple strips in one package.
For someone testing regularly, buying a multi-count package can make supply planning easier.
Instead of purchasing strips individually, the user can maintain a supply for future tests.
Before purchasing, consider:
- How often you test
- How many strips you currently have
- The expiration date
- Your meter’s compatibility
- Storage conditions
- How long it will take to receive your next order
Planning ahead can be particularly helpful for people who rely on regular glucose testing.
Buying FreeStyle Lite Blood Glucose Test Strips Online
When shopping online for diabetes supplies, product identification is important.
A professional-looking product page should provide clear information about the product rather than leaving customers to guess whether it is compatible with their equipment.
When looking for freestyle lite blood glucose test strips pack of 50, consider checking:
Product Name
Make sure the listing clearly identifies the test strips.
Quantity
Confirm that the package contains 50 strips if that is the quantity you need.
Compatibility
Check that the strips are intended for your specific FreeStyle Lite meter.
Packaging
Review the product information and packaging details.
Expiration
Check the expiration information when the product is received.
Supplier Information
Consider purchasing medical supplies from a healthcare supplier that provides clear product information and customer support.
FreeStyle Lite Test Strips at Alfa Healthcare Supply Inc.
Alfa Healthcare Supply Inc. is a medical supply provider serving customers looking for a range of healthcare and durable medical equipment products.
For customers searching for freestyle lite blood glucose test strips pack of 50, Alfa Healthcare Supply Inc. can be a convenient place to explore available diabetes supplies.
The company provides a range of healthcare products, including diabetes-related supplies and other home medical equipment.
Because product availability and pricing can change, customers should review the current product listing and confirm the details before ordering.
If you are uncertain about compatibility, check your meter model and the product information before completing your purchase.
Why Customers Should Pay Attention to Product Compatibility
It is easy to see a familiar brand name and assume that a product will work with an existing device.
However, blood glucose meters and strips are designed as compatible systems.
The FreeStyle Lite instructions specifically state that the FreeStyle Lite meter should be used with FreeStyle Lite test strips and warn that other strips may result in inaccurate readings.
That makes compatibility one of the most important considerations when purchasing replacement strips.
When in doubt, do not guess.
Check the manufacturer’s instructions or ask a healthcare professional or qualified supplier for assistance.
FreeStyle Lite Blood Glucose Test Strips Pack of 50: A Practical Supply Checklist
Before placing an order, use this simple checklist.
1. Check Your Meter
Write down the exact model of your blood glucose meter.
2. Match the Strip
Confirm that the strip is designed for that meter.
3. Confirm the Quantity
Make sure the package contains 50 strips if that is the quantity you require.
4. Check the Expiration Information
Make sure the strips will remain usable during your expected testing period.
5. Review Storage Requirements
Have a cool, dry place ready for storage.
6. Maintain Backup Supplies
Do not wait until your last strip to order another package if regular testing is important to your care routine.
7. Follow Your Healthcare Plan
Your testing schedule should come from your healthcare professional rather than from the number of strips included in a package.
Tips for Caregivers Using FreeStyle Lite Test Strips
Caregivers may sometimes help another person with blood glucose testing.
In this situation, organization becomes especially important.
Keep the meter, strips, lancets, and other supplies together.
Check that the test strip container is properly closed after removing a strip.
Make sure the correct meter and compatible test strips are being used.
Follow the person’s established testing routine and healthcare professional’s instructions.
Caregivers should also follow appropriate infection-control and sharps-safety practices.
Used lancets should be placed in an appropriate sharps container rather than left loose on a table, countertop, or bedside area.
A Human Approach to Diabetes Supplies
Medical supplies can sometimes feel like ordinary shopping items until you actually need them.
For a person living with diabetes, a test strip can represent something much more important: part of a daily routine for understanding what is happening with their blood glucose.
Maybe it is the first test of the morning.
Maybe it is a check before dinner.
Maybe it is part of a caregiver’s routine for a parent.
Maybe it is simply another item that needs to be kept in the medicine cabinet.
These small routines can become an important part of everyday life.
That is why choosing compatible, properly stored supplies and keeping them available when needed matters.
At Alfa Healthcare Supply Inc., the goal is to make healthcare supply shopping more straightforward by providing access to a range of medical and home healthcare products.
Why Choose a Healthcare Supply Provider?
When purchasing medical products, customers often want more than a product name.
They may want to know:
- Is this the correct product?
- Is the package quantity right?
- Will it work with my equipment?
- Is the product information clear?
- Can I find other medical supplies from the same supplier?
- Can I get help if I have a product question?
A healthcare-focused supplier can make the shopping process easier by organizing products into relevant medical supply categories and providing product information.
Customers should still verify the product details and compatibility themselves and consult healthcare professionals for medical advice.
FreeStyle Lite Test Strips: Important Safety Reminders
Blood glucose testing is a healthcare activity, so accuracy and proper technique matter.
Remember these basic points:
- Use only compatible test strips.
- Read the manufacturer’s current instructions.
- Do not use expired strips.
- Store strips according to the labeled conditions.
- Keep strips protected from moisture.
- Use a new strip for each test.
- Do not share personal testing equipment when doing so could create an infection risk.
- Follow proper lancet and sharps disposal practices.
- Do not make medication changes solely from general online information.
- Contact a healthcare professional if you have questions about your glucose readings or diabetes treatment.
The manufacturer’s instructions should always take priority over general online guidance.
Final Thoughts: FreeStyle Lite Blood Glucose Test Strips Pack of 50
The freestyle lite blood glucose test strips pack of 50 can be a practical replacement-supply option for people who use a compatible FreeStyle Lite blood glucose meter.
The most important considerations are not complicated: make sure the strips match your meter, store them correctly, check the expiration information, use each strip only once, and follow the manufacturer’s testing instructions.
A 50-count package can also make it easier to plan your everyday diabetes-testing supplies. How quickly you use the package will depend on your personal testing schedule.
If you are looking for FreeStyle Lite blood glucose test strips pack of 50, you can explore available diabetes supplies through Alfa Healthcare Supply Inc. and review the current product information before ordering.
For product-specific questions, compatibility concerns, or questions about how frequently you should test your blood glucose, speak with your healthcare professional or consult the manufacturer’s current instructions.
Good diabetes care often comes down to consistent everyday habits. Having the right supplies ready when you need them can make one small part of that routine a little easier.
Frequently Asked Questions About FreeStyle Lite Blood Glucose Test Strips Pack of 50
How many strips are included in a pack of 50?
A pack labeled FreeStyle Lite blood glucose test strips pack of 50 contains 50 test strips.
Each strip is intended for a single blood glucose test.
Can I reuse FreeStyle Lite test strips?
No. FreeStyle Lite test strips are designed for single use. Abbott’s instructions state that used strips should be discarded.
Do FreeStyle Lite test strips work with every glucose meter?
No. Compatibility matters. FreeStyle Lite test strips are intended for compatible FreeStyle Lite meters. Abbott warns that using other strips with the meter can produce inaccurate results.
How should I store FreeStyle Lite test strips?
Follow the storage instructions supplied with your product. Abbott’s cited instructions specify a cool, dry storage environment and provide a specified temperature range.
Can I keep test strips in my car?
It is generally better to avoid storing test strips in locations exposed to excessive heat or cold. Follow the manufacturer’s specified storage conditions.
How often should I test my blood glucose?
Testing frequency varies from person to person. Your healthcare professional should determine the appropriate schedule for you.
Can I use expired test strips?
Expired test strips should not be used. Check the expiration information before testing.
What should I do if the meter says there is not enough blood?
Follow the troubleshooting instructions supplied with your meter. Abbott’s documentation indicates that, under specified conditions, additional blood may be applied to the same sample area for a limited period. If the test still does not work, a new strip may be required.
What if I accidentally apply blood to the wrong area?
Do not attempt to correct the test by smearing or moving the blood around. Follow the manufacturer’s instructions and use a new strip if necessary.
Are FreeStyle Lite test strips the same as FreeStyle Libre sensors?
No. They are different types of glucose-monitoring products.
FreeStyle Lite test strips are used with compatible blood glucose meters. FreeStyle Libre systems use sensors as part of continuous or flash glucose monitoring technology.
Can I buy FreeStyle Lite test strips online?
Availability depends on the seller, market, and current inventory. Customers can check medical supply retailers such as Alfa Healthcare Supply Inc. for current availability.
How many tests can I perform with 50 strips?
In general, 50 individual strips provide 50 opportunities for testing, assuming one strip is used for each test.
Should I buy more than one pack?
That depends on your testing frequency, expiration dates, storage conditions, and personal supply needs. Avoid purchasing more strips than you can reasonably use before they expire.
Do I need a prescription?
Requirements can vary depending on the product, location, seller, and applicable regulations. Check the current product listing and applicable requirements before ordering.
What should I do if my blood glucose reading seems wrong?
Follow your meter’s instructions for unexpected readings. If the result does not match your symptoms or seems unreliable, follow your healthcare professional’s guidance and seek medical assistance when appropriate.
CONTOUR NEXT Test Strips Nearby
If you check your blood glucose regularly at home, running out of test strips can interrupt an important part of your daily routine. When supplies are getting low, you may start searching for contour next test strips nearby to find a trusted medical supply store, pharmacy, or online supplier that offers the correct strips for your glucose meter.
If you use a CONTOUR NEXT blood glucose meter, selecting compatible test strips is essential for routine testing. CONTOUR NEXT test strips are made for use with compatible CONTOUR NEXT meters, and they may be available through pharmacies, medical supply providers, retailers, and online suppliers. Ascensia Diabetes Care also offers resources to help customers locate CONTOUR NEXT products through nearby retailers or online options.
At Alfa Healthcare Supply Inc., we understand that medical supplies are an important part of everyday life for people managing diabetes. Having the right testing supplies available when you need them can help make your regular glucose-testing routine more convenient and organized.
In this guide, we will discuss what to consider when searching for contour next test strips nearby, how to confirm that the strips match your meter, proper storage practices, general testing steps, and important questions to consider before purchasing.
Important: This article is intended for general educational purposes only. Always read and follow the instructions provided with your specific CONTOUR NEXT meter and test strips, and follow your healthcare professional’s guidance regarding blood glucose testing, monitoring, and treatment.
What are CONTOUR NEXT Test Strips?
CONTOUR NEXT test strips are single-use blood glucose testing strips made to work with compatible CONTOUR NEXT blood glucose meters.
The test strip and meter work together as a complete testing system. To check your blood glucose, insert a compatible strip into the meter, use a lancing device to obtain a small blood sample, and apply the sample to the strip. The meter then processes the sample and displays your blood glucose reading.
According to Ascensia Diabetes Care, CONTOUR NEXT test strips are designed to deliver a blood glucose result within seconds when used with a compatible CONTOUR NEXT meter. Depending on the specific CONTOUR NEXT system, features may include No Coding and Second-Chance Sampling.
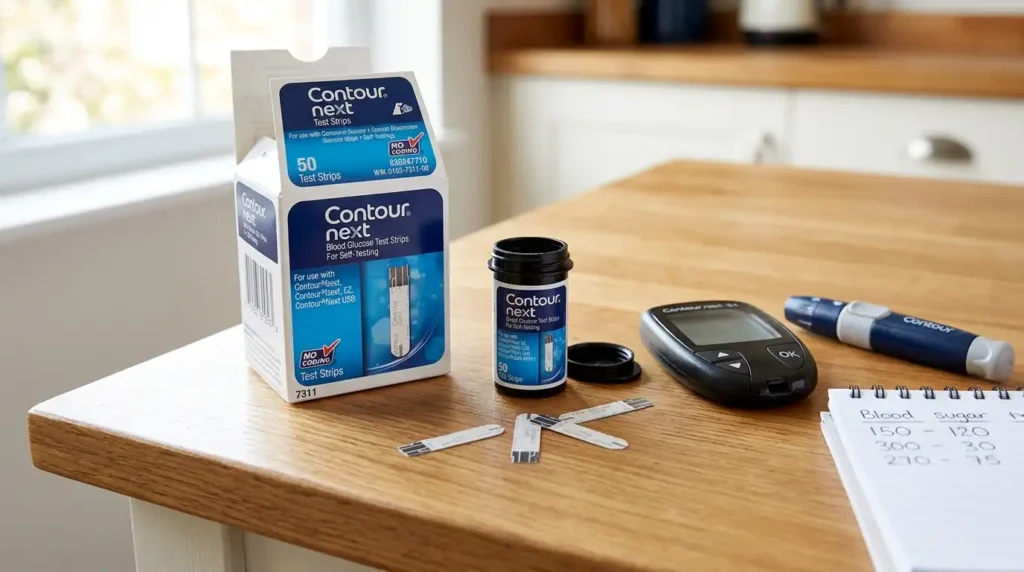
For people who check their blood glucose regularly, having a straightforward testing routine can make everyday diabetes management feel easier. Once you become familiar with the steps, testing can become a simple part of your daily routine:
Wash → Dry → Insert the strip → Obtain a blood sample → Apply the blood → Check the result
Because test strips are used for each blood glucose test, keeping an adequate supply on hand can help make regular testing more convenient. This is why many people look for CONTOUR NEXT test strips when they need replacement strips for their compatible meter.
Why People Search for “CONTOUR NEXT Test Strips Nearby”
The search phrase “contour next test strips nearby” often reflects a practical need rather than simply a product search. People may be looking for CONTOUR NEXT test strips because:
- Their current supply is running low.
- They need strips that work with their CONTOUR NEXT glucose meter.
- They prefer to purchase diabetes testing supplies from a nearby supplier.
- They are looking for a convenient online ordering option.
- They want to save time instead of checking several stores.
- They need to verify whether a supplier currently carries CONTOUR NEXT test strips.
- They want to find the package size that fits their testing needs.
- They want to make sure the strips are compatible with their specific meter.
- They prefer having diabetes supplies delivered directly to their home.
- They are beginning to use a CONTOUR NEXT blood glucose monitoring system.
When blood glucose testing is part of your everyday routine, having the right supplies available can make things much easier. Running low on test strips can be frustrating, especially when you need them for regular testing. Keeping track of your supply and ordering ahead of time can help you avoid last-minute searches or interruptions in your testing routine.
Where Can I Find CONTOUR NEXT Test Strips Nearby?
When you are searching for CONTOUR NEXT test strips nearby, you have several convenient options to consider. The best choice may depend on product availability, your meter model, convenience, and whether you prefer shopping in person or online.
1. Local Medical Supply Stores
Local medical supply stores can be a helpful option when you want diabetes-testing products and the opportunity to speak with a knowledgeable supplier. Many medical supply stores carry products such as blood glucose meters, compatible test strips, lancets, diabetic footwear, and other diabetes-care supplies.
For customers in New York, Alfa Healthcare Supply Inc. offers a selection of medical and diabetic supplies along with online product information. You can visit the company’s website to explore its diabetic supply options and learn more about available products.
2. Pharmacies
Pharmacies are another common place to look for CONTOUR NEXT test strips nearby. Many pharmacies stock blood glucose meters and test strips, but available products can differ between locations.
Before making a trip, it is a good idea to contact the pharmacy and ask whether the specific CONTOUR NEXT test strips you need are currently in stock. This can help you avoid an unnecessary visit if inventory has changed.
3. Online Medical Supply Stores
Ordering from an online medical supply store can be convenient, especially when you already know which CONTOUR NEXT product is compatible with your blood glucose meter.
Before ordering, take a moment to review important product details, including:
- Exact product name
- Compatibility with your glucose meter
- Number of test strips in the package
- Expiration date or expiration information
- Seller and supplier details
- Shipping options and delivery times
- Return or exchange policy
- Product condition
Checking these details can help you choose the appropriate test strips and avoid ordering a product that does not work with your meter.
4. Manufacturer Retailer Locator
If you are not sure where to purchase CONTOUR NEXT test strips nearby, the manufacturer’s retailer locator can also be a useful resource.
Ascensia Diabetes Care provides a CONTOUR retailer search that can help consumers find CONTOUR products through online retailers or nearby stores. Availability may differ by location, and inventory, pricing, and promotions can change over time.
Whether you choose a local medical supply store, pharmacy, online supplier, or manufacturer retailer locator, always confirm that the test strips match your specific CONTOUR NEXT meter before purchasing.
Why Compatibility Matters When Buying CONTOUR NEXT Test Strips
Before purchasing CONTOUR NEXT test strips nearby, it is important to confirm that the strips are compatible with your specific blood glucose meter. Not all glucose test strips work with every glucose meter, even when the product names appear similar.
When searching for CONTOUR NEXT test strips nearby, you may come across strips or meters such as:
- CONTOUR NEXT
- CONTOUR NEXT ONE
- CONTOUR NEXT EZ
- CONTOUR NEXT GEN
- Glucose meters from other manufacturers
Although these product names may look alike, their test strips are not necessarily interchangeable. Manufacturer documentation indicates that compatible CONTOUR NEXT systems are designed to use CONTOUR NEXT blood glucose test strips.
Check Your Meter Before Buying
Before placing an order, take a moment to identify the exact model of your glucose meter. You can check:
- The front of the meter for the model name.
- The back or bottom of the device for model information.
- The original meter packaging.
- The user manual or instruction guide.
- The label on your current test-strip container.
- The manufacturer’s latest compatibility information.
If you are still unsure which test strips are right for your meter, contact the manufacturer or speak with a qualified healthcare professional or medical-supply representative. Taking a few moments to confirm compatibility can help you avoid purchasing the wrong product and make it easier to find the test strips you actually need.
CONTOUR NEXT Test Strips and No Coding Technology
One of the helpful features found in compatible CONTOUR NEXT systems is No Coding technology.
With some traditional blood glucose meters, users may need to enter a code when opening a new vial of test strips. Compatible CONTOUR NEXT systems with No Coding technology are designed to remove the need for this manual coding step.
This can help make blood glucose testing more straightforward and convenient. For people who check their blood glucose once or multiple times a day, having fewer setup steps can make the routine easier to manage.
The manufacturer identifies No Coding technology as a feature of compatible CONTOUR NEXT blood glucose monitoring systems and test strips.
What is Second-Chance Sampling?
Another feature associated with compatible CONTOUR NEXT systems is Second-Chance Sampling.
Sometimes a person may not apply enough blood to the test strip during the first attempt.
With compatible systems, Second-Chance Sampling can allow additional blood to be applied within the specified time window instead of immediately discarding the strip.
This feature may help reduce unnecessary strip waste. Ascensia specifically describes Second-Chance Sampling as a feature that can help users save money by reducing wasted strips.
However, you should always follow the instructions for your specific meter because features and operating steps can vary between models.
How Do You Use CONTOUR NEXT Test Strips?
If you are new to CONTOUR NEXT test strips, the basic testing process is straightforward.
Step 1: Wash Your Hands
Wash your hands with soap and water.
Then dry them completely.
This is an important step because substances on your fingers may affect the blood sample, while moisture can dilute it.
Clean, dry hands are a simple part of good testing technique.
Step 2: Take Out One Test Strip
Remove one test strip from its container or package.
If your strips come in a bottle, close the bottle promptly after removing a strip.
This helps protect the remaining strips from environmental exposure.
Step 3: Check the Expiration Date
Look at the expiration information before using the strip.
Do not use expired strips.
If the packaging appears damaged or the strips have been stored incorrectly, consult the product instructions or manufacturer before use.
Step 4: Insert the Strip Into the Meter
Insert the appropriate end of the test strip into your compatible CONTOUR NEXT meter.
The meter should indicate when it is ready for the blood sample.
Always follow the instructions supplied with your particular meter.
Step 5: Obtain a Blood Sample
Use your lancing device according to its instructions.
A small blood sample is generally obtained from the fingertip for these systems.
Do not share your lancing device or lancets with another person.
Step 6: Apply the Blood to the Strip
Touch the test strip to the blood sample as directed by your meter instructions.
The strip draws in the blood sample.
The meter then analyzes the sample.
Step 7: Read the Result
After the meter processes the sample, the blood glucose result appears on the display.
For some current CONTOUR NEXT systems, the manufacturer’s specifications list a 0.6 µL sample volume and a five-second countdown.
Your specific model may have different specifications, so use the user guide for your meter.
How Much Blood Do CONTOUR NEXT Test Strips Need?
Blood sample requirements can vary by specific CONTOUR NEXT system, but current manufacturer documentation for CONTOUR NEXT systems lists a 0.6 µL sample volume.
This is a very small blood sample.
That can be helpful for people who perform regular testing because you do not need a large drop of blood.
Still, you should follow your meter’s instructions for obtaining and applying the sample.
If your meter indicates that the sample is insufficient, follow the instructions provided for your particular system.
How Fast Are CONTOUR NEXT Test Strip Results?
Testing time depends on the specific meter.
For example, current CONTOUR NEXT GEN manufacturer specifications list a five-second countdown time.
Other CONTOUR NEXT meters may have similar or different specifications.
When shopping for contour next test strips nearby, remember that the test strip itself is part of a larger system. Your testing experience depends on the compatible meter you use with it.
Are CONTOUR NEXT Test Strips Accurate?
Accuracy is naturally one of the biggest concerns when purchasing blood glucose test strips.
The manufacturer states that CONTOUR NEXT test strips are designed to provide highly accurate results when used with a compatible CONTOUR NEXT meter.
However, it is important to understand that the quality of a glucose reading depends on more than the strip.
Factors can include:
- Correct meter and strip compatibility
- Proper hand washing
- Proper blood sampling
- Strip storage
- Expiration date
- Environmental conditions
- Correct testing technique
- Meter condition
If a glucose result does not match how you feel or seems unexpectedly high or low, follow your healthcare professional’s instructions for confirming or responding to the result.
Do not make medication changes based only on general information from an online article.
How Should You Store CONTOUR NEXT Test Strips?
Proper storage is an important part of caring for glucose test strips.
Test strips are sensitive medical testing components.
Manufacturer documentation for a current CONTOUR NEXT system specifies storage conditions of approximately 41°F to 86°F (5°C to 30°C) with 10% to 80% relative humidity, although storage requirements can vary by specific product.
Always use the storage requirements printed on your own packaging.
Good storage habits include:
- Keep strips in their original container when applicable.
- Keep the container closed when not removing a strip.
- Protect strips from excessive moisture.
- Avoid extreme temperatures.
- Do not leave strips in direct sunlight.
- Check expiration dates.
- Do not use damaged strips.
- Keep supplies in a clean, dry location.
Avoid storing test strips in places such as a hot vehicle, humid bathroom, or other area with unsuitable temperature or humidity.
Why You Should Close the Test Strip Container
If your CONTOUR NEXT strips come in a bottle, remember to close the lid after removing a strip.
It can be easy to leave the container open while preparing for a test.
But repeated exposure to moisture and the surrounding environment can affect sensitive testing materials.
A simple habit can help:
Take one strip → close the container → test.
This takes only a few seconds and helps protect the strips you still need.
What Should You Check Before Buying CONTOUR NEXT Test Strips Nearby?
If you are searching for contour next test strips nearby, do not choose a product based only on the words “CONTOUR” or “blood glucose test strips.”
Use this checklist.
1. Confirm Your Meter Model
Write down the exact model of your meter.
2. Confirm Strip Compatibility
Make sure the package specifically indicates compatibility with your meter.
3. Check the Package Quantity
Test strips may be sold in different quantities.
Consider how frequently you test and how many strips you normally use.
4. Check the Expiration Date
Do not purchase or use expired strips.
5. Check Packaging
Look for intact packaging and appropriate storage conditions.
6. Check Seller Information
If purchasing online, identify the seller and review the product information carefully.
7. Check Delivery Options
If you need strips soon, check estimated delivery time.
8. Compare the Total Cost
Do not look only at the sticker price.
Consider:
- Package size
- Shipping
- Quantity per box
- Cost per strip
- Available discounts
- Insurance or benefit considerations, when applicable
Can You Buy CONTOUR NEXT Test Strips Without a Prescription?
In the United States, Ascensia currently describes CONTOUR NEXT test strips as over-the-counter products.
This means consumers can generally purchase them without a prescription.
However, individual insurance plans, healthcare programs, pharmacies, and suppliers can have their own policies regarding coverage, reimbursement, or documentation.
If you are buying through insurance, check with your plan or supplier to understand your coverage requirements.
If you are paying out of pocket, compare the available package options and make sure you are purchasing the correct strips for your meter.
Buying CONTOUR NEXT Test Strips Online
For many people, online ordering is easier than driving from store to store.
When you search contour next test strips nearby, you may find local stores as well as online medical suppliers.
Online purchasing can be particularly convenient when you already know exactly which product you need.
Before ordering online, check:
Product name:
Does the listing clearly identify the CONTOUR NEXT test strips?
Compatibility:
Does it match your meter?
Quantity:
How many strips are included?
Expiration information:
Is relevant product information provided?
Seller:
Who is actually selling the product?
Shipping:
How quickly can it arrive?
Returns:
What happens if you receive the wrong product?
Ascensia’s official retailer page also provides options for finding CONTOUR NEXT products online or through nearby retailers.
CONTOUR NEXT Test Strips at Alfa Healthcare Supply Inc.
Alfa Healthcare Supply Inc. provides medical supplies and diabetic products for customers looking for convenient healthcare-supply solutions.
The company’s diabetic supplies collection currently lists Contour Next Test Strips along with other glucose-management products.
For customers looking for contour next test strips nearby, Alfa Healthcare Supply can be a convenient option to explore, particularly for people who prefer ordering medical supplies from a dedicated healthcare supplier.
You can visit Alfa Healthcare Supply Inc. to explore available medical and diabetic supplies.
Product availability, pricing, and delivery options can change, so check the current product page before ordering.
Why Choose a Medical Supply Supplier for Diabetes Products?
Buying diabetes supplies is different from buying an everyday household product.
You want to know exactly what you are purchasing.
A medical supply company can provide access to a broader range of healthcare products in one place.
For example, a diabetes supply order may involve:
- Blood glucose test strips
- Blood glucose meters
- Lancets
- Lancing devices
- Alcohol prep pads
- Diabetes footwear
- Other diabetes-care supplies
For someone managing diabetes, having several necessary supplies available through one supplier can make ordering more convenient.
At Alfa Healthcare Supply Inc., the focus is on providing healthcare and medical-supply products for patients, caregivers, and families.
How Many CONTOUR NEXT Test Strips Should You Keep at Home?
There is no single number that is appropriate for everyone.
The amount you need depends on your testing routine and the instructions provided by your healthcare professional.
Some people test occasionally, while others test multiple times each day.
A practical approach is to monitor your supply regularly.
For example:
Count your remaining strips once a week.
If you notice that your supply is getting low, reorder before you run out.
This is especially useful if you rely on blood glucose testing as part of your regular diabetes-management routine.
What If You Are Almost Out of CONTOUR NEXT Test Strips?
If you have only a few strips remaining, do not wait until the last one.
Search for contour next test strips nearby and check several purchasing options.
You can:
- Check a nearby pharmacy.
- Contact a local medical supply store.
- Check an online medical supplier.
- Use the manufacturer’s retailer locator.
- Confirm delivery times.
- Verify the exact meter compatibility.
- Reorder enough for your normal testing routine.
Ascensia’s retailer-locator page specifically allows consumers to look for CONTOUR NEXT products nearby or online.
Common Mistakes When Buying CONTOUR NEXT Test Strips
Even experienced users can make simple purchasing mistakes.
Mistake 1: Buying Strips Without Checking the Meter
Always verify compatibility first.
Mistake 2: Choosing Only by Price
A lower price does not help if you purchase the wrong product.
Mistake 3: Ignoring Package Quantity
A box may look inexpensive until you realize it contains fewer strips.
Mistake 4: Waiting Until the Last Minute
If you test regularly, running out of strips can create unnecessary stress.
Mistake 5: Ignoring Storage Requirements
Proper storage matters.
Mistake 6: Buying From an Unclear Seller
When purchasing online, check who is selling the product and review the listing carefully.
Mistake 7: Assuming All CONTOUR Products Use the Same Instructions
Different meter models may have different features.
Always read the instructions for your specific device.
CONTOUR NEXT Test Strips Nearby: Local Buying vs. Online Buying
Both options can be useful.
| Option | Potential Benefit | What to Check |
| Local pharmacy | Convenient if in stock | Call ahead |
| Medical supply store | Healthcare-focused assistance | Current inventory |
| Online supplier | Convenient ordering | Shipping and compatibility |
| Manufacturer locator | Helps identify retailers | Retailer availability |
| Local delivery | Can reduce travel | Delivery area and timing |
There is no single purchasing method that works for everyone.
If you need the product immediately, a local store may be convenient.
If you want to compare package sizes or reorder regularly, online ordering may be easier.
Tips for Making Blood Glucose Testing Easier
The testing process does not have to feel like a major task every time.
A few simple habits can help.
Keep everything together
Store your meter, test strips, lancets, and other testing supplies in one clean location.
Create a routine
Testing around your usual daily activities can make it easier to remember.
Keep spare supplies
Do not wait until you have one strip remaining.
Check your supplies regularly
Look at expiration dates and packaging.
Learn your meter
Knowing how your meter works can make testing less stressful.
Keep instructions nearby
If you are unsure about a step, consult the user guide for your specific meter.
What If the Glucose Result Seems Unexpected?
Sometimes a glucose reading may not match what you expected.
Before assuming that the meter or strip is defective, consider whether the test was performed correctly.
Ask yourself:
- Did I wash and dry my hands?
- Did I use the correct strip?
- Was the strip expired?
- Was the strip stored correctly?
- Did I apply enough blood?
- Was the meter used according to its instructions?
- Was the test strip damaged?
- Does the result make sense compared with my usual readings?
If you repeatedly receive unexpected results, follow your healthcare professional’s advice and the manufacturer’s troubleshooting instructions.
If you have symptoms of a medical emergency, seek appropriate medical care rather than relying on an online article.
CONTOUR NEXT Test Strips and Everyday Diabetes Management
A test strip may look like a tiny piece of plastic, but for someone who tests blood glucose regularly, it becomes part of everyday life.
It may be used before breakfast.
It may be part of an evening routine.
It may travel to work.
It may go into a bag during a family trip.
It may sit beside a glucose meter on a kitchen counter.
That is why choosing the right test strips and keeping them properly stored matters.
The goal is not to make diabetes management more complicated.
The goal is to make the testing routine more predictable.
When you know which strips your meter uses, where to purchase them, how to store them, and how to use them, one small part of daily diabetes care can become easier to manage.
A Simple Checklist Before You Order
If you are searching contour next test strips nearby, save this checklist:
✓ Know your meter model
✓ Confirm strip compatibility
✓ Check the expiration date
✓ Check package quantity
✓ Review seller information
✓ Check current price
✓ Check delivery or pickup availability
✓ Store strips correctly after receiving them
✓ Reorder before your supply becomes too low
This simple checklist can help make your next purchase easier.
Why Alfa Healthcare Supply Inc. Can Be Part of Your Search
Finding medical supplies should not have to feel complicated.
For people searching for contour next test strips nearby, Alfa Healthcare Supply Inc. offers a convenient online starting point for exploring diabetes supplies and other healthcare products.
The company’s diabetic supplies collection includes Contour Next Test Strips, along with glucose-monitoring products and other diabetes-care supplies.
You can visit Alfa Healthcare Supply Inc. to review current products and availability.
Remember that product availability, pricing, inventory, and delivery information may change, so always review the current product listing before placing an order.
Final Thoughts: Finding CONTOUR NEXT Test Strips Nearby
Searching for contour next test strips nearby is often a practical need rather than a complicated decision.
You need the right strips.
You need them to work with your meter.
You want them stored properly.
And, most importantly, you do not want to run out when you need them.
CONTOUR NEXT test strips are designed for compatible CONTOUR NEXT blood glucose meters and include features such as No Coding and, on compatible systems, Second-Chance Sampling.
When purchasing, focus on compatibility first. Then compare package size, seller information, price, availability, and delivery options.
If you are located in the New York area and looking for diabetes supplies, Alfa Healthcare Supply Inc. provides an online selection of diabetic and medical supplies that you can explore from home.
A few minutes of planning can make your diabetes-testing routine much easier.
Know your meter. Choose the correct strips. Store them properly. Reorder before you run out.
That is the simple approach to finding and managing CONTOUR NEXT test strips nearby.
Frequently Asked Questions About CONTOUR NEXT Test Strips Nearby
1. Where can I find CONTOUR NEXT test strips nearby?
You can check local pharmacies, medical supply stores, and authorized retailers. Ascensia Diabetes Care also provides a retailer locator for finding CONTOUR NEXT products online or at nearby retailers.
For New York-area customers, you can also explore the diabetes supply selection from Alfa Healthcare Supply Inc.
2. Can I buy CONTOUR NEXT test strips online?
Yes. Ascensia currently provides online purchasing options and a retailer locator for CONTOUR NEXT products.
When ordering online, always verify your meter compatibility before purchasing.
3. Do CONTOUR NEXT test strips work with every glucose meter?
No. They are designed for compatible CONTOUR NEXT blood glucose meters.
Check your specific meter model and the test-strip packaging before buying.
4. Do CONTOUR NEXT test strips require coding?
Compatible CONTOUR NEXT systems use No Coding technology, eliminating manual coding requirements.
5. How much blood do CONTOUR NEXT test strips need?
Current manufacturer documentation for CONTOUR NEXT systems lists a 0.6 µL sample volume, although specifications can vary by specific model.
6. How quickly do CONTOUR NEXT meters provide results?
Testing time depends on the meter model. For example, CONTOUR NEXT GEN specifications list a five-second countdown.
7. Can I use expired CONTOUR NEXT test strips?
It is recommended not to use expired test strips. Check the expiration information and follow the manufacturer’s instructions.
8. How should I store CONTOUR NEXT test strips?
Follow the storage requirements printed on your specific package. Generally, protect the strips from excessive heat, cold, humidity, moisture, and direct sunlight. Current manufacturer documentation provides specific temperature and humidity requirements for individual systems.
9. What should I do if my test strip does not work?
Check that you are using the correct strip for your meter, that the strip is not expired or damaged, and that you followed the meter instructions correctly.
If the problem continues, consult the meter’s user guide or contact the manufacturer.
10. Can I use another brand’s test strips with my CONTOUR NEXT meter?
Do not assume that another brand’s strips are compatible.
Use the test strips specified for your meter.
11. Are CONTOUR NEXT test strips available over the counter?
Ascensia currently describes CONTOUR NEXT test strips as over-the-counter diabetes test strips in the United States.
Insurance coverage and reimbursement rules can vary.
12. What should I do if I am running low on strips?
Reorder before your supply is exhausted. You can check local pharmacies, medical supply stores, online suppliers, and the manufacturer’s retailer locator.
13. Where can I buy CONTOUR NEXT test strips in New York?
You can check local pharmacies and medical supply suppliers. Alfa Healthcare Supply Inc. lists Contour Next Test Strips among its diabetic supplies.
14. Should I compare package sizes before buying?
Yes. Different package sizes may be available. Comparing the number of strips and total price can help you understand the actual cost per strip.
15. Are CONTOUR NEXT test strips only for people with diabetes?
Blood glucose testing may be used in different healthcare situations. Follow your healthcare professional’s recommendations about whether and how often you should test.
Medical Supply Store Westchester NY:
Finding the right healthcare products should not make an already difficult situation more stressful. Whether you are recovering from surgery, managing diabetes, caring for an older family member, dealing with limited mobility, or preparing a home for someone returning from the hospital, dependable medical supplies can make everyday care easier.
For people searching for a medical supply store Westchester NY, it is important to find a supplier that offers quality products, dependable service, and healthcare solutions for different needs. Alfa Healthcare Supply Inc. is a New York-based medical equipment and DME supplier serving Westchester along with Queens, Long Island, Brooklyn, the Bronx, Manhattan, and other areas of New York.
From durable medical equipment and diabetic supplies to orthopedic products, respiratory equipment, incontinence supplies, and home-care products, Alfa Healthcare Supply provides access to a broad healthcare catalog designed for patients, caregivers, healthcare professionals, and organizations.
Why a Reliable Medical Supply Store Matters in Westchester NY
Medical supplies are often needed at important moments.
A patient may need a walker after an injury. Someone recovering from surgery may require supportive equipment at home. A person managing diabetes may need glucose monitoring supplies on a regular basis. A caregiver may need incontinence or mobility products for a family member.
In these situations, finding a dependable supplier can save time and reduce unnecessary stress.
A good medical supply store Westchester NY should make it easier to:
- Find appropriate medical equipment
- Compare available healthcare products
- Order recurring medical supplies
- Understand basic product information
- Coordinate equipment for home care
- Work through insurance-related requirements when applicable
- Arrange delivery to the appropriate location
- Get assistance when questions arise
The right supplier is not simply a place to purchase a product. It can become an important part of a patient’s support system.
Alfa Healthcare Supply Inc. Serving Westchester NY
Alfa Healthcare Supply Inc. is based in Floral Park, New York, and serves customers throughout Westchester and other New York communities. The company states that it has more than 25 years of experience in healthcare supply and has served more than 10,000 patients.
Its website identifies the company as a medical equipment supplier and DME provider offering products for patients, caregivers, healthcare professionals, and organizations.
Alfa also states that it is listed in the NPI registry and works with Parachute Health for secure ordering.
For Westchester residents and healthcare professionals, this broader service area can be useful when medical equipment needs to be coordinated between a healthcare facility and a patient’s home.
What Can You Find at a Medical Supply Store Westchester NY?
Healthcare needs are different from person to person. That is why a comprehensive medical supply catalog can be valuable.
Alfa Healthcare Supply’s online catalog includes several major product categories, including diabetic supplies, COPD and asthma supplies, DME equipment, incontinence supplies, orthopedic supplies, and other healthcare products.
1. Durable Medical Equipment
Durable medical equipment, commonly called DME, can support mobility, independence, recovery, and daily activities.
Examples may include:
- Wheelchairs
- Walkers
- Rollators
- Hospital beds
- Mobility equipment
- Patient-care equipment
- Home-care equipment
- Other supportive DME products
Alfa’s DME information states that the company works with discharge planning units and supports equipment needs for patients transitioning from hospitals to home.
For someone returning home after hospitalization, having the necessary equipment ready can make the transition more organized.
2. Diabetic Supplies
Diabetes management often involves regular monitoring and recurring supplies.
Depending on individual needs and medical recommendations, diabetic supplies can include:
- Blood glucose meters
- Glucose test strips
- Lancets
- Insulin pen needles
- Continuous glucose monitoring products
- Other diabetes-care accessories
Alfa’s catalog includes diabetic supplies designed for glucose monitoring and ongoing diabetes care.
Patients should always follow their healthcare professional’s instructions when selecting and using diabetes equipment.
3. Orthopedic Supplies
Injuries, joint problems, surgery, and mobility limitations may require orthopedic support.
Orthopedic products can include supportive braces, compression products, mobility aids, and other equipment intended to assist with everyday movement and recovery.
The correct product depends on the individual’s condition and healthcare provider’s recommendations. A medical supply specialist can help explain product information, but medical diagnosis and treatment decisions should come from an appropriate healthcare professional.
4. Incontinence and Urological Supplies
Incontinence care is a personal subject, but having the right products can make daily life much more comfortable.
Medical supply catalogs may include products for:
- Bladder control
- Incontinence management
- Urological care
- Catheter-related needs
- Personal hygiene
- Home-care support
Having supplies delivered can also be helpful for caregivers who may have difficulty making frequent trips to a store.
5. COPD and Asthma Supplies
Respiratory conditions may require specialized equipment and supplies.
Alfa Healthcare Supply lists COPD and asthma products among its healthcare categories.
Respiratory equipment should be selected and used according to the patient’s healthcare plan. If you are unsure which equipment is appropriate, speak with your physician, respiratory therapist, or qualified healthcare professional.
Surgical Supply Store Westchester NY for Recovery and Home Care
People searching for a surgical supply store Westchester NY may be preparing for surgery, recovering after a procedure, or helping a family member manage care at home.
Surgical and post-surgical supply needs can vary significantly depending on the procedure and physician’s instructions.
Depending on the patient’s care plan, supplies may involve:
- Wound-care products
- Protective supplies
- Disposable medical products
- Mobility equipment
- Orthopedic supports
- Home-care equipment
- Other post-operative essentials
It is important to remember that not every surgical supply is appropriate for every patient. The surgeon or healthcare provider should determine what products are needed for a particular procedure.
For families, the biggest benefit of working with an established supplier can be convenience. Instead of searching for individual products from multiple sources, a broader medical supply provider may help organize several healthcare needs through one supplier.
Surgical Supply Westchester for Patients and Caregivers
Searching for surgical supply Westchester often means that someone needs healthcare products quickly and reliably.
This could be a patient preparing for a procedure or a caregiver setting up a safe recovery environment at home.
Before ordering, consider:
- What supplies did the healthcare provider recommend?
- Is a prescription or medical documentation required?
- Does insurance cover the product?
- Is the product available in the required size or configuration?
- How soon is the product needed?
- Does the supplier deliver to your Westchester location?
- Are there specific manufacturer or product requirements?
Taking a few minutes to confirm these details can prevent ordering the wrong item.
Hospital Supply Store Westchester NY for Healthcare Facilities
Healthcare facilities have different requirements from individual patients.
Hospitals, clinics, rehabilitation centers, home-health organizations, and other healthcare providers may need reliable access to medical equipment and recurring supplies.
A hospital supply store Westchester NY can support organizations by providing access to products needed for patient care, discharge planning, home-care transitions, and routine operations.
Alfa Healthcare Supply states that it works with healthcare professionals and organizations and offers bulk ordering and account-management support.
For discharge planners and care teams, coordinating equipment before a patient leaves the hospital can be an important part of a smooth transition home.
Westchester Surgical Supply for Post-Discharge Care
Leaving the hospital does not always mean that healthcare needs are finished.
A patient may still need equipment or supplies at home for days, weeks, or longer.
For example, a patient recovering from orthopedic surgery might need mobility equipment. Another patient may need a hospital bed or other DME. Someone managing a chronic condition may need recurring supplies.
This is where Westchester surgical supply and DME services can become part of the broader home-care process.
Alfa Healthcare Supply’s DME information notes that it works with hospital discharge planning and can coordinate certain equipment deliveries for patients transitioning home.
Medical Equipment Delivery in Westchester
Convenience matters when ordering medical equipment.
Large equipment can be difficult to transport without the appropriate vehicle. Patients recovering from surgery may not be able to travel easily. Caregivers may already have several responsibilities.
Alfa Healthcare Supply states that it serves Westchester and offers local expedited processing for New York customers. Its FAQ also says standard shipping generally takes 2–5 business days depending on location, while urgent equipment arrangements may vary by product and location.
Delivery times can depend on product availability, insurance authorization, documentation, location, and other circumstances. It is always a good idea to confirm expected timing when placing an order.
Insurance and Medical Supply Orders
Medical equipment can sometimes be covered by insurance when specific requirements are met.
Coverage is not automatically guaranteed. Requirements may depend on:
- Insurance provider
- Medical necessity
- Prescription requirements
- Product type
- Patient eligibility
- Documentation
- Supplier requirements
- Prior authorization, when applicable
Alfa Healthcare Supply provides insurance-related assistance and works with insurance providers as part of its healthcare supply services.
If you are ordering equipment through insurance, ask the supplier what documentation is required before placing your order.
Medicare and Durable Medical Equipment
Some DME products may be covered under Medicare Part B when Medicare’s applicable requirements are met.
Alfa’s DME information specifically discusses Medicare coverage for certain equipment, including products such as wheelchairs, walkers, and hospital beds, when medically necessary and when applicable requirements are satisfied.
Coverage rules can change and individual eligibility varies. Patients should confirm their benefits and requirements with Medicare, their Medicare plan, and the supplier before ordering.
Why Product Quality Matters
Medical supplies are not ordinary household purchases.
A glucose meter, mobility device, orthopedic brace, hospital bed, respiratory product, or other healthcare item may directly affect someone’s daily routine.
That is why patients and caregivers should pay attention to:
- Manufacturer information
- Product specifications
- Intended use
- Size and fit
- Compatibility
- Instructions
- Warranty information
- Insurance requirements
- Replacement schedules
Alfa Healthcare Supply states that it prioritizes quality assurance and sources healthcare products from compliant manufacturers.
Consumers should still review product information carefully and ask their healthcare provider about clinical suitability when necessary.
Choosing a Medical Supply Store in Westchester NY
If you are comparing medical suppliers, consider more than just price.
Product Selection
Does the supplier carry the type of equipment you need?
A broader catalog can be useful when a patient needs several types of products.
Experience
An experienced supplier may be familiar with common ordering, documentation, insurance, and delivery processes.
Alfa Healthcare Supply states that it has more than 25 years of experience serving the New York healthcare community.
Customer Support
Healthcare orders can sometimes involve questions about sizes, documentation, insurance, delivery, or product options.
Accessible customer support can make the process easier.
Delivery
For patients who have limited mobility or caregivers with busy schedules, delivery can be particularly useful.
Insurance Assistance
If you intend to use insurance, ask whether the supplier works with your plan and what documentation may be required.
Secure Ordering
Healthcare providers may also want secure digital ordering options. Alfa Healthcare Supply states that it partners with Parachute Health for secure ordering.
Who Can Benefit from Alfa Healthcare Supply?
Alfa Healthcare Supply serves a wide range of customers and healthcare needs.
Its services can be relevant to:
- Patients
- Family caregivers
- Older adults
- People recovering from surgery
- People managing diabetes
- Individuals with mobility challenges
- Home-health patients
- Healthcare professionals
- Clinics
- Medical organizations
- Hospital discharge teams
The goal is simple: make access to necessary healthcare products more organized and convenient.
Serving Westchester and the Greater New York Area
Although Alfa Healthcare Supply is located in Floral Park, the company states that it serves Westchester as well as Queens, Long Island, Brooklyn, the Bronx, Manhattan, and other New York communities.
This regional service model can be useful for healthcare providers who coordinate equipment across multiple locations and for families whose loved ones live in different parts of the New York area.
For Westchester residents, access to a supplier that serves the wider region may provide an additional option when local product availability is limited.
A More Personal Approach to Medical Supply Needs
Healthcare can feel complicated enough without spending hours trying to locate basic equipment.
Sometimes the need is straightforward: a patient needs a walker after surgery. Sometimes it is more involved: a caregiver needs several products to prepare a home for a family member returning from the hospital.
In either situation, having a supplier that understands medical equipment and the ordering process can make the experience feel more manageable.
That human side of healthcare matters.
A medical supply store should not simply be about boxes, products, and invoices. Behind every order is a person who may be trying to become more independent, recover comfortably, or care for someone they love.
Final Thoughts: Medical Supply Store Westchester NY
Finding a dependable medical supply store Westchester NY can make healthcare management easier for patients, caregivers, and healthcare professionals.
From durable medical equipment and diabetic supplies to orthopedic, respiratory, incontinence, and other home-care products, having access to the right supplies can support comfort, independence, recovery, and everyday care.
Alfa Healthcare Supply Inc. serves Westchester and communities throughout the greater New York area, offering a broad healthcare catalog, DME solutions, delivery services, insurance-related assistance, and support for patients and healthcare professionals.
If you are looking for surgical supply store Westchester NY, surgical supply Westchester, hospital supply store Westchester NY, or Westchester surgical supply, start by identifying the exact products and documentation your healthcare provider recommends. Then confirm availability, insurance requirements, delivery options, and product specifications with the supplier.
Good healthcare supply service is ultimately about people—not just products. The right equipment can help someone move more safely, recover at home, manage a chronic condition, or support a loved one with greater confidence.
Frequently Asked Questions: Medical Supply Store Westchester NY
What is a medical supply store Westchester NY?
A medical supply store in Westchester provides healthcare products and equipment for patients, caregivers, healthcare professionals, and organizations. Products may include DME, diabetic supplies, orthopedic products, respiratory equipment, incontinence supplies, and other healthcare essentials.
Does Alfa Healthcare Supply serve Westchester NY?
Yes. Alfa Healthcare Supply states that it serves Westchester along with Queens, Long Island, Brooklyn, the Bronx, Manhattan, and other New York communities.
Where is Alfa Healthcare Supply located?
Alfa Healthcare Supply Inc. lists its address as 261-12 E Williston Avenue, Floral Park, NY 11001.
Does Alfa Healthcare Supply offer DME?
Yes. Its catalog includes durable medical equipment, and its DME information covers products such as wheelchairs, walkers, hospital beds, and other equipment.
Can I order diabetic supplies?
Alfa Healthcare Supply’s online catalog includes diabetic supplies, including products used for blood glucose monitoring and diabetes care.
Does insurance cover medical equipment?
Some medical equipment may be covered by insurance when eligibility, medical necessity, documentation, and other plan requirements are satisfied. Coverage varies, so patients should verify their benefits before ordering.
Does Alfa Healthcare Supply work with healthcare professionals?
Yes. Alfa states that it serves healthcare professionals and organizations and offers support for product selection, bulk ordering, and account management.
Does Alfa Healthcare Supply deliver to Westchester?
Yes. Alfa Healthcare Supply states that it serves Westchester and provides shipping and delivery services to New York customers.
Can I get surgical or post-surgical supplies?
Alfa Healthcare Supply offers a broad medical supply catalog and DME products that may support patients before and after medical procedures. The exact products required should be based on the healthcare provider’s instructions.
How can I order from Alfa Healthcare Supply?
Customers can order through the company’s website or contact its Floral Park support team. Alfa also states that healthcare providers can use Parachute Health for ordering.
FreeStyle Libre 3 Reader How to Use:
Using a Continuous Glucose Monitoring (CGM) system can seem a bit confusing at first—especially when you hold the reader for the first time and wonder what all the numbers, arrows, alerts, and screen elements mean. If you are looking for information on FreeStyle Libre 3 Reader How to Use, you are not alone. Learning the basic steps can make the system feel much easier and more convenient to use.
The FreeStyle Libre 3 system works with a compatible sensor and reader to help users monitor their glucose levels. It provides glucose information without requiring you to perform a traditional “fingerstick” (pricking your finger for a blood test) every time you want to check your sensor glucose reading. Abbott provides a Quick Start Guide, Quick Reference Guide, and User Manual for the FreeStyle Libre 3 reader that contain detailed instructions.
In this guide, Alfa Healthcare Supply Inc. explains the basic processes in simple language. This includes starting the sensor, checking glucose levels, understanding trend arrows, using alarms, viewing data, and handling common situations.
Important: This article is provided for general informational purposes only and should not replace the instructions that come with your device or guidance from your healthcare professional. Always follow Abbott’s latest instructions for your specific FreeStyle Libre system. If your glucose reading does not match how you feel, Abbott may recommend checking your blood glucose with a blood glucose meter before making treatment decisions in certain situations.
What is the FreeStyle Libre 3 Reader?
The FreeStyle Libre 3 Reader is a compact handheld device designed to work with the FreeStyle Libre 3 continuous glucose monitoring (CGM) system. When used with a compatible sensor, the reader receives glucose information from the sensor and displays it clearly on its screen.
With a CGM system, users can check the glucose information collected by the sensor without needing to perform a fingerstick test every time they want to view their sensor readings.
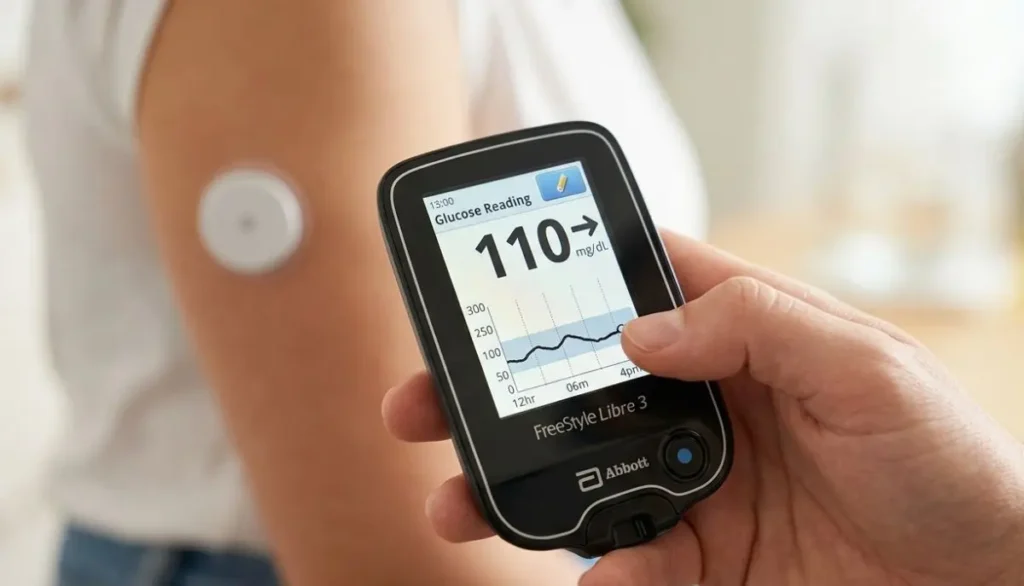
Depending on the specific system, settings, and available features, the reader may display information such as:
- Current glucose readings
- Glucose trends and direction
- Previous glucose readings and history
- A visual glucose graph
- High and low glucose alarms
- Notifications and system alerts
- Notes and other supported features
Abbott also provides U.S. support materials for the FreeStyle Libre 3 Reader, including resources such as a quick-start guide, quick-reference guide, and user manual. These materials can help users understand the device and learn how to use its available functions.
One important detail to understand is that the FreeStyle Libre 3 Reader and the FreeStyle Libre 3 smartphone app are not designed to be used interchangeably with the same sensor at the same time. Abbott’s documentation explains that users should not use both the reader and the FreeStyle Libre 3 app simultaneously with the same sensor.
FreeStyle Libre 3 Reader How to Use: Getting Started
Before using your FreeStyle Libre 3 Reader, make sure you have the correct sensor that is compatible with your system. It is also important to read the instructions included with your device and sensor before getting started.
The setup and first use can be broken down into five easy steps:
- Prepare and apply the sensor – Follow the provided instructions to safely prepare and place the sensor.
- Turn on the FreeStyle Libre 3 Reader – Power on the reader and get it ready for sensor setup.
- Start the new sensor – Use the reader to activate your newly applied sensor.
- Allow the sensor to warm up – Wait for the required warm-up period before checking your glucose readings.
- View your glucose information – Once the sensor is ready, use the reader to scan and review your glucose data.
Let’s take a closer look at each step so you can understand how the process works.
Step 1: Prepare Before Applying Your Sensor
The reader does not attach directly to your body. Instead, the sensor is the part of the FreeStyle Libre 3 system that is applied to your skin.
Before you begin, choose the sensor application site recommended by Abbott for your specific FreeStyle Libre system. For the FreeStyle Libre 3 system, Abbott recommends applying the sensor to the back of the upper arm and following the manufacturer’s application instructions carefully. Preparing the skin properly before application is an important part of the process.
Prepare Your Skin Before Applying the Sensor
- Wash the selected area: Clean the skin with soap and clean water to remove dirt, oils, or residue.
- Dry the skin thoroughly: Make sure the area is completely dry before continuing.
- Clean with an alcohol wipe: Use an alcohol wipe as directed in the manufacturer’s instructions.
- Let the area air-dry: Allow the skin to dry completely before applying the sensor.
- Choose an appropriate site: Avoid placing the sensor on areas that Abbott identifies as unsuitable for sensor application.
Proper skin preparation can help the sensor adhesive attach securely and remain in place during use. Take a few extra moments to clean and completely dry the application area. Careful preparation can make the sensor application process easier and more comfortable.
Step 2: Apply the FreeStyle Libre Sensor
After preparing the skin, use the sensor applicator by following the instructions provided with your specific sensor.
According to Abbott’s setup guidance, place the applicator over the prepared area on the back of the upper arm and press down as directed. After applying the sensor, gently check around the edges to ensure it is securely attached to the skin.
Do not alter, tamper with, or attempt to modify the sensor or applicator in any way.
If you have any questions or are unsure about the application process, review Abbott’s latest sensor application instructions before applying the sensor.
A few practical tips
You may find applying the sensor easier when:
- Your skin is clean and fully dry before application.
- You have enough time to apply the sensor carefully without feeling rushed.
- You choose a suitable, relatively flat area that stays comfortable during your normal daily activities.
- You carefully follow the manufacturer’s instructions for sensor placement.
- You avoid repeatedly touching, moving, or adjusting the sensor once it has been applied.
Step 3: Turn On the FreeStyle Libre 3 Reader
Applying the sensor may be easier and more comfortable when:
- Your skin is clean and completely dry before you begin.
- You have enough time to apply the sensor carefully without rushing.
- You select a suitable, fairly flat area that remains comfortable during your usual activities.
- You follow the manufacturer’s instructions carefully when positioning and applying the sensor.
- Once applied, avoid repeatedly touching, shifting, or adjusting the sensor.
Step 4: Start a New Sensor With the Reader
How to Activate the FreeStyle Libre 3 Sensor
After applying the sensor to your skin, follow these steps to activate it with the FreeStyle Libre 3 Reader:
- Turn on the FreeStyle Libre 3 Reader.
- Select “Start New Sensor” on the reader.
- Hold the reader close to the newly applied sensor as directed.
- Keep the reader in the recommended position while it detects and connects with the sensor.
- Wait for the reader to display a confirmation that the sensor has been successfully activated.
According to Abbott’s instructions, during the activation process, the reader should be positioned with its screen touching the sensor. If the sound feature is turned on, the reader may also provide an audible signal when the sensor has been detected successfully.
If the reader does not detect the sensor correctly, check the instructions shown on the reader’s screen and refer to the official user manual for additional guidance. Avoid repeatedly pressing buttons or removing the sensor simply because the first attempt does not work. Follow the troubleshooting instructions provided for your device instead.
Step 5: Wait for the Sensor Warm-Up Period
After you activate the sensor, it needs a little time before it begins displaying glucose readings. According to Abbott’s instructions, the sensor has a 60-minute warm-up period before you can use it to check your glucose level.
During this time, the reader may display a message saying that the sensor is warming up. This is completely normal.
What Should You Do During the Warm-Up Period?
Simply follow the instructions shown on the reader and allow the sensor to complete its warm-up. There is no need to remove or replace the sensor if a glucose reading does not appear right away.
Once the 60-minute warm-up period is finished, the system can begin providing glucose information.
How to Check Glucose With the FreeStyle Libre 3 Reader
Once the sensor is activated and working, viewing your glucose information is simple and convenient. The reader receives data from the sensor and displays it on the screen.
Depending on your device and current glucose status, the reader may show:
- Your current glucose reading
- A trend arrow showing whether glucose is rising, falling, or staying steady
- A glucose graph showing recent changes
- Alerts or notifications
- Additional information about your glucose history
Remember that the current glucose number is just one part of the information your reader provides. The trend arrow is also useful because it helps you understand the direction your glucose level is moving and can provide helpful context for your current reading.
Understanding the Glucose Number
The large number displayed on your reader shows your current sensor glucose level. Depending on your recent readings, the number may be:
- Higher than your usual glucose level
- Lower than your usual glucose level
- Similar to your recent readings
- Trending upward
- Trending downward
A single glucose reading does not always tell the complete story. It is helpful to consider the overall glucose trend and other information available on your reader, along with the treatment plan recommended by your healthcare professional.
Glucose targets are personal and can vary from one person to another. For this reason, avoid comparing your reading with someone else’s glucose level. Instead, follow the glucose targets and guidance provided by your healthcare professional.
What Does the Trend Arrow Mean?
One useful feature of a continuous glucose monitoring (CGM) system is the trend indicator. A trend arrow provides extra information about how glucose levels are changing over time. It may show that glucose is:
- Rising
- Falling
- Staying relatively steady
- Changing rapidly in either direction
This information can give you more context than a single glucose reading alone. For example, two people may have the same glucose number, but their trend arrows could point in different directions. One person’s glucose may be rising, while the other person’s glucose may be falling.
That is why it can be helpful to consider both the glucose reading and the trend information rather than focusing only on the number displayed on the screen. Together, they provide a broader picture of how glucose levels are changing.
Remember
Do not use this article to decide how much insulin or medication to take.
Use the treatment plan provided by your healthcare professional and the instructions for your specific system.
How to Use FreeStyle Libre 3 Reader Alarms
FreeStyle Libre 3 Glucose Alarms
The FreeStyle Libre 3 system can provide glucose alarms when the available alarm features are properly configured. Abbott explains that optional real-time glucose alarms can alert users when their glucose reaches a selected high or low level. The exact alarm features may vary depending on the system, settings, and compatible device being used.
These alerts can be helpful because you do not need to constantly check your reader to stay aware of your glucose levels. When configured appropriately, an alarm may notify you when your glucose is:
- Too high
- Too low
- Affected by another system-related condition
How to Set Up Glucose Alarms
You can use the reader’s settings menu and follow the instructions displayed on the screen to configure the available glucose alarms. If you are unsure which glucose thresholds are suitable for you, speak with your healthcare professional for guidance based on your individual care plan.
Remember that an alarm is an alert, not a substitute for medical advice. Do not make changes to your diabetes treatment solely because an alarm occurs. Consider the alert along with your healthcare plan and the guidance provided by your medical team.
Why Glucose Alarms Matter
Whether you are sleeping, working, exercising, cooking, traveling, or enjoying time with your family, you may not be able to monitor your glucose readings every minute.
A glucose alarm can help get your attention when your glucose level reaches a situation that may require you to check your readings and follow your personal diabetes-management plan.
Keep in mind that glucose alarms are a helpful monitoring feature, but they should not replace professional medical care. If you experience concerning symptoms or your glucose reading does not match how you feel, follow the guidance provided by your healthcare professional.
How to Read the FreeStyle Libre 3 Glucose Graph
A glucose graph can help you see how your blood sugar changes over time instead of focusing on just one reading. By looking at the overall trend, you may be able to notice patterns that are not obvious from a single number.
You may see changes in glucose levels during different situations, such as:
After eating
It is common for glucose to increase after a meal. The amount and timing of the rise can differ from person to person and may be influenced by the type of food, physical activity, medications, and other individual factors.
During exercise
Physical activity can cause glucose levels to change in different ways. The effect may depend on the type of exercise, how long you are active, and your individual circumstances.
Overnight
Glucose levels can also change while you sleep. Reviewing your previous readings may help you recognize nighttime patterns that you can discuss with your healthcare professional.
During stressful periods
Stress and other everyday factors may influence glucose levels. Looking at your glucose history can help you understand whether certain situations are associated with changes in your readings.
The key is to look at the bigger picture rather than relying on one reading alone. Reviewing glucose trends over time can provide helpful information for conversations with your healthcare team and may help you better understand how your glucose responds to different activities and daily situations.
How to Review Glucose History
The reader may allow you to view past glucose readings, depending on the specific system and device settings. Looking back at your glucose history can help you identify patterns and understand how your levels may change over time.
For example, you may notice changes in glucose levels:
- After eating certain meals or foods
- During or after specific activities
- At particular times of the day
- During the night or overnight hours
- Around your medication or insulin schedule
Glucose graphs can provide useful information, but they should not be used to diagnose a condition on your own. Instead, consider sharing these patterns with your healthcare professional. They can help you interpret your glucose history and determine what the trends may mean in relation to your individual health and treatment plan.
Can You Add Notes?
Depending on the features available with your FreeStyle Libre system, you may be able to add notes about meals, insulin, exercise, and other daily activities or events.
Adding these details can give you a better understanding of your glucose history by helping you connect changes in glucose levels with what was happening at the time.
For example:
- 8:00 AM: Breakfast
- 10:00 AM: Exercise
- 12:30 PM: Lunch
Later, you and your healthcare professional may be able to review these notes alongside your glucose readings. This can provide useful context and make your glucose records more informative than numbers alone.
FreeStyle Libre 3 Reader vs. Traditional Glucose Meter
A traditional blood glucose meter typically measures blood sugar using a small blood sample collected through a fingerstick. In contrast, a continuous glucose monitoring (CGM) system uses a sensor to gather glucose readings from the body and sends that information to a compatible reader or display device.
While both methods help people monitor glucose levels, they work differently and are intended for different uses, so they should not be treated as interchangeable.
The FreeStyle Libre 3 Reader is specifically designed to work with the compatible FreeStyle Libre 3 sensor system. For safe and proper use, always use the recommended compatible components and follow the manufacturer’s instructions.
Does the FreeStyle Libre 3 Reader Need a Fingerstick Every Time?
A CGM system is designed to provide ongoing sensor glucose readings, reducing the need for frequent traditional fingerstick tests. However, Abbott explains that a fingerstick blood glucose test may still be necessary for making treatment decisions in certain situations. This can include times when the system displays a “Check Blood Glucose” symbol or when the glucose reading or alarm does not match how you feel or what you expect.
This is an important safety consideration when using a CGM system.
If your glucose reading does not match how you feel, do not ignore the difference. Follow the instructions provided with your specific CGM system and contact or follow the advice of your healthcare professional when needed.
What If the FreeStyle Libre 3 Reader Cannot Find the Sensor?
Sometimes, the reader may not detect the sensor right away. If this happens, there is usually no need to worry.
- Stay calm and make sure the sensor is securely attached to your skin.
- Follow the instructions shown on the reader screen.
- Try scanning the sensor again as instructed.
- If the issue continues, check the User Manual for troubleshooting guidance.
- When necessary, contact Abbott Support or speak with your healthcare professional for further assistance.
According to Abbott’s instructions, if the reader does not successfully scan the sensor within the required time, it may prompt you to scan again. A single unsuccessful scan does not necessarily mean there is a problem with the sensor.
Do not remove a properly applied sensor simply because one scan attempt was unsuccessful. Follow the device instructions and try again as directed.
What If the Sensor Falls Off?
If the sensor becomes detached, follow the latest Abbott instructions provided for your specific sensor model. Never try to reinsert a sensor that has come out of the skin.
If you are unsure about the next steps, contact Abbott or speak with your healthcare professional for guidance. If the sensor repeatedly fails to stay securely attached, discuss the problem with your healthcare professional and review Abbott’s recommended sensor application and adhesion instructions.
Keeping Your FreeStyle Libre 3 Reader Ready
Taking care of your reader can make everyday use easier.
Consider these simple habits:
Keep it charged
Charge the reader according to the manufacturer’s instructions so that it is available when you need it.
Keep the screen clean
A clean touchscreen can make navigation easier.
Store it safely
Avoid exposing the reader to conditions outside the manufacturer’s specified operating and storage limits.
Keep instructions available
If you are new to the system, save the User Manual or bookmark Abbott’s official support resources.
Abbott currently provides FreeStyle Libre 3 Reader support materials online, including user manuals and quick-reference resources.
FreeStyle Libre 3 Reader How to Use: Common Mistakes to Avoid
Learning a new medical device takes time. Here are several common mistakes worth avoiding.
1. Starting without reading the instructions
Even if the system looks simple, read the instructions before using it.
2. Applying the sensor to an inappropriate location
Follow Abbott’s recommended placement instructions for your specific sensor.
3. Activating the sensor incorrectly
Use the compatible reader or app according to the manufacturer’s instructions.
4. Forgetting the warm-up period
The sensor does not provide usable glucose readings immediately after activation. Abbott’s instructions specify a 60-minute warm-up for the referenced system.
5. Ignoring alarms
An alarm is designed to bring your attention to a situation. Follow your personal diabetes-management plan.
6. Making treatment decisions from this article
Online articles can explain how a device works, but your healthcare professional should guide your individual treatment decisions.
7. Ignoring symptoms
If your symptoms and sensor readings do not agree, follow the manufacturer’s guidance regarding blood glucose testing and contact your healthcare professional when appropriate.
Can the FreeStyle Libre 3 Reader Be Used With the FreeStyle Libre 3 Plus Sensor?
Abbott’s current information states that the FreeStyle Libre 3 Plus sensor is compatible with the FreeStyle Libre 3 Reader.
However, product compatibility can depend on the specific system, region, software, and device.
Always check the current manufacturer’s information before purchasing or combining components.
This is especially important because Abbott has updated its FreeStyle Libre product lineup and support resources. Abbott’s U.S. support page currently states that the original FreeStyle Libre 3 sensor is being discontinued and directs users toward the FreeStyle Libre 3 Plus sensor.
For that reason, it is a good idea to confirm the exact sensor model you have before starting a new sensor.
FreeStyle Libre 3 Reader and Smartphone Apps
Some users choose a smartphone app instead of a dedicated reader.
Abbott provides both reader and app resources, but the available features are not necessarily identical.
Abbott’s U.S. support page currently says that the FreeStyle Libre 3 app is being phased out and recommends transitioning to the newer Libre app with the next sensor.
If you are deciding between a reader and smartphone, check:
- Your sensor model
- Smartphone compatibility
- Current Abbott app availability
- Reader compatibility
- Alarm requirements
- Your healthcare professional’s recommendations
For some people, a dedicated reader can be convenient because it provides a separate device specifically for glucose monitoring.
How to Make Daily FreeStyle Libre 3 Reader Use Easier
Once you understand the basics, using the reader can become part of your normal routine.
Here are some simple habits.
Check your glucose at meaningful times
Rather than becoming focused on constantly checking numbers, use your system according to your healthcare professional’s recommendations.
Look at trends
A single glucose number is only one piece of information.
Pay attention to alarms
Make sure your alarm settings are configured according to your treatment plan.
Keep your reader accessible
If you depend on the reader for glucose information, avoid leaving it somewhere you cannot easily reach it.
Keep your supplies organized
Keep your sensors and other diabetes supplies together so you can find them when needed.
FreeStyle Libre 3 Reader How to Use: A Quick Example
Suppose you have just received a new compatible sensor.
Your general process would look like this:
- First: Prepare the back of your upper arm according to Abbott’s instructions.
- Second: Apply the sensor using the supplied applicator.
- Third: Turn on your FreeStyle Libre 3 Reader.
- Fourth: Select Start New Sensor.
- Fifth: Hold the reader against the sensor as instructed to activate it.
- Sixth: Wait for the required warm-up period.
- Seventh: Once the sensor is ready, use the reader to view your glucose information.
- Eighth: Review the glucose number, trend information, graph, and any relevant alerts.
- Ninth: Follow your personal diabetes-management plan.
This basic sequence is what makes the system approachable for many new users.
Where to Get Help With FreeStyle Libre 3 Products
If you are having trouble understanding your reader, sensor, or setup process, the manufacturer’s resources are an important place to start.
Abbott provides official FreeStyle Libre support materials, including:
- FreeStyle Libre 3 Reader User Manual
- Quick Start Guide
- Quick Reference Guide
- Sensor application information
- App support
- Compatibility information
- Troubleshooting resources
The official FreeStyle Libre support center currently provides these reader resources and additional product information.
For questions about your personal glucose targets, medication, insulin, or treatment decisions, speak with your healthcare professional.
FreeStyle Libre 3 Reader From Alfa Healthcare Supply Inc.
At Alfa Healthcare Supply Inc., we understand that medical equipment is not simply another product that someone puts into a shopping cart.
For a person managing diabetes, the right supplies can become part of everyday life.
That is why understanding how to use the FreeStyle Libre 3 Reader matters.
Alfa Healthcare Supply Inc. is a medical supply provider based in Floral Park, New York, serving customers in the surrounding New York area. Our website provides information about diabetes supplies and other home medical equipment.
When looking for a FreeStyle Libre product, it is important to confirm the exact model, sensor compatibility, prescription requirements, insurance requirements, and current availability before ordering.
You can learn more about diabetes and medical supply products through the Alfa Healthcare Supply Inc. website.
Final Thoughts: FreeStyle Libre 3 Reader How to Use
Learning a new glucose-monitoring device does not have to happen all at once.
Start with the basics:
- Apply the sensor correctly.
- Activate it with the compatible reader.
- Wait for the warm-up period.
- Check your glucose information.
- Understand the trend information.
- Pay attention to alarms.
- Follow your healthcare professional’s treatment plan.
The most important thing is not simply knowing where to press on the screen. It is understanding how the reader fits into your overall diabetes-management routine.
If you are new to the FreeStyle Libre 3 Reader, keep the official Abbott User Manual nearby and take your time learning each feature. Abbott continues to update its FreeStyle Libre products, apps, sensors, and support resources, so checking the latest manufacturer information is especially important.
For people searching online for “freestyle libre 3 reader how to use,” the goal should be simple: understand the device, use it according to the manufacturer’s instructions, and work with your healthcare team when making decisions about your diabetes care.
Frequently Asked Questions About FreeStyle Libre 3 Reader How to Use
How do I start a FreeStyle Libre 3 sensor with the reader?
Turn on the reader, select Start New Sensor, and hold the reader against the sensor as instructed. Abbott states that the sensor requires a 60-minute warm-up before it can be used to check glucose.
How long does FreeStyle Libre 3 sensor activation take?
The referenced Abbott setup instructions specify a 60-minute warm-up period after activation.
Do I have to scan the FreeStyle Libre 3 sensor every time I want a glucose reading?
The activation scan is different from repeatedly scanning for every glucose value. Abbott’s FreeStyle Libre 3 documentation describes the sensor as providing glucose information continuously once activated and connected to a compatible device.
Can I use the FreeStyle Libre 3 Reader and app at the same time?
For a given sensor, Abbott documentation indicates that the FreeStyle Libre 3 Reader cannot be used simultaneously with the FreeStyle Libre 3 app.
Can I use the FreeStyle Libre 3 Reader with FreeStyle Libre 3 Plus?
Abbott states that the FreeStyle Libre 3 Plus sensor is compatible with the FreeStyle Libre 3 Reader. Always verify current compatibility for your exact product before use.
What should I do if the reader does not detect my sensor?
Follow the instructions displayed on the reader and attempt the scan again as directed. If the problem continues, consult the Abbott User Manual or contact Abbott support.
Can I shower while wearing the sensor?
Follow the water-resistance instructions for your exact sensor model. Do not assume that every sensor or device has identical water-exposure limits.
Should I make insulin changes based only on the reader?
No. Your medication and insulin decisions should follow the treatment plan provided by your healthcare professional and the manufacturer’s instructions.
What if my glucose reading does not match my symptoms?
Follow Abbott’s instructions. Abbott states that fingerstick testing may be required for treatment decisions when the system indicates a blood glucose check is needed or when readings and symptoms do not match.
Large Alcohol Prep Pads:
When you manage diabetes, give routine injections, prepare for certain medical procedures, or keep a home healthcare kit ready, small supplies can make a big difference. One of those simple but useful products is large alcohol prep pads.
Large alcohol prep pads are pre-moistened, disposable pads commonly used to prepare the skin before an injection or other appropriate procedure. Many medical products in this category contain 70% isopropyl alcohol, although exact formulation, size, packaging, and labeling can vary by manufacturer. Official product labeling for large alcohol prep pads commonly identifies their purpose as preparing the skin before an injection.
For someone who uses insulin, injectable medications, lancets, or other medical supplies regularly, having the right preparation supplies close by can make a healthcare routine more organized and convenient.
At Alfa Healthcare Supply Inc., we understand that medical supplies are not simply products on a shelf. They can become part of someone’s everyday routine. A person may need a dependable supply of diabetic products, injection-related supplies, DME, incontinence products, orthopedic supplies, or other home healthcare essentials.
This guide explains what large alcohol prep pads are, how they are commonly used, what to look for when buying them, important safety considerations, and how they can fit into a well-organized home medical supply kit.
What are Large Alcohol Prep Pads?
Large alcohol prep pads are disposable pads saturated with an alcohol-based solution, commonly 70% isopropyl alcohol.
They are designed to provide a convenient way to prepare an appropriate area of skin before an injection or another use specifically stated on the product label.
The word “large” generally refers to the physical size of the pad. A larger pad can provide more surface area than a smaller prep pad, which may be useful when the recommended preparation area requires broader coverage.
For example, PDI offers a large alcohol prep pad measuring approximately 1.7 inches by 3.5 inches, while its medium version measures approximately 1.1 inches by 2.6 inches. Product dimensions differ between manufacturers, so shoppers should always check the individual product specifications rather than assuming that every “large” pad has the same dimensions.
Many large alcohol prep pads are individually packaged. This makes them convenient for home use, clinical environments, travel medical kits, and other situations where a ready-to-use pad is helpful.
Common Features of Large Alcohol Prep Pads
Depending on the product, large alcohol prep pads may include:
- 70% isopropyl alcohol
- Absorbent pad material
- Large-format design
- Individual packaging
- Single-use construction
- Sterile packaging for products specifically labeled sterile
- Easy-open packets
- External-use labeling
These features can vary. Always read the product packaging and manufacturer’s instructions before use.
Why are Large Alcohol Prep Pads Used?
The main reason people use alcohol prep pads is convenience.
Instead of opening a bottle of alcohol and applying it to cotton or gauze, an individually packaged prep pad is already saturated and ready to use.
This can make a routine easier, especially for people who need to prepare their skin regularly.
For example, a person who takes routine injections may keep alcohol prep pads alongside their medication and other supplies. A healthcare worker may keep them in an organized clinical supply area. A caregiver may include them in a home healthcare kit.
The purpose is simple: prepare the appropriate skin area according to the instructions for the specific procedure and product.
The CDC recognizes alcohol-based skin preparation as one option for certain healthcare procedures. For example, its infection-control guidance recommends appropriate antiseptic skin preparation before peripheral venous catheter insertion and identifies 70% alcohol as one option in specified circumstances.
However, an alcohol prep pad should not automatically be considered suitable for every medical cleaning task.
That distinction is important.
Large Alcohol Prep Pads and 70% Isopropyl Alcohol
One of the most common questions about large alcohol prep pads is why so many products contain 70% isopropyl alcohol.
The answer is related to the antimicrobial properties of alcohol.
The CDC explains that alcohols such as ethanol and isopropyl alcohol have rapid activity against many microorganisms. It also notes that their activity drops significantly below 50% concentration, with an optimum bactericidal concentration generally described within the 60%–90% range.
This helps explain why 70% isopropyl alcohol is commonly found in products intended for skin preparation.
However, higher alcohol concentration does not automatically mean that a product is appropriate for every use.
A medical alcohol prep pad is a specific healthcare product with specific labeling. Users should follow the product’s intended purpose rather than assuming that the pad can be used as a universal disinfectant.
Large Alcohol Prep Pads for Diabetes Care
People managing diabetes often have several supplies to organize.
Depending on their treatment plan, these may include:
- Blood glucose meters
- Blood glucose test strips
- Lancets
- Insulin pens
- Insulin syringes
- Pen needles
- Continuous glucose monitoring supplies
- Injection supplies
- Alcohol prep pads
- Sharps containers
For someone who performs regular injections, having appropriate skin-preparation supplies nearby can make the routine easier to manage.
An alcohol prep pad can be used for skin preparation when its labeling and the instructions for the specific procedure call for it.
For example, many alcohol prep pad labels state that the product is intended for preparation of the skin before an injection.
It is important not to treat an alcohol prep pad as a replacement for proper diabetes care. Good hand hygiene, correct injection technique, proper medication storage, appropriate sharps disposal, and following the instructions of your healthcare professional remain important parts of safe diabetes management.
Large Alcohol Prep Pads for Injection Preparation
Injection preparation is one of the most common applications for alcohol prep pads.
The basic process is straightforward, but users should always follow the directions supplied with their medication and instructions from their healthcare professional.
A typical routine may include:
1. Wash or Clean Your Hands
Start with clean hands according to the instructions for your medication or procedure.
Hand hygiene is an important part of reducing contamination during healthcare tasks.
2. Prepare Your Supplies
Have the necessary medication, needle or other supplies, and alcohol prep pad ready before beginning.
Keeping supplies together can help make the process more organized.
3. Open a Fresh Pad
Open the individual packet immediately before use.
Avoid unnecessarily touching the pad.
4. Clean the Intended Skin Area
Use the pad according to its label and the instructions provided for your injection or procedure.
Some product labels instruct users to wipe the injection site thoroughly before the injection.
5. Allow the Area to Dry as Directed
Follow the instructions for your particular procedure regarding drying time.
Avoid touching the prepared area unnecessarily.
6. Dispose of the Used Pad
After use, discard the pad appropriately.
Alcohol prep pads are intended to be disposable and should not be reused.
Why Choose a Large Alcohol Prep Pad?
The size of an alcohol prep pad may seem like a minor detail, but it can affect convenience.
A larger pad offers more material for wiping a preparation area compared with a smaller pad.
For healthcare professionals, caregivers, and people managing regular medical routines, this can make the preparation process more convenient.
However, bigger does not automatically mean better for every situation.
The appropriate size depends on the procedure, product instructions, personal preference, and healthcare professional guidance.
Potential Advantages of a Large Format
Large alcohol prep pads may offer:
More surface area:
A larger pad can cover a broader area during skin preparation.
Easy handling:
Some people find a larger pad easier to hold and use.
Convenient packaging:
Individually wrapped pads can be stored and carried without bringing a bottle of liquid alcohol.
Simple disposal:
After use, the pad can be discarded instead of storing reusable materials.
Useful for supply organization:
Boxes of individually packaged pads are easy to keep with other medical supplies.
Individually Wrapped Large Alcohol Prep Pads
Individual packaging is an important feature to consider when purchasing large alcohol prep pads.
Each packet protects the pad from outside exposure until it is opened.
PDI, for example, describes its large alcohol prep pads as individually wrapped and packaged for single use. Its listed large format is available in a box of 100 pads.
Individual packaging can be particularly convenient for:
- Home healthcare
- Diabetes care
- Clinics
- Physician offices
- Caregiver supply kits
- Travel
- Workplace first-aid or medical supply areas
- Mobile healthcare routines
It also means you can carry a few individual packets without bringing an entire bottle of alcohol.
Sterile vs. Non-Sterile Alcohol Prep Pads
When shopping for large alcohol prep pads, you may see both sterile and non-sterile products.
This distinction matters.
A product labeled sterile has undergone a specific sterilization process and is packaged according to its labeling requirements. A product that is not labeled sterile should not automatically be assumed to be sterile.
For a medical procedure where sterility is specifically required, follow the instructions of the healthcare professional performing or directing the procedure.
Some large alcohol prep pads are specifically marketed as sterile 70% isopropyl alcohol pads for skin cleansing before injections, blood draws, or minor procedures.
Always check the actual package before use.
What Should You Look for When Buying Large Alcohol Prep Pads?
If you are shopping for large alcohol prep pads, several details are worth checking.
1. Alcohol Concentration
Check the active ingredient and concentration.
Many medical prep pads contain 70% isopropyl alcohol, but formulations can vary.
2. Pad Size
Look at the actual dimensions instead of relying only on the word “large.”
For example, one manufacturer’s large pad may have different dimensions from another manufacturer’s large pad.
3. Sterility
If sterile supplies are required for your procedure, confirm that the product is specifically labeled sterile.
4. Packaging
Individually wrapped pads are convenient for single-use applications and storage.
5. Pad Construction
Some products use 2-ply material or other absorbent designs.
The material can influence handling and how much liquid the pad holds.
6. Count Per Box
Large alcohol prep pads may be sold in different quantities.
A larger box can be useful for regular users, while a smaller package may be more convenient for occasional use.
7. Manufacturer Instructions
Always review the label.
Medical supplies can look similar while having different intended uses and warnings.
Large Alcohol Prep Pads vs. Small Alcohol Pads
The primary difference is usually size.
Small pads can be convenient for quick, targeted skin preparation.
Large pads provide more surface area and may be easier to handle for certain preparation tasks.
Neither size should automatically be considered appropriate for every procedure.
Think about your routine.
If you perform a simple injection and prefer a compact pad, a smaller format may be sufficient when permitted by the product instructions.
If you prefer more coverage or find a larger pad easier to handle, a large alcohol prep pad may be more convenient.
The important thing is using the product according to its intended purpose.
Can You Use Large Alcohol Prep Pads on Wounds?
This is an important question.
Do not assume that an alcohol prep pad is appropriate for an open wound.
Many alcohol prep pad labels are specifically intended for skin preparation before injection and include warnings against use on irritated skin. Cardinal Health’s large alcohol prep pad labeling, for example, says it is intended for preparation of skin before injection and warns against use on irritated skin and mucous membranes.
Alcohol can be irritating to damaged tissue.
If you have a deep wound, puncture wound, significant burn, infected area, or another concerning skin injury, seek appropriate medical advice rather than using an alcohol prep pad based on assumption.
Can Large Alcohol Prep Pads Be Used on Medical Devices?
Not automatically.
This is another area where people sometimes assume that “alcohol” means “safe for everything.”
It does not.
Some medical devices may have manufacturer-specific cleaning instructions. Certain plastics, coatings, adhesives, screens, sensors, or other materials may be affected by alcohol.
An alcohol prep pad intended for skin preparation should be used according to its product labeling.
If you need to clean a medical device, check the device manufacturer’s cleaning instructions first.
Can You Use Large Alcohol Prep Pads on a CGM Site?
People who use continuous glucose monitors sometimes have questions about skin preparation.
CGM products can have specific application instructions, and recommendations may vary by device.
If your CGM manufacturer’s instructions recommend a particular skin-cleaning method before sensor application, follow those instructions.
Do not assume that every alcohol prep pad is appropriate for every CGM system.
Also consider that adhesive performance can be affected by skin products, moisture, oils, and other substances.
When using a CGM, follow the current instructions supplied with your specific device.
Safety Tips for Large Alcohol Prep Pads
Large alcohol prep pads are simple to use, but they still contain alcohol and should be handled responsibly.
For External Use Only
Many medical alcohol prep pad labels specify external use only.
Do not ingest the product.
Keep Away From Fire
Isopropyl alcohol is flammable.
Keep alcohol prep pads away from flames, sparks, heat sources, and other ignition sources. Product labeling specifically warns that these products are flammable.
Avoid the Eyes
Do not use an alcohol prep pad in the eyes.
Many labels also specify avoiding mucous membranes.
Avoid Irritated Skin
Do not use the product on irritated skin unless a qualified healthcare professional specifically directs you otherwise.
Do Not Reuse
Use a new pad each time it is required.
Keep Away From Children
Store alcohol prep pads safely away from children.
Watch for Skin Irritation
If redness, irritation, or another concerning reaction develops, stop using the product and consult a healthcare professional as appropriate. Product labels commonly include this warning.
How to Store Large Alcohol Prep Pads
Proper storage helps maintain the condition of your medical supplies.
A good storage location should be:
- Clean
- Dry
- Away from excessive heat
- Away from direct flames
- Away from children
- Easily accessible when needed
- Protected from damage to the individual packets
Some product labeling specifies room-temperature storage, such as 15°C–30°C (59°F–86°F), but storage requirements can differ. Always follow the product package.
Check the Packaging Before Use
Before opening a pad, inspect the packet.
Do not use a product if the packaging is damaged or compromised when the label states that package integrity is required.
This is especially important when a product is labeled sterile.
Large Alcohol Prep Pads for Home Healthcare
Home healthcare works best when essential supplies are easy to find.
Imagine needing to give a routine injection and discovering that your supplies are scattered between different cabinets.
It is a small problem, but small problems can make healthcare routines more stressful.
Keeping large alcohol prep pads together with appropriate injection or diabetes supplies can help create a simple, organized setup.
A small home healthcare station might include:
- Prescribed medications
- Appropriate needles or syringes
- Blood glucose supplies
- CGM supplies
- Alcohol prep pads
- Gauze when appropriate
- A sharps disposal container
- Other supplies recommended by your healthcare professional
The exact contents will depend on the person’s healthcare needs.
Large Alcohol Prep Pads for Travel
Medical routines do not stop when you leave home.
For people who travel regularly, individually packaged large alcohol prep pads can be convenient because they are compact and ready to use.
You can place a reasonable supply in an organized medical travel pouch along with other necessary healthcare products.
When traveling, remember that alcohol products are flammable and should be stored and transported responsibly according to applicable rules.
Keep medications and medical supplies in their original packaging whenever appropriate, and follow travel requirements.
Why Convenience Matters in Healthcare
Healthcare can involve many small steps.
Take medication.
Prepare supplies.
Clean the appropriate area.
Complete the procedure.
Dispose of used materials.
Repeat.
When a product removes unnecessary complexity from one of those steps, it can make the routine feel easier.
That is one reason individually packaged large alcohol prep pads remain useful.
They do not replace professional medical care, but they can support a well-organized routine when used for their intended purpose.
Large Alcohol Prep Pads from Alfa Healthcare Supply Inc.
At Alfa Healthcare Supply Inc., we understand the importance of convenient access to everyday healthcare supplies.
Alfa Healthcare Supply serves customers looking for medical supplies and durable medical equipment, with a focus on making healthcare products easier to find and obtain.
Our product range includes categories such as diabetic supplies, DME equipment, incontinence supplies, orthopedic products, foot care products, COPD/asthma supplies, urinary supplies, and other medical supplies.
For customers looking for alcohol prep pads, it is important to select a product that matches the intended use, size, packaging, and labeling requirements of their healthcare routine.
Alfa Healthcare Supply also offers medical supply services from its location in Floral Park, New York, with delivery options for customers in the surrounding service area.
Product availability, packaging, pricing, and specifications can change, so customers should review the current product information before placing an order.
How to Choose the Right Alcohol Prep Pad Size
Choosing the right size does not need to be complicated.
Start by asking:
What will I use it for?
If the product is for routine skin preparation before an injection, check the instructions for your medication and the prep pad.
Does my healthcare professional recommend a specific product?
If so, follow that recommendation.
Do I need a sterile product?
If sterility is required, select a product specifically labeled sterile.
Would a larger pad be easier for me to handle?
If yes, compare the actual dimensions of large-format products.
How often will I use them?
Regular users may prefer larger box quantities.
These simple questions can help you choose a product based on your actual needs rather than simply choosing the largest package.
Common Mistakes to Avoid
Even simple medical products can be misused.
Here are several common mistakes to avoid.
Mistake 1: Assuming Every Alcohol Pad Is the Same
Different products can have different sizes, concentrations, packaging, sterility, and intended uses.
Read the label.
Mistake 2: Using an Alcohol Pad on Every Type of Skin Injury
Alcohol prep pads are not automatically appropriate for open wounds, burns, or damaged tissue.
Follow the product labeling and seek professional advice when needed.
Mistake 3: Reusing a Pad
Alcohol prep pads are generally intended for single use.
Use a fresh pad when needed.
Mistake 4: Ignoring Fire Safety
Alcohol is flammable.
Keep prep pads away from fire and ignition sources.
Mistake 5: Ignoring Device Instructions
If you are cleaning or preparing a medical device, follow the device manufacturer’s instructions rather than assuming an alcohol pad is appropriate.
Final Thoughts on Large Alcohol Prep Pads
Sometimes the simplest medical supplies are the ones people use most often.
Large alcohol prep pads can be a convenient part of an organized healthcare routine, particularly when skin preparation is required before an injection or another appropriate procedure.
Their individually packaged design makes them easy to store, carry, and use. Many products contain 70% isopropyl alcohol, and large-format versions provide additional surface area compared with smaller pads.
But convenience should always come with responsible use.
- Read the label.
- Use the pad only for its intended purpose.
- Do not use it on inappropriate areas such as the eyes or irritated skin.
- Keep it away from flames.
- Do not reuse it.
And when you are unsure whether an alcohol prep pad is appropriate for a particular medical procedure, ask your doctor, nurse, pharmacist, or another qualified healthcare professional.
For people building a reliable home medical supply kit, the goal is not simply to have more supplies. It is to have the right supplies, in the right quantity, stored safely and ready when they are needed.
For medical supplies and durable medical equipment, Alfa Healthcare Supply Inc. is here to help customers find practical healthcare products for everyday needs.
Always review the current product label and manufacturer instructions before use because product specifications, packaging, and labeling may change.
Frequently Asked Questions About Large Alcohol Prep Pads
What are large alcohol prep pads?
Large alcohol prep pads are disposable pads saturated with an alcohol solution, commonly 70% isopropyl alcohol. They are often labeled for preparing the skin before injections.
What are large alcohol prep pads used for?
They are commonly used for skin preparation before injections or other procedures when the product labeling specifically allows that use.
Are large alcohol prep pads sterile?
Some are sterile and some may not be. Always check the product packaging and specifications.
Do large alcohol prep pads contain 70% alcohol?
Many medical alcohol prep pads contain 70% isopropyl alcohol, but users should check the actual product label because formulations can vary.
Why choose large alcohol prep pads instead of small ones?
Large pads provide more surface area and may be easier for some users to handle. The correct size depends on the specific procedure and product instructions.
Can I use large alcohol prep pads before an insulin injection?
Many alcohol prep pads are specifically labeled for preparing skin before an injection. Follow the instructions for your medication and the prep pad, along with guidance from your healthcare professional.
Can I use alcohol prep pads on an open wound?
Do not assume that they are appropriate for open wounds. Many products are specifically labeled for injection-site skin preparation and warn against use on irritated skin.
Can I reuse an alcohol prep pad?
No. Alcohol prep pads are designed as disposable, single-use products.
Can I use an alcohol prep pad to clean a medical device?
Only if the device manufacturer specifically permits it. A skin-preparation pad is not automatically suitable for every medical device.
Are alcohol prep pads flammable?
Yes. Products containing isopropyl alcohol are flammable. Keep them away from fire, sparks, and other ignition sources.
How should I store large alcohol prep pads?
Store them according to the manufacturer’s instructions, generally in a clean, dry location away from heat and ignition sources and out of children’s reach.
How many large alcohol prep pads should I buy?
That depends on how often you use them. People with regular injection routines may need a larger supply, while occasional users may prefer a smaller package.
Are individually wrapped alcohol pads better?
Individual packaging offers convenience and helps protect each pad until it is opened. Whether a specific product is right for you depends on its labeling and intended use.
Where can I buy large alcohol prep pads?
Large alcohol prep pads are available from medical supply providers, pharmacies, and other healthcare retailers. Alfa Healthcare Supply Inc. provides a range of medical and DME products and can be a convenient option for customers looking for healthcare supplies.
How Do I Get a FreeStyle Libre 3 Reader?
If you are searching for “how do I get a FreeStyle Libre 3 reader,” you are probably looking for a simple answer: where to get the reader, whether you need a prescription, whether insurance can help, and how to make sure you purchase a reader that works with your FreeStyle Libre system.
For many people, a dedicated glucose reader can be useful when they do not want to depend entirely on a smartphone. It can provide a convenient way to view glucose information from a compatible sensor.
However, there is an important update to understand in 2026: Abbott’s U.S. FreeStyle Libre website says the original FreeStyle Libre 3 sensor is being discontinued and directs current users to ask their doctor about the FreeStyle Libre 3 Plus sensor. Abbott describes the current Libre 3 system around the Libre 3 Plus sensor and Libre app.
This guide from Alfa Healthcare Supply Inc. explains the practical steps to take if you want to get a FreeStyle Libre 3 Reader, what to ask your healthcare provider, how prescriptions and insurance may work, and what to check before ordering.
What is a FreeStyle Libre 3 Reader?
The FreeStyle Libre 3 Reader is a portable handheld device designed to work with compatible FreeStyle Libre continuous glucose monitoring (CGM) components.
A CGM system is different from a traditional blood glucose meter. Instead of taking a fingerstick every time you want a glucose reading, a compatible sensor collects glucose information and communicates with a compatible reader or other supported device.
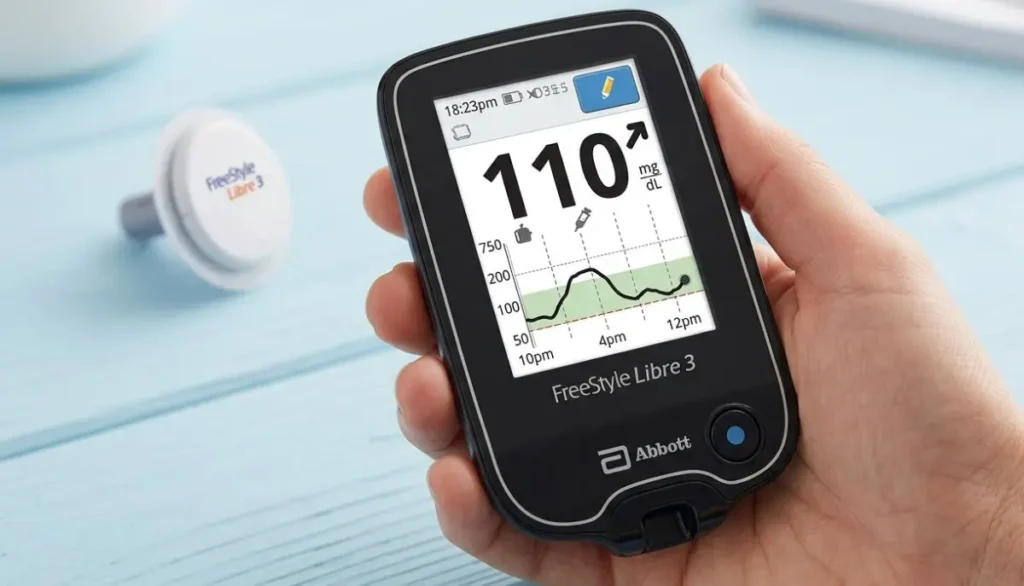
A dedicated reader may be helpful for someone who:
- Does not want to use a smartphone for glucose monitoring
- Does not have a compatible smartphone
- Prefers a separate medical device
- Wants a dedicated screen for checking glucose
- Is helping a family member or caregiver monitor glucose
- Wants another option for accessing CGM information
Abbott provides separate support resources for FreeStyle Libre readers, including a reader quick-start guide and user materials.
The reader and sensor are not the same product. The sensor is the wearable component, while the reader is the reusable handheld device.
That distinction is important when ordering.
How Do I Get a FreeStyle Libre 3 Reader?
If you are wondering how do I get a FreeStyle Libre 3 reader, the process generally starts with confirming which FreeStyle Libre system you currently use or plan to use.
Step 1: Talk With Your Healthcare Provider
Start by speaking with your doctor, diabetes care provider, or another qualified healthcare professional.
Tell them that you are interested in using a FreeStyle Libre CGM system and that you want to know whether a compatible reader is appropriate for you.
Your provider can help determine:
- Which Libre system is appropriate
- Which sensor you should use
- Whether you need a reader
- Whether a prescription is required
- What should be included on the prescription
- Whether your insurance may cover the equipment
For Medicare beneficiaries, Abbott specifically states that the prescription must include both the reader and sensors for Medicare coverage eligibility. Coverage requirements and documentation can apply.
This is one reason it is helpful to discuss the reader and sensor together rather than ordering one component without checking compatibility.
Do I Need a Prescription for a FreeStyle Libre 3 Reader?
In the United States, FreeStyle Libre systems are prescription products. Abbott’s U.S. website identifies the product as prescription-only.
Your exact prescription and coverage requirements can depend on your insurance and the way the product is being supplied.
For example, Abbott’s prescribing information distinguishes between pharmacy and DME pathways. For Medicare-eligible patients, the process can involve determining the type of Medicare coverage, confirming eligibility requirements, completing documentation, and working with a DME supplier.
What should you ask your doctor?
You can keep the conversation simple:
“I am interested in using a FreeStyle Libre continuous glucose monitoring (CGM) system. Can you tell me which current Libre sensor and reader are appropriate for me, and can you send the prescription to my pharmacy or DME supplier?”
Your healthcare provider can then determine the appropriate prescription based on your individual situation.
Can I Get a FreeStyle Libre Reader Through Insurance?
Possibly.
Insurance coverage varies, so there is no single answer that applies to every patient.
Your coverage can depend on:
- Your insurance company
- Your specific insurance plan
- Whether you have Medicare or commercial insurance
- Your medical eligibility
- Prescription requirements
- Documentation requirements
- Whether the product is supplied through a pharmacy or DME provider
Abbott’s Medicare information explains that Medicare coverage requires a prescription that includes both the reader and sensors, while additional coverage and documentation criteria may apply.
If you are using private insurance, your provider, pharmacy, or DME supplier can help determine what your plan requires.
Before ordering, ask:
- Is the reader covered?
- Are the sensors covered?
- Do I have a deductible?
- What is my copay or coinsurance?
- Does my insurance require a specific supplier?
- Does the prescription need prior authorization?
- Does my plan require documentation?
- Is the product supplied through a pharmacy or DME benefit?
Getting these answers first can help prevent unexpected costs.
Can I Buy a FreeStyle Libre Reader Directly?
Availability can change, and the appropriate purchasing route depends on the current Libre system and your prescription and coverage situation.
If you are purchasing through a medical supply company, check whether the supplier currently has the exact reader you need and whether the reader is compatible with your sensor.
Alfa Healthcare Supply Inc. lists the FreeStyle Libre 3 Reader among its diabetic supplies. Its online diabetic-supplies catalog currently displays the reader, along with FreeStyle Libre sensors and other glucose-monitoring products.
Because product availability, pricing, prescription requirements, and insurance rules can change, it is a good idea to verify these details before placing an order.
Getting a FreeStyle Libre 3 Reader From Alfa Healthcare Supply Inc.
If you are considering Alfa Healthcare Supply Inc. for your diabetic supplies, the company is a DME and medical supply provider based in Floral Park, New York.
Alfa Healthcare Supply Inc
Alfa Healthcare Supply Inc Web Address: 261-12 E Williston Ave, Queens, NY 11001, United States Phone: +1 718-343-3860
The company’s diabetic-supplies catalog includes glucose monitoring products such as the FreeStyle Libre 3 Reader and FreeStyle Libre 3 Sensor.
When contacting a medical supply provider, have useful information available, such as:
- Your name and contact information
- Your insurance information
- Your prescription, if already available
- The name of your healthcare provider
- The Libre sensor you currently use
- The reader you were prescribed or instructed to obtain
This can make the ordering process easier.
You can also visit Alfa Healthcare Supply Inc. to review available medical and diabetic supplies.
Why Does the Reader Need to Match the Sensor?
This is one of the most important questions to ask before buying.
CGM systems are made up of components that are designed to work together. A reader intended for one system should not automatically be assumed to work with another sensor.
For example, a FreeStyle Libre reader and a FreeStyle Libre sensor should be checked for compatibility before purchase.
This becomes especially important because Abbott’s U.S. product lineup is changing. Abbott currently promotes the FreeStyle Libre 3 Plus sensor as the current Libre 3 system sensor and states that the original FreeStyle Libre 3 sensor is being discontinued.
Before purchasing, confirm:
Reader:
Which reader are you receiving?
Sensor:
Which sensor are you using?
Compatibility:
Are the reader and sensor compatible?
Prescription:
Does your prescription specify the correct products?
Insurance:
Will your insurance cover the specific combination?
If you are unsure, ask your healthcare professional or the supplier before opening the package.
FreeStyle Libre 3 Reader vs. Smartphone
One common question is:
“Do I really need the reader if I have a smartphone?”
Not necessarily.
Abbott’s current Libre 3 Plus system is designed to send glucose readings automatically to a compatible smartphone using the Libre app.
However, a dedicated reader can still be useful for people who prefer a separate device.
A reader may be useful if:
- Your smartphone is not compatible
- You do not want to use your personal phone
- You prefer a dedicated screen
- You are helping another person monitor glucose
- You want a separate device for diabetes management
On the other hand, if you have a compatible smartphone and your healthcare provider recommends the current Libre app and sensor combination, you may not need a separate reader.
The right choice depends on your specific Libre system and personal circumstances.
What Information Can a FreeStyle Libre Reader Provide?
Depending on the specific Libre system and configuration, a compatible reader can provide glucose information such as:
- Current glucose level
- Glucose trend
- Glucose history
- Graphs
- High and low glucose information
- Other information associated with the CGM system
The reader is designed to help you view information collected by the compatible sensor.
However, glucose information should always be interpreted according to your healthcare professional’s instructions.
Abbott also emphasizes that if glucose readings or alarms do not match your symptoms or expectations, you should use an appropriate blood glucose meter for treatment decisions and seek medical advice when appropriate.
How Do I Start Using the Reader?
Once you have the correct reader and compatible sensor, follow the instructions supplied with your specific system.
A typical setup involves:
1. Read the user instructions
Do not skip the manufacturer’s instructions, especially if this is your first CGM.
2. Charge the reader if required
Make sure the device has sufficient battery power before beginning setup.
3. Apply the compatible sensor
Follow the manufacturer’s instructions for sensor placement and application.
4. Start the sensor
Use the compatible reader or app according to the current instructions for your system.
5. Complete the startup process
Some CGM sensors have a startup or warm-up period before glucose information becomes available.
6. Check the screen
Once the sensor is active, the reader can display the information available from the sensor.
Abbott provides setup guides, reader support, user manuals, and other resources through its FreeStyle Libre support center.
What If I Already Have a FreeStyle Libre 3 Sensor?
If you already have FreeStyle Libre 3 sensors, do not assume that every newer reader or sensor is interchangeable.
Check the exact product name and model.
This is particularly important in 2026 because Abbott states that the original FreeStyle Libre 3 sensor is being discontinued and encourages existing users to ask their doctor about moving to the FreeStyle Libre 3 Plus sensor.
If you have older unopened sensors at home, ask your healthcare professional or Abbott support whether they remain appropriate for your intended use.
What If I Cannot Find a FreeStyle Libre 3 Reader?
Don’t immediately assume that you need to purchase a different device.
First, check:
- The exact name of your sensor
- The exact reader name
- Whether the reader is currently available
- Whether your prescription specifies a reader
- Whether your insurance requires a particular supplier
- Whether your doctor intended you to use the smartphone app instead
- Whether your system has transitioned to a newer sensor
You can also contact Abbott’s customer support for current product and compatibility information. Abbott lists customer support through its FreeStyle Libre support center, including chat and telephone assistance.
How Much Does a FreeStyle Libre 3 Reader Cost?
The price can vary based on the supplier, insurance, coverage, product availability, and current retail pricing.
For example, Alfa Healthcare Supply’s online diabetic-supplies page currently lists the FreeStyle Libre 3 Reader at $159.00, but prices and availability can change.
A cash price is not necessarily the same as your insurance-covered price.
If you are paying out of pocket, ask the supplier to confirm the current price before ordering.
If you are using insurance, ask about your expected out-of-pocket cost rather than assuming the online retail price will be your final cost.
What Should I Have Ready When Ordering?
Having your information ready can save time.
Personal information
You may need:
- Full name
- Date of birth
- Shipping address
- Telephone number
Insurance information
If using insurance, have:
- Insurance card
- Member ID
- Group number, if applicable
- Medicare information, if applicable
Prescription information
If your provider has already written a prescription, you may need:
- Prescription
- Provider name
- Provider contact information
- Required clinical documentation
Your supplier can tell you what documentation is needed for your particular order.
FreeStyle Libre 3 Reader for Caregivers
A reader can also be useful for caregivers.
For example, a caregiver may be helping an older adult or family member who does not regularly use a smartphone.
A dedicated reader can provide a straightforward device for viewing glucose information when it is appropriate for the person’s prescribed system.
Caregivers should still follow the patient’s healthcare plan and should not make medication changes based only on information from an online article.
If you are assisting someone with a CGM, ask their healthcare professional:
- How often should glucose be checked?
- What readings require attention?
- What should be done for high glucose?
- What should be done for low glucose?
- When should a fingerstick be used?
- When should medical help be requested?
Having these instructions in advance can make CGM use less stressful.
Common Mistakes to Avoid When Getting a FreeStyle Libre Reader
Mistake 1: Buying the wrong reader
Don’t buy a reader simply because the name looks similar.
Confirm compatibility with your sensor.
Mistake 2: Forgetting the prescription
If the product requires a prescription, trying to order without the required documentation can delay the process.
Mistake 3: Assuming insurance covers everything
Insurance coverage varies.
Confirm your benefits before ordering.
Mistake 4: Confusing the reader with the sensor
The reader is reusable hardware. The sensor is the wearable component.
They have different roles and different replacement schedules.
Mistake 5: Ignoring product updates
CGM product lines change.
As of 2026, Abbott says the original FreeStyle Libre 3 sensor is being discontinued and directs users toward the FreeStyle Libre 3 Plus sensor.
Mistake 6: Relying on an old online article
CGM products, compatibility information, insurance policies, and availability can change.
For current information, check the manufacturer’s instructions and speak with your healthcare provider or supplier.
A Simple Checklist: How Do I Get a FreeStyle Libre 3 Reader?
If you want the process in the simplest possible format, use this checklist:
1. Talk to your healthcare provider.
Ask whether a FreeStyle Libre system is appropriate for you.
2. Confirm the current sensor.
Ask which Libre sensor you should use.
3. Ask about a reader.
Tell your provider if you prefer a dedicated reader rather than relying on a smartphone.
4. Get the appropriate prescription.
Follow your provider’s instructions.
5. Check your insurance.
Find out whether the reader and sensors are covered.
6. Choose an appropriate pharmacy or DME supplier.
Confirm availability and ordering requirements.
7. Verify compatibility.
Make sure the reader and sensor are intended to work together.
8. Confirm your cost.
Ask about insurance, copay, deductible, or cash price.
9. Follow the manufacturer’s setup instructions.
Do not rely only on general online instructions.
10. Keep your healthcare team involved.
Use their guidance when interpreting glucose information or making treatment decisions.
Why Choosing the Right Supplier Matters
Getting a CGM device is more than simply finding a product online.
For many patients, the process includes prescriptions, insurance questions, product compatibility, delivery, and ongoing supplies.
A medical supply provider can be useful when you need help navigating those practical details.
Alfa Healthcare Supply Inc. serves patients and caregivers with medical supplies and DME, including diabetic products. Its online catalog includes FreeStyle Libre products as well as other glucose-monitoring supplies.
For someone looking for how do I get a FreeStyle Libre 3 reader, the most important thing is to make sure you are getting the correct current product for your prescribed Libre system, rather than simply choosing a device based on its name or price.
Final Thoughts: How Do I Get a FreeStyle Libre 3 Reader?
So, how do I get a FreeStyle Libre 3 reader?
The simplest approach is to begin with your healthcare provider. Discuss your need for a FreeStyle Libre CGM system and whether a dedicated reader is appropriate. If a prescription is required, have your provider send the appropriate prescription to a participating pharmacy or DME supplier.
Then verify insurance coverage, product availability, pricing, and—most importantly—compatibility between the reader and your sensor.
If you are shopping through Alfa Healthcare Supply Inc., the company’s diabetic-supplies catalog currently lists the FreeStyle Libre 3 Reader.
Because Abbott’s Libre product lineup is changing, it is especially important in 2026 to confirm whether you need the original FreeStyle Libre 3 components or the newer FreeStyle Libre 3 Plus system. Abbott currently directs users toward the Libre 3 Plus sensor as the original Libre 3 sensor is being discontinued.
A little preparation before ordering can save you time, avoid compatibility problems, and help you get the CGM equipment that matches your healthcare plan.
About Alfa Healthcare Supply Inc.
Alfa Healthcare Supply Inc. is a medical supply and DME provider based in Floral Park, New York. The company offers diabetic supplies and other home healthcare products for patients, caregivers, and healthcare needs.
If you are looking for a FreeStyle Libre reader, sensor, or other diabetes-management supplies, you can review the company’s current product selection at Alfa Healthcare Supply Inc..
Frequently Asked Questions
1. How do I get a FreeStyle Libre 3 reader?
Start by talking with your healthcare provider about the FreeStyle Libre system you should use. Ask whether you need a dedicated reader and request the appropriate prescription if required. You can then work with a pharmacy or DME supplier to obtain the product.
2. Does the FreeStyle Libre 3 Reader require a prescription?
FreeStyle Libre products in the United States are prescription products. Your exact prescription and coverage requirements may depend on your insurance and the product being supplied.
3. Can I get a FreeStyle Libre reader through Medicare?
Medicare coverage may be available for eligible beneficiaries who meet applicable requirements. Abbott states that the prescription must include both the reader and sensors for Medicare coverage eligibility.
4. Can I get a FreeStyle Libre reader through a DME supplier?
Yes, DME suppliers can be part of the distribution process for eligible patients. Abbott’s prescribing information describes a DME pathway for Medicare-eligible patients.
5. Does Alfa Healthcare Supply carry the FreeStyle Libre 3 Reader?
Alfa Healthcare Supply’s diabetic-supplies catalog currently lists the FreeStyle Libre 3 Reader. Availability and pricing should be confirmed before ordering.
6. How much is the FreeStyle Libre 3 Reader?
Alfa Healthcare Supply currently displays a $159.00 price for the FreeStyle Libre 3 Reader on its online diabetic-supplies page. Prices can change, so confirm the current price before purchasing.
7. Can I use my smartphone instead of a reader?
For current compatible Libre systems, a smartphone with the appropriate Libre app may be used when the phone meets compatibility requirements. Abbott’s current Libre 3 Plus system is designed to send readings automatically to a compatible smartphone.
8. Is the FreeStyle Libre 3 sensor still available?
Abbott’s U.S. support page currently says that the FreeStyle Libre 3 sensor is being discontinued and advises users to ask their doctor about the FreeStyle Libre 3 Plus sensor.
9. Can I use a FreeStyle Libre 3 Reader with any Libre sensor?
Do not assume that all Libre products are interchangeable. Confirm compatibility between the exact reader and sensor before purchase or use.
10. What if my reader or sensor is not working?
Check the manufacturer’s instructions and contact Abbott support or your healthcare professional. Abbott provides reader resources and sensor support through its U.S. support center.
Medical Disclaimer: This article is for general educational purposes and is not a substitute for medical advice, diagnosis, or treatment. FreeStyle Libre products have specific labeling, prescription requirements, compatibility requirements, and safety instructions. Always follow the current manufacturer’s instructions and your healthcare professional’s guidance.