


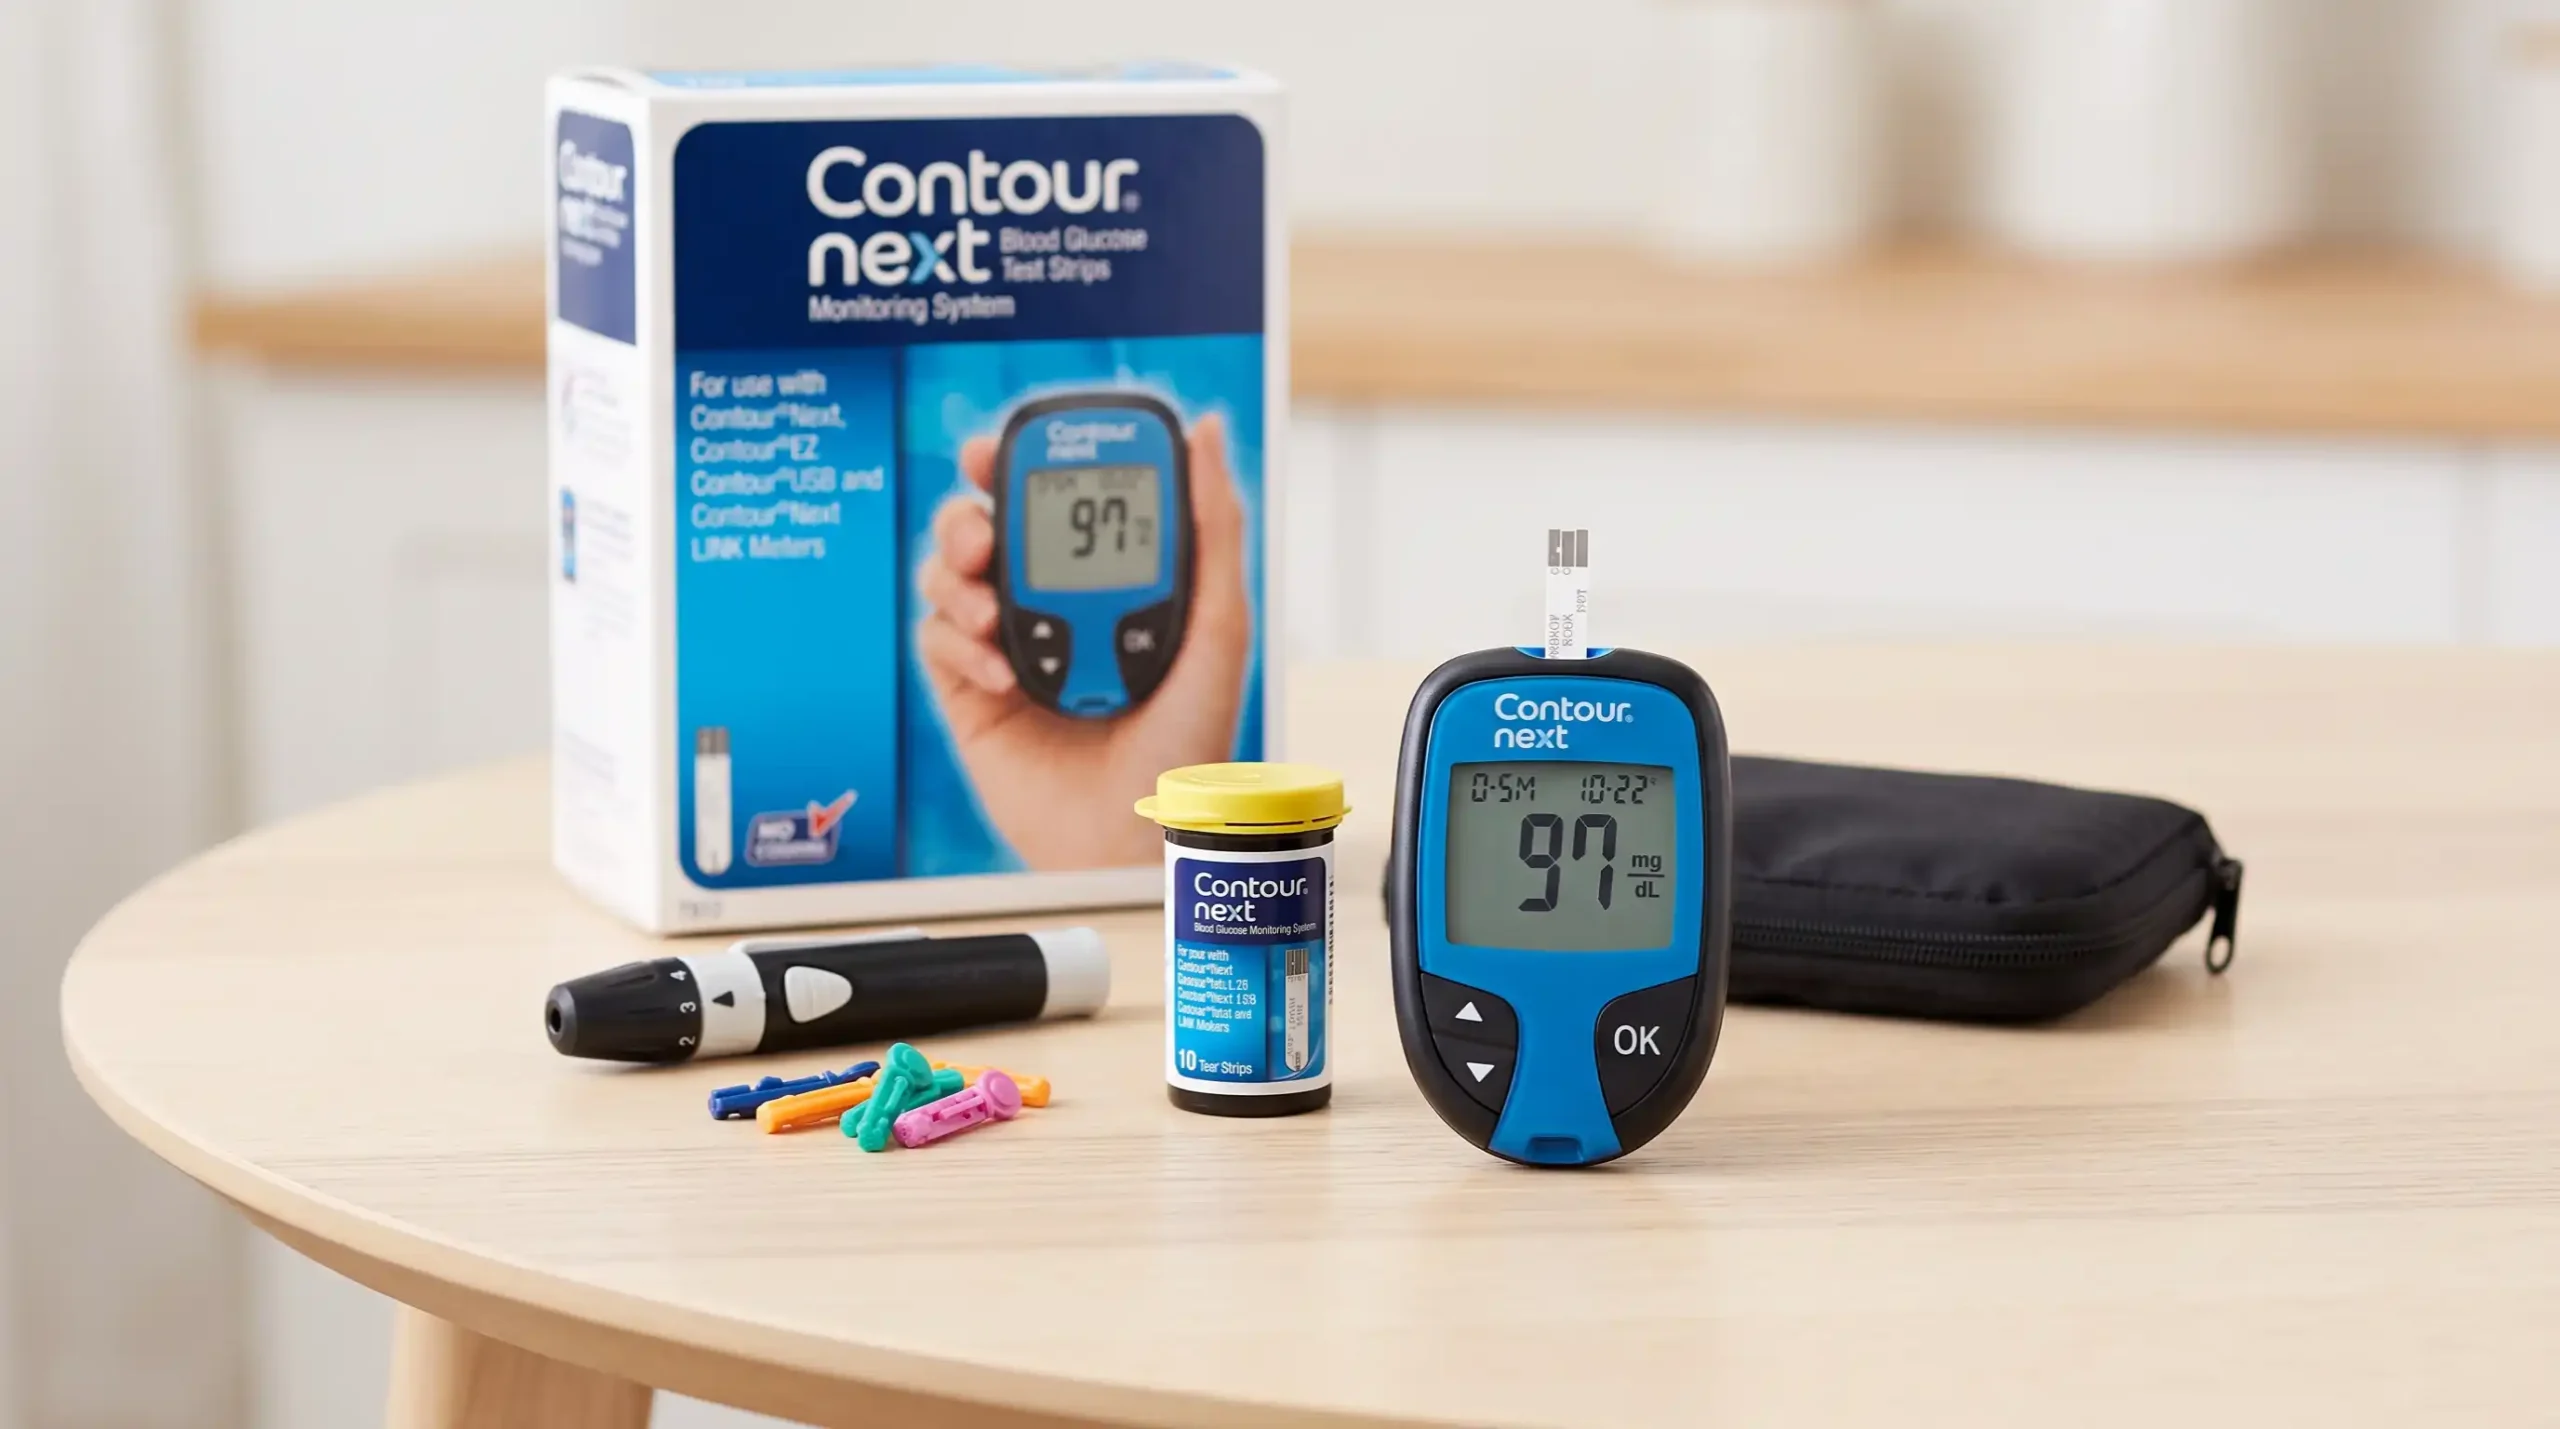
CONTOUR NEXT Blood Glucose Monitoring System How to Use
Learning how to check your blood glucose at home can feel overwhelming at first. There are test strips, lancets, a meter, blood samples, numbers to understand, and sometimes a few unfamiliar symbols on the screen. If you are using a CONTOUR®NEXT blood glucose monitoring system, the process can become much easier once you understand the basic routine.
This guide explains CONTOUR NEXT blood glucose monitoring system how to use it in simple, practical language. It covers preparing your supplies, washing and drying your hands, inserting a test strip, obtaining a blood sample, applying blood to the strip, understanding your result, caring for your meter, avoiding common testing mistakes, and knowing when to ask a healthcare professional for help.
Alfa Healthcare Supply Inc. provides healthcare and medical supply products for everyday health needs. You can learn more about its medical supply resources at Alfa Healthcare Supply Inc..
Important: CONTOUR NEXT is a family of blood glucose meters, and instructions and features can differ between models such as CONTOUR NEXT EZ, CONTOUR NEXT ONE, and CONTOUR NEXT GEN. Always read the user guide supplied with your particular meter and follow the manufacturer’s instructions. The information below is educational and does not replace advice from your doctor, diabetes educator, pharmacist, or other qualified healthcare professional.
What is the CONTOUR NEXT Blood Glucose Monitoring System?
The CONTOUR NEXT blood glucose monitoring system is a blood glucose testing system designed to help people measure their blood glucose using a small blood sample.
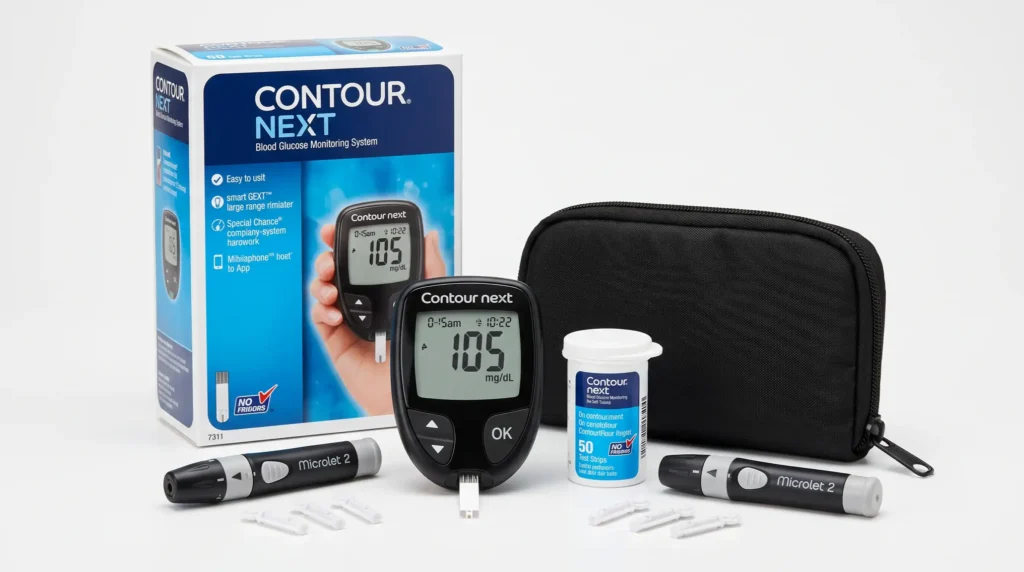
A typical system includes a blood glucose meter, compatible CONTOUR NEXT test strips, and a lancing device with lancets. Depending on the model and package, additional accessories or features may be included.
The basic testing process is straightforward:
- Prepare the meter and supplies.
- Wash and completely dry your hands.
- Insert a compatible CONTOUR NEXT test strip.
- Obtain a small blood sample using the lancing device.
- Apply the blood to the test strip.
- Wait for the meter to process the sample.
- Review the displayed blood glucose result.
- Record or synchronize the result if your model supports those functions.
- Remove the used test strip and safely dispose of the used lancet.
The manufacturer’s CONTOUR NEXT EZ guide confirms that the meter uses CONTOUR NEXT blood glucose test strips and identifies the test-strip port, display, buttons, and memory controls as key components of the device.
The goal is not simply to get a number on a screen. Regular monitoring can give you and your healthcare team useful information about glucose patterns and how your individual diabetes-management plan is working.
Why Learning to Use Your Meter Correctly Matters
A glucose meter is only useful when it is used correctly.
Something as simple as testing with wet hands, using an incorrect test strip, applying too little blood, or storing strips improperly can interfere with your testing routine.
This is why learning CONTOUR NEXT blood glucose monitoring system how to use is more than learning where to press a button.
It means learning the entire process.
You want to know:
- Which test strips belong with your meter
- How to prepare your hands
- How to use your lancing device
- Where to apply the blood
- What to do when the meter says the sample is insufficient
- How to care for your meter
- How to store your testing supplies
- How to recognize an unexpected result
- When to contact your healthcare professional
Once you understand those basics, testing can become a familiar daily routine instead of something that feels intimidating.
CONTOUR NEXT Blood Glucose Monitoring System: What You Need
Before testing, gather everything you need.
Depending on your particular CONTOUR NEXT model and package, you may need:
- CONTOUR NEXT blood glucose meter
- Compatible CONTOUR NEXT blood glucose test strips
- Lancing device
- New sterile lancet
- Tissue or gauze
- Carrying case, if desired
Some CONTOUR NEXT packages include a MICROLET NEXT lancing device and lancets, while package contents can vary by model.
Do not assume that every CONTOUR NEXT model has exactly the same accessories or functions.
The manufacturer provides separate resources for CONTOUR NEXT GEN, CONTOUR NEXT ONE, CONTOUR NEXT EZ, and other products in the CONTOUR family.
Step 1: Prepare a Clean Testing Area
Choose a clean, dry surface for your testing supplies.
Place your meter, test strips, lancing device, and other necessary items within easy reach.
You do not need a complicated setup.
A small organized area can make testing feel much easier.
For example:
Meter → Test strips → Lancing device → Lancet → Tissue
Keeping your supplies together also helps prevent the frustrating situation of having your meter ready but realizing that your lancets or test strips are somewhere else.
If you regularly test outside your home, consider keeping your supplies organized in an appropriate carrying case.
Step 2: Check Your Test Strips
Before using a test strip, check its packaging and expiration information.
Use only test strips designed for your specific CONTOUR NEXT meter.
The CONTOUR NEXT EZ user guide specifically states that the meter uses CONTOUR NEXT blood glucose test strips.
Do not assume that another glucose meter’s strips will work simply because they look similar.
Also pay attention to storage instructions.
If your strips are supplied in a container, close the container promptly after removing a strip. Protecting test strips from unsuitable environmental conditions is an important part of maintaining your testing supplies.
If a strip appears damaged, contaminated, or otherwise unsuitable, do not use it.
Step 3: Wash and Dry Your Hands
This is one of the simplest—and most important—parts of the process.
Wash your hands thoroughly with soap and water.
Rinse them well.
Then dry them completely.
Your fingertips should be clean and dry before testing.
Why does this matter?
Your hands can have traces of food, drinks, lotions, or other substances. Moisture can also affect the blood sample.
A clean testing routine can help reduce avoidable testing problems.
The CONTOUR NEXT quick reference materials specifically instruct users to wash their hands with soap and water before and after handling the meter, lancing device, or test strips.
A simple habit to remember is:
Wash → Rinse → Dry → Test
If you are helping another person with glucose testing, hand hygiene is equally important.
Step 4: Prepare a New Lancet
Use a fresh lancet according to the instructions for your lancing device.
A lancet is the small sterile component used to obtain a blood sample.
If you are using a MICROLET lancing device or another device supplied with your meter, follow its specific instructions for:
- Loading the lancet
- Removing the protective cap
- Replacing the endcap
- Selecting the depth
- Preparing the device
- Obtaining the sample
Do not share lancets.
Do not share lancing devices between people unless the manufacturer specifically states that a device is designed and approved for such use and appropriate infection-control procedures are followed. Bloodborne pathogen transmission is a serious concern with shared blood-testing equipment. The CONTOUR NEXT EZ user guide includes warnings about multiple-patient use and bloodborne pathogens.
For personal home testing, using your own equipment is the safest approach.
Step 5: Insert the CONTOUR NEXT Test Strip
Take one compatible test strip from its packaging.
For models such as CONTOUR NEXT EZ, the gray-square end of the test strip is inserted into the test-strip port.
Insert the strip according to your meter’s instructions.
The meter may automatically power on when the test strip is inserted.
Depending on the model, the display will indicate that the meter is ready for a blood sample.
Take a moment to look at the screen.
Do not rush.
If the meter is not responding as expected, check that the strip is inserted correctly and that you are using a compatible strip.
Step 6: Wait for the Blood-Drop Symbol or Testing Prompt
Once the meter is ready, it will prompt you for a blood sample.
Depending on the model, you may see a blood-drop symbol or another testing instruction.
This is your signal that the meter is ready.
Now prepare your fingertip.
If you are nervous, take a breath.
You do not need to rush the process.
Step 7: Obtain a Small Blood Sample
Use your prepared lancing device to obtain a blood sample from your fingertip.
Use the instructions provided with your specific lancing device.
The objective is to obtain enough blood for the test without unnecessarily increasing discomfort.
If you regularly have difficulty getting a sufficient sample, talk with your healthcare professional about your lancing technique and device settings.
Avoid aggressively squeezing your fingertip.
If you experience repeated difficulty obtaining a suitable sample, it is worth reviewing your technique rather than simply increasing the depth setting without guidance.
Step 8: Apply the Blood to the Test Strip
This is the moment when the meter actually receives the blood sample.
Bring the test-strip sample area to the blood drop according to your meter’s instructions.
The strip is designed to automatically draw the blood sample into the designated testing area.
Keep the strip in contact with the blood until the meter indicates that the sample has been received.
Avoid spreading blood across the strip unnecessarily.
Do not add blood in a way that is inconsistent with your meter’s instructions.
With some CONTOUR NEXT models, the meter provides an indication when enough blood has been received.
Take your time and watch the screen.
Step 9: What If There Is Not Enough Blood?
Sometimes a meter may indicate that the blood sample is insufficient.
This can happen, especially when someone is new to blood glucose testing.
Do not panic.
Certain CONTOUR NEXT models include Second-Chance® Sampling, a feature that can allow additional blood to be applied to the same test strip within the permitted time.
If your model supports this feature, follow the instructions displayed by the meter.
Do not automatically discard the strip unless the meter’s instructions tell you to do so.
However, Second-Chance Sampling availability and operation can vary by model.
If your meter does not support the feature, follow the instructions in your specific user guide.
Step 10: Wait for the Result
Once the meter has received the appropriate blood sample, allow it to process the test.
The blood glucose result should appear on the screen.
Do not try to interpret the number in isolation.
Your personal glucose targets depend on your individual circumstances and treatment plan.
Factors that can affect your appropriate target range include:
- Type of diabetes
- Age
- Medications
- Food intake
- Physical activity
- Pregnancy
- Other health conditions
- Timing of the test
- Individual treatment goals
Your healthcare professional should determine the blood glucose targets appropriate for you.
Step 11: Record the Result
Depending on your meter and your diabetes-management routine, record the result.
You may want to note:
- Date
- Time
- Blood glucose result
- Before or after a meal
- Exercise
- Medication information, when appropriate
- Unusual circumstances
- Symptoms, if relevant
Keeping useful records can help you identify patterns.
For example, you might notice that your readings are consistently different at certain times of the day.
Instead of trying to remember every number, maintaining organized records can make discussions with your healthcare professional more productive.
Step 12: Remove and Dispose of Used Supplies
After testing, remove the used test strip according to your meter’s instructions.
Dispose of used lancets safely in an appropriate sharps container or according to local disposal guidance.
Do not leave used lancets loose on a table, bedside surface, or inside an open bag.
If you test several times each day, establishing a consistent disposal routine is especially important.
Understanding the CONTOUR NEXT Meter Display
Your meter’s display communicates information during the testing process.
Depending on the model, you may see:
- Blood glucose results
- Blood-drop prompts
- Battery information
- Time and date
- Error messages
- Memory information
- Target-range indicators
- Meal markers
- Reminder information
The exact symbols and functions depend on your specific CONTOUR NEXT model.
For example, CONTOUR NEXT EZ includes a display, memory button, up/down buttons, and test-strip port.
If a symbol appears that you do not recognize, check your model-specific user guide rather than guessing.
What is SmartLIGHT®?
Some CONTOUR NEXT meters include SmartLIGHT® technology.
SmartLIGHT can provide a visual indication related to the target range programmed into the meter.
This can make it easier to recognize how a result compares with the meter’s configured target range.
However, the light should not be treated as a medical diagnosis.
The actual glucose value remains important, and your healthcare professional determines the appropriate targets for your individual situation.
SmartLIGHT behavior and availability can vary between CONTOUR NEXT models, so check the instructions for your specific device.
Understanding Your Blood Glucose Number
Seeing a number on your meter can sometimes create anxiety.
You may wonder:
“Is this good?”
“Is this too high?”
“Is this too low?”
There is no universal target number that applies to every person.
Your target range is personal.
Your healthcare professional can explain:
- Your usual target range
- When you should test
- What readings should concern you
- When you should repeat a test
- What actions you should take for unusually high or low readings
Never change insulin, medication, or another diabetes treatment solely because of a single unexpected reading unless your healthcare professional has already provided you with an appropriate action plan.
If a result seems unusual, consider whether there could have been a testing issue.
What Should You Do With an Unexpected Result?
An unexpected result does not automatically mean your meter is defective.
First, think about how the test was performed.
Ask yourself:
- Did I wash my hands?
- Were my hands completely dry?
- Did I use the correct test strip?
- Was the strip expired?
- Was the strip stored properly?
- Did I obtain enough blood?
- Did I apply the blood correctly?
- Did I follow the meter’s instructions?
- Was the meter or strip exposed to unsuitable conditions?
If you suspect a testing problem, follow the troubleshooting instructions in your meter’s user guide.
If readings remain unexpectedly high or low, contact your healthcare professional.
If your glucose result is accompanied by concerning symptoms, seek appropriate medical care rather than relying solely on the meter.
Common Mistakes When Using a CONTOUR NEXT Meter
Understanding common mistakes can make testing easier.
Mistake 1: Testing With Wet Hands
Water can interfere with the sample.
Always dry your hands completely after washing.
Mistake 2: Using the Wrong Test Strip
Use only test strips that are specifically designed for your CONTOUR NEXT meter.
Do not substitute another strip simply because it physically fits or looks similar.
Mistake 3: Using Expired Test Strips
Check the expiration information before testing.
Do not use expired strips.
Mistake 4: Leaving the Strip Container Open
Environmental exposure can affect test-strip quality.
If your strips are supplied in a container, close it promptly after removing a strip.
Mistake 5: Applying Too Little Blood
If the meter indicates that the sample is insufficient, follow the model-specific instructions.
Some CONTOUR NEXT models provide Second-Chance Sampling.
Mistake 6: Sharing Lancets
Never share your lancet.
Used lancets can carry bloodborne pathogens.
Mistake 7: Ignoring the User Guide
The CONTOUR NEXT product family includes different models.
A feature available on one model may not be available on another.
Mistake 8: Changing Treatment Based on Guesswork
A meter provides a glucose measurement. It does not independently determine your medication dose or treatment plan.
Follow your healthcare professional’s instructions.
How to Make Finger-Prick Testing More Comfortable
For many people, the finger prick is the part they worry about most.
A few practical habits may help.
Keep your hands warm
Cold fingers can sometimes make obtaining a blood sample more difficult.
Use the correct lancing depth
The correct setting depends on your device and your individual needs. Use the lowest setting that reliably provides an adequate sample, following your lancing-device instructions.
Rotate testing areas
If your healthcare professional has recommended fingertip testing, rotating fingers or testing sites appropriately may reduce repeated irritation in one location.
Avoid excessive squeezing
Aggressive squeezing can be uncomfortable and may make the process more frustrating.
Keep your equipment organized
Searching for supplies when you are ready to test can add unnecessary stress.
Take your time
The goal is a consistent routine—not a race.
How to Care for Your CONTOUR NEXT Blood Glucose Meter
Your meter is an electronic medical device, so it needs appropriate care.
Follow the cleaning and disinfection instructions supplied with your particular model.
General principles include:
- Keep the meter clean.
- Keep the meter dry.
- Avoid excessive moisture.
- Do not immerse the meter in water.
- Protect the test-strip port.
- Do not use unapproved cleaning products.
- Store the meter according to the manufacturer’s instructions.
- Inspect the meter for damage.
The exact cleaning procedure can vary between CONTOUR NEXT models.
For example, the CONTOUR NEXT EZ user guide includes a specific section covering cleaning and disinfecting the meter.
When in doubt, consult the instructions for your model.
Why You Should Protect the Test-Strip Port
The test-strip port is where the strip connects with the meter.
Keep this area clean and dry.
Do not pour liquid into the opening.
Do not soak the meter.
Do not attempt aggressive cleaning inside the port.
If you see blood, dirt, or another substance inside the test-strip area, follow the manufacturer’s cleaning instructions or contact the appropriate support resource.
Storing Your CONTOUR NEXT Test Strips
Test strips are an important part of your blood glucose testing system.
Treat them carefully.
Remember:
- Check the expiration date.
- Follow the manufacturer’s storage instructions.
- Keep strips protected from unsuitable environmental conditions.
- Close the container promptly when applicable.
- Do not use damaged strips.
- Do not use strips that appear contaminated.
- Do not use a strip if you are unsure whether it has been properly stored.
Good storage habits can become part of your everyday diabetes-management routine.
What is a Control Solution Test?
A control solution test is different from a blood glucose test.
A normal blood glucose test uses your blood.
A control solution test uses an appropriate control solution to check aspects of the testing system.
The exact control-test procedure depends on the CONTOUR NEXT model and the manufacturer’s instructions.
A general control-solution procedure may involve:
- Preparing the meter.
- Inserting an appropriate test strip.
- Selecting or identifying control testing if required by the model.
- Applying the recommended control solution.
- Waiting for the result.
- Comparing the result with the applicable control range.
Always use the control solution recommended for your specific system.
Do not use a control-solution result to make insulin or medication decisions.
When Might a Control Test Be Useful?
Follow your manufacturer’s instructions regarding when control testing is appropriate.
A control test may be useful when you want to check the testing system or when troubleshooting an unexpected result.
For example, if you are repeatedly receiving results that do not make sense, reviewing your technique, strip storage, expiration dates, and meter condition is important.
If appropriate for your system, a control solution test may be part of that troubleshooting process.
However, if you are experiencing symptoms or have a concerning glucose result, contact your healthcare professional rather than relying only on a control test.
CONTOUR NEXT and Smartphone Connectivity
Not every CONTOUR NEXT meter has the same connectivity features.
Some models, including CONTOUR NEXT ONE and CONTOUR NEXT GEN, support Bluetooth connectivity with the CONTOUR DIABETES app.
The CONTOUR NEXT EZ has different capabilities and does not provide the same Bluetooth app-pairing function.
Ascensia provides model-specific instructional videos for CONTOUR NEXT GEN, CONTOUR NEXT ONE, CONTOUR NEXT EZ, and the CONTOUR DIABETES app.
If your model supports app connectivity, pairing can provide a convenient way to transfer and review readings.
How Smartphone Connectivity Can Help
For compatible meters, automatic synchronization can reduce the need to manually record every reading.
Depending on the supported meter and app functions, you may be able to review:
- Blood glucose readings
- Trends
- Notes
- Meal information
- Reminders
- Other diabetes-management information
This can make it easier to discuss your readings with your healthcare professional.
However, app features can change, and compatibility requirements may vary.
Always follow the current instructions for your specific meter and smartphone.
What If Your Meter Will Not Connect to Your Phone?
If you have a compatible CONTOUR NEXT meter and experience connectivity problems, check the basics first.
Make sure:
- Bluetooth is enabled when required.
- Your meter is compatible with the app.
- The app is installed correctly.
- The app is updated when appropriate.
- The meter has sufficient battery power.
- The meter and smartphone are near each other.
- The meter has been paired correctly.
- You are following the current app instructions.
Ascensia provides dedicated resources covering app setup and meter pairing.
If the issue persists, refer to the manufacturer’s support resources for further assistance.
CONTOUR NEXT Blood Glucose Monitoring System: A Simple Daily Routine
If you want an easy way to remember the process, use this sequence:
Wash → Prepare → Insert → Prick → Apply → Read → Record → Dispose
Wash
Wash and dry your hands.
Prepare
Prepare your meter, test strip, lancing device, and new lancet.
Insert
Insert the compatible CONTOUR NEXT test strip.
Prick
Use your lancing device to obtain the blood sample.
Apply
Touch the sample area of the test strip to the blood.
Read
Wait for the meter to display the result.
Record
Record or synchronize the result when appropriate.
Dispose
Remove the used strip and safely dispose of the lancet.
Once you practice this sequence several times, it can become second nature.
How Often Should You Check Your Blood Glucose?
There is no single testing schedule that is right for everyone.
Your recommended testing frequency can depend on:
- Type of diabetes
- Medications
- Insulin use
- Treatment goals
- Meal patterns
- Exercise
- Pregnancy
- Illness
- Other medical conditions
- Your healthcare professional’s recommendations
Some people may be instructed to test before meals, after meals, at bedtime, or at other specific times.
Others may have a different monitoring plan.
Follow the testing schedule provided by your healthcare professional.
Do not increase or decrease your testing frequency solely because another person tests more or less frequently.
Why Consistent Testing Can Be Helpful
Blood glucose is not a fixed number.
It changes throughout the day.
Food, physical activity, medication, stress, illness, sleep, and many other factors can affect glucose levels.
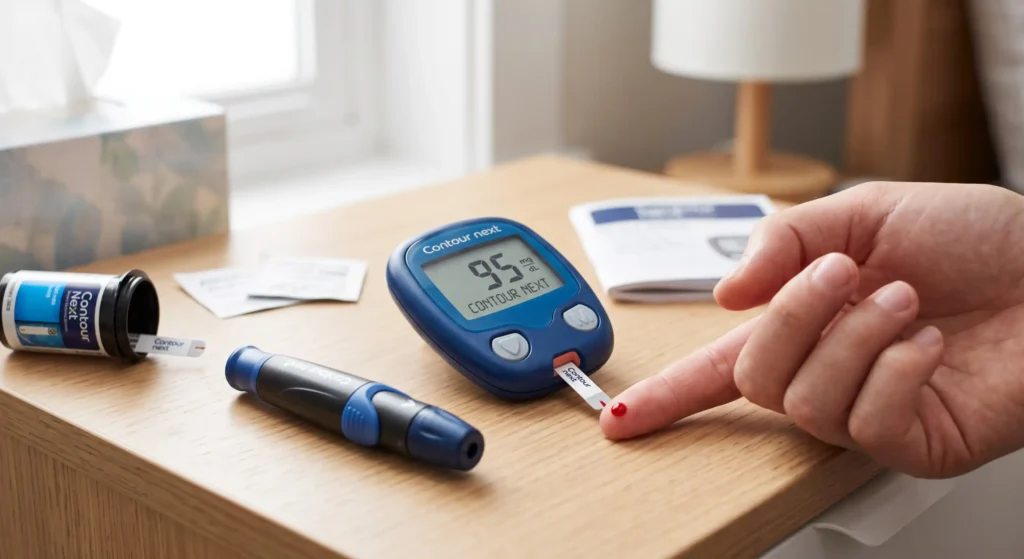
A consistent testing routine can help you and your healthcare team identify patterns.
For example, a series of readings might show that your glucose is regularly different:
- Before breakfast
- After a particular meal
- Before exercise
- After exercise
- At bedtime
Patterns can be more informative than one isolated number.
What Should You Write Down With a Blood Glucose Reading?
You do not necessarily need to create a long diary for every test.
However, useful context can include:
Time: When was the test taken?
Meal: Was it before or after eating?
Activity: Had you recently exercised?
Medication: Was medication taken according to your prescribed plan?
Symptoms: Did you feel different from usual?
Special circumstances: Were you sick, traveling, unusually stressed, or experiencing another situation that might affect your routine?
These details can help your healthcare professional understand your readings more effectively.
How to Use the CONTOUR NEXT Meter With Confidence
Confidence comes with repetition.
Your first few tests may feel slow.
You may double-check every step.
You may wonder whether you inserted the strip correctly or whether you have enough blood.
That is completely understandable.
Instead of trying to memorize everything at once, focus on the core routine.
First, learn the equipment.
Know your meter, test strips, and lancing device.
Second, learn the preparation.
Wash and dry your hands.
Third, learn the testing sequence.
Insert → Blood sample → Apply → Result.
Fourth, learn the care routine.
Dispose of used supplies and store your equipment appropriately.
Fifth, learn when to ask for help.
You don’t have to handle every challenge on your own.
CONTOUR NEXT Blood Glucose Monitoring System How to Use: Troubleshooting Guide
Problem: The meter does not turn on
Check whether:
- The test strip is inserted correctly.
- The meter has sufficient battery power.
- The strip is appropriate for the meter.
If the problem continues, consult the user guide for your specific model.
Problem: The meter says there is not enough blood
Follow the on-screen instructions.
If your model supports Second-Chance Sampling, use it according to the manufacturer’s instructions.
If additional blood cannot be added, follow the instructions for your specific meter.
Problem: You cannot get enough blood
Consider:
- Washing and drying your hands properly.
- Warming your hands if they are cold.
- Reviewing your lancing technique.
- Checking the lancing-device depth setting according to the manufacturer’s instructions.
If this continues to be a problem, ask a healthcare professional for guidance.
Problem: The result seems unusually high or low
Do not immediately assume the meter is faulty.
Review:
- Hand cleanliness
- Hand dryness
- Test-strip compatibility
- Strip expiration
- Strip storage
- Sample size
- Testing technique
If the result remains unexpected, follow your healthcare professional’s instructions.
Problem: The meter displays an error message
Do not guess what the error means.
Check the user guide supplied with your exact model.
Different models can use different messages, symbols, or troubleshooting procedures.
CONTOUR NEXT EZ: Important Model-Specific Information
The CONTOUR NEXT EZ is one member of the CONTOUR NEXT family.
Its official user guide identifies several components, including:
- Display
- Up/down buttons
- Memory button
- Test-strip port
It is designed to use CONTOUR NEXT blood glucose test strips.
The guide also describes Basic and Advanced modes, allowing users to access different meter features and settings.
Because this article covers the CONTOUR NEXT family generally, do not assume every feature described here is available on the CONTOUR NEXT EZ.
Always check the exact model name printed on your meter.
CONTOUR NEXT ONE and CONTOUR NEXT GEN
CONTOUR NEXT ONE and CONTOUR NEXT GEN are other models in the family.
Certain versions provide features such as:
- Bluetooth connectivity
- CONTOUR DIABETES app integration
- SmartLIGHT
- Second-Chance Sampling
- Additional result-management features
The manufacturer provides separate instructional resources for these models.
This is why identifying your exact meter before following model-specific instructions is important.
Why You Should Read the User Guide
Online articles can provide useful educational information, but your meter’s official instructions are the primary source for operating that specific device.
The user guide can tell you:
- Which strips are compatible
- How to insert the strip
- How to use your lancing device
- What display symbols mean
- How to perform a control test
- How to clean the meter
- How to change settings
- How to troubleshoot errors
- How to care for the device
- What warnings and precautions apply
Ascensia also provides instructional videos covering blood glucose testing for several CONTOUR NEXT models.
Safety Tips for Home Blood Glucose Testing
Safety should always come first.
Do not share your lancet
A lancet is intended for single-person use.
Do not share your lancing device
Unless specifically designed and approved for appropriate multiple-patient use under proper infection-control procedures, personal lancing devices should not be shared.
Keep used lancets contained
Use an appropriate sharps disposal method.
Keep test strips protected
Follow the manufacturer’s storage requirements.
Keep your meter dry
Avoid soaking or exposing it to excessive moisture.
Do not use damaged equipment
If your meter or supplies appear damaged, consult the manufacturer’s instructions.
Follow your healthcare professional’s treatment plan
A glucose reading should be interpreted in the context of your individual care plan.
How Families Can Help Someone Learning to Test
Sometimes the person learning to use a blood glucose meter is not the only person involved.
A family member, caregiver, or partner may also be learning the routine.
The best support is often calm and practical.
Instead of saying:
“You’re doing it wrong.”
Try:
“Let’s check the instructions together.”
Blood glucose testing can already feel emotionally tiring.
A supportive approach can make the routine less stressful.
Caregivers should also follow appropriate infection-control practices and should never share personal lancets or testing equipment inappropriately.
Helping Older Adults Learn the CONTOUR NEXT System
Older adults may appreciate a slower, simpler teaching approach.
Consider breaking the process into small steps:
- Identify the meter.
- Identify the correct test strip.
- Wash and dry hands.
- Prepare the lancet.
- Insert the strip.
- Obtain the sample.
- Apply the sample.
- Read the result.
- Record the result.
- Dispose of used supplies.
A printed reminder near the testing area may be useful if appropriate.
The objective is not to memorize technical terminology.
It is to make the process familiar.
Teaching Someone Who Is Newly Diagnosed With Diabetes
Being diagnosed with diabetes can bring many emotions.
There may be questions about food, medication, exercise, appointments, and blood glucose monitoring—all at the same time.
Learning CONTOUR NEXT blood glucose monitoring system how to use can feel like one more thing to remember.
Take it one step at a time.
First learn how to perform one test correctly.
Then practice.
Then learn how to review the result.
Then learn how to recognize patterns.
You do not need to understand every feature of your meter on day one.
How Alfa Healthcare Supply Inc. Can Support Your Medical Supply Needs
Alfa Healthcare Supply Inc. is a medical supply company serving customers with healthcare and durable medical equipment needs.
For people looking for diabetes-management supplies, having access to appropriate products can make everyday care more convenient.
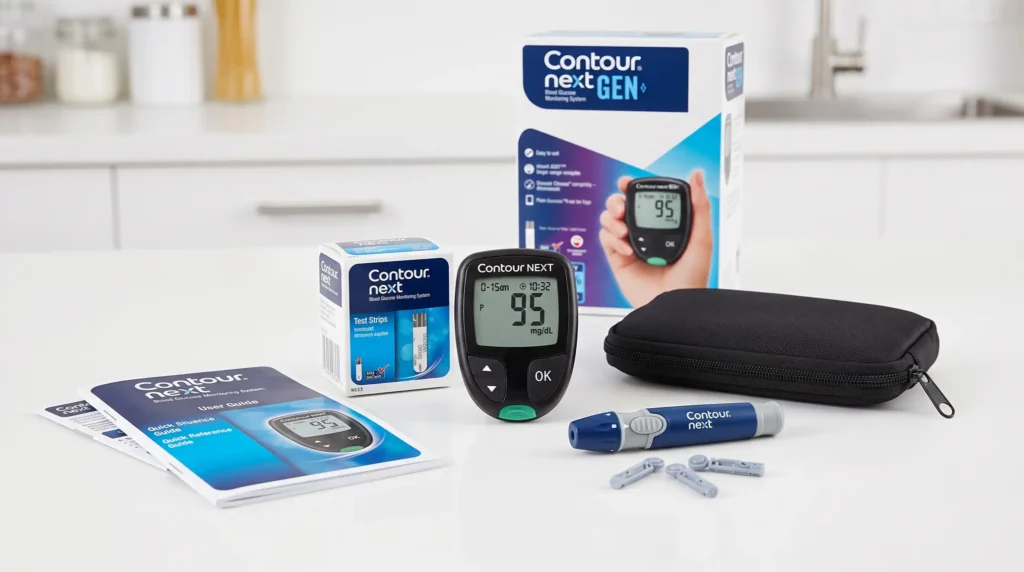
The important thing is to choose supplies that match your healthcare needs and your specific device.
If you are shopping for a CONTOUR NEXT blood glucose monitoring system or related diabetes supplies, confirm the exact model and compatibility before ordering.
You can visit Alfa Healthcare Supply Inc. to explore its healthcare supply resources.
A Quick CONTOUR NEXT Testing Checklist
Before testing:
- Wash your hands.
- Dry your hands completely.
- Prepare the meter.
- Check the test strip.
- Confirm the strip is compatible.
- Check the expiration information.
- Prepare a new lancet.
- Prepare the lancing device.
During testing:
- Insert the test strip correctly.
- Wait for the blood-sample prompt.
- Obtain a blood sample.
- Apply blood to the test strip.
- Wait for the result.
- Follow the meter’s instructions if the sample is insufficient.
After testing:
- Review the result.
- Record or synchronize it if appropriate.
- Remove the used test strip.
- Dispose of the lancet safely.
- Store the meter and supplies appropriately.
A 30-Second Reminder
If you need a very short version of CONTOUR NEXT blood glucose monitoring system how to use, remember:
1. Wash your hands.
2. Dry them completely.
3. Prepare a compatible test strip.
4. Insert the strip into the meter.
5. Prepare a fresh lancet.
6. Obtain a fingertip blood sample.
7. Apply the blood to the strip.
8. Wait for the reading.
9. Record or sync the result if appropriate.
10. Dispose of used supplies safely.
That’s the basic routine.
Building a Blood Glucose Testing Habit
- The most useful glucose meter is one you can comfortably incorporate into your daily routine.
- At first, testing may interrupt your day.
- You may need to stop, find your supplies, wash your hands, prepare the lancet, and check the meter.
- After a while, the routine can become much more natural.
- Try keeping your supplies organized.
- Keep your meter where it is appropriate and convenient.
- Know where your test strips are stored.
- Keep fresh lancets available.
- Follow your healthcare professional’s testing schedule.
- And give yourself permission to take your time while learning.
- You are learning a skill that can become part of your everyday diabetes-management routine.
Final Thoughts: CONTOUR NEXT Blood Glucose Monitoring System How to Use
Understanding CONTOUR NEXT blood glucose monitoring system how to use does not have to be complicated.
The process begins with good preparation:
Clean hands. Correct supplies. Fresh lancet. Compatible test strip.
Then comes the actual test:
Insert. Prick. Apply. Wait. Read.
Finally, complete the routine:
Record. Dispose. Store.
The CONTOUR NEXT family includes several models, so some features and instructions differ. CONTOUR NEXT EZ, CONTOUR NEXT ONE, and CONTOUR NEXT GEN should not automatically be treated as identical devices. Ascensia Diabetes Care offers separate user guides and instructional materials for each of its blood glucose monitoring models.
Most importantly, your glucose meter is a tool for monitoring—not a replacement for personalized medical care. Your healthcare professional can help you determine when to test, what your individual target range should be, and what to do when your readings are outside that range.
If you are just beginning, remember that confidence comes with practice. The first few tests may take longer. You may make mistakes. You may need to reread the instructions.
That’s okay.
Take one step at a time.
With the right supplies, proper technique, and a consistent routine, using a CONTOUR NEXT blood glucose monitoring system can become a manageable part of everyday diabetes care.
For healthcare and medical supply resources, visit Alfa Healthcare Supply Inc..
Frequently Asked Questions About CONTOUR NEXT Blood Glucose Monitoring System How to Use
1. How do I use the CONTOUR NEXT blood glucose monitoring system?
Start by washing and drying your hands. Prepare a compatible CONTOUR NEXT test strip and a new lancet. Insert the test strip into the meter, obtain a fingertip blood sample using the lancing device, and apply the blood to the test strip. Wait for the meter to display the result, then record or synchronize it if appropriate.
The exact procedure can vary by model.
2. Which test strips does the CONTOUR NEXT meter use?
CONTOUR NEXT meters are designed for compatible CONTOUR NEXT blood glucose test strips. For example, the official CONTOUR NEXT EZ guide specifies the use of CONTOUR NEXT blood glucose test strips.
Always verify compatibility with your exact meter.
3. Do I need to wash my hands before testing?
Yes. Wash your hands with soap and water and dry them completely before testing.
Clean, dry hands are an important part of preparing a blood glucose sample.
4. Where should I get the blood sample?
For routine fingertip testing, use the lancing device according to its instructions.
If you have questions about alternative testing sites, speak with your healthcare professional and consult the instructions for your specific device.
5. What happens if I do not get enough blood?
If your meter indicates that the sample is insufficient, follow the instructions on the meter.
Some CONTOUR NEXT models include Second-Chance Sampling, allowing additional blood to be applied to the same strip within the permitted time.
6. Can I reuse a lancet?
It is recommended to use a fresh lancet for each test according to the manufacturer’s instructions and good infection-control practices.
Never share a lancet with another person.
7. Can I use another brand’s test strips?
Do not assume another brand’s strips will work with your meter.
Use the test strips specified for your CONTOUR NEXT model.
8. Why should I dry my hands before testing?
Water remaining on your fingertips can affect the blood sample.
Dry hands also help ensure that the sample is obtained from a clean surface.
9. Can I use the CONTOUR NEXT meter without a smartphone?
Yes, depending on your model.
Some CONTOUR NEXT meters have Bluetooth connectivity and app integration, while other models do not.
You do not need to assume that every CONTOUR NEXT meter requires a smartphone.
10. Does CONTOUR NEXT EZ connect to a smartphone?
The CONTOUR NEXT EZ has different capabilities from Bluetooth-enabled CONTOUR NEXT models and does not provide the same app-pairing function.
Always check your exact model before expecting smartphone connectivity.
11. What is SmartLIGHT?
SmartLIGHT is a feature available on certain CONTOUR NEXT meters that provides a visual indication related to the meter’s configured target range.
Its availability and behavior depend on the model and settings.
12. What is Second-Chance Sampling?
Second-Chance Sampling is a feature available on certain CONTOUR NEXT meters that can allow additional blood to be applied to the same test strip when the first sample is insufficient.
Follow the instructions shown by your particular meter.
13. How should I store CONTOUR NEXT test strips?
Follow the storage instructions supplied with your specific test strips.
Keep them protected from unsuitable environmental conditions, check expiration dates, and close the strip container promptly when applicable.
14. Can I clean my CONTOUR NEXT meter with any disinfectant?
No.
Do not assume that every household cleaner, alcohol product, or disinfectant is safe for your meter.
Follow the cleaning and disinfection instructions for your specific model.
15. What should I do if the result does not look right?
Review your testing technique and supplies.
Check your hands, test-strip compatibility, expiration date, storage conditions, and sample collection.
If the result remains unexpected, follow your healthcare professional’s instructions.
If you have concerning symptoms, seek appropriate medical advice.
16. How often should I check my blood glucose?
Your healthcare professional should recommend the testing schedule that is appropriate for you.
The frequency can depend on your diabetes type, medication, insulin use, treatment plan, and other factors.
17. Should I change my medication based on one reading?
Do not make medication changes based solely on an isolated reading unless your healthcare professional has already given you a specific action plan.
If you are unsure what a result means, contact your healthcare professional.
18. Can children use a CONTOUR NEXT meter?
Whether a particular meter is appropriate for a child depends on the product’s intended use and the child’s healthcare plan.
Parents or caregivers should follow the manufacturer’s instructions and guidance from the child’s healthcare professional.
19. What should I do if the meter displays an error?
Look up the error in the user guide for your exact CONTOUR NEXT model.
Do not guess at the meaning of an unfamiliar error message.
20. Where can I find instructions for my CONTOUR NEXT meter?
Ascensia Diabetes Care provides model-specific user guides and instructional videos for CONTOUR NEXT products.
The official CONTOUR NEXT EZ guide is also available through Ascensia’s resources.
Medical Disclaimer: This article is intended for general educational and informational purposes. It is not a substitute for diagnosis, treatment, or personalized medical advice. Always follow the instructions supplied with your specific CONTOUR NEXT meter and test strips and consult your healthcare professional for questions about blood glucose targets, testing frequency, medication, insulin, or treatment decisions.