


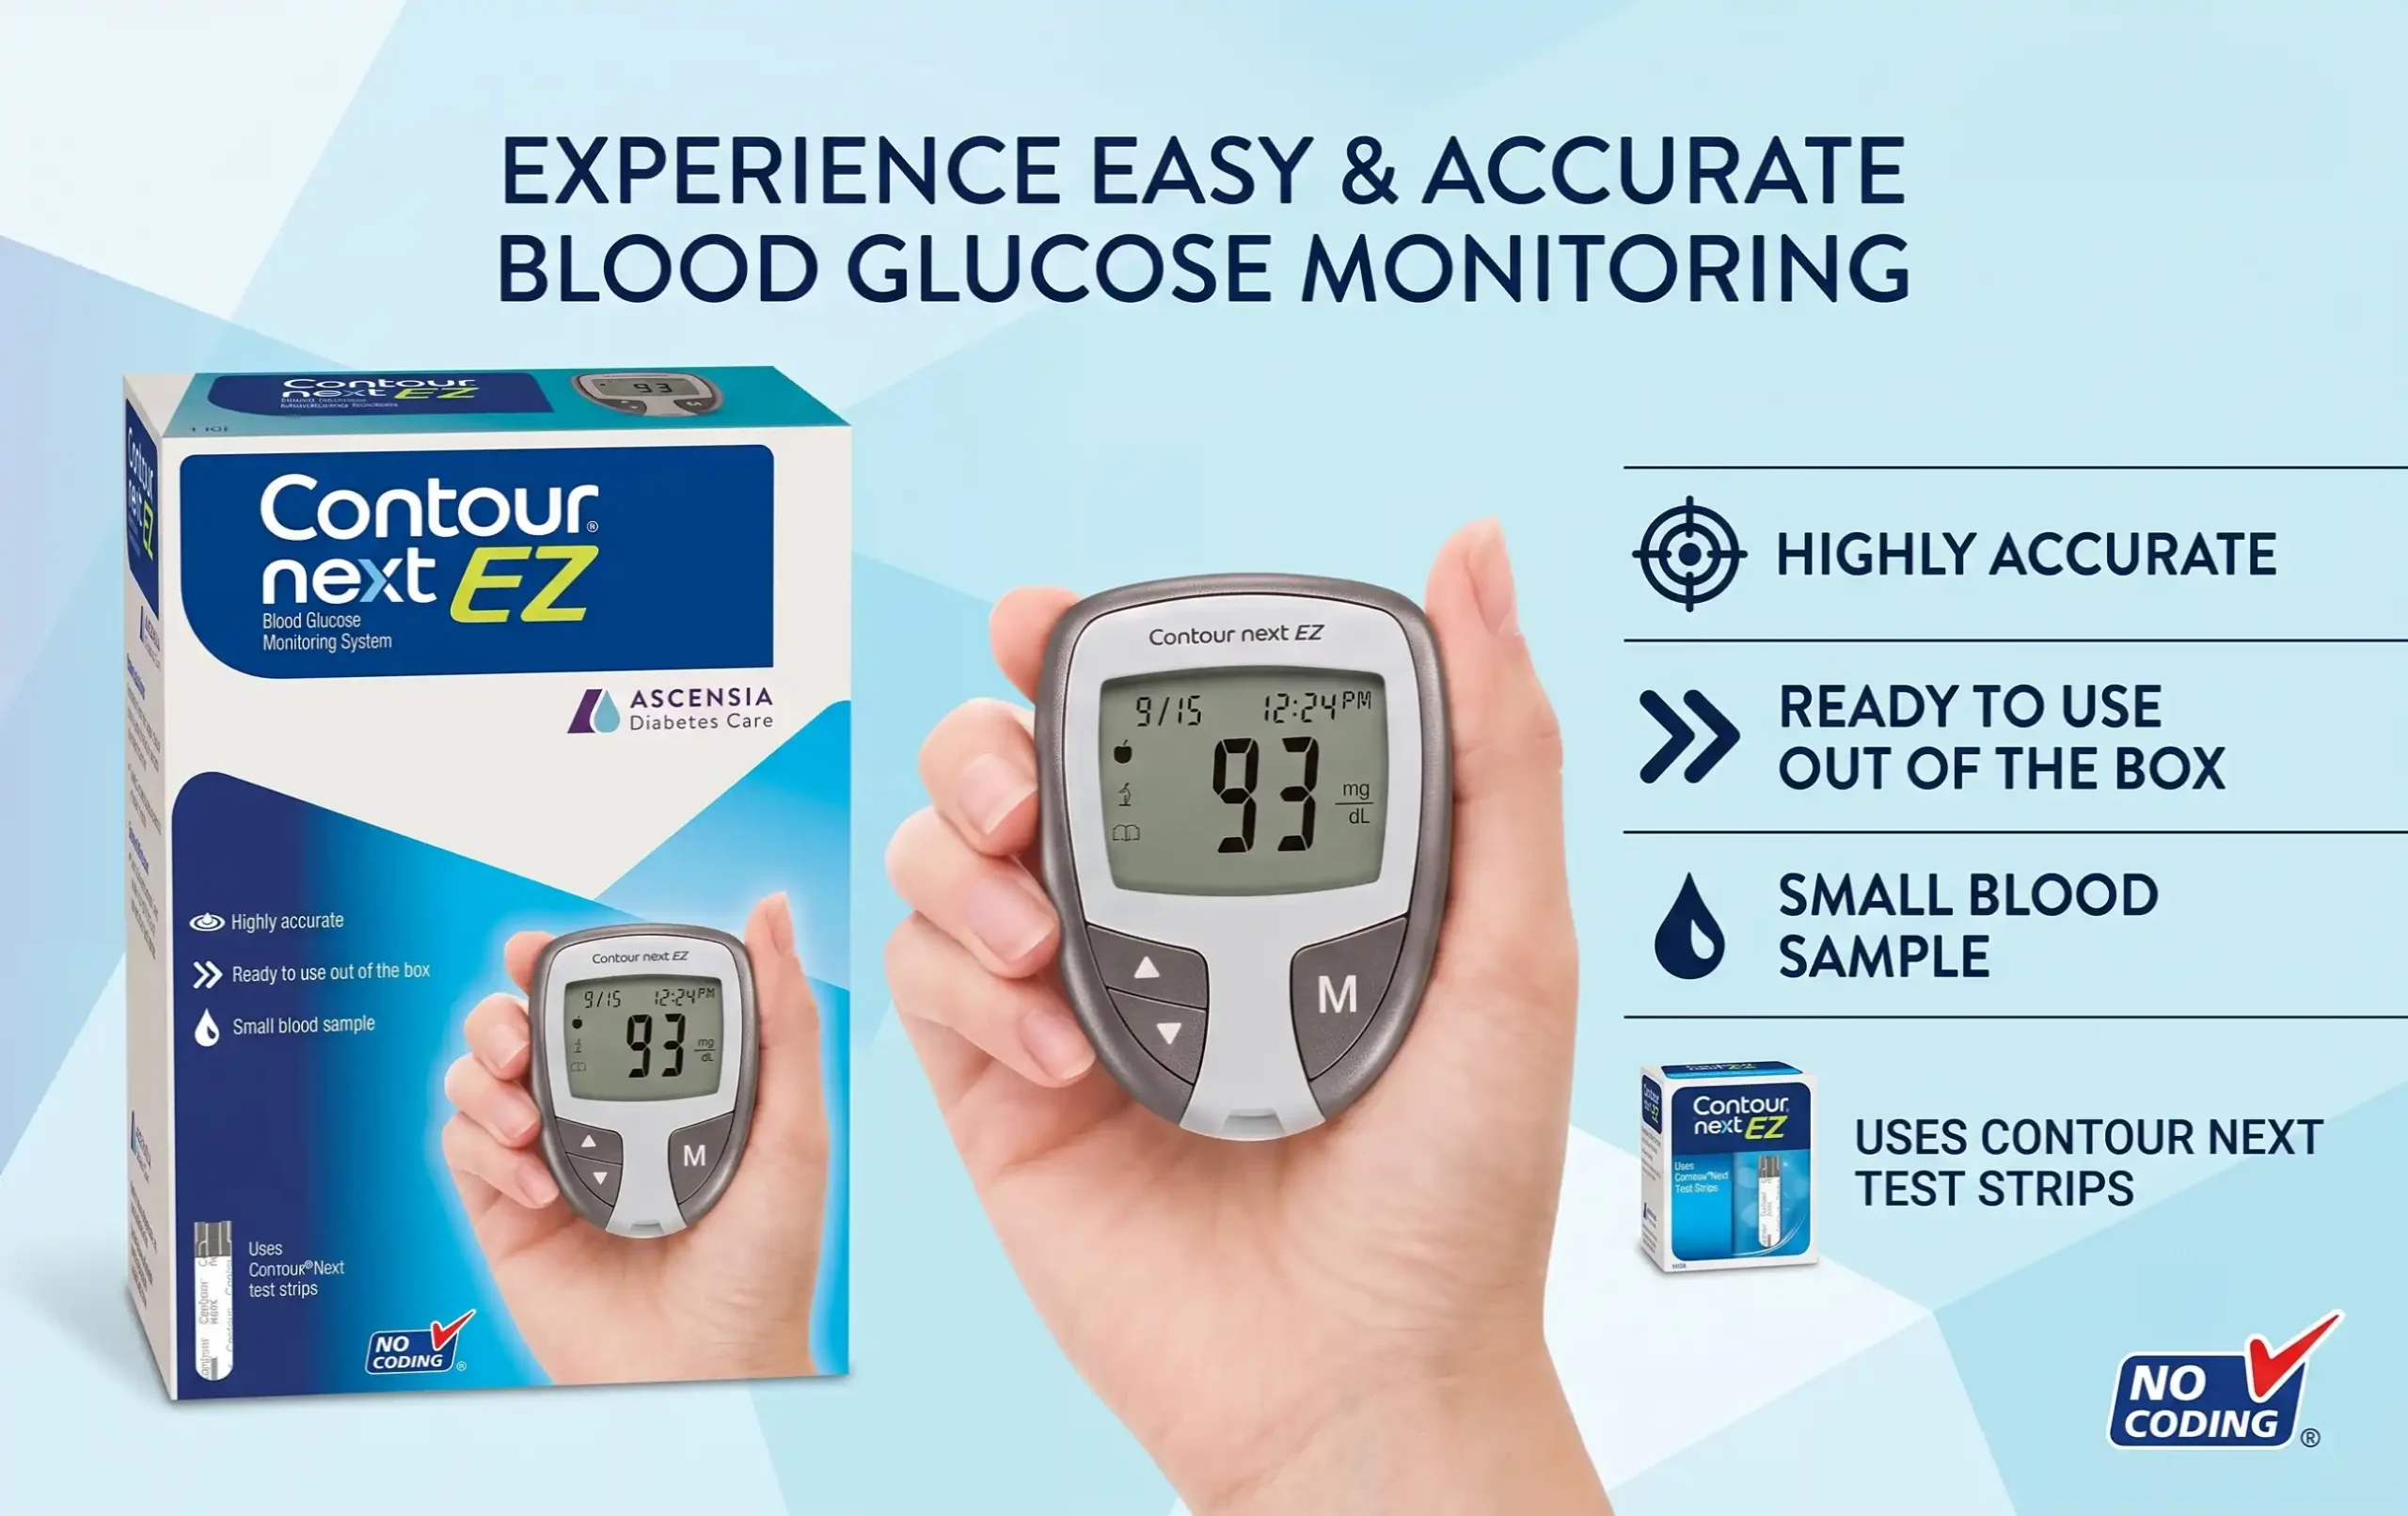
Managing blood glucose can feel complicated when you are first learning how to use a glucose meter. The good news is that the CONTOUR®NEXT blood glucose monitoring system is designed to make routine blood sugar testing straightforward.
This guide explains contour next blood glucose monitoring system how to use it in simple, easy-to-follow steps. It also covers preparation, fingertip testing, common mistakes, cleaning, test-strip care, and when to discuss an unexpected reading with your healthcare professional.
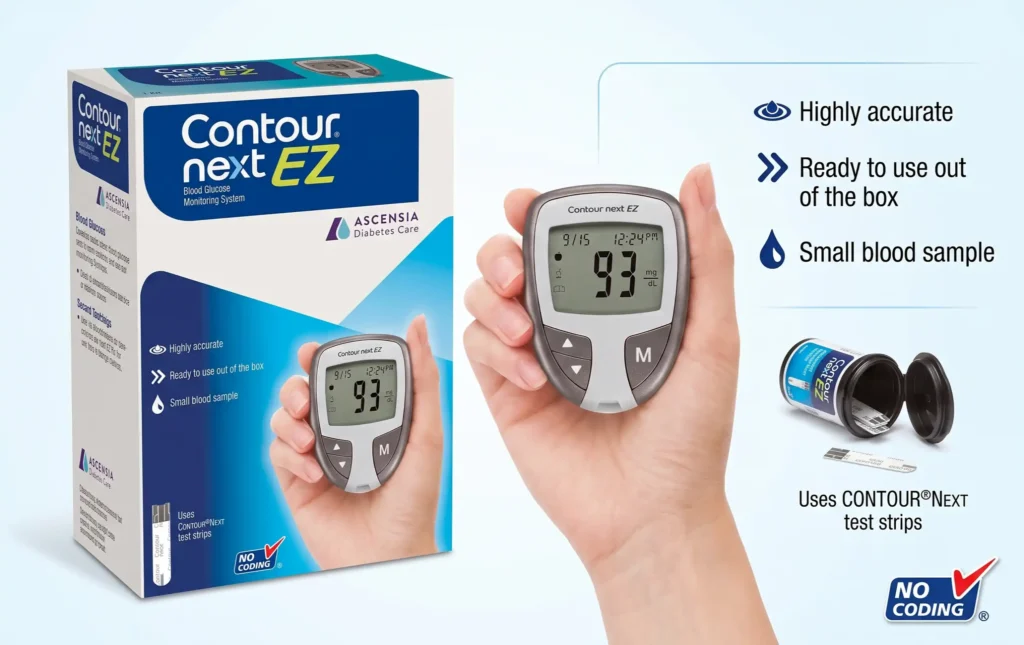
Alfa Healthcare Supply Inc. provides medical and healthcare supplies to help individuals and families manage everyday health needs with greater confidence. Always follow the instructions supplied with your specific CONTOUR®NEXT meter because features can vary between models such as CONTOUR NEXT ONE, CONTOUR NEXT GEN, and CONTOUR NEXT EZ. Ascensia Diabetes Care provides separate user guides and instructional resources for these models.
What is the CONTOUR NEXT Blood Glucose Monitoring System?
The CONTOUR®NEXT Blood Glucose Monitoring System is a blood glucose meter system designed to help people with diabetes measure and monitor their blood sugar levels using a small blood sample. It combines a glucose meter, compatible CONTOUR NEXT test strips, and other testing supplies to make regular blood glucose testing easier and more convenient.
Developed by Ascensia Diabetes Care, the CONTOUR NEXT family focuses on combining accuracy with user-friendly features to support everyday diabetes management.
How Does It Work?
The basic process is simple:
- Insert a compatible CONTOUR NEXT test strip into the meter until it is securely in place.
- Use a lancing device to obtain a small blood sample, usually from the fingertip.
- Apply the blood to the test strip.
- The meter analyzes the sample.
- Your blood glucose reading appears on the screen.
Depending on the CONTOUR NEXT model, additional features may include No Coding® technology, SmartLIGHT® target-range indicators, Second-Chance® Sampling, and Bluetooth® connectivity for syncing readings with the CONTOUR®DIABETES app.
What Is Included?
The exact contents vary by model and package. For example, a CONTOUR NEXT GEN Blood Glucose Monitoring System package includes the CONTOUR NEXT GEN meter, a MICROLET®NEXT lancing device, and 10 MICROLET® lancets. Compatible CONTOUR NEXT test strips are used for blood glucose testing.
Why Do People Use a CONTOUR NEXT System?
Regular blood glucose monitoring can help people understand how their glucose levels change throughout the day and provide useful information for diabetes management. The CONTOUR NEXT system is designed to make this routine easier with a clear display and features intended to simplify testing.
Some connected models can also transfer readings to the CONTOUR DIABETES app, where users can review results and trends and, when supported, share information with healthcare professionals.
Before You Begin: What Do You Need?
Before using the CONTOUR®NEXT blood glucose monitoring system, gather all the supplies you need and make sure everything is clean, undamaged, and ready for use. Having your supplies prepared first can make blood glucose testing feel much easier and more comfortable.
The exact contents can vary depending on the CONTOUR NEXT model and package. A typical system may include the following:
1. CONTOUR NEXT Blood Glucose Meter
This is the electronic device that analyzes your blood sample and displays your blood glucose result. Different models, such as CONTOUR NEXT, CONTOUR NEXT ONE, and CONTOUR NEXT GEN, may have different features, so always follow the instructions for your specific model.
2. CONTOUR NEXT Blood Glucose Test Strips
Test strips are used to collect the small blood sample that the meter analyzes. Use only test strips that are compatible with your CONTOUR NEXT meter. Check the expiration date and store the product according to the manufacturer’s recommended guidelines.
3. Lancing Device
The lancing device helps you obtain a small drop of blood, usually from your fingertip. Follow the instructions supplied with your particular lancing device for loading and adjusting it.
4. New Lancet
A lancet is the small, sterile needle used with the lancing device. Use a new lancet each time you test and dispose of the used lancet safely after testing. The manufacturer advises that lancets should not be reused because they are no longer sterile after use.
5. Control Solution
CONTOUR NEXT control solution may be included with some kits or may need to be purchased separately. It is used for quality-control checks to help verify that the meter and test strips are working properly.
You may want to perform a control test when you first start using a meter, open a new supply of strips, or suspect that the meter or strips may not be working correctly. Follow the instructions provided with your specific system.
6. Carrying Case
Many CONTOUR NEXT kits include a carrying case, making it easier to keep the meter and testing supplies together when traveling or testing away from home.
7. User Guide and Quick Reference Guide
Keep these instructions nearby, especially when you are learning how to use your meter. The guides provide model-specific information about testing, troubleshooting, cleaning, and other important safety instructions.
A Few Things to Remember Before Testing
Before you begin:
- Wash your hands with soap and water.
- Dry your hands thoroughly.
- Make sure the test strips you use are compatible with your blood glucose meter.
- Check the test-strip expiration date.
- Use a new lancet.
- Make sure your meter and supplies are clean and undamaged.
- Keep the user guide available if you are unfamiliar with the meter.
- Do not share your meter, lancing device, or lancets with another person. CONTOUR NEXT systems are intended for single-patient use.
A little preparation goes a long way. Once your meter, test strip, lancing device, and lancet are ready, you can move on to the actual blood glucose test with confidence.
Contour Next Blood Glucose Monitoring System How to Use: Step-by-Step
Learning contour next blood glucose monitoring system how to use it does not have to be difficult. Once you understand the basic sequence—prepare your supplies, wash and dry your hands, insert the test strip, obtain a small blood sample, apply the blood, and read the result—It can quickly become a simple and manageable part of your daily routine.
The instructions below are based on manufacturer guidance for CONTOUR®NEXT systems. Because CONTOUR NEXT GEN, CONTOUR NEXT ONE, CONTOUR NEXT EZ, and other models can have different features, always follow the user guide supplied with your specific meter. Ascensia Diabetes Care provides model-specific user guides.
Step 1: Gather Your Testing Supplies
Before you begin, place your supplies on a clean, dry surface.
You will generally need:
- CONTOUR NEXT blood glucose meter
- Compatible CONTOUR NEXT blood glucose test strip
- Lancing device
- New lancet
- Tissue or gauze for afterward
For a CONTOUR NEXT GEN system, the manufacturer identifies the meter, CONTOUR NEXT test strips, and MICROLET NEXT lancing device with a lancet as the basic items needed for testing.
Keeping everything together can make testing faster and less stressful, particularly when you are still learning.
Step 2: Wash and Dry Your Hands
Clean your hands thoroughly with soap and warm water, rinse well, and dry them completely.
This is an important part of preparing for a blood glucose test. Your fingers should be clean and completely dry before obtaining the blood sample. Ascensia’s CONTOUR NEXT GEN testing instructions specifically recommend washing with soap and warm water and drying well before testing.
Simple reminder: Clean hands + dry hands = better preparation for testing.
Step 3: Prepare a New Lancet
Use a fresh, sterile lancet for every blood glucose test.
If you are using the MICROLET NEXT lancing device, prepare it according to the manufacturer’s instructions. This includes inserting the lancet securely, removing its protective cap, replacing the endcap, and selecting an appropriate depth setting.
Choose a depth that provides enough blood without causing unnecessary discomfort. If you are unsure about the appropriate setting, ask your healthcare professional for guidance.
Do not share lancets or lancing devices with anyone else.
Step 4: Insert the CONTOUR NEXT Test Strip
Take one CONTOUR NEXT test strip from its container or package.
Hold the strip with the gray-square end facing toward the meter and insert it firmly into the test-strip port until the meter beeps. The meter will then indicate that it is ready for a blood sample.
Use only test strips designed for your CONTOUR NEXT meter. The manufacturer states that CONTOUR NEXT meters are designed to work with CONTOUR NEXT test strips.
Important
Check the test-strip expiration date before use. Do not use expired materials, as they may contribute to inaccurate results.
Step 5: Prepare Your Fingertip
Once the meter displays the blood-drop symbol, your meter is ready for the blood sample.
Use your prepared lancing device to obtain a small drop of blood from your fingertip.
If you have difficulty obtaining enough blood, follow the instructions for your specific lancing device. Avoid aggressively squeezing your finger.
If testing is uncomfortable, ask your healthcare professional about proper lancing technique and depth settings.
Step 6: Place the Blood Drop on the Test Strip
This is the most important part of the testing process.
Bring the tip of the test strip directly to the blood drop. The strip is designed to draw the blood into the sample area.
Hold the strip in contact with the blood drop until the meter indicates that enough blood has been received. For CONTOUR NEXT GEN, the manufacturer’s instructions state that the meter beeps when the sample has been accepted.
Avoid spreading or smearing the blood across the test strip.
Step 7: Use Second-Chance Sampling if Your Meter Requests More Blood
Some CONTOUR NEXT meters feature Second-Chance® Sampling.
If the meter indicates that the first blood sample was insufficient, you may be able to apply additional blood to the same test strip within the time allowed by the meter.
For CONTOUR NEXT GEN, the manufacturer’s instructions say that when the meter indicates insufficient blood, additional blood can be applied to the same strip within 60 seconds.
This feature can be helpful because it may prevent you from having to discard a strip simply because the first sample was too small.
Important: Follow the instructions displayed by your particular meter because timing and features can vary by model.
Step 8: Wait for Your Blood Glucose Result
After the meter receives an adequate blood sample, it processes the test.
For CONTOUR NEXT GEN and CONTOUR NEXT ONE, the manufacturer describes a 5-second countdown before the blood glucose result is displayed.
Take a moment to review the displayed result.
Depending on your model, the screen may also show information such as:
- Blood glucose value
- Date and time
- Meal marker
- Target-range indicator
Do not make changes to medication or insulin based solely on general information in an online article. Follow the personalized guidance provided by your healthcare professional.
Step 9: Add a Meal Marker When Available
Some CONTOUR NEXT models allow you to add a Meal Marker to your result.
Depending on the model and settings, you may be able to identify a reading as related to:
- Fasting or breakfast
- Lunch
- Dinner
- Overnight
For example, CONTOUR NEXT ONE can suggest a meal marker based on the time of day, which you can review and select on the meter.
Meal markers can provide useful context when reviewing your blood glucose history.
Step 10: Record or Sync Your Result
Keeping track of your readings can help you and your healthcare professional identify patterns over time.
Depending on your CONTOUR NEXT model, readings may be stored in the meter’s logbook. Compatible models can also connect with the CONTOUR DIABETES app, where readings can be reviewed and additional information can be recorded.
You can record information such as:
- Blood glucose result
- Testing time
- Meal information
- Exercise
- Other notes
The goal is not to worry about every individual number, but to create useful information that can help with your overall diabetes-management plan.
Step 11: Remove the Used Test Strip
When testing is complete, remove the used test strip from the meter.
Dispose of the used test strip and lancet safely according to local requirements and the instructions provided by your healthcare professional. Ascensia recommends appropriate disposal of used test strips and lancets as medical waste or according to healthcare-professional guidance.
Quick Summary: How to Use CONTOUR NEXT
The complete process can be remembered with this simple sequence:
Wash → Prepare → Insert → Prick → Apply → Wait → Record → Dispose
- Wash and dry your hands.
- Prepare a new lancet.
- Insert a compatible CONTOUR NEXT test strip.
- Obtain a small blood drop from your fingertip.
- Touch the test-strip tip to the blood.
- Wait for the meter to display the result.
- Record or sync the reading if appropriate.
- Remove and safely dispose of the used strip and lancet.
With practice, these steps can become a familiar routine rather than something that feels complicated.
What If the Meter Says There Is Not Enough Blood?
Do not panic if the meter indicates that the sample is too small.
If your particular CONTOUR NEXT model supports Second-Chance Sampling, follow the meter’s instructions for adding more blood to the same test strip. CONTOUR NEXT GEN, for example, allows additional blood to be applied within the specified time when the meter indicates an insufficient sample.
If you cannot complete the test, remove the strip and start again with a new strip and lancet as appropriate.
What If the Blood Glucose Result Looks Unexpected?
An unexpected result does not necessarily mean that your meter is malfunctioning.
First, think about your testing technique:
- Were your hands clean?
- Were your hands completely dry?
- Was the test strip compatible with your meter?
- Was the strip expired?
- Was the strip stored correctly?
- Was there enough blood for the test?
- Did you follow the meter’s instructions?
If results repeatedly seem unexpected or do not match how you feel, contact your healthcare professional for advice. The manufacturer also recommends considering a control solution test when you suspect the meter may not be working properly or when repeated unexpected results occur.
If you have symptoms of severe high or low blood glucose, follow the emergency or treatment plan provided by your healthcare professional rather than relying on an online guide.
A Few Tips to Make Testing Easier
Using the CONTOUR NEXT blood glucose monitoring system can become much easier once you develop a simple, consistent testing routine. A few small habits can help make testing more comfortable, organized, and less stressful.
1. Keep Your Testing Supplies Together
Store your meter, compatible test strips, lancing device, lancets, and other necessary supplies together. A carrying case can be especially useful when you need to test away from home.
Having everything in one place means you spend less time searching for supplies when it is time to test.
2. Always Wash and Dry Your Hands
Clean hands are an important part of reliable blood glucose testing. Wash your hands with soap and water before testing and dry them completely.
Food, drinks, lotions, or moisture left on your fingers may interfere with the blood sample.
3. Use a Fresh Lancet
Using a new lancet for each test helps maintain good hygiene and can make finger-pricking more comfortable.
Follow the instructions supplied with your lancing device for safe lancet removal and disposal.
4. Rotate Your Fingertips
Repeatedly testing the same spot can make your fingertip sore.
Whenever appropriate, alternate between different fingers and different areas of the fingertip. Ask your healthcare professional about proper lancing techniques if frequent testing causes discomfort.
5. Avoid Excessive Squeezing
After using the lancing device, allow a blood drop to form naturally. Excessive squeezing may make testing uncomfortable.
If you regularly have difficulty obtaining enough blood, discuss your lancing technique or device-depth setting with your healthcare professional.
6. Check Your Test Strips Before Using Them
Before testing, make sure your CONTOUR NEXT test strips:
- Are compatible with your meter
- Have not expired
- Have been stored according to the manufacturer’s instructions
- Are not damaged or contaminated
Using the correct test strips is essential because different glucose meters require specific strips.
7. Keep the Test-Strip Container Closed
If your test strips come in a container, close it promptly after removing a strip. Proper storage helps protect the strips from environmental conditions that could affect their performance.
Always follow the storage instructions supplied with your specific CONTOUR NEXT test strips.
8. Create a Consistent Testing Routine
Testing at the times recommended by your healthcare professional can make it easier to recognize patterns in your blood glucose levels.
Depending on your individual diabetes-care plan, this might include testing before meals, after meals, at bedtime, or at other recommended times.
Do not change your testing schedule without discussing it with your healthcare professional.
9. Record Useful Information
Don’t just record the number. When appropriate, add useful context such as:
- Time of testing
- Before or after a meal
- Exercise
- Medication information
- Any unusual circumstances
Compatible CONTOUR NEXT meters and the CONTOUR DIABETES app may provide features for recording and reviewing this information.
Over time, these details can help you and your healthcare professional understand your blood glucose patterns.
10. Learn Your Meter’s Features
Different CONTOUR NEXT models have different features. Depending on your model, you may have access to features such as Second-Chance® Sampling, SmartLIGHT® target-range indicators, meal markers, reminders, and Bluetooth® connectivity.
Take some time to read your specific user guide. Understanding your meter can make everyday testing feel more natural.
11. Don’t Worry About Making It Perfect
If you are new to blood glucose testing, it may take several attempts to feel comfortable. A missed test, a small blood sample, or an unfamiliar screen does not mean you are doing everything wrong.
Slow down, review the instructions, and try again when appropriate.
The goal is to create a routine that fits naturally into your life.
12. Know When to Ask for Help
If you repeatedly receive unexpected readings, have difficulty using your meter, or are unsure how to respond to a blood glucose result, contact your healthcare professional.
Your doctor, diabetes educator, pharmacist, or other qualified healthcare professional can help you understand your individual testing plan.
A Simple Routine to Remember
Clean hands → Fresh lancet → Correct test strip → Small blood sample → Check result → Record → Dispose safely
With a little practice, the CONTOUR NEXT blood glucose monitoring system can become a familiar part of your everyday diabetes-management routine.
How to Understand the Reading
Your blood glucose target is personal. It can depend on factors such as:
- Diabetes type
- Age
- Medications
- Pregnancy status
- Other health conditions
- Meal timing
- Physical activity
- Your individual treatment plan
For this reason, there is no single blood glucose number that is right for everyone.
Your healthcare professional can tell you what range is appropriate for you and when you should test.
If your meter gives an unexpectedly high or low result, do not immediately assume that something is wrong with your treatment. Consider whether there may have been a testing issue, such as dirty or wet hands, an inadequate sample, or an improperly stored test strip. If the result remains unexpected or does not match how you feel, follow your healthcare professional’s instructions.
What Does the SmartLIGHT Feature Mean?
The SmartLIGHT® feature is a helpful visual indicator available on certain CONTOUR®NEXT blood glucose meters. It uses colored lights to give you a quick indication of how your blood glucose result compares with the target range programmed into your meter.
Instead of looking only at the number on the screen, SmartLIGHT gives you an additional visual cue that can make your results easier to understand at a glance.
How Does SmartLIGHT Work?
After you complete a blood glucose test, the meter compares your result with the target range that has been set on the device.
Depending on the result, the indicator may show:
- Green: Your result is within your configured target range.
- Yellow: Your result is above or below the configured target range.
- Red: Your result is significantly outside the configured target range.
The exact indicator behavior can vary by CONTOUR NEXT model and the target-range settings selected on the meter. Always check your specific user guide for the meaning of the indicators on your device.
Why Is SmartLIGHT Helpful?
Blood glucose numbers can sometimes be difficult to interpret quickly, especially when you are new to glucose monitoring. A simple visual indicator can make it easier to recognize whether a reading falls within your configured range.
For example, if you test before breakfast, you can look at both the numerical result and the SmartLIGHT indicator. Over time, this can help you become more familiar with your blood glucose patterns.
Can SmartLIGHT Tell Me If My Blood Sugar Is Safe?
Not by itself.
SmartLIGHT compares your reading with the target range programmed into the meter. It does not diagnose a medical condition or determine whether a particular blood glucose level is medically safe for you.
Your personal target range should be established with your healthcare professional. Your appropriate range may depend on your diabetes treatment plan, age, medications, and other individual factors.
Never change insulin, medication, food intake, or treatment solely because of the SmartLIGHT color.
What If the SmartLIGHT Color Is Unexpected?
If the indicator does not match what you expected, first look at the actual blood glucose number displayed on the meter.
If the reading seems unusually high or low, consider whether there could have been a testing issue, such as:
- Unwashed or wet hands
- Incorrect test-strip handling
- Expired or improperly stored test strips
- An insufficient blood sample
- Incorrect testing technique
If you repeatedly receive unexpected readings, follow your healthcare professional’s advice and consult the meter’s user guide.
A Simple Way to Remember SmartLIGHT
Think of SmartLIGHT as a quick visual guide—not a diagnosis.
The number tells you your blood glucose result.
SmartLIGHT helps show how that result compares with your configured target range.
Your healthcare professional helps determine what your target range should be.
For anyone learning contour next blood glucose monitoring system how to use, understanding SmartLIGHT can make everyday readings easier to review and understand.
Medical Disclaimer: This information is for general educational purposes and does not replace medical advice. SmartLIGHT behavior and features vary between CONTOUR NEXT models. Always follow the instructions supplied with your specific meter and consult your healthcare professional regarding your personal blood glucose targets.
How to Get More Accurate Blood Glucose Testing
Getting a reliable blood glucose reading is about more than simply using the meter. Small details—such as washing your hands, using the correct test strip, and storing supplies properly—can make your testing routine more consistent.
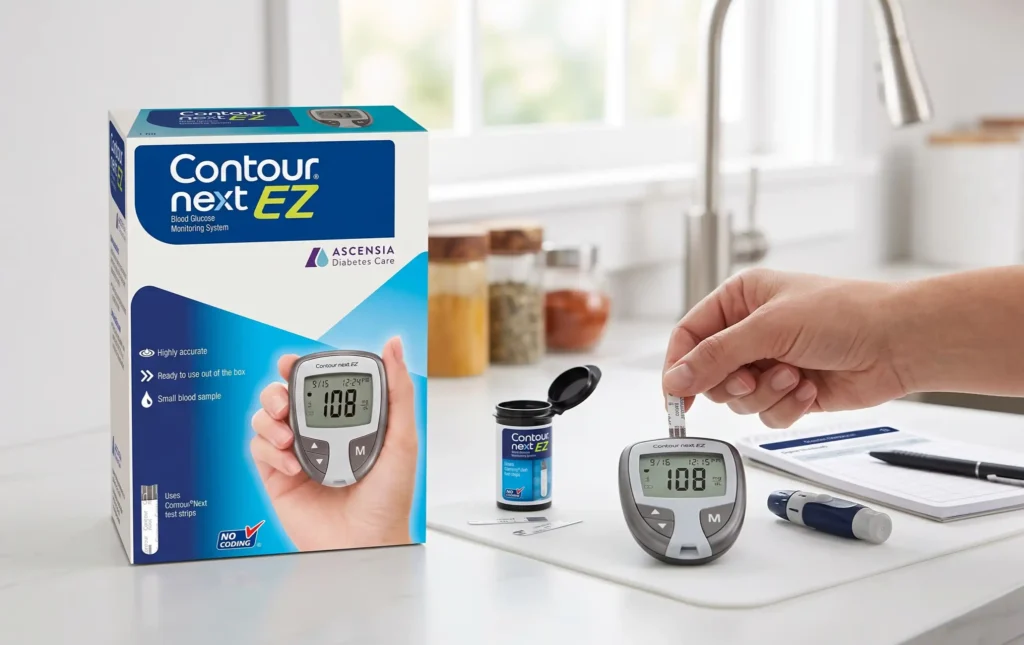
If you are learning contour next blood glucose monitoring system how to use, the following practical tips can help you perform each test correctly and confidently.
1. Always Wash and Dry Your Hands
Before testing, wash your hands with soap and water and dry them completely.
Your fingers can have traces of food, sugar, lotions, or other substances that may interfere with the blood sample. Water left on your fingertips can also dilute the sample.
Simple habit: Wash → Rinse → Dry → Test.
2. Use the Correct CONTOUR NEXT Test Strips
Always use test strips specifically intended for your CONTOUR NEXT meter.
Do not assume that another brand or type of glucose test strip will work with your device. Check the packaging and your meter’s user guide to confirm compatibility.
Using the appropriate test strip is an important part of obtaining a dependable result.
3. Check the Test-Strip Expiration Date
Before inserting a test strip, check that it has not expired.
Do not use strips that are past their expiration date or appear damaged. Follow the manufacturer’s instructions regarding storage and handling.
4. Store Test Strips Properly
Test strips should be protected from conditions that could affect their performance.
Depending on the packaging, this may include exposure to moisture, heat, or other environmental conditions. Keep strips stored according to the instructions supplied with your particular CONTOUR NEXT test-strip package.
If your strips are supplied in a container, close the container promptly after removing a strip.
5. Make Sure Your Hands Are Completely Dry
Clean hands are not enough—they should also be dry.
Even a small amount of water remaining on the fingertip can affect the blood sample. Take a few seconds to make sure your testing finger is completely dry before lancing.
6. Use a New Lancet
Use a fresh lancet when testing.
A new lancet is designed to provide a clean, sharp puncture. Reusing lancets can make the tip less effective and may increase the risk of contamination.
Dispose of used lancets safely in accordance with local requirements and your healthcare professional’s instructions.
7. Choose an Appropriate Lancing Depth
Your lancing device should be set at a depth that produces enough blood without causing unnecessary discomfort.
If you frequently have trouble obtaining a sufficient sample, ask your healthcare professional to review your lancing technique and device settings.
Avoid simply increasing the depth every time you have difficulty getting blood.
8. Avoid Excessive Finger Squeezing
After lancing, allow a blood drop to form naturally whenever possible.
If you need to encourage blood flow, gently massage or stroke the finger toward the puncture site rather than squeezing it aggressively.
If you consistently struggle to obtain enough blood, discuss the problem with your healthcare professional.
9. Apply Blood Correctly
When the meter indicates that it is ready for a sample, bring the tip of the test strip to the blood drop.
Allow the test strip to draw the blood into the sample area. Do not smear blood across the strip.
Follow the instructions displayed by your particular CONTOUR NEXT meter.
10. Use Second-Chance® Sampling When Available
Some CONTOUR NEXT meters include Second-Chance Sampling, which allows additional blood to be applied to the same test strip when the initial sample is insufficient.
If your meter provides this feature, follow the instructions and timing shown on the meter.
This can help reduce wasted test strips when the first blood sample is too small.
11. Test at Consistent Times When Recommended
Your healthcare professional may recommend testing at specific times, such as:
- Before meals
- After meals
- Before bedtime
- When you wake up
- Before or after physical activity
- When you experience symptoms of unusually high or low blood glucose
Following a consistent testing schedule can make it easier to identify patterns.
Do not change your testing schedule or treatment plan without discussing it with your healthcare professional.
12. Record More Than Just the Number
A blood glucose reading becomes more useful when you know the circumstances surrounding it.
When appropriate, record:
- Date and time
- Before or after a meal
- Physical activity
- Medication information
- Any unusual circumstances
- Symptoms you experienced
Compatible CONTOUR NEXT models may allow you to store readings in the meter or synchronize information with the CONTOUR DIABETES app.
13. Keep Your Meter Clean
Keep your meter clean and handle it according to the manufacturer’s cleaning and disinfection instructions.
Do not immerse the meter in water or use cleaning products that are not recommended for your particular model.
If you are unsure how to clean your meter, consult its user guide.
14. Perform a Control Solution Test When Appropriate
A control solution test can help determine whether your meter and test strips are functioning as expected.
You may need to consider a control test when:
- You are using the meter for the first time.
- You open a new supply of test strips.
- You suspect the meter or strips may not be working correctly.
- You repeatedly receive unexpected results.
Use the appropriate CONTOUR NEXT control solution and follow the manufacturer’s instructions.
Important: A control solution result is not a blood glucose result and should not be used to make treatment or insulin-dosing decisions.
15. Pay Attention to Repeated Unexpected Results
One unusual reading does not always mean that there is a problem with your meter.
However, if you repeatedly receive readings that seem inconsistent with your usual results or how you feel, do not ignore the pattern.
Review your testing technique and supplies, and contact your healthcare professional for guidance when appropriate.
If you have symptoms of severe high or low blood glucose, follow the action plan provided by your healthcare professional.
A Simple Accuracy Checklist
Before each test, remember:
Clean hands → Dry hands → Correct strip → Fresh lancet → Proper blood sample → Correct testing technique → Record the result
These small habits can make blood glucose testing more consistent and help you feel more confident using your CONTOUR NEXT system.
When Should You Perform a Control Solution Test?
A control solution test is a quality-check procedure used with compatible CONTOUR®NEXT meters and test strips. Instead of using a blood sample, you apply CONTOUR NEXT control solution to a test strip to check whether the meter and test strips are working together properly.
For someone learning contour next blood glucose monitoring system how to use, understanding when to perform a control test can provide extra confidence in the testing process.
What is a Control Solution Test?
Control solution contains a known amount of glucose and is used instead of blood.
When you perform the test, the meter displays a result. You then compare that result with the control range printed on the test-strip packaging or supplied documentation.
If the result falls within the stated control range, the meter and test strip are generally performing as expected under the conditions of the control test.
A control solution test is not a blood glucose test and should not be used to determine your glucose level or make medication decisions.
When Should You Perform a Control Solution Test?
The manufacturer recommends considering a control solution test in several situations.
1. When You First Start Using Your Meter
Performing a control test when you first begin using your CONTOUR NEXT system can help you become familiar with the testing procedure and confirm that the meter and test strips are working as expected.
It can also give you an opportunity to practice before relying on the meter for routine blood glucose testing.
2. When You Open a New Box or Supply of Test Strips
A control test can be useful when beginning a new supply of test strips.
This provides an additional check that the new strips and your meter are functioning properly together.
Always follow the instructions supplied with your specific CONTOUR NEXT system.
3. If You Suspect the Meter Is Not Working Correctly
If your meter appears damaged, behaves unexpectedly, or produces unusual results, a control test may help determine whether the testing system is functioning properly.
Check the meter and test strips carefully and follow the troubleshooting instructions in your user guide.
4. When You Receive Repeated Unexpected Blood Glucose Results
Suppose you repeatedly receive readings that seem unusual or inconsistent with your normal results.
Before assuming that your meter is inaccurate, review your testing technique and consider performing a control solution test according to the manufacturer’s instructions.
Also check:
- Your hands were clean and dry.
- The test strips are compatible with your meter.
- The strips have not expired.
- The strips were stored correctly.
- The meter and test strips have not been exposed to inappropriate conditions.
If you continue to receive unexpected readings, contact your healthcare professional.
5. When You Want to Practice the Testing Procedure
A control solution test can also help new users become comfortable with inserting a strip, applying a sample, and reading the meter.
Practicing can make routine blood glucose testing feel less intimidating.
How to Perform a Control Solution Test
The exact procedure varies by CONTOUR NEXT model, so use your model-specific user guide. In general, the process involves:
- Wash and dry your hands.
- Prepare the CONTOUR NEXT meter.
- Insert a compatible test strip.
- Confirm that the meter is ready for a sample.
- Apply the appropriate CONTOUR NEXT control solution to the test strip.
- Wait for the meter to display the result.
- Compare the result with the control range provided with your test strips.
- Remove and safely dispose of the used test strip.
Do not apply control solution to a test strip unless your meter’s instructions specifically indicate that a control test is appropriate.
What Does the Control Range Mean?
The control range is the range of results expected when using the specified control solution with the particular test strips.
You can find the appropriate range on the test-strip packaging or related documentation.
If the result is within the control range
The meter and test strip are generally functioning as expected for the control test.
You can proceed with normal blood glucose testing according to your healthcare professional’s instructions.
If the result is outside the control range
Do not use the meter to make diabetes-treatment decisions based on that control result.
First, review the manufacturer’s troubleshooting instructions. Check factors such as:
- Expired test strips
- Incorrect control solution
- Improper storage
- Contaminated control solution
- Incorrect testing technique
- Damaged test strips
- Environmental conditions
If the control result continues to fall outside the expected range, contact the manufacturer’s support service or your healthcare professional for guidance.
Important Control Solution Tips
To obtain a useful control result:
- Use the control solution recommended for your CONTOUR NEXT system.
- Check the control solution’s expiration date.
- Follow the storage instructions.
- Keep the control solution container properly closed when not in use.
- Do not use contaminated control solution.
- Follow the user guide for your specific meter.
- Record or identify control tests appropriately if your meter provides this option.
Some CONTOUR NEXT systems allow you to identify a result as a control test, helping prevent it from being treated as a normal blood glucose reading in the meter’s records.
How Often Should You Perform a Control Test?
There is no universal schedule that applies to every CONTOUR NEXT user.
The appropriate frequency can depend on your meter, test strips, manufacturer’s instructions, and individual circumstances.
Rather than performing control tests unnecessarily, follow the recommendations in your specific CONTOUR NEXT user guide.
If your healthcare professional has given you additional instructions, follow those recommendations.
Control Solution Test vs. Blood Glucose Test
It is important not to confuse the two.
| Control Solution Test | Blood Glucose Test |
| Uses control solution | Uses a blood sample |
| Checks the testing system | Measures your blood glucose |
| Result is compared with a control range | Result is interpreted according to your personal glucose targets |
| Not used for medication decisions | May be used as part of your diabetes-management plan |
| Used for quality checking | Used for routine glucose monitoring |
Most importantly: Never use a control solution result to calculate an insulin dose or change diabetes medication.
Common Mistakes to Avoid
Learning how to use a glucose meter is easier when you know the common mistakes.
Using the wrong test strips
Not every glucose strip works with every glucose meter. CONTOUR NEXT meters are designed for CONTOUR NEXT test strips.
Testing with wet hands
Even a small amount of water can affect the sample.
Applying too little blood
If the meter indicates that the sample is insufficient, follow the meter’s instructions for applying additional blood. Some models provide Second-Chance Sampling.
Using expired strips
Always check the expiration date and storage conditions.
Sharing equipment
Your glucose meter, lancing device, and lancets should not be shared between people.
Ignoring repeated unexpected readings
If readings repeatedly seem inconsistent with your usual results or how you feel, contact your healthcare professional for guidance.
How to Clean Your CONTOUR NEXT Meter
Keeping your CONTOUR®NEXT blood glucose meter clean is an important part of good meter care. Regular cleaning can help remove dirt and residue from the outside of the device and keep it ready for your next blood glucose test.
Because CONTOUR NEXT models can have different cleaning and disinfection requirements, always follow the instructions provided with your specific meter. Do not use a cleaning method simply because it works for another glucose meter.
Why Is Cleaning Your CONTOUR NEXT Meter Important?
Your meter is handled frequently and may come into contact with your hands, testing supplies, or small amounts of blood.
Proper cleaning helps:
- Keep the meter’s exterior clean.
- Remove dirt and residue.
- Support good hygiene.
- Keep the testing area organized.
- Reduce the risk of transferring contaminants between testing sessions.
Cleaning is different from disinfection. If your model requires disinfection, follow the manufacturer’s approved procedure rather than using a household disinfectant at random.
Step-by-Step: How to Clean Your CONTOUR NEXT Meter
Step 1: Gather the Recommended Cleaning Supplies
Before cleaning, check your meter’s user guide for the approved cleaning and disinfection materials.
Do not assume that every household wipe, alcohol product, or disinfectant is safe for your particular CONTOUR NEXT model.
Keep the meter away from water and excessive moisture.
Step 2: Remove the Test Strip
If a test strip is inserted in the meter, remove it before cleaning.
Never clean the meter while a test is in progress.
Dispose of used test strips according to the instructions provided with your testing supplies.
Step 3: Turn Your Attention to the Exterior
Clean the exterior surfaces of the meter according to the manufacturer’s instructions.
Pay attention to areas that are frequently touched, such as:
- The screen
- Buttons
- Outer casing
- Test-strip port area
Avoid allowing liquid to enter openings in the meter.
Step 4: Do Not Immerse the Meter
Never place your CONTOUR NEXT meter in water or another liquid.
A glucose meter contains electronic components and should not be soaked.
Instead, use only the cleaning method recommended for your specific model.
Step 5: Keep the Test-Strip Port Dry
The test-strip port is an especially important area to protect.
Do not pour liquid into the port or attempt to clean inside the opening with excessive moisture.
If you notice dirt, blood, or another substance inside the test-strip port, consult the manufacturer’s instructions or contact customer support rather than attempting an aggressive cleaning method.
Step 6: Allow the Meter to Dry Properly
After cleaning, allow the meter to dry according to the manufacturer’s instructions before using it again.
Do not insert a test strip while the meter or test-strip port is wet.
Moisture around the testing area can interfere with normal operation.
What Should You Avoid When Cleaning the Meter?
When caring for your CONTOUR NEXT meter, avoid practices that could damage the device.
Avoid soaking the meter
Do not immerse it in water, cleaning solution, or disinfectant.
Avoid spraying liquid directly onto the meter
Spraying can allow moisture to enter openings and damage electronic components.
Avoid abrasive cleaners
Harsh or abrasive cleaning products may damage the meter’s surface.
Avoid cleaning while testing
Finish your blood glucose test and remove the used test strip before cleaning.
Avoid inserting wet test strips
Make sure the meter and testing area are dry before beginning another test.
Avoid guessing about disinfectants
Not every disinfectant is approved for every glucose meter. Follow your specific CONTOUR NEXT user guide.
Cleaning vs. Disinfecting: What’s the Difference?
These terms are sometimes used interchangeably, but they are not exactly the same.
Cleaning generally means removing dirt, residue, and visible contamination from a surface.
Disinfection involves using an approved method or product to reduce or eliminate certain microorganisms.
Whether your particular CONTOUR NEXT meter can be disinfected—and which products can be used—depends on the model.
For this reason, always consult the manufacturer’s instructions before disinfecting your meter.
How Often Should You Clean Your CONTOUR NEXT Meter?
The appropriate cleaning frequency depends on your specific CONTOUR NEXT model and how the meter is used.
Rather than following a one-size-fits-all schedule, check the user guide supplied with your meter for the manufacturer’s recommendations.
It is also sensible to clean the exterior whenever you notice visible dirt or residue, using only the approved method.
If your meter is used in a setting where infection-control requirements are particularly important, follow the applicable professional guidance.
What About the Lancing Device?
Your lancing device should be cared for separately from the meter.
Follow the cleaning and maintenance instructions provided with your particular lancing device.
Remember:
- Use a new lancet for each test.
- Do not share your lancing device with another person.
- Dispose of used lancets safely.
- Keep the lancing device clean and dry.
- Follow the manufacturer’s instructions for cleaning.
The lancing device and meter are separate components, so do not assume that the cleaning instructions for one apply to the other.
What If Blood Gets on the Meter?
If blood accidentally gets onto the meter, stop and follow the cleaning and disinfection instructions for your specific CONTOUR NEXT model.
Do not simply pour water or disinfectant over the device.
If blood enters the meter through an opening, or you are unable to clean the area safely, consult the manufacturer’s support resources for your model.
How to Keep Your Meter in Good Condition
Good meter care involves more than cleaning.
Store it properly
Keep the meter and supplies in an appropriate, clean, dry location according to the manufacturer’s storage instructions.
Protect your test strips
Test strips are sensitive to environmental conditions. Store them exactly as directed on their packaging.
Avoid extreme conditions
Do not leave the meter in places where it may be exposed to excessive heat, cold, or moisture.
Keep the user guide
Your model-specific instructions are useful for cleaning, troubleshooting, storage, and other important procedures.
Inspect the meter
If you notice cracks, damage, unusual display behavior, or other problems, stop using the meter if appropriate and consult the manufacturer’s instructions or your healthcare professional.
A Simple Cleaning Routine to Remember
For everyday meter care, remember:
Remove strip → Follow approved cleaning method → Keep openings dry → Allow to dry → Store properly
Taking a few moments to care for your meter can help make your blood glucose testing routine cleaner, more organized, and more comfortable.
Can the CONTOUR NEXT Meter Connect to a Smartphone?
Yes—but smartphone connectivity depends on the specific CONTOUR®NEXT meter model.
Bluetooth®-enabled models such as the CONTOUR NEXT ONE and CONTOUR NEXT GEN can connect wirelessly to the CONTOUR®DIABETES app on a compatible smartphone or tablet. The app can automatically transfer blood glucose readings from the meter, helping you review and track your results more conveniently.
However, not every CONTOUR NEXT meter has Bluetooth. For example, the CONTOUR NEXT EZ does not support app pairing because it does not have Bluetooth connectivity.
How Does the Smartphone Connection Work?
For compatible connected models, the meter communicates with your smartphone through Bluetooth technology.
The general process is:
- Download the CONTOUR DIABETES app from the Apple App Store or Google Play.
- Open the app and follow the setup instructions.
- Turn on Bluetooth on your smartphone.
- Put your compatible CONTOUR NEXT meter into pairing mode.
- Select your meter in the app.
- Confirm the pairing.
- Once connected, your blood glucose readings can automatically sync with the app.
For example, when pairing a CONTOUR NEXT ONE, Ascensia’s instructions direct users to open the app, select Settings → My Meters, choose the CONTOUR NEXT ONE meter, and follow the pairing instructions.
What Can You Do With the CONTOUR DIABETES App?
Depending on your compatible meter and app version, the CONTOUR DIABETES app can help you:
- Automatically store blood glucose readings
- Review your glucose history
- View graphs and trends
- Add notes to readings
- Set testing reminders
- Review readings in relation to target ranges
- Share reports with healthcare professionals or caregivers when you choose to do so
This can be especially helpful if you want to keep your blood glucose information organized without manually writing down every reading.
Is Every Smartphone Compatible?
Not necessarily.
The CONTOUR DIABETES app is designed for compatible Apple iOS and Android devices, but compatibility can vary by device and operating-system version. Ascensia recommends checking its current compatibility information before pairing your meter.
What If My Meter Does Not Connect?
If a compatible CONTOUR NEXT meter is not connecting to your smartphone, check that:
- Bluetooth is enabled on both devices.
- The meter has already been paired with the app.
- Your smartphone is compatible with the app.
- The meter is close to your smartphone.
- The CONTOUR DIABETES app is up to date.
- The meter is turned on when required for synchronization.
Ascensia specifically recommends checking Bluetooth settings, pairing status, device compatibility, and the distance between the meter and mobile device when troubleshooting connectivity.
Why Smartphone Connectivity Can Be Helpful
Managing diabetes often means keeping track of many readings over days and weeks. Automatically transferring results to your smartphone can reduce manual record-keeping and make it easier to see patterns.
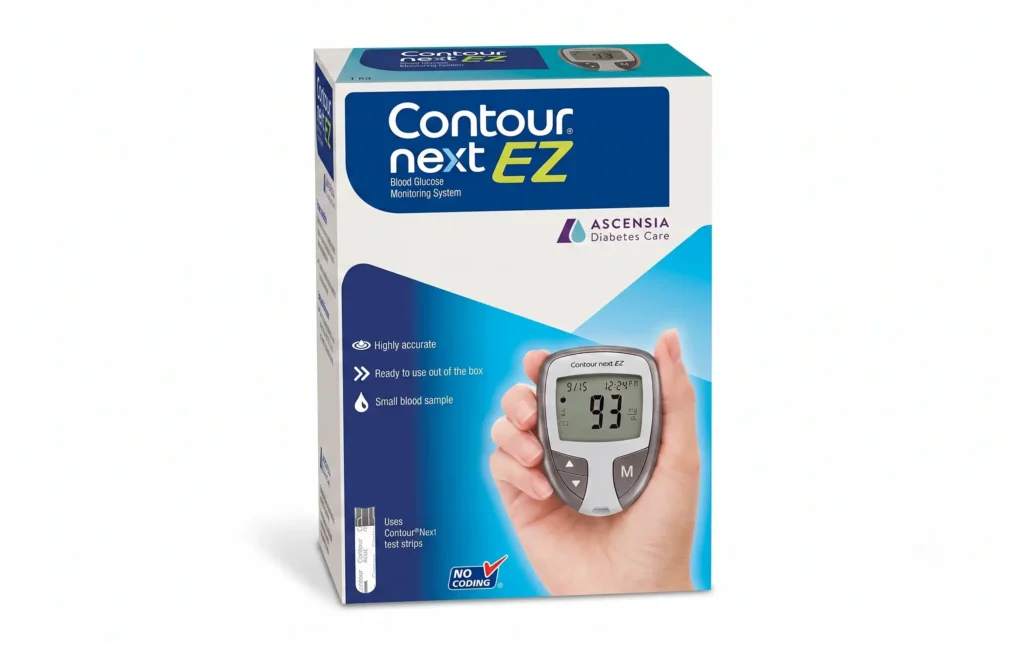
Instead of asking yourself, “What was my reading last Tuesday?”, you can use the app to review your stored results and trends.
A Quick Reminder
CONTOUR NEXT ONE: Bluetooth enabled and can connect to the CONTOUR DIABETES app.
CONTOUR NEXT GEN: Bluetooth enabled and can connect to the CONTOUR DIABETES app.
CONTOUR NEXT EZ: No Bluetooth or app pairing.
So, if you are researching contour next blood glucose monitoring system how to use, first identify your exact meter model. That will tell you whether smartphone connectivity is available and which features you can use.
Medical Disclaimer: This information is for general educational purposes and does not replace medical advice or the manufacturer’s instructions. Smartphone compatibility, app features, and pairing procedures may change. Always check the current Ascensia Diabetes Care instructions for your specific CONTOUR NEXT meter and compatible mobile device.
CONTOUR NEXT Blood Glucose Monitoring System: Quick Checklist
- Wash and completely dry your hands.
- Prepare your CONTOUR NEXT meter.
- Prepare a compatible test strip.
- Load a new lancet into the lancing device.
- Insert the test strip into the meter.
- Use the lancing device to obtain a fingertip blood drop.
- Touch the test-strip tip to the blood sample.
- Wait for the meter to display the result.
- Record or sync the reading if appropriate.
- Remove and safely dispose of the used strip and lancet.
- Follow your healthcare professional’s recommended testing schedule.
A Simple Routine Can Make Blood Sugar Testing Less Stressful
Blood glucose testing can seem intimidating at first. After a few attempts, however, the process often becomes a familiar part of your daily routine.
The most important things are to use the correct supplies, keep your hands and equipment clean, follow your meter’s instructions, record useful results, and stay in communication with your healthcare professional.
If you are using a CONTOUR NEXT blood glucose monitoring system, take your time during the first few tests. Understanding each step can make the process feel much more manageable.
For official model-specific instructions, Ascensia Diabetes Care’s support center provides CONTOUR NEXT guides and how-to resources.
About Alfa Healthcare Supply Inc.
Alfa Healthcare Supply Inc. is a medical equipment and healthcare supply provider serving customers across New York. The company offers a range of healthcare products and supplies designed to support everyday medical needs.
For CONTOUR NEXT products and other blood glucose monitoring supplies, customers can explore the available products through Alfa Healthcare Supply Inc..
Medical Disclaimer: This article is intended for general educational purposes and is not a substitute for medical advice, diagnosis, or treatment. Always follow the instructions supplied with your specific CONTOUR NEXT meter and test strips. For questions about your blood glucose targets, testing schedule, medications, or unusual readings, speak with your doctor, diabetes educator, pharmacist, or other qualified healthcare professional.
Frequently Asked Questions: Contour Next Blood Glucose Monitoring System How to Use
How do I use the CONTOUR NEXT blood glucose monitoring system?
Wash and dry your hands, insert a compatible CONTOUR NEXT test strip into the meter, obtain a fingertip blood sample using a lancing device, touch the strip to the blood drop, and wait for the meter to display your result. Exact steps and features can vary by model, so use the user guide supplied with your meter.
Which test strips work with CONTOUR NEXT meters?
CONTOUR NEXT meters are designed to work with CONTOUR NEXT blood glucose test strips. Always confirm compatibility with your specific meter before using a strip.
Can I use the CONTOUR NEXT meter without the app?
Yes. Compatible CONTOUR NEXT meters can be used directly with the meter. Certain models also provide the option of connecting to the CONTOUR DIABETES app for additional tracking and management features.
How much blood is needed?
The required sample depends on the specific CONTOUR NEXT model and test strip. Follow the meter’s on-screen instructions and user guide rather than trying to estimate the amount yourself.
What should I do if my reading seems wrong?
First, review your testing technique: wash and dry your hands, confirm that the strip is appropriate and not expired, and repeat the test if appropriate. If readings continue to be unexpected, consult your healthcare professional and consider performing a control solution test according to the manufacturer’s instructions.
Can someone else use my CONTOUR NEXT meter?
The CONTOUR NEXT system is intended for use by one person and should not be shared.
Where can I find official CONTOUR NEXT instructions?
Ascensia Diabetes Care provides user guides, quick-reference guides, FAQs, and instructional videos for CONTOUR NEXT models.