


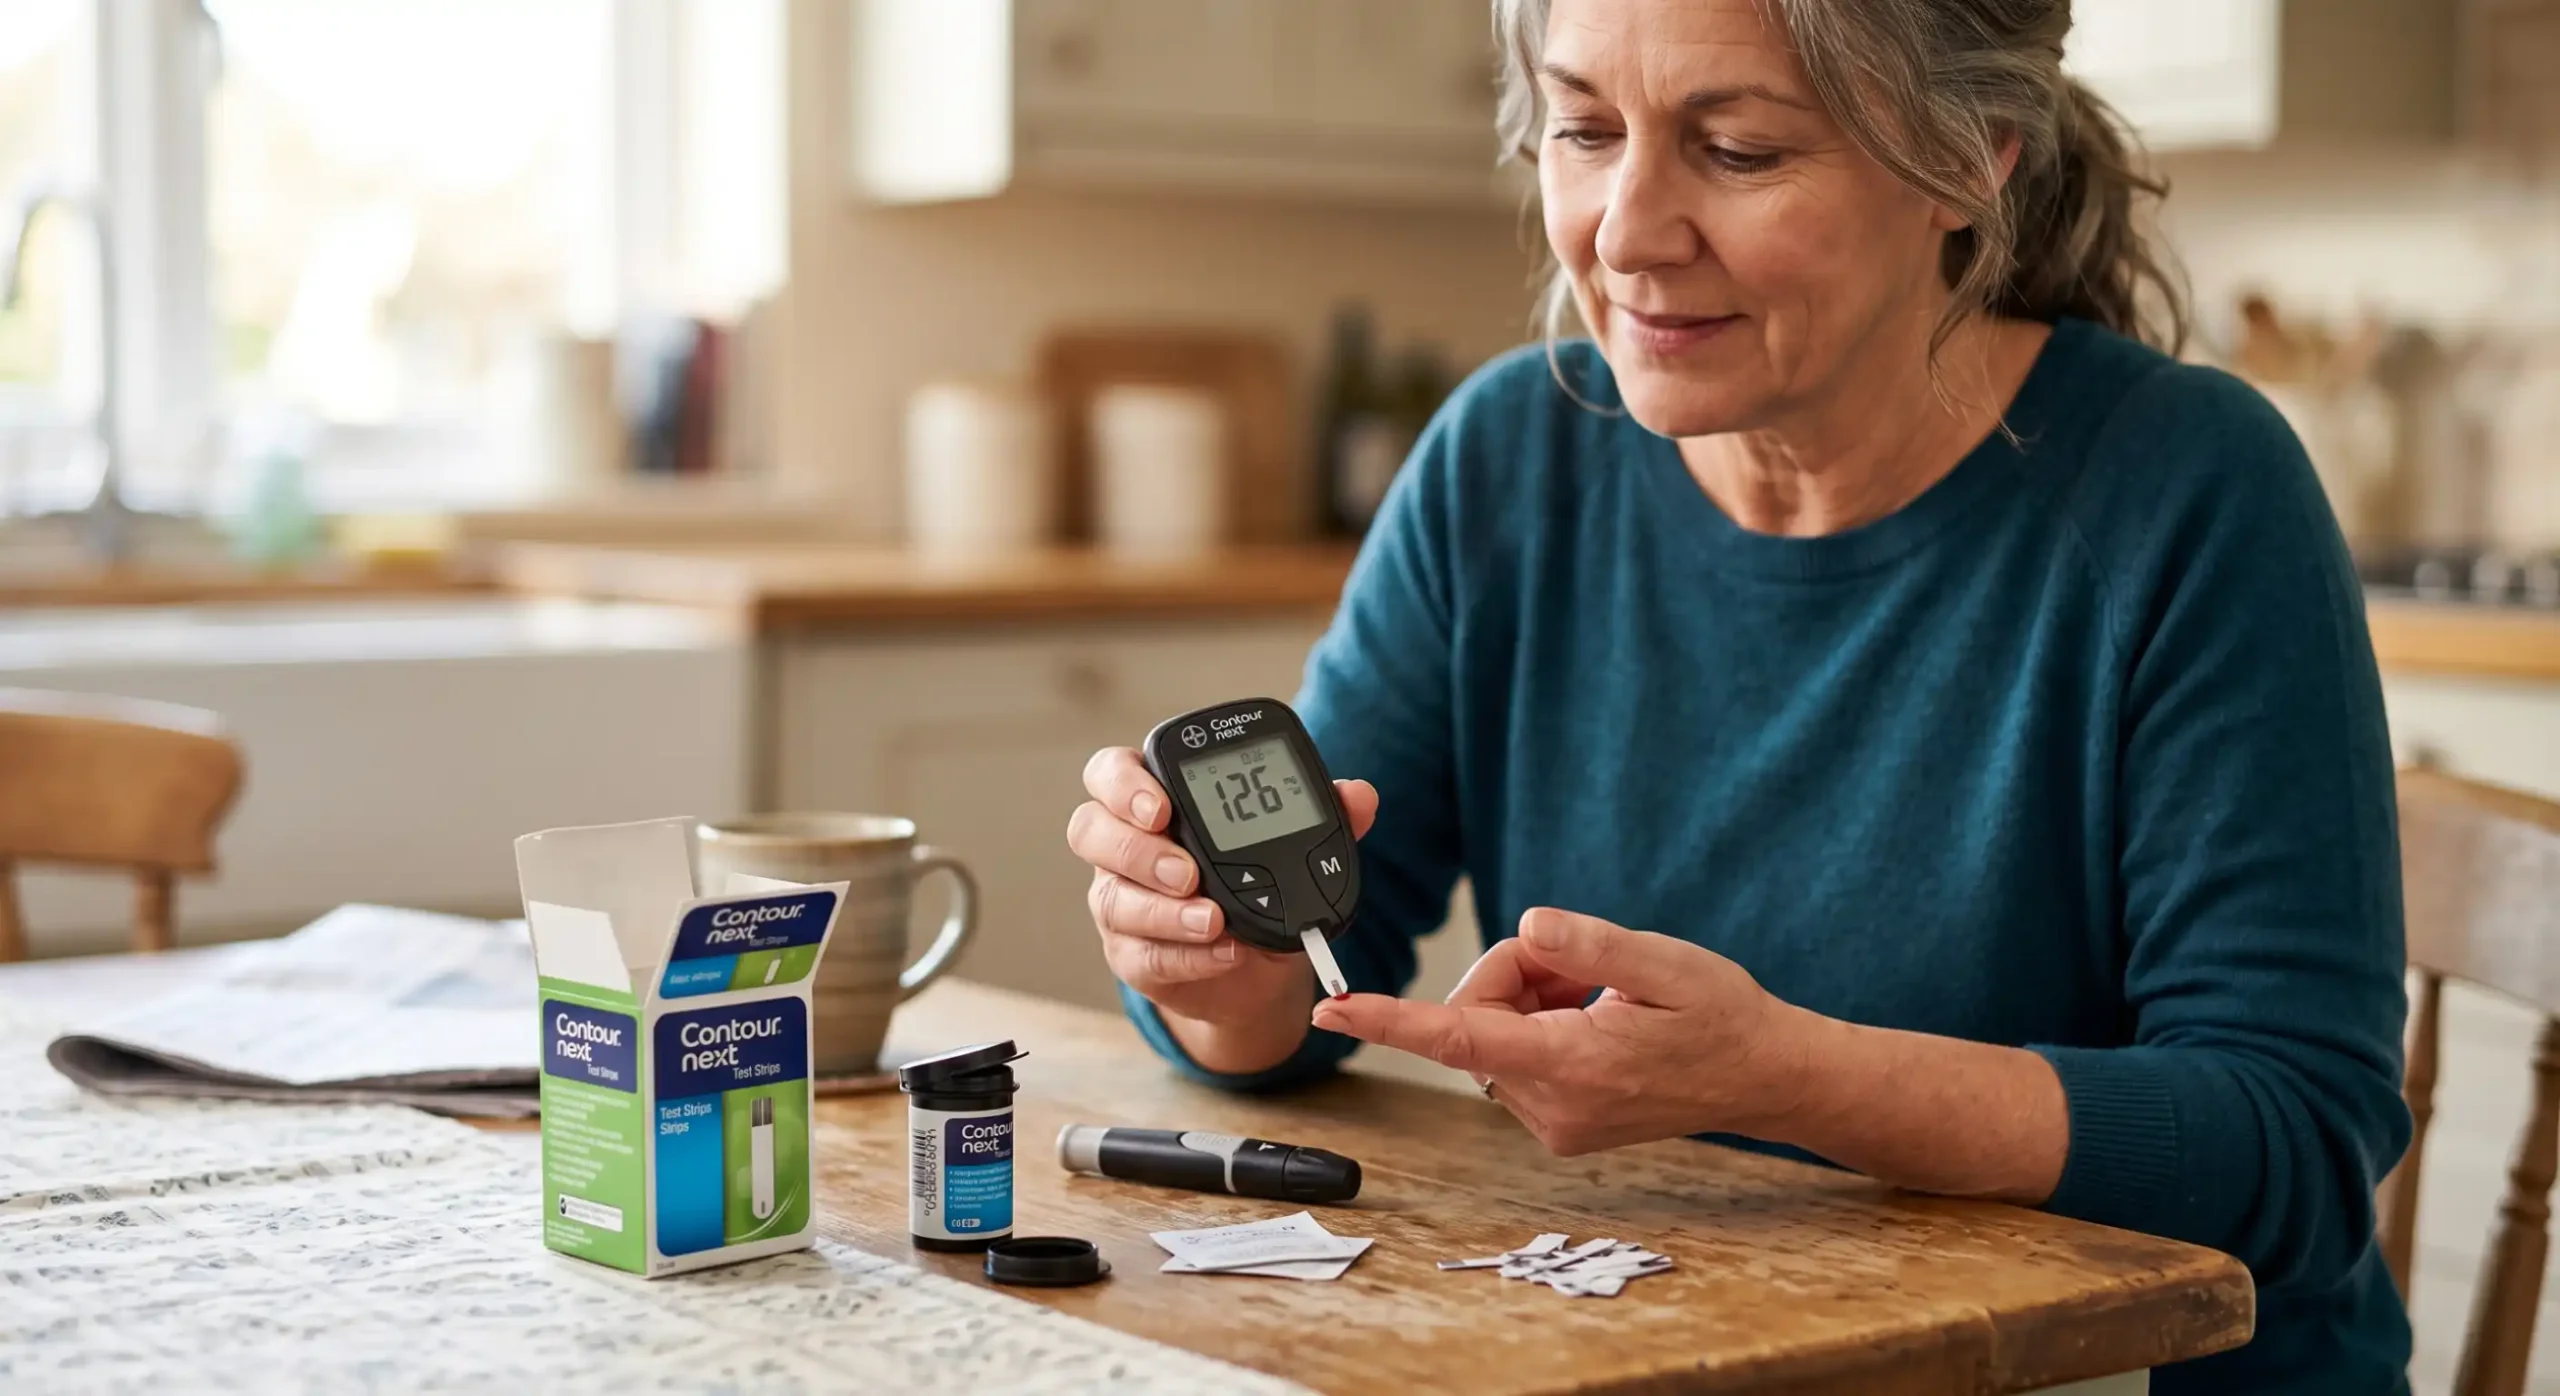
Checking blood glucose at home can become a normal part of everyday life when you have the right supplies and know how to use them correctly. For many people, the hardest part is not understanding the glucose result—it is feeling confident about the testing process itself.
If you are searching for contour next test strips how to use, this guide explains the process in simple language. Whether you are using CONTOUR NEXT test strips for the first time or simply want to make sure you are testing correctly, understanding each step can help make blood glucose testing easier and more consistent.
CONTOUR NEXT test strips are designed to work with compatible CONTOUR NEXT blood glucose meters. Ascensia Diabetes Care recommends washing and drying your hands, inserting the test strip into the meter, obtaining a small blood sample, touching the strip to the blood drop, and waiting for the meter to display the result.
This article is for general educational purposes. Always follow the instructions supplied with your specific meter and test strips, and follow your healthcare professional’s recommendations for glucose testing and treatment decisions.
CONTOUR NEXT test strips are disposable strips used with compatible CONTOUR NEXT blood glucose meters to measure glucose in a small blood sample.
The strip works together with the meter. After you insert the strip, the meter prepares for the blood sample. You then apply a small drop of blood to the strip. The meter analyzes the sample and displays the blood glucose reading.
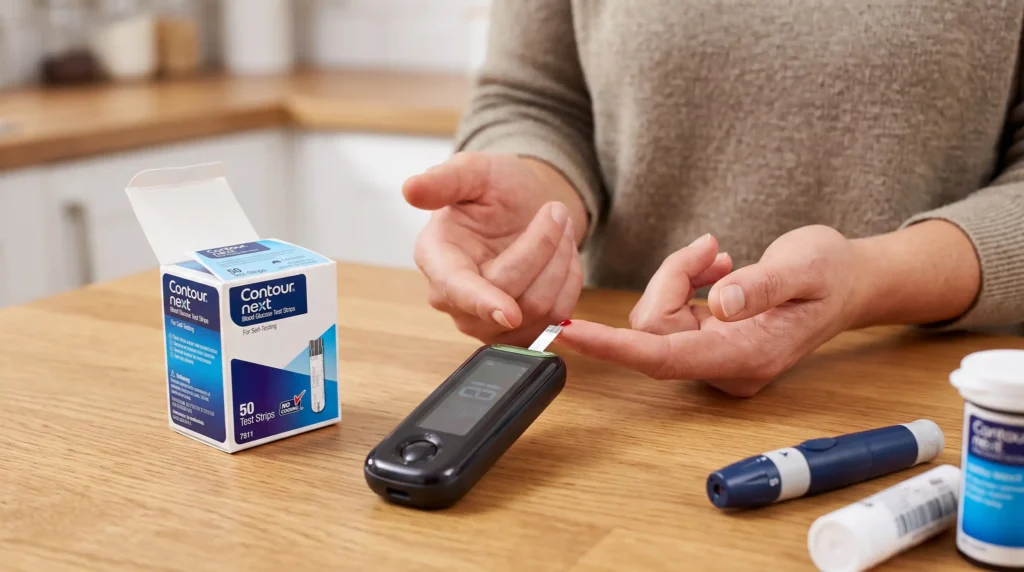
One useful feature of the CONTOUR NEXT system is its No Coding technology, which eliminates the need for users to manually enter a code when starting a test. The strips also use Second-Chance Sampling, which can allow additional blood to be applied when the initial sample is not sufficient, helping reduce unnecessarily wasted strips.
For someone testing regularly, these small conveniences can make a real difference. When testing becomes part of your daily routine, a simple process can feel much less stressful.
Using CONTOUR NEXT test strips is straightforward when you follow the correct sequence.
Here is the basic process:
Let’s look at each step more closely.
Before testing, wash your hands with soap and water.
Rinse them thoroughly and dry them completely.
This step may seem simple, but it is important. Anything left on your fingers can potentially affect a glucose test. Water on your fingertips can also dilute a blood sample.
Ascensia’s instructions specifically recommend washing and drying your hands before testing and again after handling the testing supplies.
Keep your testing supplies together in one convenient location. When your meter, strips, lancet device, and other supplies are easy to find, you are less likely to rush through the process.
Take one test strip from its container.
If your strips are supplied in a bottle, close the bottle promptly after removing a strip. Protecting the remaining strips from moisture is important for maintaining their performance.
Check the expiration date before using the strip.
Do not use expired test strips. The CONTOUR NEXT GEN user guide specifically warns that expired materials can contribute to inaccurate results.
You should not leave a strip sitting out unnecessarily.
Take out the strip you need, close the container if applicable, and continue with your test.
Hold the test strip according to the instructions for your meter.
For compatible CONTOUR NEXT meters, the gray square end of the strip is inserted into the meter’s test strip port. The meter will activate and indicate that it is ready for a blood sample.
On compatible systems, you do not need to manually code the meter for each new strip.
When the blood-drop symbol appears or the meter otherwise indicates that it is ready, you can move to the next step.
CONTOUR NEXT test strips are intended for use with compatible CONTOUR NEXT meters. Always verify that the strips you purchase match your meter model.
A lancing device is used to obtain the small blood sample needed for the test.
Follow the instructions provided with your particular lancing device.
If you use a MICROLET NEXT lancing device, follow its user instructions for inserting a new lancet and preparing the device.
Never share a lancing device with another person.
A fresh lancet should be used according to the manufacturer’s instructions. The CONTOUR NEXT EZ guide warns against reusing lancets and emphasizes that the lancing device supplied for self-testing should not be used on multiple people because of the risk of infection.
Use the lancing device to obtain a blood sample, generally from your fingertip when following the standard fingertip-testing procedure.
Do not squeeze or manipulate the finger excessively.
The goal is to obtain an adequate blood drop without making the process unnecessarily uncomfortable.
If you regularly find finger testing uncomfortable, talk with your healthcare professional about proper lancing technique and whether alternative testing approaches are appropriate for you.
This is the part many first-time users worry about.
You do not need to smear blood across the strip.
Instead, gently touch the tip or sample area of the test strip to the blood drop.
The strip draws the blood into the appropriate area. Hold the strip against the blood sample until the meter indicates that enough blood has been received.
Ascensia describes the process as gently touching the test strip to the blood drop until the meter beeps.
Make sure the strip actually receives the blood sample.
If you pull the strip away too quickly, the meter may not receive enough blood.
One helpful feature of CONTOUR NEXT test strips is Second-Chance Sampling.
Sometimes you may apply a blood sample that is too small. Instead of immediately requiring a new strip, compatible CONTOUR NEXT systems with this feature can indicate that additional blood is needed.
According to Ascensia, when Second-Chance Sampling is activated, the meter can indicate that more blood is required, and additional blood can be applied within the specified time window. For certain compatible systems, the additional sample window is up to 60 seconds.
This can be useful because it may help reduce the number of strips wasted because of an insufficient sample.
Always follow the instructions displayed by your particular meter.
Once enough blood has been applied, the meter processes the sample.
The result appears on the meter screen after a short countdown or processing period, depending on the specific CONTOUR NEXT meter you are using.
For example, the CONTOUR NEXT system specifications list a 5-second countdown and a 0.6 µL sample requirement.
Do not assume that every CONTOUR model has identical features, however. Always check the user guide for your specific meter.
Once the glucose number appears, record or review it according to your usual diabetes-management routine.
Some CONTOUR NEXT meters can store test results and may work with the CONTOUR Diabetes app, depending on the model and compatible device.
Your glucose result is only one part of diabetes management.
A single reading does not always tell the complete story. Your healthcare professional may consider your readings over time, meals, medications, physical activity, symptoms, and other factors.
If a glucose result seems unusually high or low, follow the action plan provided by your healthcare professional.
If you are experiencing symptoms of severe low or high blood glucose, seek appropriate medical assistance rather than relying only on the meter reading.
After testing, remove the used test strip from the meter.
Dispose of the used strip and lancet according to local recommendations and the instructions provided with your supplies.
Never reuse a disposable test strip.
Used lancets should also be handled carefully because they can cause accidental needle injuries.
A sharps container or other appropriate disposal method may be recommended in your area. Ask your healthcare professional or local waste authority if you are unsure about disposal requirements.
A major benefit of the CONTOUR NEXT system is that it is designed to work with a small blood sample.
The CONTOUR NEXT specifications list a sample volume of approximately 0.6 µL.
This is a very small amount of blood.
However, you should never intentionally provide an inadequate sample. Let the strip draw the blood naturally into the sample area and follow the meter’s instructions.
If the meter indicates that there is not enough blood, use the Second-Chance Sampling feature when available and follow the displayed instructions.
No manual coding is required with CONTOUR NEXT meters that use the system’s No Coding technology.
This removes one step from the testing process and can help avoid errors associated with manually entering a strip code. Ascensia identifies No Coding technology as one of the features of CONTOUR NEXT test strips.
This is especially convenient for people who test frequently.
Instead of stopping to enter a code, you can concentrate on preparing your sample and completing the test correctly.
Proper storage is an important part of accurate glucose testing.
Keep your test strips according to the storage instructions supplied with your product.
If your strips are packaged in a bottle:
The CONTOUR NEXT GEN guide specifically advises users to tightly close the bottle lid immediately after removing a test strip.
Why does this matter?
Test strips are sensitive testing components. Poor storage conditions can affect their performance and may contribute to unreliable results.
No.
CONTOUR NEXT test strips should be used with compatible CONTOUR NEXT blood glucose meters.
Do not assume that a strip will work simply because the meter is made by the same manufacturer.
Different meter families can require different strips.
Before purchasing, check the exact model of your meter and confirm that the test strips are compatible.
If you are unsure, ask your healthcare professional, pharmacist, medical supply provider, or the manufacturer’s customer support team.
Do not panic.
If your compatible meter supports Second-Chance Sampling, it may tell you that additional blood is needed.
Ascensia states that, with this feature, users can add more blood within the specified time period rather than immediately discarding the strip.
Follow the meter’s instructions carefully.
If the meter does not accept the sample or displays an error, check:
If problems continue, consult the meter’s user guide or contact the manufacturer.
Sometimes a glucose reading may be surprising.
Before assuming that the meter is malfunctioning, consider whether something could have affected the test.
For example:
If you repeatedly receive unexpected readings, follow your meter’s troubleshooting instructions and contact your healthcare professional or the manufacturer as appropriate.
Do not ignore symptoms simply because a meter reading appears normal or expected.
A control solution test can help you check whether the meter and test strips are functioning together properly.
Ascensia recommends performing a control test in situations such as:
Use only the control solution specified for your CONTOUR NEXT system.
Do not use control solution as a substitute for a blood glucose sample.
The control result should be compared with the control range printed on the test strip container, packet, or box, as applicable.
Even a simple glucose test can go wrong if a few basic steps are skipped.
Water can dilute the blood sample.
Always wash and dry your hands thoroughly.
Moisture can affect test strips.
Close the container promptly after removing a strip when applicable.
Always check the expiration date before testing.
Verify compatibility between the strip and your meter.
Make sure the strip receives an adequate sample.
If your meter supports Second-Chance Sampling, follow its instructions when additional blood is requested.
Use a new lancet according to the manufacturer’s instructions rather than repeatedly reusing one.
Lancing devices should not be shared between people because of the risk of bloodborne infection.
One unusual reading can happen. Repeated unexpected readings deserve attention.
Good testing habits can make your results easier to understand over time.
Try to test at the times recommended by your healthcare professional.
Store your meter, strips, lancing device, and other necessary supplies in an organized location.
Look at expiration dates and replace supplies before they run out.
Clean, dry hands are one of the easiest ways to improve your testing routine.
Different CONTOUR NEXT meters can have different functions. The manufacturer’s user guide is the best source for model-specific instructions.
If your meter supports a logbook or app, use those features if they fit your diabetes-management routine.
CONTOUR NEXT test strips are designed around a relatively simple testing process.
Some of the features highlighted by Ascensia include:
For someone who tests several times a day, convenience matters.
The best testing system is not simply the one with the most features. It is one you can use correctly and consistently as part of your diabetes care plan.
Finger-stick testing can become uncomfortable when performed frequently.
A few simple habits may help:
If testing is consistently painful, talk with your healthcare professional about your lancing technique.
You should not have to simply accept unnecessary discomfort.
It is easy to think of a test strip as just a small piece of material.
In reality, it is an important part of the glucose-testing system.
The meter depends on the strip to interact correctly with the blood sample. If strips are expired, damaged, improperly stored, or incompatible with the meter, the result may not be reliable.
That is why correct storage, compatibility, and handling are just as important as knowing where to place the blood sample.
If you want the short version, remember this sequence:
1. Wash your hands.
Use soap and water, then dry thoroughly.
2. Take out one test strip.
Check the expiration date and close the container if applicable.
3. Insert the strip.
Insert the appropriate end into the compatible CONTOUR NEXT meter.
4. Prepare the lancing device.
Use a new lancet according to the device instructions.
5. Get a small blood drop.
Follow the recommended fingertip-testing procedure.
6. Touch the strip to the blood.
Allow the strip to draw in the sample.
7. Wait for the result.
The meter will process the sample and display your blood glucose reading.
8. Record and respond appropriately.
Use your diabetes-care plan to understand what to do with the result.
9. Dispose of used supplies safely.
Follow local recommendations and product instructions.
Learning contour next test strips how to use does not have to be complicated.
The basic routine is simple: wash and dry your hands, insert the strip, obtain a small blood sample, apply it correctly, wait for the reading, and safely dispose of the used supplies.
What matters most is consistency.
When you understand your meter and test strips, keep your supplies stored correctly, and follow the instructions every time, blood glucose testing can become a much more comfortable part of your daily routine.
For anyone starting a new glucose-testing routine, remember that you do not have to figure everything out at once. Take the process one step at a time. If something seems unusual—especially repeated unexpected readings, persistent testing problems, or symptoms that concern you—contact your healthcare professional.
Alfa Healthcare Supply Inc. is a medical supply provider serving patients, caregivers, and healthcare needs with a range of medical equipment and supplies. For people looking for dependable diabetes-testing supplies, choosing the correct products and understanding how to use them properly can make everyday diabetes management more convenient.
When purchasing CONTOUR NEXT test strips, always confirm that the strips are compatible with your specific CONTOUR NEXT meter and follow the manufacturer’s instructions.
For additional product information and healthcare supply options, visit Alfa Healthcare Supply Inc. and explore the available diabetes and medical supply products.
Wash and dry your hands, insert a CONTOUR NEXT test strip into a compatible meter, obtain a small blood drop using a lancing device, and touch the strip to the blood until the meter indicates that the sample has been received. The glucose result then appears on the meter.
Compatible CONTOUR NEXT systems use No Coding technology, so users do not need to manually code the meter for each test strip.
The CONTOUR NEXT specifications list a blood sample requirement of approximately 0.6 µL.
If your compatible meter has Second-Chance Sampling, follow the meter’s instructions to add more blood within the permitted time. Ascensia states that this feature can allow additional blood to be applied within the specified window.
No. Expired test strips should not be used because they may contribute to inaccurate results.
No. Use the strips only with compatible CONTOUR NEXT blood glucose meters. Check your specific meter model before purchasing strips.
Follow the storage instructions supplied with your product. If the strips are supplied in a bottle, keep the bottle tightly closed when you are not removing a strip and protect the strips from moisture.
Clean, dry hands help reduce the possibility that substances on your fingers will interfere with the blood sample. Ascensia specifically recommends washing and drying hands before testing.
No. Test strips are intended for single use.
Follow the manufacturer’s instructions, but do not share lancets or lancing devices between people. The CONTOUR NEXT EZ guidance specifically warns against reusing lancets.
The exact timing depends on the meter model. The CONTOUR NEXT specifications list a 5-second countdown for the CONTOUR NEXT system.
A control test may be appropriate when you first use the meter, open a new package of test strips, suspect a problem with the meter or strips, or receive repeated unexpected results. Follow your specific meter’s user guide.