


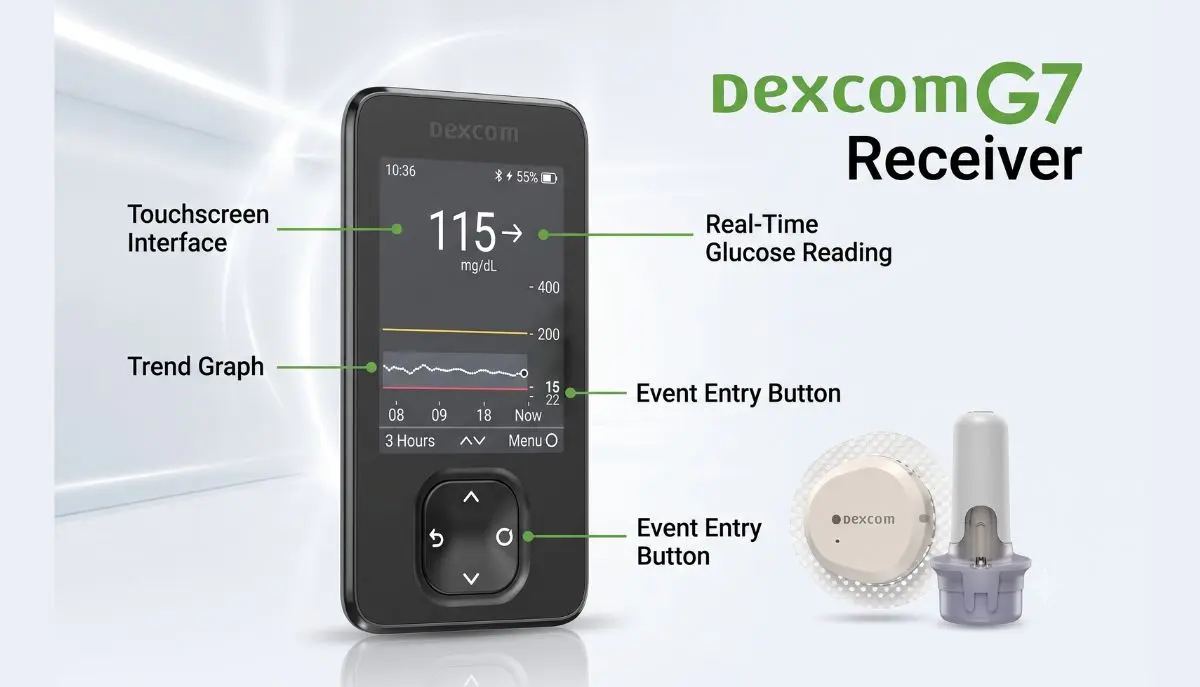
If you are searching for “dexcom g7 receiver how to use,” you are probably looking for a simple explanation of how the receiver works, how to connect it to a Dexcom G7 sensor, how to read glucose information, and what to do when the sensor needs to be replaced.
The Dexcom G7 is a continuous glucose monitoring (CGM) system designed to provide glucose readings without requiring frequent fingerstick checks. The receiver gives users a dedicated screen for viewing glucose readings, trends, alerts, and other information.
For someone using a CGM for the first time, the receiver can seem confusing at first. The good news is that most of the setup is guided directly on the receiver. Dexcom also provides official G7 receiver guides and training resources.
This guide from Alfa Healthcare Supply Inc. explains the basic process in easy-to-understand language. It is intended for general education and should not replace the instructions supplied with your device or advice from your healthcare professional.
The Dexcom G7 Receiver is a dedicated display device that can receive glucose information from a compatible Dexcom G7 sensor.
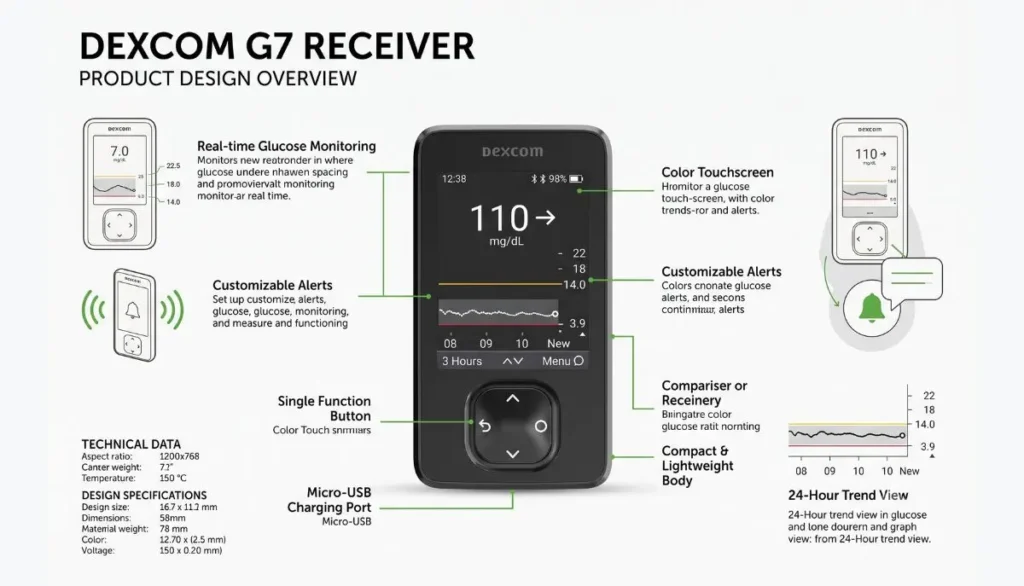
Instead of relying only on a smartphone, a person can use the receiver to view their glucose information.
The receiver can display information such as:
Dexcom provides a receiver-specific setup process that walks the user through pairing and sensor warm-up.
For people who prefer a dedicated medical device instead of using a smartphone for glucose monitoring, a receiver can be a convenient option.
The easiest way to understand the dexcom g7 receiver how to use process is to divide it into several simple stages:
Let’s look at each step in more detail.
Before beginning, make sure you have the necessary components.
The Dexcom G7 receiver kit includes the receiver, USB cable, and power adapter, according to Dexcom’s setup instructions.
You will also need your Dexcom G7 sensor and its applicator.
Before using any component, check the packaging and instructions supplied with your particular product.
If something appears damaged, do not use it until you have confirmed what to do with the manufacturer or your healthcare provider.
It is a good idea to make sure the receiver has enough battery power before beginning setup.
A low battery during initial setup can be frustrating, especially if you are trying to start a new sensor.
Connect the receiver using the supplied charging equipment and allow it to charge as needed.
Keep the receiver and charging accessories somewhere convenient. A consistent charging routine can make everyday CGM use easier.
The receiver has physical navigation buttons.
According to Dexcom’s setup instructions, you can turn the receiver on by pressing and holding the Select button for approximately three seconds.
When the receiver starts for the first time, it guides you through the setup process.
You do not have to memorize every step.
Simply read each screen carefully and follow the instructions shown.
During the first setup, the receiver may ask you to complete several basic settings.
These can include:
Take your time during this stage.
If you are new to CGM technology, the built-in educational screens can be particularly helpful. Dexcom says the receiver tutorial covers subjects such as glucose readings, trend arrows, alerts, treatment decisions, and the home screen.
Do not rush through the tutorial just because you want to see your first glucose number.
Understanding what the arrows and alerts mean can help you use the receiver more confidently.
The sensor must be inserted before the receiver can receive glucose information from it.
Sensor placement should always follow the current instructions for your specific Dexcom G7 system, age group, and region.
For the standard G7 system, Dexcom’s U.S. instructions identify the back of the upper arm as an approved site for people age 7 and older. Dexcom’s labeling can differ by age and product version, so always check the instructions that came with your sensor.
Before inserting the sensor:
Dexcom also advises avoiding areas where the sensor could be bumped, pushed, compressed during sleep, or placed too close to an infusion or injection site.
After inserting the sensor, return to the receiver.
The receiver will ask you to confirm that the sensor has been inserted.
Follow the on-screen instructions.
This tells the receiver that you are beginning a new sensor session.
At this point, you will also need the sensor’s four-digit pairing code.
One of the most important parts of learning dexcom g7 receiver how to use is understanding the pairing code.
The G7 sensor has a four-digit pairing code associated with that sensor.
Dexcom’s setup instructions state that the pairing code can be found on the applicator used to insert the sensor.
When the receiver asks for the code:
Every new sensor needs to be paired correctly.
Entering the wrong code can prevent the receiver from connecting with the sensor as expected.
Do not guess the code. Use the code associated with the sensor you are currently applying.
After entering the four-digit code, the receiver attempts to communicate with the sensor.
This is the pairing stage.
Dexcom recommends keeping the receiver close to the sensor during pairing and warm-up. Its setup guidance states to keep the phone/receiver within the recommended communication range during this process.
If you are having difficulty pairing:
Avoid repeatedly entering random codes.
If the receiver continues to show a problem, use the official Dexcom troubleshooting guidance or contact Dexcom support.
Once pairing is complete, the sensor enters its warm-up period.
The receiver displays a timer showing when glucose readings and alerts should become available.
Dexcom’s current setup information states that the G7 warm-up can take up to about 30 minutes.
During warm-up, you may not see your normal glucose information yet.
That does not necessarily mean something is wrong.
Think of this period as the sensor getting ready to provide glucose information.
Keep the receiver near the sensor and follow the instructions shown on the screen.
After the warm-up period is complete, the receiver begins displaying glucose information.
The home screen is one of the most important parts of learning dexcom g7 receiver how to use.
You may see:
This is the glucose value being reported by your CGM system.
The trend arrow provides information about the direction and rate at which glucose is changing.
For example, glucose may be:
Do not look at the glucose number alone.
The trend information provides additional context.
The graph allows you to see glucose information over time.
Looking at the graph can help you and your healthcare professional understand patterns.
The receiver can provide alerts for certain glucose conditions and system events, depending on your settings.
Imagine that your glucose reading is currently within your target range.
You might see that the number is relatively stable.
In another situation, the current number could be similar, but the trend arrow may indicate that glucose is changing quickly.
This is why understanding the trend arrow is important.
However, you should not make treatment decisions based solely on a number or trend arrow without understanding your personal diabetes treatment plan.
Dexcom’s safety information emphasizes following the system’s instructions and using a blood glucose meter when CGM readings or alerts do not match symptoms or expectations.
Alerts are an important part of CGM technology.
Depending on your settings, the receiver can notify you about certain glucose conditions and system situations.
Dexcom provides alert customization through the receiver’s settings. Its setup instructions identify Menu → Settings → Alerts as the location for changing applicable alert settings.
Your healthcare professional can help you decide which alert settings are appropriate for you.
An alert is designed to get your attention.
If you receive an alert that concerns you, follow the instructions in your diabetes management plan.
If you experience symptoms that do not agree with the CGM reading, follow the safety instructions supplied with your Dexcom system.
Yes, applicable alert settings can be customized.
The available options depend on your system and settings.
Dexcom’s receiver information indicates that users can change alert settings and other notification behaviors through the Settings menu.
You may also have options related to sounds and vibration, depending on the device and software version.
Do not change alert settings simply because an alert is inconvenient.
If alerts are waking you frequently or becoming difficult to manage, talk with your healthcare professional about appropriate settings rather than disabling important safety notifications without guidance.
The graph is useful because one glucose number tells only part of the story.
For example, you might see:
Glucose → relatively stable
This suggests that the glucose level is not changing rapidly.
Or you may see an arrow indicating that glucose is moving upward or downward.
Looking at the graph can help you see the bigger picture.
Over time, this information can also help your healthcare professional understand patterns in your glucose levels.
Once your sensor is working, using the receiver becomes much simpler.
A normal routine might look like this:
Check the receiver when you wake up.
Look at:
Check the receiver when appropriate according to your diabetes management plan.
Pay attention to alerts and changes in glucose trends.
If your healthcare professional has recommended checking your glucose around meals, use the receiver as instructed.
Follow your personal diabetes plan and consider your glucose information and trends as instructed by your healthcare team.
Review the receiver and make sure important alerts are configured appropriately.
Your individual routine should always be based on your healthcare professional’s recommendations.
For the standard Dexcom G7 system, Dexcom states that the sensor lasts up to 10 days, followed by a 12-hour grace period.
Dexcom also offers a G7 15 Day system in some markets, so it is important to check which version you have.
Do not assume that every G7 sensor has the same wear duration.
Check the packaging and instructions for your specific product.
As the sensor session approaches its end, the receiver provides alerts.
For the standard G7 system, the sensor can continue during the stated 12-hour grace period after the initial 10-day session.
You can replace the sensor during the appropriate period according to the instructions.
When it is time to start a new sensor, the receiver guides you through the replacement process.
When the sensor session is ending, you will need to remove the old sensor and apply a new one.
Dexcom provides two relevant receiver menu options:
For continuous monitoring, the replacement option is generally the relevant choice.
After removing the old sensor:
Dexcom’s replacement guidance describes this general process.
Even a simple device can sometimes cause confusion.
Here are some common situations.
Check the following:
If the issue continues, use Dexcom’s official troubleshooting resources.
This can be normal.
The sensor needs to complete its warm-up period before readings and alerts become available.
Dexcom states that the G7 warm-up can take up to approximately 30 minutes.
If the warm-up takes longer than expected or the receiver displays a specific error, follow the instructions shown on the receiver.
A signal or communication problem means the receiver is temporarily having difficulty receiving information from the sensor.
Try keeping the receiver near the sensor.
Also check that the sensor is properly attached and that you are following the device’s communication guidance.
If the problem continues, consult the official Dexcom troubleshooting instructions rather than repeatedly restarting or changing settings without guidance.
This is an important safety point.
CGM readings and symptoms do not always appear to agree.
If your Dexcom G7 reading or alert does not match your symptoms or expectations, Dexcom advises using a blood glucose meter to make treatment decisions.
Never ignore concerning symptoms simply because the receiver shows a number that appears reassuring.
When in doubt, follow your healthcare professional’s instructions and the safety information supplied with your Dexcom system.
A receiver can provide a dedicated way to view your CGM information.
Dexcom offers separate guidance for people using the G7 receiver, and its product information explains that compatible display devices and system configurations can vary.
If you prefer not to depend on a smartphone for your primary CGM display, a dedicated receiver may be useful.
However, compatibility and available features depend on the specific Dexcom system and region.
If you are using a G7 receiver for the first time, these simple habits can make the experience easier.
A dead battery can prevent you from viewing information when you need it.
Store it somewhere you can easily reach it.
Always use the correct pairing code for the sensor you are applying.
Don’t focus only on the glucose number.
Alerts are an important part of CGM use.
The receiver provides information; your treatment plan should come from your healthcare professional.
Dexcom’s official guides are useful when you need to check a setup or troubleshooting step. Dexcom maintains a current guides and resources page for G7 users.
Some people prefer a receiver, while others prefer a compatible smartphone.
A receiver can be appealing because it is a dedicated device.
Depending on the compatible system and device, a smartphone may offer additional connected features.
However, compatibility requirements can change, so users should always check Dexcom’s current compatibility information.
The best choice depends on your needs, preferences, healthcare plan, and the specific G7 system you use.
For most beginners, the initial setup is the part that requires the most attention.
Once the sensor is paired and warmed up, the daily process is much simpler.
You generally look at the receiver to see your glucose information, trend, graph, and applicable alerts.
The important thing is not to feel overwhelmed during the first setup.
Take it one screen at a time.
The receiver is designed to guide users through the setup process, including pairing and sensor warm-up.
Learning dexcom g7 receiver how to use does not have to be complicated.
The process can be summarized simply:
Charge the receiver → turn it on → insert the sensor correctly → confirm the sensor → enter the four-digit pairing code → wait for pairing → complete warm-up → review glucose readings and trends → respond appropriately to alerts → replace the sensor when required.
The first setup may take a little patience, but the receiver is designed to guide you through many of the steps.
At Alfa Healthcare Supply Inc., we understand that medical equipment is not just about a product box. It is about helping people feel more comfortable managing everyday health needs. For someone starting a CGM system, having clear information can make that first experience much less stressful.
If you are purchasing or using a Dexcom G7 Receiver, always follow the latest manufacturer instructions supplied with your specific device. Dexcom’s official resources should be your primary source for product-specific setup, warnings, compatibility, and troubleshooting.
Press and hold the Select button for approximately three seconds. The receiver then guides you through the setup process.
After inserting the sensor, confirm the insertion on the receiver and enter the four-digit pairing code associated with the sensor. Then wait for the receiver and sensor to pair.
Dexcom states that the G7 warm-up can take up to about 30 minutes.
The four-digit pairing code is provided with the sensor applicator. Use the code associated with the sensor you are currently applying.
Applicable alert settings can be changed through the receiver’s settings. Dexcom identifies Menu → Settings → Alerts as the relevant navigation path.
The standard G7 sensor is designed for up to 10 days, followed by a 12-hour grace period, according to Dexcom’s replacement guidance.
Follow the safety instructions for your Dexcom system. Dexcom advises using a blood glucose meter to make treatment decisions when G7 readings or alerts do not match symptoms or expectations.
Receiver hardware and compatibility matter. Dexcom explains that different G6 receiver versions have different capabilities, and the current G6 touchscreen receiver cannot be upgraded to G7. Always verify your receiver model and compatibility before attempting to use it with a G7 sensor.
Dexcom provides G7 user guides, receiver start guides, and other training resources through its official guides page.
Disclaimer: This article is for general educational purposes and is not medical advice. Dexcom G7 availability, labeling, approved sensor locations, features, and instructions can vary by product version, age, and country. Follow the instructions supplied with your device and consult your healthcare professional for individual diabetes-management decisions.