


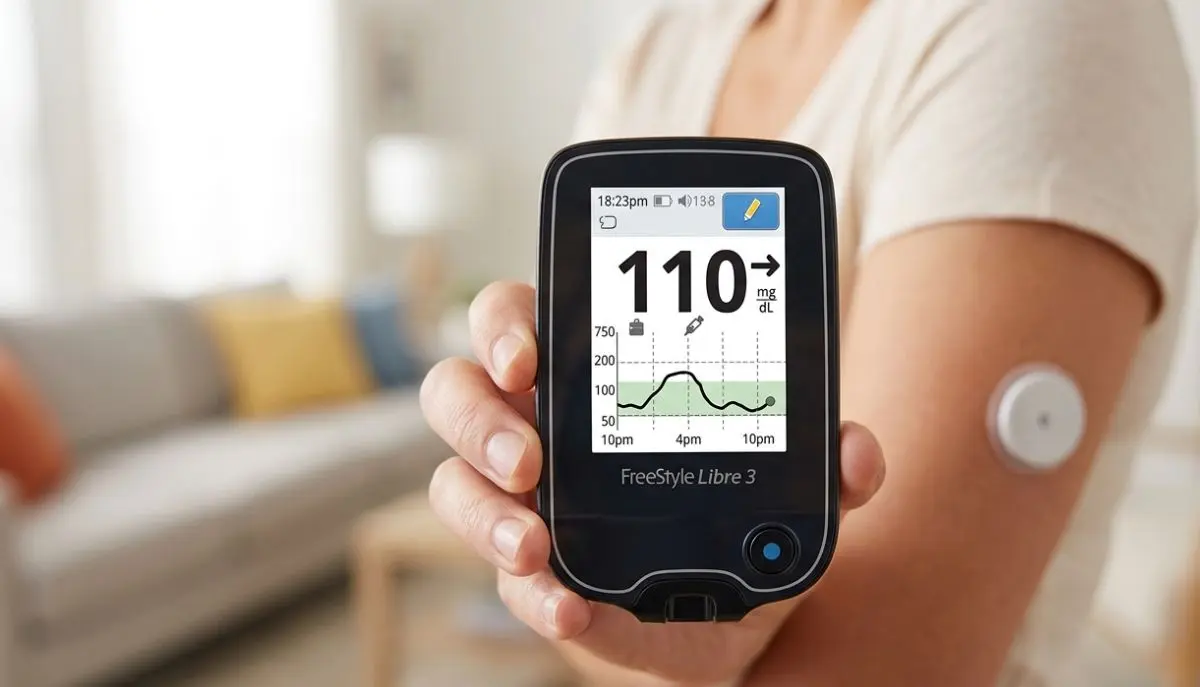
Using a Continuous Glucose Monitoring (CGM) system can seem a bit confusing at first—especially when you hold the reader for the first time and wonder what all the numbers, arrows, alerts, and screen elements mean. If you are looking for information on FreeStyle Libre 3 Reader How to Use, you are not alone. Learning the basic steps can make the system feel much easier and more convenient to use.
The FreeStyle Libre 3 system works with a compatible sensor and reader to help users monitor their glucose levels. It provides glucose information without requiring you to perform a traditional “fingerstick” (pricking your finger for a blood test) every time you want to check your sensor glucose reading. Abbott provides a Quick Start Guide, Quick Reference Guide, and User Manual for the FreeStyle Libre 3 reader that contain detailed instructions.
In this guide, Alfa Healthcare Supply Inc. explains the basic processes in simple language. This includes starting the sensor, checking glucose levels, understanding trend arrows, using alarms, viewing data, and handling common situations.
Important: This article is provided for general informational purposes only and should not replace the instructions that come with your device or guidance from your healthcare professional. Always follow Abbott’s latest instructions for your specific FreeStyle Libre system. If your glucose reading does not match how you feel, Abbott may recommend checking your blood glucose with a blood glucose meter before making treatment decisions in certain situations.
The FreeStyle Libre 3 Reader is a compact handheld device designed to work with the FreeStyle Libre 3 continuous glucose monitoring (CGM) system. When used with a compatible sensor, the reader receives glucose information from the sensor and displays it clearly on its screen.
With a CGM system, users can check the glucose information collected by the sensor without needing to perform a fingerstick test every time they want to view their sensor readings.
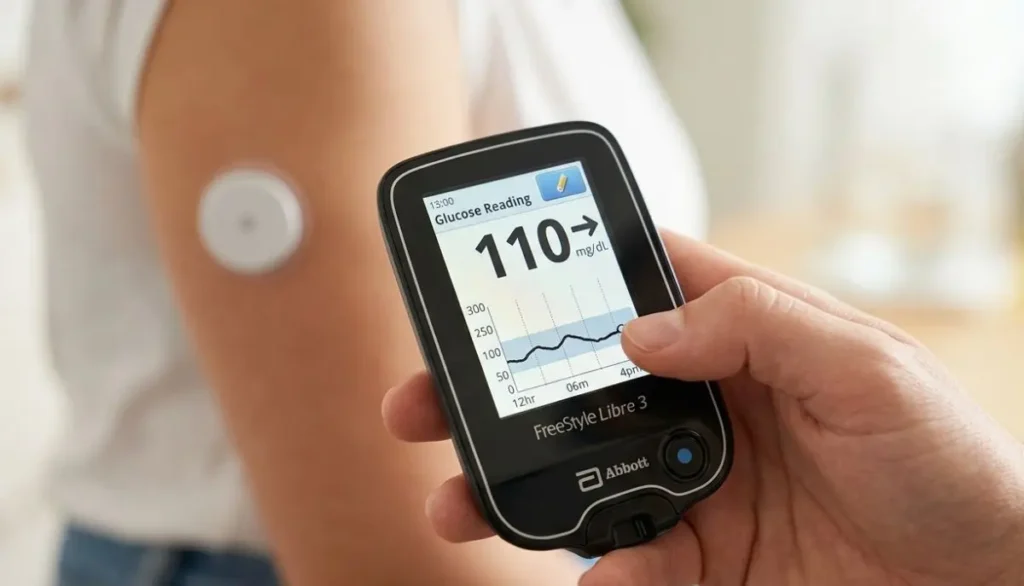
Depending on the specific system, settings, and available features, the reader may display information such as:
Abbott also provides U.S. support materials for the FreeStyle Libre 3 Reader, including resources such as a quick-start guide, quick-reference guide, and user manual. These materials can help users understand the device and learn how to use its available functions.
One important detail to understand is that the FreeStyle Libre 3 Reader and the FreeStyle Libre 3 smartphone app are not designed to be used interchangeably with the same sensor at the same time. Abbott’s documentation explains that users should not use both the reader and the FreeStyle Libre 3 app simultaneously with the same sensor.
Before using your FreeStyle Libre 3 Reader, make sure you have the correct sensor that is compatible with your system. It is also important to read the instructions included with your device and sensor before getting started.
The setup and first use can be broken down into five easy steps:
Let’s take a closer look at each step so you can understand how the process works.
The reader does not attach directly to your body. Instead, the sensor is the part of the FreeStyle Libre 3 system that is applied to your skin.
Before you begin, choose the sensor application site recommended by Abbott for your specific FreeStyle Libre system. For the FreeStyle Libre 3 system, Abbott recommends applying the sensor to the back of the upper arm and following the manufacturer’s application instructions carefully. Preparing the skin properly before application is an important part of the process.
Proper skin preparation can help the sensor adhesive attach securely and remain in place during use. Take a few extra moments to clean and completely dry the application area. Careful preparation can make the sensor application process easier and more comfortable.
After preparing the skin, use the sensor applicator by following the instructions provided with your specific sensor.
According to Abbott’s setup guidance, place the applicator over the prepared area on the back of the upper arm and press down as directed. After applying the sensor, gently check around the edges to ensure it is securely attached to the skin.
Do not alter, tamper with, or attempt to modify the sensor or applicator in any way.
If you have any questions or are unsure about the application process, review Abbott’s latest sensor application instructions before applying the sensor.
You may find applying the sensor easier when:
Applying the sensor may be easier and more comfortable when:
After applying the sensor to your skin, follow these steps to activate it with the FreeStyle Libre 3 Reader:
According to Abbott’s instructions, during the activation process, the reader should be positioned with its screen touching the sensor. If the sound feature is turned on, the reader may also provide an audible signal when the sensor has been detected successfully.
If the reader does not detect the sensor correctly, check the instructions shown on the reader’s screen and refer to the official user manual for additional guidance. Avoid repeatedly pressing buttons or removing the sensor simply because the first attempt does not work. Follow the troubleshooting instructions provided for your device instead.
After you activate the sensor, it needs a little time before it begins displaying glucose readings. According to Abbott’s instructions, the sensor has a 60-minute warm-up period before you can use it to check your glucose level.
During this time, the reader may display a message saying that the sensor is warming up. This is completely normal.
Simply follow the instructions shown on the reader and allow the sensor to complete its warm-up. There is no need to remove or replace the sensor if a glucose reading does not appear right away.
Once the 60-minute warm-up period is finished, the system can begin providing glucose information.
Once the sensor is activated and working, viewing your glucose information is simple and convenient. The reader receives data from the sensor and displays it on the screen.
Depending on your device and current glucose status, the reader may show:
Remember that the current glucose number is just one part of the information your reader provides. The trend arrow is also useful because it helps you understand the direction your glucose level is moving and can provide helpful context for your current reading.
The large number displayed on your reader shows your current sensor glucose level. Depending on your recent readings, the number may be:
A single glucose reading does not always tell the complete story. It is helpful to consider the overall glucose trend and other information available on your reader, along with the treatment plan recommended by your healthcare professional.
Glucose targets are personal and can vary from one person to another. For this reason, avoid comparing your reading with someone else’s glucose level. Instead, follow the glucose targets and guidance provided by your healthcare professional.
One useful feature of a continuous glucose monitoring (CGM) system is the trend indicator. A trend arrow provides extra information about how glucose levels are changing over time. It may show that glucose is:
This information can give you more context than a single glucose reading alone. For example, two people may have the same glucose number, but their trend arrows could point in different directions. One person’s glucose may be rising, while the other person’s glucose may be falling.
That is why it can be helpful to consider both the glucose reading and the trend information rather than focusing only on the number displayed on the screen. Together, they provide a broader picture of how glucose levels are changing.
Do not use this article to decide how much insulin or medication to take.
Use the treatment plan provided by your healthcare professional and the instructions for your specific system.
The FreeStyle Libre 3 system can provide glucose alarms when the available alarm features are properly configured. Abbott explains that optional real-time glucose alarms can alert users when their glucose reaches a selected high or low level. The exact alarm features may vary depending on the system, settings, and compatible device being used.
These alerts can be helpful because you do not need to constantly check your reader to stay aware of your glucose levels. When configured appropriately, an alarm may notify you when your glucose is:
You can use the reader’s settings menu and follow the instructions displayed on the screen to configure the available glucose alarms. If you are unsure which glucose thresholds are suitable for you, speak with your healthcare professional for guidance based on your individual care plan.
Remember that an alarm is an alert, not a substitute for medical advice. Do not make changes to your diabetes treatment solely because an alarm occurs. Consider the alert along with your healthcare plan and the guidance provided by your medical team.
Whether you are sleeping, working, exercising, cooking, traveling, or enjoying time with your family, you may not be able to monitor your glucose readings every minute.
A glucose alarm can help get your attention when your glucose level reaches a situation that may require you to check your readings and follow your personal diabetes-management plan.
Keep in mind that glucose alarms are a helpful monitoring feature, but they should not replace professional medical care. If you experience concerning symptoms or your glucose reading does not match how you feel, follow the guidance provided by your healthcare professional.
A glucose graph can help you see how your blood sugar changes over time instead of focusing on just one reading. By looking at the overall trend, you may be able to notice patterns that are not obvious from a single number.
You may see changes in glucose levels during different situations, such as:
After eating
It is common for glucose to increase after a meal. The amount and timing of the rise can differ from person to person and may be influenced by the type of food, physical activity, medications, and other individual factors.
During exercise
Physical activity can cause glucose levels to change in different ways. The effect may depend on the type of exercise, how long you are active, and your individual circumstances.
Overnight
Glucose levels can also change while you sleep. Reviewing your previous readings may help you recognize nighttime patterns that you can discuss with your healthcare professional.
During stressful periods
Stress and other everyday factors may influence glucose levels. Looking at your glucose history can help you understand whether certain situations are associated with changes in your readings.
The key is to look at the bigger picture rather than relying on one reading alone. Reviewing glucose trends over time can provide helpful information for conversations with your healthcare team and may help you better understand how your glucose responds to different activities and daily situations.
The reader may allow you to view past glucose readings, depending on the specific system and device settings. Looking back at your glucose history can help you identify patterns and understand how your levels may change over time.
For example, you may notice changes in glucose levels:
Glucose graphs can provide useful information, but they should not be used to diagnose a condition on your own. Instead, consider sharing these patterns with your healthcare professional. They can help you interpret your glucose history and determine what the trends may mean in relation to your individual health and treatment plan.
Depending on the features available with your FreeStyle Libre system, you may be able to add notes about meals, insulin, exercise, and other daily activities or events.
Adding these details can give you a better understanding of your glucose history by helping you connect changes in glucose levels with what was happening at the time.
For example:
Later, you and your healthcare professional may be able to review these notes alongside your glucose readings. This can provide useful context and make your glucose records more informative than numbers alone.
A traditional blood glucose meter typically measures blood sugar using a small blood sample collected through a fingerstick. In contrast, a continuous glucose monitoring (CGM) system uses a sensor to gather glucose readings from the body and sends that information to a compatible reader or display device.
While both methods help people monitor glucose levels, they work differently and are intended for different uses, so they should not be treated as interchangeable.
The FreeStyle Libre 3 Reader is specifically designed to work with the compatible FreeStyle Libre 3 sensor system. For safe and proper use, always use the recommended compatible components and follow the manufacturer’s instructions.
A CGM system is designed to provide ongoing sensor glucose readings, reducing the need for frequent traditional fingerstick tests. However, Abbott explains that a fingerstick blood glucose test may still be necessary for making treatment decisions in certain situations. This can include times when the system displays a “Check Blood Glucose” symbol or when the glucose reading or alarm does not match how you feel or what you expect.
This is an important safety consideration when using a CGM system.
If your glucose reading does not match how you feel, do not ignore the difference. Follow the instructions provided with your specific CGM system and contact or follow the advice of your healthcare professional when needed.
Sometimes, the reader may not detect the sensor right away. If this happens, there is usually no need to worry.
According to Abbott’s instructions, if the reader does not successfully scan the sensor within the required time, it may prompt you to scan again. A single unsuccessful scan does not necessarily mean there is a problem with the sensor.
Do not remove a properly applied sensor simply because one scan attempt was unsuccessful. Follow the device instructions and try again as directed.
If the sensor becomes detached, follow the latest Abbott instructions provided for your specific sensor model. Never try to reinsert a sensor that has come out of the skin.
If you are unsure about the next steps, contact Abbott or speak with your healthcare professional for guidance. If the sensor repeatedly fails to stay securely attached, discuss the problem with your healthcare professional and review Abbott’s recommended sensor application and adhesion instructions.
Taking care of your reader can make everyday use easier.
Consider these simple habits:
Charge the reader according to the manufacturer’s instructions so that it is available when you need it.
A clean touchscreen can make navigation easier.
Avoid exposing the reader to conditions outside the manufacturer’s specified operating and storage limits.
If you are new to the system, save the User Manual or bookmark Abbott’s official support resources.
Abbott currently provides FreeStyle Libre 3 Reader support materials online, including user manuals and quick-reference resources.
Learning a new medical device takes time. Here are several common mistakes worth avoiding.
Even if the system looks simple, read the instructions before using it.
Follow Abbott’s recommended placement instructions for your specific sensor.
Use the compatible reader or app according to the manufacturer’s instructions.
The sensor does not provide usable glucose readings immediately after activation. Abbott’s instructions specify a 60-minute warm-up for the referenced system.
An alarm is designed to bring your attention to a situation. Follow your personal diabetes-management plan.
Online articles can explain how a device works, but your healthcare professional should guide your individual treatment decisions.
If your symptoms and sensor readings do not agree, follow the manufacturer’s guidance regarding blood glucose testing and contact your healthcare professional when appropriate.
Abbott’s current information states that the FreeStyle Libre 3 Plus sensor is compatible with the FreeStyle Libre 3 Reader.
However, product compatibility can depend on the specific system, region, software, and device.
Always check the current manufacturer’s information before purchasing or combining components.
This is especially important because Abbott has updated its FreeStyle Libre product lineup and support resources. Abbott’s U.S. support page currently states that the original FreeStyle Libre 3 sensor is being discontinued and directs users toward the FreeStyle Libre 3 Plus sensor.
For that reason, it is a good idea to confirm the exact sensor model you have before starting a new sensor.
Some users choose a smartphone app instead of a dedicated reader.
Abbott provides both reader and app resources, but the available features are not necessarily identical.
Abbott’s U.S. support page currently says that the FreeStyle Libre 3 app is being phased out and recommends transitioning to the newer Libre app with the next sensor.
If you are deciding between a reader and smartphone, check:
For some people, a dedicated reader can be convenient because it provides a separate device specifically for glucose monitoring.
Once you understand the basics, using the reader can become part of your normal routine.
Here are some simple habits.
Rather than becoming focused on constantly checking numbers, use your system according to your healthcare professional’s recommendations.
A single glucose number is only one piece of information.
Make sure your alarm settings are configured according to your treatment plan.
If you depend on the reader for glucose information, avoid leaving it somewhere you cannot easily reach it.
Keep your sensors and other diabetes supplies together so you can find them when needed.
Suppose you have just received a new compatible sensor.
Your general process would look like this:
This basic sequence is what makes the system approachable for many new users.
If you are having trouble understanding your reader, sensor, or setup process, the manufacturer’s resources are an important place to start.
Abbott provides official FreeStyle Libre support materials, including:
The official FreeStyle Libre support center currently provides these reader resources and additional product information.
For questions about your personal glucose targets, medication, insulin, or treatment decisions, speak with your healthcare professional.
At Alfa Healthcare Supply Inc., we understand that medical equipment is not simply another product that someone puts into a shopping cart.
For a person managing diabetes, the right supplies can become part of everyday life.
That is why understanding how to use the FreeStyle Libre 3 Reader matters.
Alfa Healthcare Supply Inc. is a medical supply provider based in Floral Park, New York, serving customers in the surrounding New York area. Our website provides information about diabetes supplies and other home medical equipment.
When looking for a FreeStyle Libre product, it is important to confirm the exact model, sensor compatibility, prescription requirements, insurance requirements, and current availability before ordering.
You can learn more about diabetes and medical supply products through the Alfa Healthcare Supply Inc. website.
Learning a new glucose-monitoring device does not have to happen all at once.
Start with the basics:
The most important thing is not simply knowing where to press on the screen. It is understanding how the reader fits into your overall diabetes-management routine.
If you are new to the FreeStyle Libre 3 Reader, keep the official Abbott User Manual nearby and take your time learning each feature. Abbott continues to update its FreeStyle Libre products, apps, sensors, and support resources, so checking the latest manufacturer information is especially important.
For people searching online for “freestyle libre 3 reader how to use,” the goal should be simple: understand the device, use it according to the manufacturer’s instructions, and work with your healthcare team when making decisions about your diabetes care.
Turn on the reader, select Start New Sensor, and hold the reader against the sensor as instructed. Abbott states that the sensor requires a 60-minute warm-up before it can be used to check glucose.
The referenced Abbott setup instructions specify a 60-minute warm-up period after activation.
The activation scan is different from repeatedly scanning for every glucose value. Abbott’s FreeStyle Libre 3 documentation describes the sensor as providing glucose information continuously once activated and connected to a compatible device.
For a given sensor, Abbott documentation indicates that the FreeStyle Libre 3 Reader cannot be used simultaneously with the FreeStyle Libre 3 app.
Abbott states that the FreeStyle Libre 3 Plus sensor is compatible with the FreeStyle Libre 3 Reader. Always verify current compatibility for your exact product before use.
Follow the instructions displayed on the reader and attempt the scan again as directed. If the problem continues, consult the Abbott User Manual or contact Abbott support.
Follow the water-resistance instructions for your exact sensor model. Do not assume that every sensor or device has identical water-exposure limits.
No. Your medication and insulin decisions should follow the treatment plan provided by your healthcare professional and the manufacturer’s instructions.
Follow Abbott’s instructions. Abbott states that fingerstick testing may be required for treatment decisions when the system indicates a blood glucose check is needed or when readings and symptoms do not match.