


How Do You Replace a ResMed F20 Cushion?
Using a CPAP machine every night can become an important part of your sleep routine. But when your mask cushion becomes worn, loose, or uncomfortable, it may be time to replace it. The good news is that replacing the cushion on a ResMed AirFit F20 full face mask is usually a simple task that you can do at home.
If you are wondering how do you replace a ResMed F20 cushion, this guide explains each step in easy-to-understand language. You will learn how to remove the old cushion, attach the new one, check the fit, and care for your CPAP equipment.
At Alfa Healthcare Supply Inc., we understand that comfortable CPAP equipment matters to people managing sleep apnea. Our goal is to help you make informed decisions about your medical supplies and maintain a consistent sleep routine.
What is a ResMed AirFit F20 Cushion?
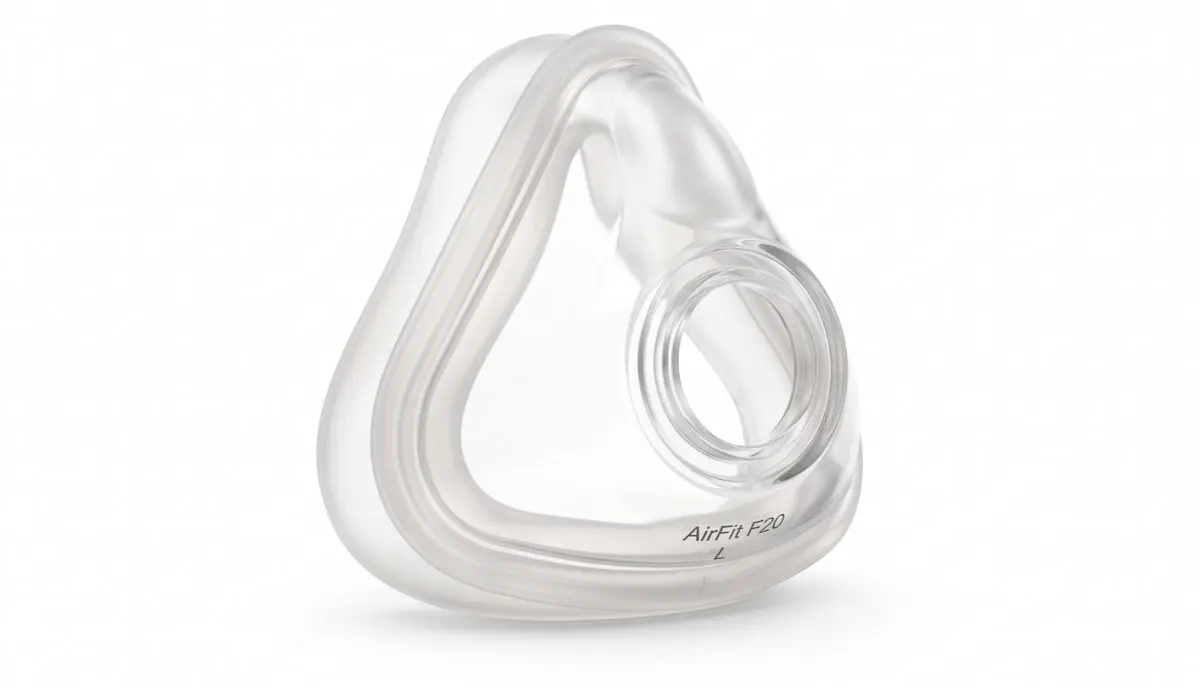
The ResMed AirFit F20 is a full face CPAP mask designed to cover both the nose and mouth. It is used with compatible CPAP equipment to deliver prescribed air pressure during sleep.
The cushion is the soft silicone part that rests against your face. It helps create a seal between your skin and the mask frame, allowing air to reach you as intended during therapy.
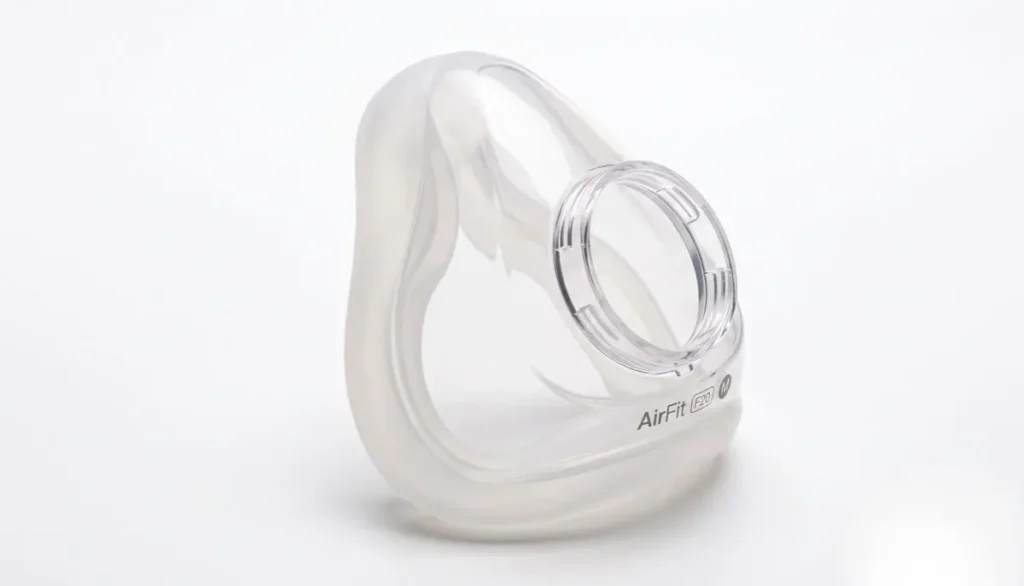
Over time, natural facial oils, regular use, and repeated cleaning can affect the cushion’s condition. A worn cushion may become less flexible, develop tears, or fail to seal properly.
Understanding how do you replace a ResMed F20 cushion can help you maintain your equipment without needing to replace the entire mask when only the cushion needs attention.
When Should You Replace Your ResMed F20 Cushion?
There is no single replacement schedule that works for every person. Your cushion’s condition, how often you use it, your cleaning routine, and your insurance or supplier guidelines can all affect replacement timing.
Look for these common signs:
- Air leaks: Air escapes around the edges even after you adjust the mask correctly.
- Visible damage: The silicone has cracks, tears, or other signs of deterioration.
- Loss of flexibility: The cushion feels unusually stiff, stretched, or misshapen.
- Skin discomfort: The cushion causes new irritation or no longer rests comfortably against your face.
- Persistent fit problems: You continue to experience leaks despite cleaning the cushion and adjusting the headgear.
Cleaning your cushion regularly may help keep it in good condition, but cleaning cannot repair damaged silicone.
If your cushion is damaged or no longer seals reliably, inspect it and consider replacing it. Follow the manufacturer’s recommendations and ask your CPAP equipment provider if you are unsure.
What Do You Need Before Replacing the Cushion?
Before learning how do you replace a ResMed F20 cushion, gather the items you need.
- A compatible replacement cushion for your ResMed AirFit F20 mask.
- Your existing F20 mask frame and headgear.
- A clean, dry surface where you can place the mask parts.
- Mild liquid detergent and warm water if you need to clean the components.
You generally do not need special tools to replace the cushion. The cushion is designed to detach from the frame and be fitted back into place.
Important: Confirm that you have the correct cushion for your mask model and size. The AirFit F20 and AirTouch F20 use different cushion materials, so check compatibility before purchasing a replacement.
How Do You Replace a ResMed F20 Cushion? Step-by-Step Instructions
Follow these steps to remove the old cushion and install the replacement. For model-specific details, consult the official ResMed AirFit F20 user guide.
Step 1: Turn Off Your CPAP Machine
Switch off your CPAP machine and disconnect the mask from the air tubing if necessary. Place the mask on a clean surface with enough room to handle the parts comfortably.
Working with the machine off makes it easier to inspect and reassemble your mask.
Step 2: Remove the Mask Elbow
The elbow is the connector between the mask and the CPAP air tubing.
Press the release buttons on the sides of the elbow and gently pull it away from the mask frame. Set it aside in a safe place.
Avoid pulling hard or twisting the connector with excessive force. The parts should release using their intended mechanism.
Step 3: Detach the Headgear as Needed
Unclip the lower magnetic clips from the mask frame. Then undo the fastening tabs on the upper headgear straps and slide the straps out of the frame slots.
Keep track of the upper and lower straps so you can put them back correctly. You do not need to rush this step.
Removing the headgear gives you better access to the cushion and frame.
Step 4: Remove the Old Cushion
Hold the mask frame securely by its sides, between the upper and lower arms.
Gently pull the old cushion away from the frame. Work carefully around the connection rather than yanking one section forcefully.
Once the cushion comes free, inspect the frame for dirt, residue, cracks, or other visible damage.
This is the main step in learning how do you replace a ResMed F20 cushion. The cushion should detach without requiring you to replace the entire mask assembly.
Step 5: Clean the Mask Components
If the frame, elbow, or reusable cushion components need cleaning, follow ResMed’s instructions for your specific mask.
For the AirFit F20, the frame, elbow, and silicone cushion can generally be washed with warm water and mild liquid detergent. Rinse them thoroughly and allow them to air-dry away from direct sunlight.
Do not use harsh chemicals, abrasive cleaners, or unapproved cleaning methods. If you are replacing the cushion with a new one, keep it clean and handle it with clean hands.
Check the manufacturer’s instructions before cleaning any different cushion material, especially memory foam.
Step 6: Attach the New Cushion
Take the replacement cushion and align its circular opening with the matching opening in the mask frame.
Press the cushion and frame together gently until the cushion is seated and retained securely. Check the connection around the edges to make sure the cushion is attached evenly.
Do not force the cushion into place. If it does not fit, check the model, size, and alignment before trying again.
A properly installed cushion should sit evenly in the frame without loose sections or visible gaps.
Step 7: Reattach the Headgear
Thread the upper headgear straps through the frame slots from the inside, keeping the ResMed logo facing outward and upright. Fold the fastening tabs over the straps to secure them.
Reconnect the lower magnetic clips to their corresponding attachment points.
Check that the headgear is not twisted and that the straps are secured correctly. Proper headgear placement helps keep the cushion stable during sleep.
Step 8: Reconnect the Elbow and Air Tubing
Push the elbow back into the mask frame until it is securely connected. Attach the CPAP air tubing to the elbow.
Check that the tubing connection is secure and that the mask parts are assembled correctly before use.
Step 9: Check the Fit and Air Seal
Place the mask over your nose and mouth, then position the headgear comfortably. Connect the mask to your CPAP machine and turn the machine on according to its instructions.
Check for escaping air around the cushion. If you notice leaks, reposition the mask and make small adjustments to the headgear.
Avoid overtightening the straps. Excessive tightness can cause discomfort and may not improve the seal.
If you still experience significant leaks, check the cushion installation and size. Contact your equipment provider or healthcare professional if the problem continues.
How to Get a Comfortable Fit After Replacing the Cushion
Replacing the cushion is only part of maintaining a comfortable CPAP experience. A few simple habits can make your nightly routine easier.
Keep the cushion correctly positioned. The mask should sit comfortably over your nose and mouth without pressing painfully against your skin.
Adjust the straps evenly. Uneven straps can pull the cushion to one side and create gaps.
Check for leaks while lying down. Your face position can change the way the mask seals, so check the fit in your usual sleeping position.
Keep the cushion clean. Facial oils and residue can affect the contact between the cushion and your skin.
Do not ignore persistent discomfort. If the cushion repeatedly leaks, causes irritation, or feels wrong even after adjustment, ask a qualified CPAP provider to check the fit.
Learning how do you replace a ResMed F20 cushion is useful, but a replacement part cannot solve every mask-fitting problem. The correct size and proper positioning remain important.
AirFit F20 Cushion vs. AirTouch F20 Cushion
Before ordering a replacement, understand the difference between these two ResMed mask options.
| Feature | AirFit F20 | AirTouch F20 |
| Cushion material | Silicone | Memory foam |
| Main consideration | Reusable cushion designed for regular cleaning | Soft foam cushion with specific care requirements |
| Replacement check | Confirm the correct model and size | Confirm the correct model and size |
Although these masks share the F20 platform, their cushions are different. Do not assume that all replacement cushions are interchangeable simply because the frames look similar.
Check the product description and compatibility information before placing an order.
How to Clean and Maintain Your New Cushion
After learning how do you replace a ResMed F20 cushion, establish a regular cleaning routine to help maintain your mask.
- Clean the AirFit F20 cushion according to the manufacturer’s recommended schedule.
- Use warm water and mild liquid detergent as directed.
- Rinse away all detergent residue.
- Allow the components to air-dry completely away from direct sunlight.
- Inspect the cushion regularly for tears, discoloration, or changes in shape.
- Store your mask in a clean, dry place when it is not being used.
Avoid using harsh chemicals or unapproved ozone and ultraviolet cleaning devices. These methods may damage CPAP components.
Follow the instructions supplied with your particular mask, especially if you use a different cushion material.
Common Mistakes to Avoid When Replacing an F20 Cushion
A few simple mistakes can make a new cushion uncomfortable or less effective.
Choosing the wrong size: A cushion that is too small or too large may not create a reliable seal. Check your mask size before ordering.
Installing the cushion unevenly: If part of the cushion is not seated correctly, air may leak. Check the connection around the frame.
Overtightening the headgear: Pulling the straps too tightly can cause pressure marks and discomfort. Adjust them gradually.
Ignoring visible damage: A cracked frame or damaged connector may prevent proper assembly. Replace damaged components as recommended.
Using the wrong cleaning products: Strong cleaners can damage materials or leave residue. Use only the recommended cleaning method.
Avoiding these mistakes can help make cushion replacement simpler and more comfortable.
Where Can You Find a Replacement ResMed F20 Cushion?
When shopping for a replacement, look for a medical supply provider that clearly identifies the product, cushion size, compatible mask model, and manufacturer information.
Alfa Healthcare Supply Inc. offers medical supply information through its website at https://alfahealthcaresupplyinc.com/. Visit the website to explore available supplies and confirm current product availability.
Before ordering, verify the following:
- The cushion is intended for your exact mask model.
- The selected size matches your existing mask or confirmed fitting needs.
- The product listing clearly describes the cushion material.
- Any prescription, insurance, or supplier requirements are understood.
- The product’s return and replacement policies meet your needs.
If you are unsure which cushion you need, contact your medical equipment supplier before purchasing. Confirming compatibility first can help prevent unnecessary returns and delays.
Final Thoughts: How Do You Replace a ResMed F20 Cushion?
Knowing how do you replace a ResMed F20 cushion can help you care for your CPAP equipment with greater confidence. The process involves removing the old cushion, checking the frame, attaching the correct replacement, and testing the fit before going to sleep.
Take your time during each step. A securely fitted cushion, regular cleaning, and properly adjusted headgear can make your nightly routine more comfortable.
For additional medical supply information, visit Alfa Healthcare Supply Inc. at https://alfahealthcaresupplyinc.com/ and confirm the compatibility of any replacement part before ordering.
Frequently Asked Questions: How Do You Replace a ResMed F20 Cushion?
1. How do you replace a ResMed F20 cushion at home?
Turn off your CPAP machine, remove the elbow and headgear as needed, and gently pull the old cushion away from the frame. Align the replacement cushion with the frame opening and press the parts together until securely seated. Reassemble the mask and check its fit before therapy.
2. Do I need to replace the entire AirFit F20 mask?
Not necessarily. If the frame, elbow, and headgear remain in good condition, replacing only the worn cushion may be sufficient. If other components are damaged, ask your equipment provider whether they also need replacement.
3. How do I know which F20 cushion size to buy?
Check the size marked on your existing cushion or mask packaging and consult the official ResMed sizing guide. AirFit F20 cushions are available in Small, Medium, and Large sizes. If the current size causes persistent discomfort or leaks, seek a fitting assessment.
4. Can I use an AirTouch F20 cushion on an AirFit F20 frame?
ResMed designed the F20 platform so the AirFit silicone cushion and AirTouch memory foam cushion can be used with the compatible F20 frame. However, check the exact model, fit, and care instructions before switching cushion types.
5. Why does my mask leak after I replace the cushion?
Possible causes include incorrect cushion installation, the wrong size, uneven headgear adjustment, facial movement, or a damaged frame. Reseat the cushion and adjust the straps gently. If leaks continue, consult your CPAP provider.
6. Should I tighten my mask more if air leaks?
Not always. Excessive tightening may cause discomfort without fixing the leak. Reposition the cushion, inspect its connection to the frame, and adjust the headgear evenly. Seek professional help if the leak persists.
7. Can I wash a new replacement cushion before using it?
Follow the cleaning instructions supplied with your specific replacement cushion. For an AirFit silicone cushion, use the manufacturer’s recommended cleaning method and rinse thoroughly. Memory foam cushions have different care requirements.
8. Does replacing the cushion improve CPAP therapy?
A new cushion may help restore a better seal when the previous cushion is worn or damaged. However, it does not guarantee improved therapy in every situation. Proper mask sizing, machine settings, and consistent use also matter.
Medical disclaimer: This article provides general equipment guidance and is not a substitute for the manufacturer’s instructions or advice from your healthcare professional. Continue using CPAP therapy as prescribed, and seek professional assistance for persistent leaks, discomfort, or other therapy concerns.