


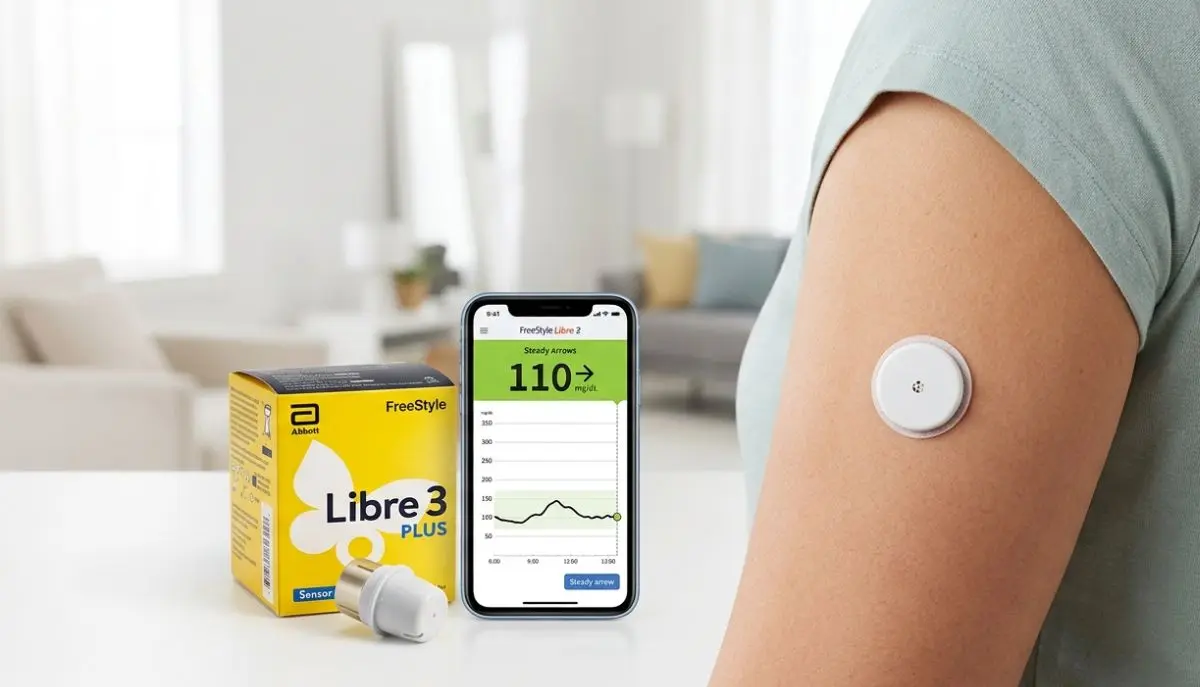
Learning how to apply FreeStyle Libre 3 Plus sensor correctly can make the first day of wearing a continuous glucose monitor (CGM) much easier. For someone using a CGM for the first time, the applicator, sensor, and phone setup may seem unfamiliar. The good news is that the FreeStyle Libre 3 Plus sensor is designed to be applied with a simple disposable applicator.
The sensor is placed on the back of the upper arm and is designed to provide glucose readings for up to 15 days. Abbott recommends choosing a suitable area of the upper arm, preparing the skin carefully, applying the sensor firmly, and then activating it with the compatible app or reader.
In this guide, Alfa Healthcare Supply Inc. explains how to apply FreeStyle Libre 3 Plus sensor step by step, what to do before application, how to start the sensor, how to help it stay attached, and what to do if you experience a problem.
Important: This article is for general educational information. Always follow the instructions included with your specific sensor and the guidance of your healthcare professional. If your glucose reading does not match how you feel, follow your healthcare professional’s instructions for confirming your glucose level.
The FreeStyle Libre 3 Plus is a continuous glucose monitoring sensor designed to help people monitor glucose levels throughout the day. Abbott describes it as a real-time CGM sensor that can provide glucose readings automatically to a compatible smartphone, depending on the system and device being used.
Instead of repeatedly using a traditional blood glucose meter, a CGM sensor can provide ongoing glucose information and trends. The FreeStyle Libre 3 Plus sensor is designed to be worn for up to 15 days.
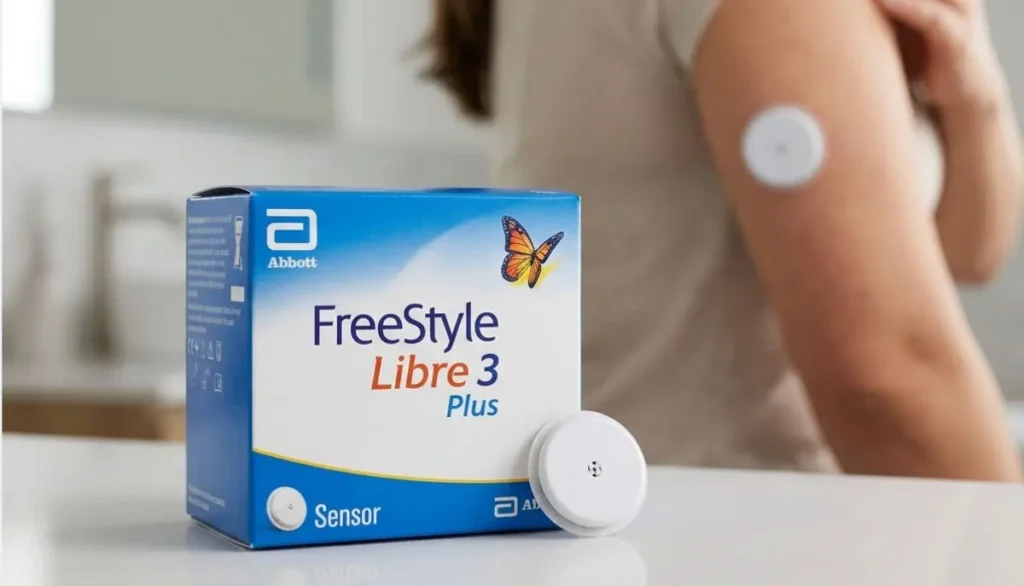
The sensor is applied to the back of the upper arm. A small filament sits just under the skin and measures glucose in the interstitial fluid.
For many people, the most important question before starting is simple:
“How do I put the sensor on correctly?”
Let’s walk through it.
Applying the FreeStyle Libre 3 Plus sensor involves four basic stages:
Taking a few extra minutes to prepare your skin properly can help the adhesive stay attached and may reduce the chance of early sensor loss.
Before opening or handling your sensor supplies, wash your hands thoroughly.
Clean hands are important because the sensor will be placed directly against your skin and the applicator inserts the sensor filament under the skin.
Avoid handling the sensor unnecessarily after preparing your skin.
If your hands are wet, dry them completely before continuing.
One of the most important parts of learning how to apply FreeStyle Libre 3 Plus sensor is knowing where it should go.
Abbott’s instructions specify the back of the upper arm as the application site. The selected area should generally remain flat during normal activities rather than frequently bending or folding.
Abbott recommends changing the application site between sensors to allow the skin to recover.
For the FreeStyle Libre 3 Plus sensor, do not choose an alternative body location simply because it seems convenient.
Follow the manufacturer’s approved application location for your specific sensor. Abbott’s current safety information says to apply the Libre 3 Plus sensor to the back of the upper arm.
Before applying your sensor, inspect the skin.
Do not select an area with:
Abbott also recommends keeping the sensor away from insulin injection sites. A distance of at least 2.5 cm (1 inch) is recommended.
If you recently used one arm for a sensor, consider using a different suitable location on the opposite arm for the next sensor.
Rotating locations can help reduce repeated irritation.
Good skin preparation is one of the easiest ways to improve sensor adhesion.
First, wash the selected area with plain soap and water.
Abbott recommends a non-moisturizing, fragrance-free soap for preparing the application site. After washing, dry the area thoroughly with a clean towel.
Next, use an alcohol wipe to remove remaining oils from the skin.
Allow the skin to air dry completely.
This last step is important.
Do not apply the sensor while the skin is still wet from alcohol.
Do not apply:
to the sensor application area immediately before applying the sensor.
Oily residue can interfere with adhesion. Abbott’s guidance emphasizes cleaning the area and allowing it to dry completely before application.
Before using the applicator, inspect the packaging.
Do not use a sensor if its package appears damaged or opened, or if the product is past its expiration date. Follow the specific instructions supplied with your sensor.
The FreeStyle Libre 3 Plus sensor is supplied with its applicator ready for use.
Do not attempt to modify the applicator or sensor.
When you are ready to apply the sensor, remove the applicator from its packaging according to the instructions.
Abbott’s FreeStyle Libre 3 Plus getting-started instructions say to unscrew the cap from the applicator.
Once the cap is removed, do not put it back on.
The applicator is designed to apply the sensor in one controlled movement.
Keep the applicator away from children and handle it carefully.
Place the applicator over the prepared area on the back of your upper arm.
Make sure you have selected the intended location before pressing down.
This is an important point:
Do not press the applicator while it is away from your skin.
Position it first.
Once the applicator is correctly positioned, follow the manufacturer’s instructions and press down firmly.
This is the key part of how to apply FreeStyle Libre 3 Plus sensor.
With the applicator positioned correctly on the prepared skin:
Abbott’s official instructions describe this same basic process.
You should now see the sensor attached to the back of your upper arm.
The applicator should be discarded according to applicable local disposal instructions.
After application, gently check that the sensor is attached securely.
Do not repeatedly press, move, or twist the sensor.
Avoid catching it on clothing, door frames, car doors, seat belts, or other objects.
Abbott’s getting-started guide recommends being gentle with the sensor to help prevent accidental removal.
If you need additional protection because of your activity level, discuss appropriate over-bandage or skin-adhesive options with your healthcare professional and follow Abbott’s sensor adhesion guidance.
After applying the sensor, the next step is activation.
The exact process can depend on the compatible smartphone, app, reader, and version of the FreeStyle Libre system you are using.
For the FreeStyle Libre 3 Plus system, Abbott’s instructions explain that you can start the sensor using the compatible Libre app or reader.
Open the compatible Libre app.
Select the option to start a new sensor.
Follow the instructions displayed by the app.
You may need to scan the sensor with your smartphone.
The scanning position can vary by phone model.
Abbott notes that smartphone compatibility should be checked before use.
If your setup requires scanning, hold the appropriate part of your smartphone near the sensor.
For some iPhone configurations, the top of the phone is used.
For Android devices, the NFC antenna location can vary by model, so you may need to move the phone slowly around the sensor until it detects the sensor.
Wait for the app to confirm that the sensor has been successfully started.
Do not move the phone away too quickly during the scanning process.
A newly applied FreeStyle Libre 3 Plus sensor requires a 60-minute warm-up period before glucose readings are available for use.
During this time, you can continue using your phone normally.
When the warm-up period is complete, the system can begin providing glucose information according to your compatible setup.
The app or reader may provide a notification when the sensor is ready.
Once your sensor is active and the warm-up period is complete, you can begin viewing your glucose information through the compatible system.
Depending on the setup, the system can display:
Abbott states that the FreeStyle Libre 3 Plus system can send glucose readings automatically to a compatible smartphone, with system features depending on the device and software being used.
Always follow your healthcare professional’s instructions when using CGM information to make treatment decisions.
Everyone’s experience can be different.
The applicator is designed to place the sensor filament under the skin, and Abbott describes the application as designed to be comfortable.
Some people may notice:
Abbott’s safety information notes that bruising or bleeding can occur because the sensor inserts just under the skin.
If significant bleeding does not stop, or you experience a concerning reaction, follow your healthcare professional’s advice and the manufacturer’s instructions.
No.
You do not need to pinch or stretch the skin when applying the FreeStyle Libre sensor.
Abbott specifically advises selecting an appropriate area on the back of the upper arm rather than manipulating the skin during application.
Simply prepare the skin, position the applicator correctly, and follow the application instructions.
Proper preparation is the first step.
Here are some practical tips:
Oil and residue can make it harder for adhesive to stay attached.
Do not apply the sensor while the skin is wet.
Keep creams and moisturizers away from the application site before applying the sensor.
Avoid areas that bend or fold during normal activity.
When changing shirts, avoid pulling clothing directly across the sensor.
A sensor can accidentally catch on objects.
Sports, sweating, swimming, and other activities may put additional stress on the adhesive.
Abbott provides additional adhesion guidance for users who have difficulty keeping a sensor attached.
The FreeStyle Libre 3 Plus sensor is designed to be worn during activities such as bathing and swimming, within the manufacturer’s specified limitations.
However, water exposure should still be handled carefully.
Abbott’s getting-started guide says the sensor is water-resistant and advises avoiding submerging it in more than 3 feet of water for more than 30 minutes at a time.
After water exposure, gently pat the sensor dry rather than rubbing it aggressively.
Always check the instructions supplied with your specific product because product guidance can change.
The FreeStyle Libre 3 Plus sensor is designed for up to 15 days of wear.
Your compatible app or reader can notify you when it is time to replace the sensor.
When it is time to remove it, gently lift the adhesive edge and slowly peel the sensor away from your skin.
For your next sensor, choose a different appropriate area on the back of your upper arm.
Changing sites can help reduce repeated skin irritation.
Removing the sensor does not require the applicator.
When the sensor reaches the end of its approved wear period:
If the adhesive is difficult to remove, follow the manufacturer’s recommendations.
Avoid pulling aggressively because doing so can irritate the skin.
Sometimes a CGM sensor can become loose or come off before the intended wear period.
This may happen because of:
If the sensor comes off, do not attempt to reattach the same sensor with ordinary tape or glue unless the manufacturer specifically instructs you to do so.
Contact Abbott’s customer support or follow the instructions that came with your sensor for assistance.
If you experience a significant skin reaction, speak with your healthcare professional.
Learning how to apply FreeStyle Libre 3 Plus sensor becomes easier when you know what not to do.
The approved application site is the back of the upper arm.
Moisturizer and oily products may interfere with adhesion.
Give the skin time to dry completely.
Do not repeatedly use the same irritated area.
Keep the sensor at least 1 inch away from insulin injection sites.
Position the applicator first and follow the manufacturer’s application procedure.
The FreeStyle Libre 3 Plus sensor requires a 60-minute warm-up before it can be used for glucose readings.
Before you begin, use this quick checklist:
☐ Wash your hands
☐ Check the sensor expiration date
☐ Check that the package is intact
☐ Choose the back of the upper arm
☐ Avoid scars, moles, lumps, and irritated skin
☐ Stay at least 1 inch away from insulin injection sites
☐ Wash with plain soap and water
☐ Dry completely
☐ Clean with an alcohol wipe
☐ Let the skin air dry
☐ Remove the applicator cap
☐ Position the applicator correctly
☐ Press firmly
☐ Listen for the click
☐ Wait a few seconds
☐ Slowly remove the applicator
☐ Confirm the sensor is attached
☐ Open the compatible Libre app or reader
☐ Start the new sensor
☐ Scan if required
☐ Wait for the 60-minute warm-up
☐ Follow your healthcare professional’s instructions for using readings
Another important safety point is vitamin C.
Abbott’s current U.S. safety information states that taking more than 1,000 mg of vitamin C per day may falsely raise FreeStyle Libre 3 Plus sensor readings.
This matters because an inaccurate glucose reading could affect decisions made from the CGM information.
If you take vitamin C supplements or medications containing vitamin C, discuss them with your healthcare professional and check the current product labeling.
A CGM is a valuable tool, but you should not ignore how you feel.
If your glucose reading does not match your symptoms or expectations, follow the manufacturer’s instructions and your healthcare professional’s guidance regarding confirmation with a blood glucose meter.
Abbott’s safety information specifically notes that finger-prick testing may be required when glucose readings do not match symptoms or expectations.
For example, if your CGM displays a number that seems inconsistent with how you feel, do not simply assume that the sensor must be correct.
Follow your diabetes care plan.
The current U.S. Abbott safety information states that the FreeStyle Libre 3 Plus sensor is indicated for people age 2 and older, while specific system compatibility and indications may vary by country.
The sensor can also be used with certain compatible automated insulin delivery systems, depending on the approved system and market.
Because diabetes technology changes and product approvals can vary by location, check the instructions and indications applicable to your country and specific product.
Correct placement is more than simply putting the sensor somewhere on your arm.
The sensor needs an appropriate location so that:
Abbott specifically recommends the back of the upper arm and avoiding scars, moles, stretch marks, lumps, and areas that bend or fold.
Taking your time before application can make the entire experience easier.
Once you have applied one or two FreeStyle Libre 3 Plus sensors, the process may feel much more familiar.
A simple routine can help:
Choose → Clean → Dry → Apply → Activate → Warm Up → Monitor
Find an appropriate area on the back of your upper arm.
Wash the area with plain soap and water.
Dry the skin and use an alcohol wipe. Allow it to air dry completely.
Use the supplied applicator according to the manufacturer’s instructions.
Start the sensor through your compatible app or reader.
Allow the required 60-minute warm-up period.
Use the CGM information as directed by your healthcare professional.
This simple routine can make sensor changes feel much less complicated.
Learning how to apply FreeStyle Libre 3 Plus sensor does not have to be stressful.
The most important steps are straightforward:
Choose the correct site, clean the skin, let it dry completely, apply the sensor correctly, activate it, and allow the full warm-up period.
The back of the upper arm is the recommended application area, and the skin should be clean, dry, and free from lotions or oily residue. Abbott recommends avoiding scars, moles, lumps, and areas that bend or fold.
The FreeStyle Libre 3 Plus sensor is designed for up to 15 days of wear, giving users an extended period of continuous glucose monitoring before the sensor needs to be replaced.
For people using CGM technology for the first time, it is completely normal to take a little extra time with the first application. After a few sensor changes, the process can become a familiar part of your diabetes-management routine.
If you have questions about whether a CGM is appropriate for you, how to interpret readings, or how to make treatment decisions from glucose data, speak with your doctor, diabetes educator, pharmacist, or other qualified healthcare professional.
Alfa Healthcare Supply Inc. provides medical supply resources for patients and caregivers looking for diabetes and home healthcare products. For product availability, insurance questions, or help finding appropriate diabetes supplies, contact a qualified medical supply provider and verify that the product and accessories are compatible with your specific CGM system.
For the current U.S. FreeStyle Libre 3 Plus system, Abbott specifies the back of the upper arm as the application site.
Do not choose another body location simply because it is more convenient.
No. Abbott advises that you do not need to pinch or stretch the skin before applying the sensor.
After application, the FreeStyle Libre 3 Plus has a 60-minute warm-up period before glucose readings can be used.
The sensor is designed for up to 15 days of wear.
The FreeStyle Libre 3 Plus sensor is designed to be worn during bathing and swimming within the manufacturer’s water-exposure limitations.
Avoid pulling it unnecessarily. Follow Abbott’s current sensor adhesion guidance. If it comes completely off, contact the manufacturer for support and follow the instructions supplied with your product.
It is better to keep lotion, moisturizer, and oily products away from the application area before sensor placement because they can interfere with adhesion.
Abbott advises avoiding scars, moles, stretch marks, and lumps when selecting the application site.
It is better to rotate suitable application sites rather than repeatedly applying the sensor to the exact same area. This gives the skin time to recover and can help reduce irritation.