


If you are searching for “dexcom g7 receiver near me,” you are probably looking for a convenient way to view your glucose readings without depending entirely on a smartphone. For many people using continuous glucose monitoring (CGM), having a dedicated receiver can make everyday diabetes management feel simpler and more dependable.
A Dexcom G7 receiver is designed to display glucose information from a compatible Dexcom G7 CGM system. Dexcom explains that users can choose to use the G7 app on a compatible smartphone, use the receiver, or use both at the same time.
For people who prefer a dedicated medical device, do not have a compatible smartphone, or need a receiver for insurance-related reasons, finding a reliable medical supply provider can be an important part of the process.
If you are in the New York area, you can explore diabetes and medical supply products from Alfa Healthcare Supply Inc.
What is a Dexcom G7 Receiver?
The Dexcom G7 receiver is a dedicated handheld device that can display glucose readings from the Dexcom G7 continuous glucose monitoring system.
Instead of relying only on a smartphone, a person can use the receiver to view information from their CGM system. This can be helpful for someone who prefers a separate medical device for glucose monitoring.
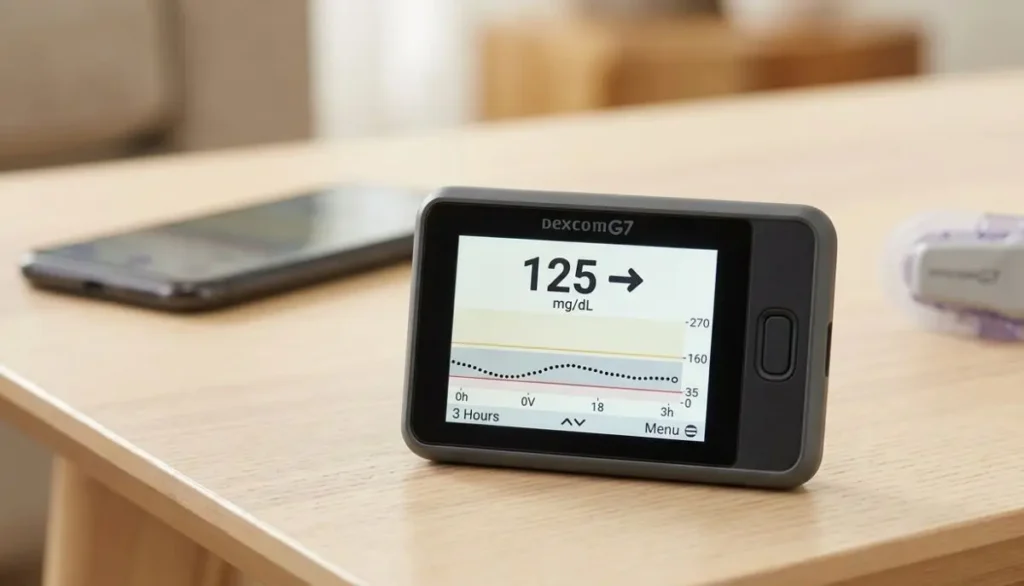
According to Dexcom, the G7 receiver is small and lightweight, and its battery can last for up to seven days on a single charge.
The receiver is designed to work as part of the Dexcom G7 system. It can display glucose readings and alerts, helping users stay informed about their glucose levels throughout the day.
For someone searching for a dexcom g7 receiver near me, understanding what the receiver actually does is the first step before purchasing one.
Why Are People Searching for a Dexcom G7 Receiver Near Me?
The phrase “dexcom g7 receiver near me” often represents a very practical need.
You may be searching because:
- Your current receiver is damaged.
- You are starting Dexcom G7 for the first time.
- Your smartphone is not compatible with the Dexcom G7 app.
- You prefer not to use your personal phone for diabetes management.
- You want a dedicated device for viewing glucose information.
- Your healthcare provider recommended using a receiver.
- Your insurance or Medicare coverage may involve receiver requirements.
- You want to purchase your diabetes supplies from a medical supply company.
- You need help understanding which receiver is compatible with your system.
Whatever the reason, choosing the correct device matters.
It is especially important not to assume that every Dexcom receiver works with every Dexcom sensor generation.
Does Dexcom G7 Need a Receiver?
Not necessarily.
One of the most common questions is whether someone must purchase a receiver to use Dexcom G7.
Dexcom states that users have the option to use:
- The Dexcom G7 app on a compatible smartphone.
- The Dexcom receiver.
- Both the smartphone app and receiver.
This means a receiver is not automatically required for every Dexcom G7 user.
However, whether you personally need one depends on your equipment, smartphone compatibility, insurance situation, and healthcare needs.
For example, someone who already has a compatible smartphone may prefer the app. Another person may feel more comfortable carrying a dedicated receiver.
There is no single solution that is right for everyone.
Why Choose a Dedicated Dexcom G7 Receiver?
A smartphone is convenient, but a dedicated receiver can offer several advantages.
1. You Do Not Have to Depend Completely on Your Phone
Some people prefer keeping their diabetes management separate from their everyday smartphone.
A dedicated receiver gives you another way to view your glucose information.
This can be especially convenient if your phone battery is low, you are using another phone, or you simply prefer a separate device.
2. It Can Be Helpful If Your Phone Is Not Compatible
Not every smartphone is compatible with every CGM application.
Dexcom regularly updates its list of compatible smart devices. Dexcom also recommends the redesigned G7 receiver for people whose smart device is not currently compatible with the G7 app.
Before purchasing a receiver or relying on your phone, check current compatibility information.
3. A Receiver Can Feel Simpler
For some users, simplicity matters.
Instead of opening multiple phone applications or changing smartphone settings, a dedicated receiver provides a device specifically intended for glucose monitoring.
That straightforward experience can be reassuring, especially for people who are new to CGM technology.
4. It Provides Another Option for Glucose Monitoring
Some users like having both a smartphone and receiver available.
Dexcom allows G7 users to use the receiver and compatible smart devices together, depending on their setup.
Having options can make diabetes management more flexible.
Dexcom G7 Receiver Near Me: What Should You Look For?
When searching for a dexcom g7 receiver near me, do not focus only on distance.
A nearby supplier may be convenient, but you should also consider whether the supplier can help with the type of product you need.
Here are several things to check.
Product Compatibility
First, make sure the receiver is intended for Dexcom G7.
A Dexcom G6 receiver is not compatible with Dexcom G7 sensors. Dexcom specifically states that G7 uses a redesigned receiver.
This is one reason it is important to verify the product before ordering.
Supplier Experience
Medical supplies are different from ordinary consumer products.
A knowledgeable medical supply provider can help you understand product availability, ordering requirements, insurance questions, and related diabetes supplies.
Insurance Support
Coverage can vary by insurance plan.
If you are planning to use insurance, ask the supplier what documentation may be needed.
Dexcom states that people seeking to obtain a receiver through insurance should contact their Dexcom supplier or have their healthcare provider prescribe the receiver to their pharmacy.
Availability
If you need the receiver quickly, ask whether it is currently available before making a trip.
Product inventory can change.
Delivery Options
For people who cannot easily visit a medical supply store, delivery can be an important consideration.
A medical supplier serving your area may be able to provide convenient delivery depending on product availability, insurance requirements, and location.
Where Can I Find a Dexcom G7 Receiver Near Me?
If you are located in or around Floral Park and the greater New York area, Alfa Healthcare Supply Inc is a local medical supply store at 261-12 E Williston Ave, Queens, NY 11001.
You can also visit the Alfa Healthcare Supply website to explore available medical supplies and contact the supplier about current product availability.
When looking specifically for a dexcom g7 receiver near me, it is a good idea to contact the supplier before visiting to confirm the exact product you need.
Dexcom G7 Receiver vs. Smartphone App
One of the biggest decisions for a G7 user is whether to use the receiver or smartphone app.
Here is a simple comparison:
| Feature | Dexcom G7 Receiver | Compatible Smartphone |
| Dedicated glucose device | Yes | No |
| Requires compatible phone | No | Yes |
| Portable | Yes | Yes |
| Displays glucose data | Yes | Yes |
| Can provide alerts | Yes | Yes |
| Uses phone battery | No | Yes |
| Can be used as dedicated device | Yes | No |
| Requires app installation | No | Yes |
The best option depends on your lifestyle and personal preferences.
If you like using your smartphone and have a compatible device, the app may be convenient.
If you prefer a dedicated medical device, the receiver may be a better fit.
Is the Dexcom G7 Receiver the Same as the Dexcom G6 Receiver?
No.
This is an important distinction.
Dexcom states that the Dexcom G6 receiver is not compatible with Dexcom G7 sensors. The G7 uses a redesigned receiver with a smaller design and an easier-to-read display.
So, if you are searching for a dexcom g7 receiver near me, make sure the listing or supplier specifically identifies the product as a G7 receiver.
Do not purchase a used or older Dexcom receiver simply because it looks similar.
When in doubt, verify compatibility with your healthcare provider, diabetes care team, or supplier.
Can the Dexcom G7 Receiver Work With Dexcom G7 15 Day?
Yes.
Dexcom states that the Dexcom G7 15 Day CGM system uses the same receiver as the Dexcom G7 system. Existing G7 receivers may require a software update to work with the G7 15 Day system.
This is useful information for people who already own a G7 receiver.
Instead of automatically assuming that a new receiver is needed, check whether your existing receiver can be updated.
Dexcom provides instructions for updating the receiver through Dexcom Clarity.
Does Medicare Require a Dexcom Receiver?
Medicare coverage can have specific requirements.
Dexcom states that a receiver is required for Medicare coverage of its CGM system, with the receiver used along with a smart device to receive Medicare benefits for CGM.
If you have Medicare, do not assume that you can simply choose the smartphone-only option.
Your individual coverage and eligibility should be confirmed with your healthcare provider, Medicare plan, or medical equipment supplier.
If you are a new patient, Dexcom says the receiver may be provided through a medical device supplier.
This is one reason searching for a reliable dexcom g7 receiver near me can be particularly important for Medicare beneficiaries.
What Comes With a Dexcom G7 Receiver?
According to Dexcom’s setup information, the receiver package includes the receiver, USB cable, and power adapter.
Remember that the receiver is part of the larger CGM system.
Depending on what you are purchasing, the receiver may not automatically mean that you have everything needed to start a new CGM session.
The sensor and receiver are different components.
Always review the product description and package contents before ordering.
How Does the Dexcom G7 Receiver Work?
The basic idea is straightforward.
The Dexcom G7 sensor collects glucose information and communicates with a compatible receiving device.
The receiver displays glucose information so that you can monitor your readings and trends.
The system can also provide alerts for certain glucose conditions. Dexcom lists features such as customizable high and low alerts, urgent low alerts, and other alert settings.
The exact setup and available features can depend on the product version, software, region, age, and other factors.
Always follow the official Dexcom instructions for your particular system.
What Are the Benefits of Using Dexcom G7?
Dexcom G7 is designed to provide continuous glucose monitoring rather than requiring users to manually test glucose at every moment.
Dexcom describes G7 as a CGM system that provides real-time glucose information and can show glucose data on a smartphone, smartwatch, or dedicated receiver.
Potential advantages include:
Continuous glucose information
Rather than relying only on occasional fingerstick readings, CGM technology provides ongoing information from the sensor.
Glucose trend awareness
The system can help users understand whether glucose is moving upward, downward, or remaining relatively stable.
Alerts
Alerts can notify users about certain glucose conditions.
Flexible viewing options
Depending on compatibility and system configuration, users can view information through a receiver or compatible smart device.
Data sharing
Dexcom also offers connected tools such as Dexcom Clarity for sharing glucose information with healthcare professionals.
How Long Does a Dexcom G7 Receiver Battery Last?
Dexcom’s product information states that the G7 receiver battery can last for up to seven days on a single charge.
Actual battery performance can vary depending on use and other factors.
To keep your receiver ready, charge it according to the manufacturer’s instructions.
If you notice unusual battery behavior, charging problems, or other technical issues, consult Dexcom’s official support resources rather than attempting to repair the medical device yourself.
Tips for Buying a Dexcom G7 Receiver Near Me
Searching online for “dexcom g7 receiver near me” can bring up many results, but not every listing is necessarily suitable for your needs.
Use these practical tips.
1. Confirm the Model
Look specifically for the Dexcom G7 receiver.
Avoid confusing G7 with G6.
2. Check Availability
Call or contact the supplier before traveling.
Ask whether the receiver is currently available.
3. Ask About Insurance
If you are using insurance, ask what documentation or prescription requirements apply.
4. Verify Compatibility
If you already have a sensor or G7 system, make sure the receiver is compatible with your version.
5. Consider Delivery
If visiting a store is difficult, ask whether delivery is available to your location.
6. Purchase From a Reputable Supplier
Medical devices should come from a reliable source.
Be cautious with unknown marketplace sellers, especially when product authenticity, warranty, storage, or return policies are unclear.
Why a Local Medical Supplier Can Be Helpful
Buying a medical device is different from ordering an everyday household product.
A local medical supply provider can give you a place to ask questions and discuss practical ordering concerns.
For someone searching “dexcom g7 receiver near me,” local access may also make it easier to communicate about insurance, prescriptions, availability, delivery, and related diabetes supplies.
Alfa Healthcare Supply serves customers looking for a range of medical equipment and healthcare supplies in the New York area.
You can explore the Alfa Healthcare Supply online store and contact the company to ask about current Dexcom G7 receiver availability.
Dexcom G7 Receiver Near Me in New York
If you live in New York, searching by location can make it easier to find a medical supply provider.
People in communities around Queens, Long Island, Brooklyn, Bronx, Manhattan, Westchester, and other parts of New York may look for terms such as:
- Dexcom G7 receiver near me
- Dexcom receiver Queens
- Dexcom G7 receiver Long Island
- Dexcom G7 receiver Floral Park
- Dexcom G7 receiver New York
- Diabetes supplies near me
- CGM supplies near me
- Dexcom supplies near me
- Diabetes medical equipment near me
- Medical supply store near me
However, local search results can change frequently.
Always confirm the supplier’s current location, hours, inventory, and delivery options before visiting.
What If Your Smartphone Is Compatible?
If your smartphone is compatible with Dexcom G7, you may not need a receiver.
Dexcom provides an app for compatible iOS and Android devices.
But compatibility is only one part of the decision.
You may still prefer a receiver because:
- You want a dedicated medical device.
- You do not want diabetes information mixed with your phone.
- Your phone battery is frequently low.
- Your healthcare or insurance situation calls for a receiver.
- You prefer the receiver’s display.
- You want another way to access your glucose information.
There is nothing wrong with choosing the option that fits your routine best.
What If Your Phone Is Not Compatible?
This is one situation where a receiver can become particularly useful.
Dexcom recommends checking its current compatibility list because supported devices can change over time.
If your smartphone is not supported, a dedicated G7 receiver may provide an alternative way to view your CGM information.
Before buying, however, verify the receiver model and confirm that it works with your specific Dexcom G7 system.
A Simple Way to Think About the Decision
If you are unsure whether you need a receiver, consider this simple checklist.
Choose a receiver if:
- You prefer a dedicated device.
- Your smartphone is not compatible.
- Your insurance requires or supports receiver use.
- You want an alternative to your smartphone.
- Your healthcare provider recommends one.
You may prefer the smartphone app if:
- Your phone is compatible.
- You are comfortable using your phone for CGM.
- You do not need a dedicated receiver.
- Your insurance and healthcare setup allow smartphone-only use.
You may consider using both if:
- You want additional flexibility.
- You want a backup viewing option.
- Your particular system and healthcare setup support both.
Safety and Medical Guidance
A Dexcom receiver is a medical device, so it should be used according to the manufacturer’s instructions.
CGM readings can be extremely useful, but you should understand your system’s instructions, alerts, limitations, and recommended response procedures.
Do not make major medication or insulin decisions based solely on general information from an online article.
If your glucose readings do not match how you feel, follow your healthcare professional’s guidance and the instructions provided with your CGM system.
For official product instructions and training materials, Dexcom provides G7 user guides and receiver guides.
Final Thoughts: Finding the Right Dexcom G7 Receiver Near Me
Searching for a dexcom g7 receiver near me is about more than finding the closest store.
You want to make sure you are getting the correct receiver, from a reliable medical supply source, with the right information about compatibility, insurance, prescriptions, availability, and delivery.
The Dexcom G7 receiver can be a convenient option for people who want a dedicated device for viewing their CGM information. Dexcom confirms that users can choose a receiver, compatible smartphone, or both depending on their setup.
If you are located in or around the New York area, Alfa Healthcare Supply Inc can be a local starting point for your medical supply needs. Before placing an order or visiting, contact the supplier to confirm current availability of the specific Dexcom G7 receiver you need.
For diabetes management, small conveniences can make a real difference. Having a device that fits naturally into your daily routine can make it easier to stay informed, prepared, and confident about monitoring your glucose.
Looking for a Dexcom G7 receiver near you? Visit Alfa Healthcare Supply Inc. to explore available diabetes and medical supply products, or contact the supplier to ask about Dexcom G7 receiver availability, ordering, insurance, and delivery.
Frequently Asked Questions About Dexcom G7 Receiver Near Me
1. Do I need a Dexcom G7 receiver?
Not everyone needs one. Dexcom says G7 can be used with the compatible app, the receiver, or both.
2. Can I use a Dexcom G6 receiver with G7?
No. The Dexcom G6 receiver is not compatible with Dexcom G7 sensors.
3. Where can I find a Dexcom G7 receiver near me?
If you are in the New York area, you can contact a local medical supply provider such as Alfa Healthcare Supply Inc. to ask about current availability, ordering requirements, and delivery options.
4. Does Medicare require a Dexcom receiver?
Dexcom states that a receiver is required for Medicare coverage of its CGM system, subject to the applicable coverage requirements.
5. Can I use my G7 receiver with G7 15 Day?
Yes. Dexcom states that the G7 15 Day system uses the same receiver, although an existing receiver may need a software update.
6. How long does the G7 receiver battery last?
Dexcom states that the receiver battery can last up to seven days on a single charge.
7. Can I use both the G7 app and receiver?
Yes. Dexcom says users can use the compatible app, the receiver, or both simultaneously.
8. Do I need a prescription?
Requirements can depend on how the receiver is being obtained and your insurance. Dexcom recommends contacting a supplier or having your healthcare provider prescribe the receiver to your pharmacy when using insurance coverage.
9. Should I buy a used Dexcom receiver?
Be cautious. Before purchasing any used medical device, consider compatibility, condition, authenticity, warranty, software, and supplier reliability. A reputable medical supply provider may be a safer option.
10. How can I check whether my phone works with Dexcom G7?
Dexcom maintains a current compatibility list for supported smartphones. Check the manufacturer’s compatibility information before relying on your phone for CGM monitoring.
Medical disclaimer: This article is for general educational purposes and does not replace advice from your physician, diabetes care team, pharmacist, insurer, or the official Dexcom instructions. Product availability, compatibility, insurance coverage, and requirements can change. Always verify current information before purchasing or using a medical device.
FreeStyle Libre 3 Buy Online Nearby
If you are searching for “freestyle libre 3 buy online nearby,” you are probably looking for more than just a product listing. You may want a reliable medical supply provider, a convenient way to order your continuous glucose monitoring (CGM) supplies, dependable delivery, and clear information before you make a purchase.
For people who manage diabetes, having glucose monitoring supplies available when they are needed can make everyday life easier. A delay in getting a replacement sensor or uncertainty about where to order can be frustrating.
The FreeStyle Libre 3 system is designed to make glucose monitoring more convenient by providing continuous glucose information through a compatible sensor and reader or smartphone, depending on the system and device being used.
At Alfa Healthcare Supply Inc., we understand that buying diabetes supplies is not simply an online shopping decision. These products can become part of someone’s daily healthcare routine. That is why choosing a dependable medical supply provider matters.
Whether you are located in Queens, Long Island, Brooklyn, the Bronx, Manhattan, Westchester, or another area, this guide explains what to consider when searching for a FreeStyle Libre 3 buy online nearby option.
What is the FreeStyle Libre 3 System?
The FreeStyle Libre 3 is a continuous glucose monitoring system designed to help people with diabetes monitor glucose levels throughout the day.
Instead of depending only on traditional fingerstick testing, a CGM system uses a small sensor worn on the body to collect glucose information. Depending on the compatible system configuration, readings can be viewed using a smartphone or dedicated reader.
The goal is simple: make glucose information easier to access and understand.
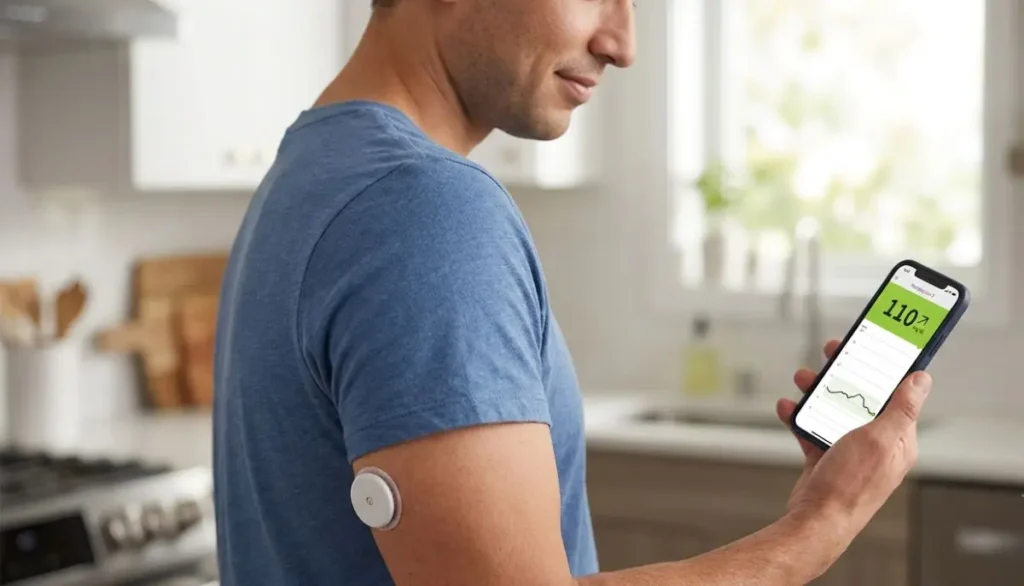
For someone managing diabetes every day, having access to glucose trends can provide useful information to discuss with a healthcare professional. It can help users recognize changes in glucose levels and better understand how meals, activity, medication, stress, illness, and daily routines may affect glucose.
The FreeStyle Libre 3 system has been designed to provide glucose information automatically to compatible devices. The standard FreeStyle Libre 3 sensor has a wear period of up to 14 days, while the newer FreeStyle Libre 3 Plus sensor has a different wear period and labeling.
Because product versions and indications can change, always check the package and current manufacturer’s instructions for the exact product you are ordering.
Why Search for “FreeStyle Libre 3 Buy Online Nearby”?
The phrase “freestyle libre 3 buy online nearby” reflects a very practical need.
People searching this phrase may want:
- A nearby medical supply provider
- Online ordering convenience
- Reliable product availability
- Fast or dependable delivery
- Help understanding the product
- A trustworthy healthcare supplier
- Insurance assistance when applicable
- Replacement sensors without unnecessary delays
- A supplier experienced with diabetic supplies
Ordering medical supplies online can save time, particularly for people who do not want to travel to multiple stores looking for a specific CGM product.
However, convenience should not come at the expense of reliability.
When purchasing a medical device, it is important to know who is supplying the product, whether the item is appropriate for your prescription or healthcare needs, how shipping works, and what support is available if you have questions.
Where Can You Buy FreeStyle Libre 3 Online?
If you want to buy FreeStyle Libre 3 online nearby, one option is to look at established medical equipment and DME suppliers rather than relying only on general online marketplaces.
Alfa Healthcare Supply Inc. offers diabetic supplies through its online catalog and serves patients and healthcare providers with medical equipment and healthcare products.
The company is based in Floral Park, New York, and provides diabetic supplies to customers throughout the New York area.
You can explore the diabetic supply selection through the Alfa Healthcare Supply website:
When ordering, confirm the exact product name and version you need. The FreeStyle Libre 3 and FreeStyle Libre 3 Plus are related products but are not identical in every specification.
Why Buy From a Medical Supply Provider?
When shopping online, price is often one of the first things people notice. But for medical products, price should not be the only consideration.
A professional medical supply provider can offer additional value.
1. Product Knowledge
A medical supply company understands that healthcare products are different from ordinary consumer goods.
A glucose monitoring system may involve sensors, readers, prescriptions, insurance documentation, compatible devices, and replacement schedules.
Having access to knowledgeable support can make the ordering process easier.
2. Convenient Ordering
Online ordering can be helpful for people who have busy schedules, limited transportation, mobility challenges, or simply prefer having medical supplies delivered to their home.
You can review products, confirm the item you need, and place an order without spending time visiting multiple stores.
3. Delivery Support
For recurring medical supplies, dependable delivery matters.
Running out of a glucose sensor can be stressful, especially when glucose monitoring is part of your daily routine.
Planning your replacement orders ahead of time can help prevent unnecessary interruptions.
4. Insurance Assistance
Depending on your individual circumstances, insurance coverage may apply to certain diabetes supplies.
Coverage requirements can vary by insurance plan, product, diagnosis, prescription status, and other factors.
A medical supply provider may be able to help with documentation or insurance-related questions.
Do not assume that every FreeStyle Libre product is automatically covered by your insurance. Always confirm your benefits and eligibility.
FreeStyle Libre 3 Sensor vs. Reader
One common source of confusion is the difference between the sensor and the reader.
The sensor is the small wearable component that collects glucose information.
The reader is a dedicated device that can be used with compatible FreeStyle Libre systems to view glucose information.
Some users prefer a smartphone-based experience, while others appreciate having a dedicated reader.
Before ordering, determine which components you already have.
For example, if you already own a compatible reader, you may only need replacement sensors. If you are beginning a new system, you may need to discuss the appropriate components with your healthcare professional.
This is one reason why searching for “freestyle libre 3 buy online nearby” should involve more than simply clicking the first product listing you see.
How Does the FreeStyle Libre 3 Sensor Work?
The sensor is applied to the body according to the manufacturer’s instructions.
The sensor continuously measures glucose information and communicates with a compatible reader or smartphone.
Instead of manually checking a traditional meter every time you want a glucose value, a CGM provides ongoing glucose information.
This can make it easier to see:
- Current glucose information
- Glucose trends
- Changes over time
- High or low glucose alerts when supported
- Patterns that can be discussed with your healthcare professional
The system is designed to provide information that can support diabetes management.
However, a CGM is not a replacement for medical care. Your healthcare professional should guide you on how to interpret glucose information and make treatment decisions.
How Long Does a FreeStyle Libre 3 Sensor Last?
The standard FreeStyle Libre 3 sensor is designed for up to 14 days of wear according to current manufacturer information.
The FreeStyle Libre 3 Plus sensor has a different wear period of up to 15 days.
This distinction is important.
If you search for a FreeStyle Libre 3 replacement online, carefully check whether the listing is for the standard FreeStyle Libre 3 sensor or the FreeStyle Libre 3 Plus sensor.
Do not assume that every product labeled “Libre 3” has identical specifications.
Always read the packaging and manufacturer’s instructions for the specific product you receive.
Can I Buy FreeStyle Libre 3 Without a Prescription?
Prescription requirements can depend on the product, location, and applicable regulations.
The FreeStyle Libre 3 system is a medical device used for diabetes management, and prescription requirements should be confirmed with your healthcare provider and the supplier.
If a prescription is required, your doctor or other qualified healthcare professional can provide the appropriate prescription.
This is another reason to use an established medical supply provider. A professional supplier can explain what information is needed before an order can be processed.
If you are unsure whether your prescription is current, contact your healthcare provider or the medical supply company before placing an order.
What Should You Check Before Ordering Online?
Before you purchase a FreeStyle Libre 3 sensor online, take a few minutes to confirm the following.
Check the Exact Product
Make sure the listing matches what your healthcare professional prescribed or recommended.
Look carefully at:
- Product name
- Sensor version
- Quantity
- Compatibility
- Package size
- Prescription requirements
- Expiration information
Check the Supplier
Look for a supplier that provides clear contact information and a legitimate business address.
A trustworthy medical supplier should make it reasonably easy to contact customer service.
Check Shipping Information
If you need your sensor soon, understand how the supplier processes and ships orders.
Ask about standard shipping, expedited options, delivery areas, and order processing times.
Check Insurance Information
If you plan to use insurance, confirm coverage before assuming that your order will be reimbursed.
Insurance rules can differ significantly between plans.
Check Return Policies
Medical devices and sensors can have specific return policies.
Read the supplier’s policy before purchasing.
Why Local Online Ordering Can Be Convenient
Searching for “freestyle libre 3 buy online nearby” combines two important advantages: local support and online convenience.
A local or regional medical supplier can provide a more personal experience than an anonymous online marketplace.
For example, if you have a question about an order, you may prefer speaking with a medical supply company that understands healthcare products.
For New York customers, Alfa Healthcare Supply Inc. is located in Floral Park and serves communities throughout the Greater New York area.
The company provides diabetic supplies as part of its broader medical supply and DME services.
FreeStyle Libre 3 Buy Online Nearby in Queens
If you live in Queens, finding a dependable diabetic supply provider can make recurring CGM purchases easier.
Alfa Healthcare Supply Inc. serves customers throughout Queens and offers diabetic supplies through its online catalog.
Whether you are in Floral Park, Bayside, Jamaica, Astoria, Forest Hills, Fresh Meadows, Rego Park, Richmond Hill, or another Queens community, online ordering can provide a convenient alternative to visiting multiple stores.
For customers who need recurring supplies, planning orders ahead of time can be particularly useful.
FreeStyle Libre 3 Buy Online Nearby on Long Island
Long Island residents may also prefer online ordering when purchasing recurring diabetes supplies.
Instead of making repeated trips to a retail location, customers can order online and have supplies delivered.
When selecting a supplier, consider whether the company provides delivery to your specific ZIP code and whether expedited shipping is available when needed.
Alfa Healthcare Supply Inc. serves customers throughout Long Island and the surrounding New York area.
FreeStyle Libre 3 Buy Online Nearby in Brooklyn and the Bronx
Patients and caregivers in Brooklyn and the Bronx can also benefit from online medical supply ordering.
For someone managing diabetes, convenience is important. If you already know which sensor you need and have the required prescription or documentation, ordering online may simplify the process.
The key is to choose a supplier that provides clear product information and accessible customer support.
What Makes Alfa Healthcare Supply Different?
Alfa Healthcare Supply Inc. has more than 25 years of experience serving patients, caregivers, healthcare professionals, and medical facilities.
The company provides a broad selection of healthcare products, including diabetic supplies, DME equipment, orthopedic products, incontinence supplies, respiratory products, and other medical essentials.
This broad experience matters because healthcare needs often extend beyond a single product.
Someone ordering a CGM sensor today may also need test strips, glucose meters, diabetic footwear, orthopedic products, or other healthcare supplies in the future.
Having a dependable medical supplier can make managing these needs easier.
A Human Approach to Medical Supply Shopping
Healthcare shopping can sometimes feel impersonal.
You search for a product, compare prices, click “buy,” and wait for a package.
But behind every order is a real person.
Someone may be managing diabetes while working full time. Someone else may be caring for an elderly parent. A caregiver may be ordering supplies for a family member who cannot easily leave home.
That is why dependable service matters.
At Alfa Healthcare Supply Inc., the goal is not simply to move products from a warehouse to a doorstep. The company focuses on helping patients, caregivers, and healthcare providers access the medical supplies they need.
When a product becomes part of someone’s everyday healthcare routine, reliability matters.
Tips for Managing Your FreeStyle Libre 3 Supplies
If you use CGM sensors regularly, a little planning can prevent unnecessary stress.
Keep Track of Your Sensor Schedule
Write down when your current sensor was started and when it is expected to end.
This can help you remember when it is time to replace the sensor.
Order Before You Run Out
Do not wait until your last sensor is nearly finished before ordering your next supply.
Shipping delays, prescription issues, insurance questions, or product availability can sometimes take longer than expected.
Store Products Correctly
Follow the manufacturer’s storage instructions.
Do not use products that have been damaged, improperly stored, or appear compromised.
Check Expiration Dates
Before applying a new sensor, check its packaging and expiration information.
If you receive a product that appears damaged or has an unexpected expiration issue, contact the supplier before using it.
Follow the Manufacturer’s Instructions
Always follow the current instructions supplied with your specific FreeStyle Libre product.
The instructions for one version may not be identical to another.
FreeStyle Libre 3 and Smartphone Compatibility
Many people like CGM systems because they can access glucose information through a compatible smartphone.
However, not every smartphone automatically works with every CGM application.
Before relying on a smartphone, check the manufacturer’s current compatibility information for your phone model and operating system.
If you prefer not to use a smartphone, a compatible dedicated reader may be an alternative depending on your prescribed system.
Is FreeStyle Libre 3 Easy to Use?
One of the major attractions of modern CGM systems is convenience.
The sensor is designed to be relatively small and discreet, and the system can provide glucose information without requiring traditional fingerstick testing for every reading.
However, “easy to use” does not mean you should ignore the instructions.
Proper sensor application, device compatibility, alert settings, and understanding the glucose information are all important.
If you are new to CGM technology, ask your healthcare professional or supplier for guidance.
Important Safety Information
A CGM is an important healthcare device, but it should be used according to its approved labeling and instructions.
Do not make major changes to insulin or other diabetes medications based solely on general information from an online article.
If your glucose reading does not match how you feel, or if you believe the reading may be inaccurate, follow the instructions provided with your device and contact your healthcare professional when appropriate.
Also review the manufacturer’s current safety information before using the product.
For example, Abbott provides specific safety information concerning sensor wear, age indications, medication or supplement interactions, and compatible systems.
The standard FreeStyle Libre 3 sensor and FreeStyle Libre 3 Plus sensor have different labeling, so make sure you are reviewing information for the exact product you use.
How to Order From Alfa Healthcare Supply Inc.
If you are ready to explore your options for freestyle libre 3 buy online nearby, the process can be simple.
Step 1: Find the Product
Visit the Alfa Healthcare Supply diabetic supplies section and look for the FreeStyle Libre 3 Sensor.
Step 2: Confirm the Product
Make sure you are ordering the correct sensor version and quantity.
Step 3: Check Your Prescription
If a prescription is required for your order, make sure the necessary documentation is available.
Step 4: Place Your Order
Follow the online ordering process or contact Alfa Healthcare Supply if you need assistance.
Step 5: Confirm Delivery
Provide accurate shipping information and review the available delivery options.
Step 6: Plan Your Next Order
If you use CGM sensors continuously, consider ordering your next supply before your current supply runs out.
Why Planning Matters When You Use CGM Sensors
For people who use CGM technology regularly, consistency is important.
Imagine reaching the end of your current sensor and realizing that your next sensor has not arrived yet.
Even if the delay is only a few days, it can create unnecessary stress.
A better approach is to create a simple replacement routine.
Know when your current sensor started.
Know when your replacement should be available.
Order ahead when appropriate.
Keep your prescription information current.
Save your supplier’s contact information.
These small steps can make diabetes supply management much easier.
Choosing a Trusted Medical Supply Store
The phrase “nearby” does not always mean the store with the closest physical address.
Today, nearby can also mean a supplier that is easy to reach online, delivers to your location, provides responsive customer service, and understands your healthcare supply needs.
When evaluating an online medical supplier, look for:
- Clear business information
- A physical business address
- A working customer service phone number
- Product information
- Secure ordering
- Clear shipping policies
- Prescription guidance when applicable
- Insurance support when available
- A range of healthcare products
- Experience in medical supply services
These factors can help you make a more informed decision.
Final Thoughts: Finding FreeStyle Libre 3 Online Nearby
Searching for “freestyle libre 3 buy online nearby” is really about finding a convenient and dependable way to maintain access to an important diabetes management product.
The FreeStyle Libre 3 system can provide ongoing glucose information and may make daily glucose monitoring more convenient for eligible users.
But choosing the right supplier is just as important as choosing the product.
Before ordering, confirm the exact sensor version, prescription requirements, compatibility, shipping information, expiration details, and insurance coverage when applicable.
For customers in New York, Alfa Healthcare Supply Inc. provides diabetic supplies and other medical products with a focus on dependable service and healthcare support.
With more than 25 years of experience, Alfa Healthcare Supply serves patients, caregivers, and healthcare professionals throughout the Greater New York area.
If you are looking for a FreeStyle Libre 3 buy online nearby option, start by reviewing the available diabetic supplies and contact the supplier if you need help confirming the right product for your needs.
Your diabetes supplies are part of your healthcare routine. Choosing a reliable supplier can make that routine a little easier, more organized, and less stressful.
Frequently Asked Questions
Where can I buy FreeStyle Libre 3 online nearby?
You can purchase or inquire about FreeStyle Libre 3 through medical supply providers that carry the product. Alfa Healthcare Supply Inc. offers FreeStyle Libre 3 diabetic supplies through its online medical supply catalog and serves customers in New York and other areas.
Can I order FreeStyle Libre 3 online?
Yes, FreeStyle Libre 3 products can be ordered through appropriate medical supply channels, subject to product availability and applicable prescription requirements.
Does Alfa Healthcare Supply sell FreeStyle Libre 3 sensors?
Alfa Healthcare Supply Inc. lists the FreeStyle Libre 3 Sensor among its diabetic supplies. Product availability can change, so confirm the current listing before ordering.
How long does a FreeStyle Libre 3 sensor last?
The standard FreeStyle Libre 3 sensor is designed for up to 14 days of wear. The FreeStyle Libre 3 Plus sensor is designed for up to 15 days. Always confirm the exact product version and current manufacturer’s labeling.
Do I need a prescription for FreeStyle Libre 3?
Prescription requirements depend on the applicable product and circumstances. Ask your healthcare provider and supplier about current requirements before ordering.
Can I get FreeStyle Libre 3 delivered?
Delivery options depend on the supplier, destination, and shipping method. Alfa Healthcare Supply Inc. provides delivery services for diabetic supplies and other medical products.
Can I use my phone with FreeStyle Libre 3?
A compatible smartphone may be used with the appropriate FreeStyle Libre application. Compatibility should be confirmed with the manufacturer’s current smartphone compatibility information.
Is FreeStyle Libre 3 the same as FreeStyle Libre 3 Plus?
No. They are related products within the Libre 3 family but have different specifications, including sensor wear duration and other product characteristics.
Should I buy a reader or use my smartphone?
That depends on your healthcare needs, preferences, and the compatible system you are using. Some people prefer the convenience of a smartphone, while others prefer having a dedicated reader.
What should I do if my sensor stops working?
Follow the troubleshooting and support instructions provided with your specific product. If the sensor appears defective, contact the manufacturer or supplier for assistance.
Where Can I Buy a Dexcom G7 Receiver?
If you use a Dexcom G7 Continuous Glucose Monitoring (CGM) system, having a reliable way to view your glucose information can make everyday diabetes management easier. While many people use the Dexcom G7 mobile app on a compatible smartphone, others prefer a dedicated receiver.
This leads to a common question: where can I buy a Dexcom G7 receiver?
You can purchase a Dexcom G7 receiver through appropriate medical supply channels, healthcare providers, and authorized suppliers. Alfa Healthcare Supply Inc. also lists the Dexcom G7 Receiver among its diabetic supplies, providing another option for people looking for a medical equipment supplier.
Before purchasing, however, it is important to understand what the receiver does, whether you actually need one, whether your insurance may cover it, and whether the receiver you are buying is compatible with your Dexcom G7 system.
This guide explains these points in simple language so you can make an informed decision with your healthcare provider or diabetes care team.
What is a Dexcom G7 Receiver?
The Dexcom G7 receiver is a dedicated display device that receives glucose information from a Dexcom G7 sensor.
The sensor is worn on the body and collects glucose information. The receiver then displays information such as glucose readings, trends, graphs, and alerts.
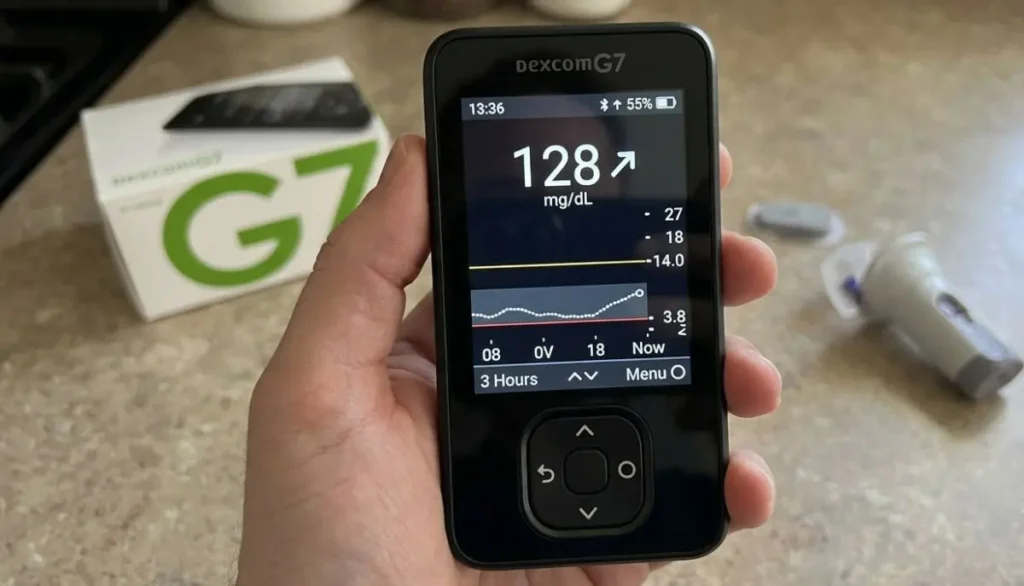
Think of the system in a simple way:
Dexcom G7 Sensor → Glucose Information → Receiver → Glucose Display
The receiver is different from the sensor.
The sensor is the wearable component that collects glucose information, while the receiver is the device you use to view that information.
Dexcom explains that G7 users can choose to use the compatible smartphone app, the receiver, or both at the same time.
That flexibility is helpful because not everyone’s daily routine is the same.
Where Can I Buy a Dexcom G7 Receiver?
If you are searching online for where can I buy a Dexcom G7 receiver, there are several places you may consider.
1. Medical Supply Companies
Medical supply companies and durable medical equipment (DME) suppliers are one option for obtaining diabetes-related equipment.
Alfa Healthcare Supply Inc. lists the Dexcom G7 Receiver in its diabetic supplies category. Its website currently displays the receiver as a product available through its online medical supply store.
A medical supplier can also be useful when you have questions about:
- Product availability
- Insurance
- Prescription requirements
- Delivery
- Diabetes supplies
- Other DME products
When ordering a medical device, always provide accurate insurance and prescription information when requested.
2. Your Healthcare Provider
Your doctor, endocrinologist, diabetes educator, or other qualified healthcare professional may be able to help you obtain a Dexcom receiver.
This can be particularly useful if you are starting Dexcom G7 for the first time or if your healthcare plan requires documentation or a prescription.
Dexcom’s guidance also recommends contacting your healthcare professional if your CGM is prescribed or provided directly through your healthcare professional and you need a receiver.
3. Dexcom
Dexcom itself provides information and purchasing options for its receiver products.
If you are considering buying directly from Dexcom, check the current product availability, eligibility requirements, and ordering information on the official Dexcom website.
This is also a useful place to confirm current compatibility information before purchasing.
4. Insurance or Medicare-Related Medical Equipment Channels
Depending on your insurance plan and medical circumstances, your receiver may be supplied through a medical equipment provider.
Medicare coverage has specific receiver requirements. Dexcom states that Medicare coverage requires use of a receiver, subject to the applicable coverage rules.
Because insurance policies can change, it is important to confirm your current benefits rather than assuming that every plan handles the receiver in the same way.
Does Everyone Need a Dexcom G7 Receiver?
No.
This is one of the most important things to understand before you buy one.
Dexcom states that users have the option to use:
- Only the Dexcom G7 app
- Only the Dexcom G7 receiver
- Both the app and receiver
A compatible smartphone is required if you choose the app option.
Therefore, the answer to “where can I buy a Dexcom G7 receiver?” should start with another question:
Do I actually need a receiver?
If your smartphone is compatible with Dexcom G7 and you are comfortable using it for glucose monitoring, you may not need a separate receiver.
However, a dedicated receiver can be useful for people who prefer a separate medical device.
Why Do Some People Prefer a Dexcom G7 Receiver?
Everyone has different habits and needs.
Some people prefer to keep their glucose monitoring separate from their personal smartphone.
For example, you may prefer a receiver because:
You Don’t Have a Compatible Smartphone
Not every smartphone supports every CGM application.
Dexcom maintains a compatibility list because supported devices can change over time. Dexcom recommends checking its current compatibility information before relying on a smartphone for G7 monitoring.
If your phone is not compatible, a dedicated receiver can provide another display option.
You Don’t Want to Depend on Your Phone
Your smartphone may run out of battery.
You may upgrade your phone.
You may accidentally delete an application.
You may simply prefer not to use your personal phone for medical monitoring.
A dedicated receiver gives you another option.
You Prefer a Dedicated Medical Device
For some people, simplicity matters.
Instead of opening a phone, finding an app, and navigating notifications, you can keep a dedicated receiver with your diabetes supplies.
That can make the daily routine feel more straightforward.
Your Coverage Requires a Receiver
Insurance requirements are another important reason.
For example, Dexcom’s Medicare guidance states that a receiver is required for Medicare coverage.
Always confirm your individual coverage requirements with your insurer and healthcare provider.
Can I Use My Dexcom G6 Receiver With Dexcom G7?
No.
This is a very important purchasing consideration.
Dexcom states that the Dexcom G6 receiver is not compatible with the Dexcom G7 sensor. The G7 uses a redesigned receiver.
Therefore, if you are upgrading from G6 to G7, do not assume that your existing G6 receiver will work.
Before ordering, make sure the product is specifically identified as a Dexcom G7 Receiver.
Buying the wrong generation can lead to unnecessary expense and frustration.
What Should I Check Before Buying a Dexcom G7 Receiver?
If you have searched where can I buy a Dexcom G7 receiver, don’t stop at the first product listing you see.
Take a few minutes to check the following.
1. Confirm the Product Name
Look specifically for a Dexcom G7 Receiver.
Do not confuse it with:
- Dexcom G6 receiver
- Dexcom G7 sensor
- Dexcom G7 app
- Other glucose meters
- Other CGM readers
The receiver and sensor are different products.
2. Confirm Compatibility
Your receiver needs to work with the Dexcom system you are using.
Dexcom states that G6 components are not compatible with the G7 system.
If you are using a newer Dexcom G7 product or a connected diabetes device, check the current compatibility information.
3. Ask About Prescription Requirements
Depending on the supplier, insurance arrangement, and applicable rules, you may need a prescription or documentation.
If a supplier asks for prescription information, provide it accurately.
If you are unsure whether you need a prescription, ask the supplier or your healthcare professional.
4. Check Insurance Coverage
Do not assume that your insurance will automatically pay for the receiver.
Coverage can depend on:
- Insurance plan
- Medical necessity
- Prescription
- Supplier requirements
- Medicare or other program rules
- Your specific diabetes management situation
Ask your insurance company or medical supplier about coverage before placing an order if cost is a concern.
5. Check Supplier Information
When buying medical equipment online, look for a supplier that clearly identifies its business, product information, contact information, and ordering process.
This is especially important when purchasing equipment that may become part of your daily diabetes-management routine.
Buying a Dexcom G7 Receiver From a Medical Supply Store
A medical supply store can be convenient because it may offer more than one type of diabetes product.
For example, Alfa Healthcare Supply Inc. lists the Dexcom G7 Receiver alongside other diabetes supplies, including glucose monitoring products, test strips, and lancets.
This can be helpful if you are already ordering several diabetes supplies.
Instead of searching for every product separately, you can discuss your needs with one medical supply provider.
If you are considering Alfa Healthcare Supply Inc., visit the company’s website to review current product availability and ordering information.
What Is the Difference Between a Receiver and a Smartphone?
The receiver and smartphone can both serve as display devices, but they fit different lifestyles.
| Feature | Dexcom G7 Receiver | Compatible Smartphone |
| Dedicated glucose display | Yes | No |
| Requires compatible phone | No | Yes |
| Designed specifically for G7 | Yes | Uses Dexcom G7 app |
| Can be used as a separate device | Yes | No |
| Smartphone notifications | No | Yes |
| Convenient if you already carry a phone | May be less convenient | Often convenient |
| Useful for people avoiding smartphone dependence | Yes | Less suitable |
There is no universal solution for every person.
Your healthcare professional can help you determine which setup fits your medical and personal needs.
Can I Use the Dexcom G7 Receiver Without a Smartphone?
Yes.
Dexcom states that you can use the receiver without relying on the Dexcom G7 smartphone app. The company also allows users to use both the receiver and compatible smartphone together.
This makes the receiver useful for someone who does not want their glucose monitoring to depend on a smartphone.
For example, a person may carry the receiver during the day and keep their smartphone separate.
However, always follow the current Dexcom instructions for setup, pairing, alerts, and system use.
Can I Use the Receiver and Smartphone Together?
Yes.
Dexcom specifically states that you can use both the receiver and the Dexcom G7 app at the same time.
This can provide flexibility.
For example, your smartphone may be convenient when you are already using it, while the receiver can serve as a dedicated backup display device.
However, using multiple display devices does not mean that every feature will work identically on both devices. Always review current Dexcom instructions for your specific setup.
How Does the Dexcom G7 Receiver Work?
The basic process is easy to understand.
First, the Dexcom G7 sensor is placed according to the manufacturer’s instructions.
The sensor collects glucose information.
The information is transmitted to a compatible display device.
If you are using the receiver, the receiver displays the glucose information.
Depending on your setup, you may see:
- Current glucose information
- Trend information
- Graphs
- Alerts
- Other available diabetes-management information
The receiver acts as the screen through which you interact with the CGM system.
What If My Receiver Is Lost or Damaged?
If your receiver is lost, damaged, or stops working, contact the appropriate supplier or Dexcom support team for guidance.
Do not assume that any generic glucose meter or old Dexcom receiver can replace it.
If you have a compatible smartphone, you may have another display option, but this depends on your specific device and Dexcom compatibility.
For a replacement, keep your purchase information, prescription information, and device details available if requested.
What If My Smartphone Is Not Compatible With Dexcom G7?
This is one of the situations where a receiver may be especially useful.
Dexcom says that it regularly adds compatible smartphones and recommends checking its current compatibility list. For people whose smartphone is not compatible, Dexcom points to the redesigned G7 receiver as an alternative display option.
Before purchasing a new smartphone simply to use a CGM app, compare the cost and convenience of using the dedicated receiver.
A healthcare professional or medical equipment supplier can also help you understand your available options.
Is the Dexcom G7 Receiver the Same as a Glucose Meter?
No.
A Dexcom G7 receiver is designed to display information from a Dexcom G7 CGM sensor.
A traditional blood glucose meter measures glucose from a blood sample using a test strip.
These are different technologies.
A person may use both CGM technology and a traditional glucose meter depending on their healthcare plan and circumstances.
If CGM readings do not match how you feel or if you have questions about treatment decisions, follow the manufacturer’s current safety instructions and contact your healthcare professional as appropriate.
How Much Does a Dexcom G7 Receiver Cost?
The price of a Dexcom G7 receiver can vary by supplier, insurance coverage, location, and purchasing arrangement.
For example, Alfa Healthcare Supply Inc.’s website currently lists the Dexcom G7 Receiver at $249.99, but online prices can change.
Before purchasing, check the current product page for the latest price.
Also consider whether insurance may cover some or all of the cost.
A lower advertised price is not necessarily the final amount you will pay if insurance, prescription, shipping, or other requirements apply.
Is a Dexcom G7 Receiver Reusable?
Yes.
Unlike the wearable sensor, the receiver is a reusable electronic display device.
The sensor is replaced according to its approved wear period and manufacturer’s instructions, while the receiver is intended to be used repeatedly.
This is another reason why you should not think of the receiver as a replacement for the sensor.
You need the appropriate components of the CGM system for it to function as intended.
A Simple Checklist Before You Order
If you are ready to search for where can I buy a Dexcom G7 receiver, use this checklist:
Before ordering:
☐ Confirm that you need a receiver.
☐ Confirm that it is specifically a Dexcom G7 Receiver.
☐ Check your smartphone compatibility.
☐ Check whether your insurance covers the device.
☐ Ask whether a prescription is required.
☐ Confirm supplier availability.
☐ Check the return and warranty information.
☐ Make sure you are not accidentally purchasing a G6 receiver.
☐ Ask your healthcare provider if you are unsure which setup is appropriate.
This small checklist can prevent many common purchasing mistakes.
Why Choose Alfa Healthcare Supply Inc.?
When searching for a medical supply provider, people often want more than a product listing.
They want clear information, dependable service, and a supplier that understands that healthcare products are part of real people’s everyday lives.
Alfa Healthcare Supply Inc. is a medical supply and DME provider serving patients and caregivers with a range of healthcare products.
Its online diabetic supplies category currently includes the Dexcom G7 Receiver along with other glucose-monitoring products.
For someone searching where can I buy a Dexcom G7 receiver, Alfa Healthcare Supply Inc. can be one supplier to consider when checking product availability and ordering requirements.
If you have questions about the receiver, insurance, prescription documentation, or delivery, contact the supplier directly before ordering.
Where Can I Buy a Dexcom G7 Receiver? Final Answer
So, where can I buy a Dexcom G7 receiver?
You can look for the device through Dexcom, your healthcare provider, and qualified medical equipment suppliers. Alfa Healthcare Supply Inc. currently lists the Dexcom G7 Receiver in its online diabetic supplies category.
Before you purchase, remember these important points:
- Not everyone needs a dedicated receiver.
- A compatible smartphone can be used with the Dexcom G7 app.
- Dexcom allows the receiver, app, or both to be used depending on the setup.
- The older Dexcom G6 receiver is not compatible with G7 sensors.
- Insurance requirements can affect whether a receiver is covered.
- Medicare has specific receiver requirements for CGM coverage.
- Always verify current compatibility and product information before buying.
Most importantly, don’t feel pressured to figure everything out by yourself. If you are starting a CGM system, upgrading from another Dexcom model, or trying to understand your insurance coverage, your healthcare provider and medical equipment supplier can help you identify the appropriate setup.
A receiver may be a small device, but for someone managing diabetes every day, having a display option that feels comfortable and dependable can make the routine a little easier.
Frequently Asked Questions About Where Can I Buy a Dexcom G7 Receiver?
1. Where can I buy a Dexcom G7 receiver?
You can purchase or obtain a Dexcom G7 receiver through Dexcom, healthcare providers, and qualified medical equipment suppliers. Alfa Healthcare Supply Inc. currently lists the Dexcom G7 Receiver in its diabetic supplies category.
2. Do I need a prescription for a Dexcom G7 receiver?
Prescription requirements can depend on your healthcare situation, supplier, and insurance. Ask your healthcare provider or medical supplier about the current requirements before ordering.
3. Can I use my Dexcom G6 receiver with G7?
No. Dexcom states that the G6 receiver is not compatible with Dexcom G7 sensors.
4. Can I use Dexcom G7 without a receiver?
Yes. If you have a compatible smartphone, you can use the Dexcom G7 app as your display device. Dexcom also allows users to use the receiver alone or both the receiver and app.
5. Can I use the Dexcom G7 receiver without a smartphone?
Yes. The receiver can be used as a dedicated display device without relying on the Dexcom G7 smartphone app.
6. Does Medicare require a Dexcom receiver?
Dexcom states that Medicare coverage requires use of a receiver, subject to the applicable Medicare coverage requirements.
7. How much does a Dexcom G7 receiver cost?
Prices vary by supplier and coverage. Alfa Healthcare Supply Inc.’s website currently lists the Dexcom G7 Receiver at $249.99, although prices are subject to change.
8. Is the Dexcom G7 receiver the same as the G7 sensor?
No. The sensor is the wearable component that collects glucose information, while the receiver is a display device used to view information from the sensor.
9. Can I use both the Dexcom G7 app and receiver?
Yes. Dexcom states that users can use the app, receiver, or both at the same time.
10. What should I check before buying?
Confirm that the product is specifically a Dexcom G7 receiver, check compatibility, review prescription and insurance requirements, and confirm current availability and price with the supplier.
Medical Disclaimer
This article is provided for general educational purposes and is not medical advice. Dexcom G7 products should be used according to the manufacturer’s current instructions and your healthcare professional’s recommendations. If you have questions about glucose readings, treatment decisions, device compatibility, or your individual diabetes-management plan, speak with your doctor or qualified diabetes care professional.
If you use a continuous glucose monitoring (CGM) system, you may wonder, how long does a FreeStyle Libre 3 reader last? It is an important question because the reader is the device you rely on to review glucose information and manage your daily monitoring routine.
The good news is that the FreeStyle Libre 3 Reader is designed for long-term use. Unlike the disposable sensor, which is replaced after its approved wear period, the reader is a reusable device. Abbott states that the typical usable life of a FreeStyle Libre Reader is about 3 years.
It is also important to understand that the reader’s battery life, sensor life, data storage, and overall usable life are four different things. Confusing these can make it difficult to know when you actually need a new reader.
In this guide, we will explain how long the FreeStyle Libre 3 Reader lasts, how often you may need to recharge it, how much glucose information it can store, what happens when the battery runs out, and when it may be time to replace the reader.
How Long Does a FreeStyle Libre 3 Reader Last?
So, how long does a FreeStyle Libre 3 reader last?
There are several answers depending on what you mean by “last.”
- Overall usable life: Abbott says the typical usable life of a FreeStyle Libre Reader is approximately 3 years.
- Battery between charges: With normal use, the reader can be used for approximately 7 days before it needs to be recharged.
- Full recharge: A completely discharged reader takes approximately 3 hours to fully charge.
- Stored glucose history: The FreeStyle Libre 3 Reader can hold approximately 90 days of glucose data.
- Sensor life: The sensor is a separate disposable component and is designed for its specified wear period; Abbott’s current information for the FreeStyle Libre 3 system describes a 14-day sensor.
Therefore, the reader does not need to be replaced every 14 days. The sensor and reader have very different lifespans.
FreeStyle Libre 3 Reader vs. Sensor: What’s the Difference?
One of the most common questions people have is whether the FreeStyle Libre 3 Reader needs to be replaced whenever they replace their sensor.
The answer is generally no.
The sensor is designed to be worn for a limited period and then replaced. The reader is the reusable electronic device used to receive and display glucose information.
Think of it like this:
Sensor = short-term disposable component
Reader = reusable electronic device
Abbott explains that the FreeStyle Libre sensor is designed to provide glucose readings for up to 14 days. At the end of that period, the reader can notify the user that the sensor has ended and needs to be replaced.
The reader itself can continue being used with compatible sensors rather than being discarded after each sensor.
This distinction can make managing your diabetes supplies much easier.
How Long Does a FreeStyle Libre 3 Reader Last in Normal Use?
When someone asks how long does a FreeStyle Libre 3 reader last, they are often asking about the total working life of the device.
According to Abbott, the typical usable life of a FreeStyle Libre Reader is approximately three years.
That does not necessarily mean every reader will stop working exactly on the third anniversary. Actual performance can depend on normal use, charging habits, physical condition, storage, and other factors.
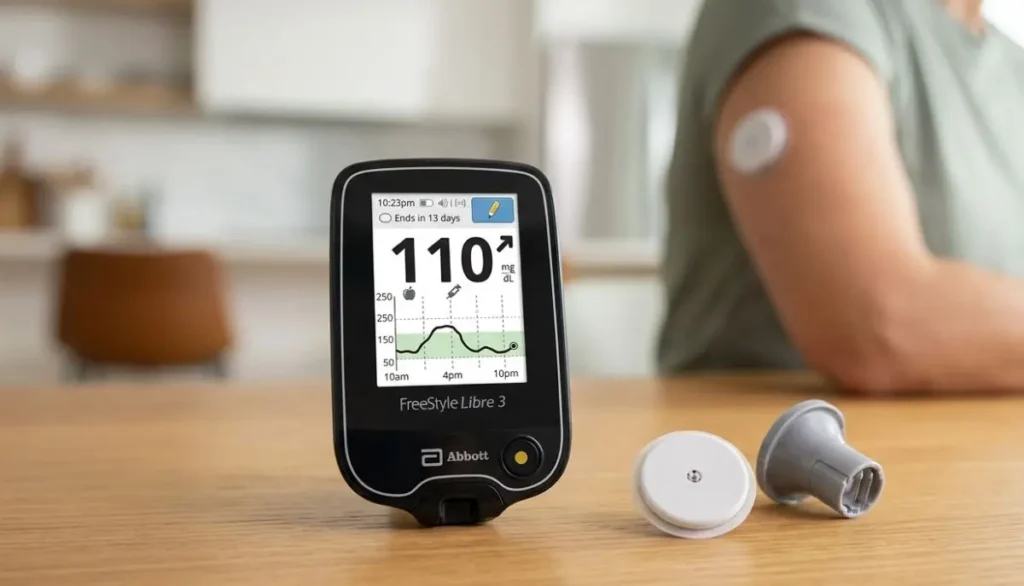
A reader that is handled carefully may remain useful throughout its expected service life.
However, electronic devices can eventually experience battery or hardware problems. If your reader is no longer functioning correctly, you should follow Abbott’s support guidance rather than assuming that the device must simply be discarded.
Why Reader Lifespan Matters
Your reader may become an important part of your daily routine.
For many people, glucose monitoring happens around meals, exercise, medication, work, travel, sleep, and other everyday activities. Having a dependable reader can make the process feel more predictable.
Nobody wants to discover that their device needs attention when they are away from home.
That is why it is helpful to understand the difference between:
- The reader’s total usable life
- Battery life
- Sensor wear time
- Data storage capacity
- Charging time
How Long Does the FreeStyle Libre 3 Reader Battery Last?
Another meaning of how long does a FreeStyle Libre 3 reader last relates to battery life.
Abbott says that, with normal use, the reader can be used for approximately 7 days before it needs to be recharged.
The exact time between charges can vary depending on how the device is used.
The reader includes a battery icon so you can monitor the remaining charge. Abbott also explains that a low-battery warning appears when the reader needs to be recharged.
This is useful because you do not have to guess when the battery is running low.
How Often Should You Charge It?
You do not necessarily need to charge the reader every day.
With normal use, approximately one week between charges is expected according to Abbott’s support information.
However, building a charging routine can help prevent surprises.
For example, some people may prefer to recharge their reader on a particular day of the week, while others may charge it whenever the battery indicator gets low.
The important thing is to avoid waiting until the device is completely empty if you know you will need it.
How Long Does It Take to Charge a FreeStyle Libre 3 Reader?
If your FreeStyle Libre reader battery is completely discharged, Abbott says it should take approximately 3 hours to fully charge.
That means planning ahead can be helpful.
If you are preparing for a trip, appointment, or busy day, check the battery level before leaving home.
A simple habit such as checking the battery while packing your medical supplies can help you stay organized.
What Happens If the FreeStyle Libre Reader Battery Dies?
It is understandable to worry that all your glucose history will disappear if the reader runs out of power.
According to Abbott, stored glucose readings are not lost when the reader runs out of power. The reader simply needs to be recharged.
This is reassuring because a temporary low battery does not automatically mean that your stored information is erased.
Once the reader is charged, your stored data can remain available according to the device’s storage capacity and system functionality.
Still, it is a good practice to keep the reader charged, particularly if you depend on it for regular glucose monitoring.
How Much Glucose Data Can the FreeStyle Libre 3 Reader Store?
The FreeStyle Libre 3 Reader can store approximately 90 days of glucose history.
This is considerably longer than the amount of information that may be visible during a single short viewing session.
Having stored history can be useful when looking for patterns over time.
For example, you and your healthcare professional may be interested in looking at glucose information alongside:
- Meals
- Physical activity
- Medication
- Sleep
- Daily routines
- Other health-related factors
Glucose data should always be interpreted in the context of your individual treatment plan and healthcare professional’s advice.
Does the Reader Need to Be Replaced Every 14 Days?
No.
This is one of the most important points to understand.
The 14-day period refers to the sensor, not the overall lifespan of the reader. Abbott states that the FreeStyle Libre sensor is designed for up to 14 days of use.
After the sensor reaches the end of its approved wear period, it stops collecting glucose data and should be replaced.
The reader itself is reusable and has a much longer expected usable life.
So a typical monitoring routine might look like:
Use Reader → Use Sensor → Replace Sensor → Continue using Reader → Repeat
The reader is not thrown away with each sensor.
What Happens When a FreeStyle Libre Sensor Ends?
When a sensor reaches the end of its wear period, the reader can notify you.
Abbott explains that after 14 days, the sensor automatically stops collecting glucose data and should be removed. The reader displays information about the remaining sensor life and provides notifications as the sensor approaches the end of its period.
This makes it easier to prepare for your next sensor.
It is a good idea to have your replacement sensor available before the current sensor reaches its end.
How Can You Make Your FreeStyle Libre 3 Reader Last Longer?
While no electronic device lasts forever, careful handling can help you get dependable use from your reader.
1. Keep the Reader Clean
Use appropriate cleaning practices recommended by the manufacturer.
Avoid exposing the electronic device to unnecessary moisture or harsh substances.
2. Protect It From Drops
A reader may be compact and easy to carry, but it is still an electronic medical device.
Consider using a protective case if appropriate.
3. Charge It Regularly
Don’t routinely allow the battery to remain completely discharged for long periods.
Check the battery indicator and recharge when necessary.
4. Keep It in a Suitable Environment
Avoid leaving the reader in extreme temperatures, such as a hot vehicle or direct sunlight.
Medical devices can be sensitive to environmental conditions.
5. Follow Abbott’s Instructions
The user manual and official support resources are important references for proper operation.
If you experience an unexpected error, damage, or unusual behavior, consult Abbott’s official support information.
Signs Your FreeStyle Libre Reader May Need Attention
Knowing the expected lifespan is useful, but it is also important to recognize signs that your reader may not be functioning properly.
Potential warning signs can include:
- The device repeatedly fails to turn on
- The touchscreen does not respond properly
- The reader repeatedly displays unexpected errors
- Charging problems occur
- The battery appears to drain unusually quickly
- The device has visible physical damage
- The reader does not work as expected with a compatible sensor
A single problem does not necessarily mean the reader has reached the end of its useful life.
Before replacing the device, check the manufacturer’s troubleshooting instructions or contact Abbott support.
Can You Continue Using an Older FreeStyle Libre Reader?
If your reader is still within its expected usable life and is functioning properly, it may continue to be useful.
However, technology and product compatibility can change.
Before purchasing replacement sensors or another reader, verify that the reader and sensor you plan to use are compatible with each other.
This is particularly important because FreeStyle Libre products can differ by model, market, software version, and generation.
If you are unsure, check the product documentation or speak with your healthcare provider or supplier.
FreeStyle Libre 3 Reader Data: Why History Can Be Helpful
One of the useful features of a CGM system is that glucose monitoring is not only about one number.
A single reading tells you what is happening at a particular moment.
Historical information can help you and your healthcare professional identify patterns.
For example, you might notice that glucose behaves differently:
- After breakfast
- After exercise
- Overnight
- Before meals
- After certain foods
- During stressful days
- Around medication times
The reader’s ability to store approximately 90 days of glucose history provides a substantial amount of information for reviewing trends.
However, stored data should not be used to independently change medication or insulin doses unless your healthcare professional has given you an appropriate plan.
FreeStyle Libre 3 Reader and Daily Life
Managing diabetes can sometimes feel like having another responsibility added to an already busy day.
Work, family, travel, meals, exercise, appointments, and everyday commitments do not stop because you are monitoring glucose.
That is why convenience matters.
A reusable reader can become a familiar part of your routine. Instead of learning a completely new device every couple of weeks, you generally continue using the same reader while replacing the disposable sensor according to the manufacturer’s instructions.
For someone who is new to CGM technology, this distinction can make the system feel less complicated.
What Should You Keep With Your FreeStyle Libre 3 Reader?
Keeping your supplies organized can make glucose monitoring easier.
Depending on your individual treatment plan and the system you use, your supplies may include:
- FreeStyle Libre reader
- Compatible sensors
- Charging equipment
- Backup glucose-monitoring supplies when recommended
- Other diabetes supplies prescribed or recommended by your healthcare professional
It can also be useful to have a replacement sensor available before your current sensor ends.
Planning ahead is especially helpful when traveling.
Can the FreeStyle Libre 3 Reader Be Used While Charging?
Abbott’s official support information explains that the reader needs to be recharged when the battery runs out and that stored readings are not lost.
For questions about using the device during charging, always follow the instructions for your specific reader model and the applicable user manual.
Because FreeStyle Libre products can differ between markets and generations, avoid assuming that instructions for an older Libre reader automatically apply to a newer model.
How Long Does a FreeStyle Libre 3 Sensor Last Compared With the Reader?
This comparison makes the difference very clear:
| Component | Typical duration |
| FreeStyle Libre 3 Reader | Approximately 3 years of typical usable life |
| Reader battery | Approximately 7 days with normal use before recharge |
| Complete battery recharge | Approximately 3 hours |
| Reader data storage | Approximately 90 days |
| FreeStyle Libre 3 Sensor | Up to 14 days |
The reader-life information comes from Abbott’s official support resources, while sensor duration and data-storage information are also documented by Abbott.
Keep in mind that these figures describe different aspects of the system and should not be treated as interchangeable.
What If Your Reader Stops Working Before Three Years?
The three-year figure is a typical usable-life estimate, not a guarantee that every device will operate for exactly that length of time.
If your reader stops functioning unexpectedly:
- Check that the device has adequate charge.
- Review the manufacturer’s troubleshooting instructions.
- Check for visible damage.
- Confirm that you are using compatible components.
- Contact Abbott or your healthcare professional/supplier for additional assistance if necessary.
If your glucose readings do not match how you feel, or you have concerns about the accuracy of a reading, follow the safety instructions provided with your system and use an appropriate alternative glucose measurement method when instructed.
Do not make medication or insulin changes based solely on general information from an online article.
Where Can You Get a FreeStyle Libre Reader?
If you are searching for a FreeStyle Libre reader, it is important to purchase from a legitimate medical supply provider or another authorized source appropriate for your location and prescription requirements.
Alfa Healthcare Supply Inc. is a medical supply provider serving customers in New York and offers a range of diabetes and home medical supplies.
Before ordering a specific reader or sensor, confirm the exact product model you need. This is particularly important when searching online because FreeStyle Libre products have different generations and configurations.
You can visit Alfa Healthcare Supply Inc. to explore available medical supplies.
If you are unsure which FreeStyle Libre product is appropriate for you, speak with your healthcare professional before purchasing.
Why Buying the Correct Reader Matters
Searching online for “FreeStyle Libre reader” can return several different products.
A reader designed for one generation of the FreeStyle Libre system may not necessarily be interchangeable with every other FreeStyle Libre product.
Before purchasing, check:
- Exact product name
- Reader generation
- Sensor compatibility
- Your location and market
- Prescription requirements, if applicable
- Manufacturer instructions
- Supplier information
A few minutes of checking can help prevent the frustration of receiving a device that does not work with the sensor you already have.
Final Thoughts: How Long Does a FreeStyle Libre 3 Reader Last?
So, how long does a FreeStyle Libre 3 reader last?
The most important answer is that the reader has a typical usable life of approximately three years, according to Abbott.
That should not be confused with the battery, which lasts approximately 7 days with normal use between charges, or the sensor, which is designed for up to 14 days of wear. The reader can also store approximately 90 days of glucose history.
Understanding these differences can make your diabetes-supply routine much easier.
A simple way to remember it is:
Reader = long-term device
Battery = recharge about weekly with normal use
Sensor = replace according to its approved wear period
Data = approximately 90 days stored on the FreeStyle Libre 3 Reader
If you are replacing an old reader or purchasing one for the first time, take a moment to confirm the exact FreeStyle Libre model and sensor compatibility. When it comes to glucose monitoring, having the right equipment and following the manufacturer’s instructions can help make everyday monitoring more organized and predictable.
For additional information about diabetes supplies and medical equipment, visit Alfa Healthcare Supply Inc..
Frequently Asked Questions
How long does a FreeStyle Libre 3 reader last?
The typical usable life of a FreeStyle Libre Reader is approximately 3 years, according to Abbott. This is different from the sensor’s wear period.
How often does the FreeStyle Libre 3 reader need charging?
With normal use, Abbott says the reader can be used for approximately 7 days before it needs to be recharged.
How long does it take to fully charge the reader?
A completely discharged reader takes approximately 3 hours to fully charge, according to Abbott.
Does the FreeStyle Libre 3 reader store glucose data?
Yes. Abbott states that the FreeStyle Libre 3 Reader can store approximately 90 days of glucose history.
Will I lose my data if the reader battery dies?
No. Abbott states that stored glucose readings are not lost when the reader runs out of power. The device needs to be recharged.
Does the reader need to be replaced every 14 days?
No. The 14-day period applies to the FreeStyle Libre 3 sensor, not the reader. The reader is designed for repeated use.
How long does a FreeStyle Libre 3 sensor last?
The FreeStyle Libre 3 sensor is designed for up to 14 days of wear. After that period, the sensor stops collecting glucose data and should be replaced according to the manufacturer’s instructions.
Can an old reader continue to work?
It may continue to work if it is functioning correctly and remains compatible with the sensors you use. Always check current manufacturer compatibility information before purchasing replacement sensors.
Should I replace my reader if the battery runs down quickly?
A rapidly draining battery can be a reason to investigate the device. First check charging and troubleshooting information from Abbott. If the problem continues, contact the manufacturer or your supplier.
Where can I buy a FreeStyle Libre reader?
You can look for a FreeStyle Libre reader through legitimate medical supply providers such as Alfa Healthcare Supply Inc. Before purchasing, verify the exact reader model and sensor compatibility.
Living with type 1 diabetes can involve many daily decisions—insulin doses, glucose levels, meals, infusion sets, sensors, alerts, and supplies. The iLet Bionic Pancreas is designed to reduce some of that day-to-day decision-making by automatically adjusting insulin delivery based on continuous glucose monitoring (CGM) information.
If you are looking for an iLet Bionic Pancreas User Guide, this article explains the system in simple language and helps you understand what the official guide covers, how the system works, what users should know about meals and CGM connectivity, and where to find reliable support.
Important: This article is an educational overview, not a replacement for the official iLet Bionic Pancreas User Guide, diabetes education, or instructions from your healthcare professional. The manufacturer states that users should receive adequate training before using the iLet system.
What is the iLet Bionic Pancreas?
The iLet Bionic Pancreas is an automated insulin delivery system from Beta Bionics. The system includes the iLet device, its dosing decision software, compatible disposables, a compatible continuous glucose monitor, and an infusion set. The official user guide provides instructions for setting up, operating, maintaining, and safely using the system.
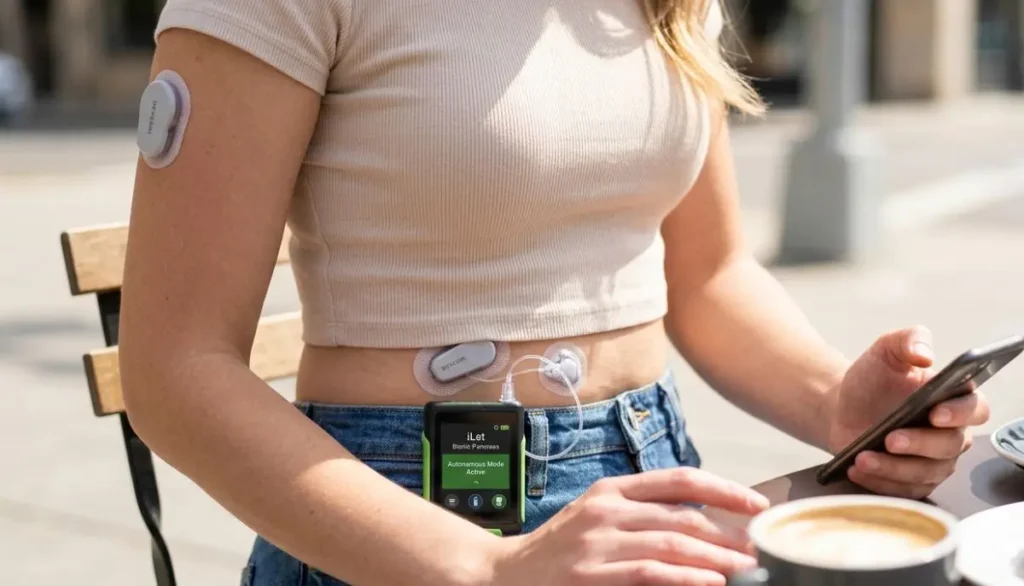
Unlike traditional insulin pumps that may require users or clinicians to enter several insulin settings, the iLet is designed around automated insulin dosing. Beta Bionics describes the system as requiring one starting input—body weight—and says that users do not need to program traditional preset basal rates, insulin-to-carbohydrate ratios, or correction factors in the same way as conventional pumps. Users still need to be carb aware and announce meals.
The system is intended for people with type 1 diabetes age 6 and older and requires a prescription.
Why the iLet Bionic Pancreas User Guide Matters
A medical device that delivers insulin should never be treated like an ordinary electronic gadget.
The iLet Bionic Pancreas User Guide contains important information about:
- Setting up the iLet system
- Understanding the touchscreen
- Connecting the CGM
- Filling and replacing the insulin cartridge
- Changing infusion sets
- Announcing meals
- Responding to alerts
- Charging the device
- Managing CGM interruptions
- Entering blood glucose information when appropriate
- Caring for the system
- Understanding safety warnings and precautions
The official guide specifically warns users not to begin using the system before reading the guide and participating in training. Incorrect use can result in too much or too little insulin being delivered, potentially causing dangerously high or low blood glucose.
For that reason, an online article such as this one should be viewed as a learning resource, not as a substitute for the official instructions.
iLet Bionic Pancreas Components
Understanding the main parts makes the iLet system easier to understand.
1. iLet Device
The iLet device is the central part of the system. It contains the dosing decision software and controls insulin delivery.
The touchscreen allows users to view information, notifications, glucose status, trends, and other system information.
2. Continuous Glucose Monitor
The iLet works with a compatible CGM to receive glucose information.
The CGM provides the glucose data that the system uses for automated insulin dosing. Beta Bionics currently provides resources for compatible CGM options, including Dexcom G7 and FreeStyle Libre 3 Plus-related resources.
Because CGM information is important to automated dosing, users should understand what to do if the CGM becomes unavailable or disconnected.
3. Insulin Cartridge
Insulin is loaded into a cartridge that connects with the iLet system.
Cartridge changes are an important part of routine maintenance. The manufacturer’s resources include specific cartridge-fill and cartridge-change instructions.
4. Infusion Set
The infusion set connects the insulin cartridge and pump to the user’s body.
Different infusion-set resources are available from Beta Bionics, including Inset and Contact Detach instructions.
5. Mobile App
The iLet Mobile App can connect with the iLet device through Bluetooth and provides additional data-sharing functionality. Beta Bionics provides separate instructions for downloading, registering, pairing, and syncing the app.
How Does the iLet Bionic Pancreas Work?
The iLet system uses automated insulin dosing based on glucose information from the compatible CGM.
Instead of requiring the user to calculate every insulin dose manually, the system uses its dosing decision software to make automated dosing decisions.
This does not mean that the user can simply forget about diabetes management.
Users still need to:
- Wear and maintain the CGM as instructed
- Keep the iLet supplied with insulin
- Maintain a functioning infusion set
- Respond to system alerts
- Announce meals
- Carry necessary backup supplies
- Follow their healthcare provider’s instructions
- Complete required training
Beta Bionics emphasizes that the iLet learns and adapts to changing insulin needs over time.
Getting Started With the iLet
Starting a new insulin delivery system can feel like a lot at first.
It is normal to have questions such as:
Where do I start?
When do I change the cartridge?
What happens if my CGM stops working?
How do I announce a meal?
What does this alert mean?
The best starting point is the official training provided for the iLet system.
Beta Bionics says new users should receive training and provides clinical trainer resources.
A new user should become familiar with the following before relying on the system:
- Basic device navigation
- CGM connection
- Insulin cartridge procedures
- Infusion-set procedures
- Meal announcements
- Alerts and notifications
- Charging
- Backup diabetes supplies
- What to do when CGM data is unavailable
- Who to contact for technical or medical questions
Understanding the iLet Home Screen
The iLet user guide explains the touchscreen and home screen.
Depending on the system status, the display can provide information about glucose, trends, notifications, insulin delivery, and other important system conditions.
The FDA’s publicly available quick-reference documentation also identifies sections covering the home screen, status bar, notifications, glucose status, glucose trend arrows, graphs, therapy summaries, menu screens, and settings.
A useful habit is to become comfortable with the screen before you need to respond to an urgent alert.
Take time during training to understand:
- What normal operation looks like
- Where alerts appear
- How to access menus
- How to check system status
- How to recognize CGM-related issues
- How to respond when the system asks for action
iLet Meal Announcements Explained
One of the important differences new users should understand is the role of meal announcements.
The iLet does not require traditional carbohydrate counting in the same way as many conventional insulin pumps. However, users are still expected to be carb aware and announce meals.
Beta Bionics advises users to announce meals when they sit down to eat and to be consistent with their meal announcements. The company also advises against using “fake meals” simply to try to correct a high glucose level because the iLet is already working to adjust insulin delivery.
Why does this matter?
The iLet needs information about the meal so its automated dosing system can respond appropriately.
Think of a meal announcement as telling your system:
“I am about to eat.”
The device then uses that information along with glucose data and its dosing algorithm.
Your healthcare professional or iLet trainer can teach you how to use the appropriate meal announcement settings.
What If You Forget to Announce a Meal?
Forgetting something occasionally can happen. However, users should follow the instructions provided during their iLet training.
Beta Bionics’ current educational guidance says that if 30 minutes have passed after starting a meal, users should not announce that meal as though it were about to begin.
Do not create an additional or “fake” meal announcement to compensate for a high glucose reading.
If you are uncertain about what to do after forgetting a meal announcement, follow your healthcare professional’s instructions or contact iLet support.
Keeping the CGM Connected
The CGM is an important part of the iLet system.
The device needs glucose information to support automated insulin dosing. Beta Bionics specifically advises users to always have their CGM available because CGM readings allow the iLet to dose insulin.
A CGM issue can happen for many reasons:
- Sensor replacement
- Transmitter problems
- Communication interruption
- Bluetooth issues
- Sensor failure
- Device distance
- Temporary technical problems
The manufacturer’s user resources include instructions for CGM replacement and situations where the CGM is offline.
What Happens When the CGM Is Offline?
CGM interruptions are something every iLet user should understand before starting.
Beta Bionics provides a specific CGM Offline (BG-Run Mode) resource. The official documentation should be followed for your particular situation.
The FDA quick-reference documentation also includes information on entering blood glucose values and managing the system when CGM information is unavailable.
Do not guess about insulin dosing during a CGM interruption.
If you are unsure what your system is asking you to do, contact your diabetes care team or appropriate technical support.
Changing the Insulin Cartridge
Cartridge replacement is part of regular iLet maintenance.
Before changing a cartridge or performing procedures involving the insulin delivery path, follow the exact instructions in your official user guide.
One important safety point from Beta Bionics is to disconnect the tubing from your body while changing the cartridge or filling the tubing to prevent unintended insulin delivery.
The official resources cover:
- Preparing the cartridge
- Preparing insulin tubing
- Preparing the device
- Inserting a new cartridge
- Filling insulin tubing
- Connecting the infusion set
The FDA quick-reference guide also identifies cartridge, tubing, and infusion-set replacement as core maintenance procedures.
Changing the Infusion Set
An infusion set needs to be replaced according to the instructions provided for the particular set you use.
Your healthcare professional or trained educator can show you how to:
- Choose an appropriate site
- Prepare the skin
- Insert the infusion set
- Connect the tubing
- Check that insulin delivery is working
- Recognize potential site problems
Beta Bionics provides separate resources for its infusion sets, including Inset and Contact Detach systems.
If glucose remains unexpectedly high, do not automatically assume that the iLet itself is the problem.
Beta Bionics’ new-user guidance notes that an infusion-set problem can sometimes be responsible and recommends changing the infusion set when appropriate.
Follow your healthcare provider’s instructions for managing unexpected high glucose.
Charging the iLet Bionic Pancreas
Like other electronic medical devices, the iLet needs adequate battery power.
Charging should become part of your normal routine.
Beta Bionics provides a dedicated Charging Your iLet resource in its user-resource library.
A practical habit is to avoid waiting until the battery is nearly empty before thinking about charging.
Keep your charging equipment available and understand what the battery alerts mean.
The FDA quick-reference guide includes a dedicated section for charging and battery alerts.
Understanding iLet Alerts and Notifications
Alerts are an important safety feature.
An alert can indicate that the system needs your attention.
The official documentation covers different categories of alerts, including:
- CGM and glucose alerts
- Insulin delivery alerts
- Battery alerts
- Reminders
Do not ignore repeated alerts.
Instead:
- Read the alert carefully.
- Follow the instructions provided on the device.
- Check the official user guide when needed.
- Contact your healthcare provider or technical support if you cannot resolve the issue.
Beta Bionics’ 2026 educational guidance also emphasizes responding promptly to iLet alerts and alarms.
What Supplies Should an iLet User Keep Available?
Being prepared can make diabetes management less stressful.
Your healthcare team can help you determine the supplies appropriate for you, but iLet users may need access to items such as:
- Extra infusion sets
- Insulin
- Cartridges
- Compatible CGM supplies
- Blood glucose testing supplies when recommended
- Backup diabetes supplies
- Charging equipment
- Fast-acting carbohydrate for treating lows, according to your diabetes care plan
Beta Bionics also recommends having extra supplies available.
For families and caregivers, having supplies organized in one place can make unexpected situations easier to manage.
Can You Take Additional Insulin While Using the iLet?
This is an especially important safety question.
Beta Bionics’ new-user guidance advises users not to use “outside” insulin, such as additional injections or inhaled insulin, because the iLet is intended to provide the user’s insulin doses and additional insulin may increase the risk of hypoglycemia or interfere with the system’s dosing process.
However, individual medical situations can differ.
If your healthcare provider has given you a specific emergency plan, follow that plan.
Never create your own additional-insulin strategy based only on an online article.
What About Low Blood Sugar?
Low blood glucose can be concerning, particularly when starting a new automated insulin delivery system.
Beta Bionics notes that during the first couple of weeks, the iLet is learning the user’s insulin needs. The company’s educational guidance recommends avoiding over-treatment of lows with excessive fast-acting carbohydrates.
This does not mean that a low should be ignored.
Users should follow their personalized hypoglycemia treatment plan from their healthcare professional.
If you experience severe, repeated, or unexplained low blood glucose, contact your healthcare provider.
For emergencies, seek immediate medical assistance.
iLet Bionic Pancreas and the First Few Weeks
Starting the iLet can feel different from using multiple daily injections or another insulin pump.
Beta Bionics explains that the iLet learns and adapts to a user’s insulin needs during the early period.
During this period, consistency matters.
Try to:
- Announce meals consistently
- Respond to alerts
- Keep the CGM connected
- Keep insulin available
- Maintain the infusion set
- Follow your training instructions
- Keep backup supplies nearby
It may take time to become comfortable with a system that makes more automated dosing decisions.
Connecting the iLet to the Mobile App
The iLet Mobile App can communicate with the iLet through Bluetooth.
Beta Bionics’ current pairing instructions include:
- Download the iLet Mobile App.
- Create or log into your account.
- Select the option to connect or pair with an iLet.
- Keep the iLet within the required distance.
- Ensure Bluetooth is enabled.
- Unlock the iLet.
- Access the appropriate menu.
- Enter the six-digit pairing code displayed on the iLet.
- Allow the devices to sync.
Exact app screens can change with software updates, so check the latest manufacturer’s instructions when pairing or updating the application.
How to Handle an iLet Problem
When something does not seem right, take a moment before troubleshooting.
Ask:
Is the CGM working?
Check whether the iLet is receiving glucose information.
Is the infusion set functioning?
Check for problems described in your training materials.
Is there enough insulin?
An empty or improperly prepared cartridge can affect insulin delivery.
Does the device have sufficient battery?
Review the battery indicator and alerts.
Is there an active notification?
Read the notification carefully.
Do you need help?
If you cannot resolve the problem safely, contact your healthcare provider or Beta Bionics technical support.
Beta Bionics currently lists 24/7 technical support at 1-855-745-3800, Option 1, and provides support by email.
Where Can You Find the Official iLet Bionic Pancreas User Guide?
The safest place to find the current official documentation is the Beta Bionics User Resources page.
The resource library includes the:
- iLet Bionic Pancreas User Guide
- iLet Quick Reference Guide
- iLet Educational Guide
- iLet Mobile App User Guide
- Cartridge Fill resources
- CGM resources
- Infusion-set resources
- Charging instructions
- Meal announcement resources
- Traveling guide
- Replacement and troubleshooting resources
The official PDF user guide is also available from Beta Bionics.
iLet Bionic Pancreas User Guide vs. Quick Reference Guide
These two resources serve different purposes.
| Resource | Main purpose |
| iLet Bionic Pancreas User Guide | Detailed instructions, safety information, operation, maintenance, and system information |
| iLet Quick Reference Guide | Shorter reference for commonly used functions and procedures |
| Educational Guide | Helps users learn important concepts |
| Mobile App User Guide | Covers app-related functions |
| Supply Change Guides | Focus on cartridge, infusion set, and other supply procedures |
For learning the system from the beginning, the full user guide and professional training are especially important.
For a quick reminder after training, the quick-reference materials can be useful.
Is the iLet Bionic Pancreas Right for Everyone?
The iLet is a prescription medical device with specific indications and requirements.
Beta Bionics states that the iLet Bionic Pancreas System is indicated for people with type 1 diabetes age 6 and older.
Whether it is appropriate for a particular person depends on individual medical circumstances, compatible equipment, insulin requirements, insurance, clinical considerations, and healthcare-provider guidance.
A person considering the iLet should discuss it with their diabetes care team rather than choosing a system based only on online information.
Tips for New iLet Users
Here are some simple habits that can make learning the system easier.
1. Read before using
Don’t skip the official user guide.
2. Complete training
The manufacturer specifically says users should not start using the system without adequate training.
3. Keep your CGM working
The CGM is an essential source of glucose information for automated dosing.
4. Announce meals consistently
Meal announcements are an important part of using the iLet.
5. Don’t create fake meals
Do not use meal announcements as a shortcut for correcting high glucose.
6. Keep extra supplies
Unexpected sensor or infusion-set problems can happen.
7. Learn your alerts
Knowing what different alerts mean can reduce stress.
8. Keep support information handy
Save your healthcare provider’s contact information and the appropriate technical support number.
9. Don’t make medication changes on your own
Insulin is powerful. Follow your prescribed treatment plan.
10. Ask questions
There is no need to feel embarrassed about asking your diabetes educator to explain something again.
Buying Diabetes Supplies From a Trusted Medical Supply Provider
For people managing diabetes, having reliable access to supplies can be just as important as understanding the equipment.
Alfa Healthcare Supply Inc. provides medical supplies and DME products for patients and caregivers. Its product categories include diabetes supplies and other home healthcare equipment.
When looking for diabetes products, check product compatibility, prescription requirements, insurance coverage, and manufacturer instructions before ordering.
For prescription medical devices such as an insulin delivery system, speak with your healthcare provider and confirm the appropriate ordering process.
A Human Reminder for iLet Users
Managing type 1 diabetes can sometimes feel like a full-time job.
There are sensors to remember, supplies to organize, alerts to understand, meals to announce, and appointments to attend. If you are learning the iLet and feel overwhelmed during the first few days or weeks, give yourself time to learn.
You do not need to memorize everything on day one.
Keep the official iLet Bionic Pancreas User Guide available. Work with your diabetes care team. Learn one procedure at a time. Keep backup supplies ready. And when something does not make sense, ask for help instead of guessing.
A good medical device is only helpful when the person using it understands how to use it safely.
Final Takeaway: iLet Bionic Pancreas User Guide
The iLet Bionic Pancreas User Guide is an essential resource for anyone using or preparing to use the iLet system. It covers the device, CGM connection, insulin cartridge, infusion sets, meal announcements, alerts, charging, maintenance, troubleshooting, and important safety information.
The iLet is designed to automate much of insulin dosing, but it does not remove the need for user participation. Users still need to monitor their system, announce meals, maintain supplies, respond to alerts, and follow their healthcare team’s instructions.
For the most accurate and current information, always use the latest official documentation from Beta Bionics rather than relying only on third-party articles.
Alfa Healthcare Supply Inc. aims to help patients and caregivers find medical supplies and educational information that make everyday healthcare a little easier. For product availability, prescription requirements, and compatible supplies, consult the appropriate healthcare professional and supplier.
Frequently Asked Questions About iLet Bionic Pancreas User Guide
What is the iLet Bionic Pancreas?
The iLet Bionic Pancreas is an automated insulin delivery system that uses dosing decision software and compatible CGM information to automatically adjust insulin delivery.
Does the iLet require a prescription?
Yes. Beta Bionics states that the iLet Bionic Pancreas requires a physician’s prescription.
Who can use the iLet?
The manufacturer states that the system is indicated for people with type 1 diabetes age 6 and older.
Do I need to count carbohydrates?
The iLet is designed to reduce the need for traditional carbohydrate calculations, but users still need to be carb aware and announce meals.
Does the iLet work with a CGM?
Yes. The iLet system uses compatible CGM technology as part of its automated insulin delivery system. Beta Bionics provides current resources for compatible CGM options.
Can I use extra insulin injections with the iLet?
Beta Bionics advises users not to use additional “outside” insulin because it can increase the risk of hypoglycemia and interfere with the system’s automated dosing.
Where can I find the iLet Bionic Pancreas User Guide?
The official guide is available through Beta Bionics’ User Resources page.
What should I do if my iLet gives an alert?
Read the alert and follow the instructions in your official guide and training materials. If you cannot resolve the issue, contact your healthcare provider or Beta Bionics technical support.
Can I connect the iLet to a smartphone?
The iLet Mobile App can connect with the iLet through Bluetooth. Current pairing instructions are available from Beta Bionics.
Medical Disclaimer
This article is for general educational purposes only and is not medical advice. The iLet Bionic Pancreas is a prescription medical device. Do not begin, stop, or change insulin therapy based on this article. Always follow the official iLet Bionic Pancreas User Guide and instructions from your healthcare professional. In an emergency or severe glucose event, seek appropriate medical care.
How to Apply FreeStyle Libre 3 Plus Sensor
Learning how to apply FreeStyle Libre 3 Plus sensor correctly can make the first day of wearing a continuous glucose monitor (CGM) much easier. For someone using a CGM for the first time, the applicator, sensor, and phone setup may seem unfamiliar. The good news is that the FreeStyle Libre 3 Plus sensor is designed to be applied with a simple disposable applicator.
The sensor is placed on the back of the upper arm and is designed to provide glucose readings for up to 15 days. Abbott recommends choosing a suitable area of the upper arm, preparing the skin carefully, applying the sensor firmly, and then activating it with the compatible app or reader.
In this guide, Alfa Healthcare Supply Inc. explains how to apply FreeStyle Libre 3 Plus sensor step by step, what to do before application, how to start the sensor, how to help it stay attached, and what to do if you experience a problem.
Important: This article is for general educational information. Always follow the instructions included with your specific sensor and the guidance of your healthcare professional. If your glucose reading does not match how you feel, follow your healthcare professional’s instructions for confirming your glucose level.
What is the FreeStyle Libre 3 Plus Sensor?
The FreeStyle Libre 3 Plus is a continuous glucose monitoring sensor designed to help people monitor glucose levels throughout the day. Abbott describes it as a real-time CGM sensor that can provide glucose readings automatically to a compatible smartphone, depending on the system and device being used.
Instead of repeatedly using a traditional blood glucose meter, a CGM sensor can provide ongoing glucose information and trends. The FreeStyle Libre 3 Plus sensor is designed to be worn for up to 15 days.
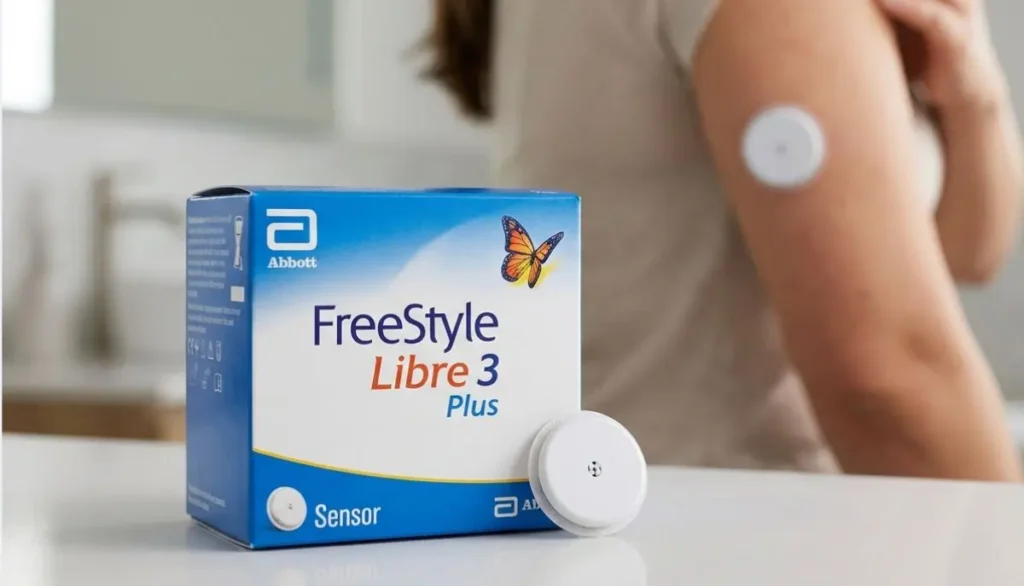
The sensor is applied to the back of the upper arm. A small filament sits just under the skin and measures glucose in the interstitial fluid.
For many people, the most important question before starting is simple:
“How do I put the sensor on correctly?”
Let’s walk through it.
How to Apply FreeStyle Libre 3 Plus Sensor
Applying the FreeStyle Libre 3 Plus sensor involves four basic stages:
- Choose the right location.
- Clean and prepare your skin.
- Apply the sensor with the applicator.
- Start the sensor with your compatible app or reader.
Taking a few extra minutes to prepare your skin properly can help the adhesive stay attached and may reduce the chance of early sensor loss.
Step 1: Wash Your Hands
Before opening or handling your sensor supplies, wash your hands thoroughly.
Clean hands are important because the sensor will be placed directly against your skin and the applicator inserts the sensor filament under the skin.
Avoid handling the sensor unnecessarily after preparing your skin.
If your hands are wet, dry them completely before continuing.
Step 2: Choose the Correct Sensor Location
One of the most important parts of learning how to apply FreeStyle Libre 3 Plus sensor is knowing where it should go.
Abbott’s instructions specify the back of the upper arm as the application site. The selected area should generally remain flat during normal activities rather than frequently bending or folding.
Look for an area that is:
- On the back of your upper arm
- Relatively flat
- Free from scars
- Free from moles
- Free from lumps
- Away from areas that bend or fold frequently
- At least 1 inch away from an insulin injection site
Abbott recommends changing the application site between sensors to allow the skin to recover.
Should You Use Your Stomach or Thigh?
For the FreeStyle Libre 3 Plus sensor, do not choose an alternative body location simply because it seems convenient.
Follow the manufacturer’s approved application location for your specific sensor. Abbott’s current safety information says to apply the Libre 3 Plus sensor to the back of the upper arm.
Step 3: Avoid Problem Areas
Before applying your sensor, inspect the skin.
Do not select an area with:
- A mole
- A scar
- A lump
- Significant irritation
- A previously irritated sensor site
- Stretch marks
- Skin that frequently bends or folds
Abbott also recommends keeping the sensor away from insulin injection sites. A distance of at least 2.5 cm (1 inch) is recommended.
If you recently used one arm for a sensor, consider using a different suitable location on the opposite arm for the next sensor.
Rotating locations can help reduce repeated irritation.
Step 4: Prepare the Skin
Good skin preparation is one of the easiest ways to improve sensor adhesion.
First, wash the selected area with plain soap and water.
Abbott recommends a non-moisturizing, fragrance-free soap for preparing the application site. After washing, dry the area thoroughly with a clean towel.
Next, use an alcohol wipe to remove remaining oils from the skin.
Allow the skin to air dry completely.
This last step is important.
Do not apply the sensor while the skin is still wet from alcohol.
Avoid lotion before applying the sensor
Do not apply:
- Body lotion
- Moisturizer
- Oil
- Cream
- Sunscreen
- Other oily products
to the sensor application area immediately before applying the sensor.
Oily residue can interfere with adhesion. Abbott’s guidance emphasizes cleaning the area and allowing it to dry completely before application.
Step 5: Check the Sensor and Applicator
Before using the applicator, inspect the packaging.
Do not use a sensor if its package appears damaged or opened, or if the product is past its expiration date. Follow the specific instructions supplied with your sensor.
The FreeStyle Libre 3 Plus sensor is supplied with its applicator ready for use.
Do not attempt to modify the applicator or sensor.
Step 6: Open the Applicator
When you are ready to apply the sensor, remove the applicator from its packaging according to the instructions.
Abbott’s FreeStyle Libre 3 Plus getting-started instructions say to unscrew the cap from the applicator.
Once the cap is removed, do not put it back on.
The applicator is designed to apply the sensor in one controlled movement.
Keep the applicator away from children and handle it carefully.
Step 7: Position the Applicator
Place the applicator over the prepared area on the back of your upper arm.
Make sure you have selected the intended location before pressing down.
This is an important point:
Do not press the applicator while it is away from your skin.
Position it first.
Once the applicator is correctly positioned, follow the manufacturer’s instructions and press down firmly.
Step 8: Apply the FreeStyle Libre 3 Plus Sensor
This is the key part of how to apply FreeStyle Libre 3 Plus sensor.
With the applicator positioned correctly on the prepared skin:
- Press down firmly.
- Listen for the application click.
- Wait a few seconds.
- Slowly pull the applicator away.
- Leave the sensor attached to your arm.
Abbott’s official instructions describe this same basic process.
You should now see the sensor attached to the back of your upper arm.
The applicator should be discarded according to applicable local disposal instructions.
Step 9: Check the Sensor Adhesive
After application, gently check that the sensor is attached securely.
Do not repeatedly press, move, or twist the sensor.
Avoid catching it on clothing, door frames, car doors, seat belts, or other objects.
Abbott’s getting-started guide recommends being gentle with the sensor to help prevent accidental removal.
If you need additional protection because of your activity level, discuss appropriate over-bandage or skin-adhesive options with your healthcare professional and follow Abbott’s sensor adhesion guidance.
Step 10: Start Your New Sensor
After applying the sensor, the next step is activation.
The exact process can depend on the compatible smartphone, app, reader, and version of the FreeStyle Libre system you are using.
For the FreeStyle Libre 3 Plus system, Abbott’s instructions explain that you can start the sensor using the compatible Libre app or reader.
Using the Libre App
Open the compatible Libre app.
Select the option to start a new sensor.
Follow the instructions displayed by the app.
You may need to scan the sensor with your smartphone.
The scanning position can vary by phone model.
Abbott notes that smartphone compatibility should be checked before use.
Step 11: Scan the Sensor Correctly
If your setup requires scanning, hold the appropriate part of your smartphone near the sensor.
For some iPhone configurations, the top of the phone is used.
For Android devices, the NFC antenna location can vary by model, so you may need to move the phone slowly around the sensor until it detects the sensor.
Wait for the app to confirm that the sensor has been successfully started.
Do not move the phone away too quickly during the scanning process.
Step 12: Allow the Sensor to Warm Up
A newly applied FreeStyle Libre 3 Plus sensor requires a 60-minute warm-up period before glucose readings are available for use.
During this time, you can continue using your phone normally.
When the warm-up period is complete, the system can begin providing glucose information according to your compatible setup.
The app or reader may provide a notification when the sensor is ready.
What Happens After the Sensor Starts?
Once your sensor is active and the warm-up period is complete, you can begin viewing your glucose information through the compatible system.
Depending on the setup, the system can display:
- Current glucose information
- Glucose trends
- Historical glucose information
- Alerts
- Other diabetes-management information
Abbott states that the FreeStyle Libre 3 Plus system can send glucose readings automatically to a compatible smartphone, with system features depending on the device and software being used.
Always follow your healthcare professional’s instructions when using CGM information to make treatment decisions.
Does Applying the FreeStyle Libre 3 Plus Sensor Hurt?
Everyone’s experience can be different.
The applicator is designed to place the sensor filament under the skin, and Abbott describes the application as designed to be comfortable.
Some people may notice:
- A brief pinch
- Mild discomfort
- A small amount of bleeding
- Bruising
- Temporary skin irritation
Abbott’s safety information notes that bruising or bleeding can occur because the sensor inserts just under the skin.
If significant bleeding does not stop, or you experience a concerning reaction, follow your healthcare professional’s advice and the manufacturer’s instructions.
Do You Pinch Your Skin Before Applying the Sensor?
No.
You do not need to pinch or stretch the skin when applying the FreeStyle Libre sensor.
Abbott specifically advises selecting an appropriate area on the back of the upper arm rather than manipulating the skin during application.
Simply prepare the skin, position the applicator correctly, and follow the application instructions.
How Can You Help the FreeStyle Libre 3 Plus Sensor Stay On?
Proper preparation is the first step.
Here are some practical tips:
1. Start with clean skin
Oil and residue can make it harder for adhesive to stay attached.
2. Let alcohol completely dry
Do not apply the sensor while the skin is wet.
3. Avoid lotion
Keep creams and moisturizers away from the application site before applying the sensor.
4. Choose a flat location
Avoid areas that bend or fold during normal activity.
5. Be careful with clothing
When changing shirts, avoid pulling clothing directly across the sensor.
6. Watch seat belts and doorways
A sensor can accidentally catch on objects.
7. Consider your activities
Sports, sweating, swimming, and other activities may put additional stress on the adhesive.
Abbott provides additional adhesion guidance for users who have difficulty keeping a sensor attached.
Can You Shower or Swim With the FreeStyle Libre 3 Plus Sensor?
The FreeStyle Libre 3 Plus sensor is designed to be worn during activities such as bathing and swimming, within the manufacturer’s specified limitations.
However, water exposure should still be handled carefully.
Abbott’s getting-started guide says the sensor is water-resistant and advises avoiding submerging it in more than 3 feet of water for more than 30 minutes at a time.
After water exposure, gently pat the sensor dry rather than rubbing it aggressively.
Always check the instructions supplied with your specific product because product guidance can change.
How Long Does the FreeStyle Libre 3 Plus Sensor Last?
The FreeStyle Libre 3 Plus sensor is designed for up to 15 days of wear.
Your compatible app or reader can notify you when it is time to replace the sensor.
When it is time to remove it, gently lift the adhesive edge and slowly peel the sensor away from your skin.
For your next sensor, choose a different appropriate area on the back of your upper arm.
Changing sites can help reduce repeated skin irritation.
How to Remove a FreeStyle Libre 3 Plus Sensor
Removing the sensor does not require the applicator.
When the sensor reaches the end of its approved wear period:
- Find the adhesive edge.
- Gently lift the edge.
- Slowly peel the sensor away from your skin.
- Dispose of it appropriately.
- Inspect the skin.
- Choose a different approved location for the next sensor.
If the adhesive is difficult to remove, follow the manufacturer’s recommendations.
Avoid pulling aggressively because doing so can irritate the skin.
What If the Sensor Falls Off Early?
Sometimes a CGM sensor can become loose or come off before the intended wear period.
This may happen because of:
- Sweat
- Water exposure
- Friction from clothing
- Contact with objects
- Skin oils
- Incorrect skin preparation
- Physical activity
If the sensor comes off, do not attempt to reattach the same sensor with ordinary tape or glue unless the manufacturer specifically instructs you to do so.
Contact Abbott’s customer support or follow the instructions that came with your sensor for assistance.
If you experience a significant skin reaction, speak with your healthcare professional.
Common Mistakes to Avoid When Applying FreeStyle Libre 3 Plus
Learning how to apply FreeStyle Libre 3 Plus sensor becomes easier when you know what not to do.
Mistake 1: Applying it to the wrong body area
The approved application site is the back of the upper arm.
Mistake 2: Applying over lotion
Moisturizer and oily products may interfere with adhesion.
Mistake 3: Applying before alcohol dries
Give the skin time to dry completely.
Mistake 4: Choosing irritated skin
Do not repeatedly use the same irritated area.
Mistake 5: Placing it near an insulin injection site
Keep the sensor at least 1 inch away from insulin injection sites.
Mistake 6: Pressing the applicator before positioning it
Position the applicator first and follow the manufacturer’s application procedure.
Mistake 7: Ignoring the warm-up period
The FreeStyle Libre 3 Plus sensor requires a 60-minute warm-up before it can be used for glucose readings.
FreeStyle Libre 3 Plus Sensor Application Checklist
Before you begin, use this quick checklist:
Before application
☐ Wash your hands
☐ Check the sensor expiration date
☐ Check that the package is intact
☐ Choose the back of the upper arm
☐ Avoid scars, moles, lumps, and irritated skin
☐ Stay at least 1 inch away from insulin injection sites
☐ Wash with plain soap and water
☐ Dry completely
☐ Clean with an alcohol wipe
☐ Let the skin air dry
During application
☐ Remove the applicator cap
☐ Position the applicator correctly
☐ Press firmly
☐ Listen for the click
☐ Wait a few seconds
☐ Slowly remove the applicator
☐ Confirm the sensor is attached
After application
☐ Open the compatible Libre app or reader
☐ Start the new sensor
☐ Scan if required
☐ Wait for the 60-minute warm-up
☐ Follow your healthcare professional’s instructions for using readings
FreeStyle Libre 3 Plus Sensor and Vitamin C
Another important safety point is vitamin C.
Abbott’s current U.S. safety information states that taking more than 1,000 mg of vitamin C per day may falsely raise FreeStyle Libre 3 Plus sensor readings.
This matters because an inaccurate glucose reading could affect decisions made from the CGM information.
If you take vitamin C supplements or medications containing vitamin C, discuss them with your healthcare professional and check the current product labeling.
When Should You Confirm a CGM Reading?
A CGM is a valuable tool, but you should not ignore how you feel.
If your glucose reading does not match your symptoms or expectations, follow the manufacturer’s instructions and your healthcare professional’s guidance regarding confirmation with a blood glucose meter.
Abbott’s safety information specifically notes that finger-prick testing may be required when glucose readings do not match symptoms or expectations.
For example, if your CGM displays a number that seems inconsistent with how you feel, do not simply assume that the sensor must be correct.
Follow your diabetes care plan.
Who Can Use the FreeStyle Libre 3 Plus Sensor?
The current U.S. Abbott safety information states that the FreeStyle Libre 3 Plus sensor is indicated for people age 2 and older, while specific system compatibility and indications may vary by country.
The sensor can also be used with certain compatible automated insulin delivery systems, depending on the approved system and market.
Because diabetes technology changes and product approvals can vary by location, check the instructions and indications applicable to your country and specific product.
Why Correct Sensor Placement Matters
Correct placement is more than simply putting the sensor somewhere on your arm.
The sensor needs an appropriate location so that:
- The adhesive can stay attached.
- The sensor can function as intended.
- The site remains comfortable.
- The risk of irritation is reduced.
- The sensor is less likely to be bumped or pulled.
Abbott specifically recommends the back of the upper arm and avoiding scars, moles, stretch marks, lumps, and areas that bend or fold.
Taking your time before application can make the entire experience easier.
A Simple Routine for Every New Sensor
Once you have applied one or two FreeStyle Libre 3 Plus sensors, the process may feel much more familiar.
A simple routine can help:
Choose → Clean → Dry → Apply → Activate → Warm Up → Monitor
Choose
Find an appropriate area on the back of your upper arm.
Clean
Wash the area with plain soap and water.
Dry
Dry the skin and use an alcohol wipe. Allow it to air dry completely.
Apply
Use the supplied applicator according to the manufacturer’s instructions.
Activate
Start the sensor through your compatible app or reader.
Warm Up
Allow the required 60-minute warm-up period.
Monitor
Use the CGM information as directed by your healthcare professional.
This simple routine can make sensor changes feel much less complicated.
Final Thoughts: How to Apply FreeStyle Libre 3 Plus Sensor
Learning how to apply FreeStyle Libre 3 Plus sensor does not have to be stressful.
The most important steps are straightforward:
Choose the correct site, clean the skin, let it dry completely, apply the sensor correctly, activate it, and allow the full warm-up period.
The back of the upper arm is the recommended application area, and the skin should be clean, dry, and free from lotions or oily residue. Abbott recommends avoiding scars, moles, lumps, and areas that bend or fold.
The FreeStyle Libre 3 Plus sensor is designed for up to 15 days of wear, giving users an extended period of continuous glucose monitoring before the sensor needs to be replaced.
For people using CGM technology for the first time, it is completely normal to take a little extra time with the first application. After a few sensor changes, the process can become a familiar part of your diabetes-management routine.
If you have questions about whether a CGM is appropriate for you, how to interpret readings, or how to make treatment decisions from glucose data, speak with your doctor, diabetes educator, pharmacist, or other qualified healthcare professional.
Alfa Healthcare Supply Inc. provides medical supply resources for patients and caregivers looking for diabetes and home healthcare products. For product availability, insurance questions, or help finding appropriate diabetes supplies, contact a qualified medical supply provider and verify that the product and accessories are compatible with your specific CGM system.
Frequently Asked Questions About How to Apply FreeStyle Libre 3 Plus Sensor
Can I apply the FreeStyle Libre 3 Plus sensor anywhere on my body?
For the current U.S. FreeStyle Libre 3 Plus system, Abbott specifies the back of the upper arm as the application site.
Do not choose another body location simply because it is more convenient.
Do I need to pinch my skin?
No. Abbott advises that you do not need to pinch or stretch the skin before applying the sensor.
How long does the FreeStyle Libre 3 Plus take to start?
After application, the FreeStyle Libre 3 Plus has a 60-minute warm-up period before glucose readings can be used.
How long can I wear a FreeStyle Libre 3 Plus sensor?
The sensor is designed for up to 15 days of wear.
Can I shower while wearing the sensor?
The FreeStyle Libre 3 Plus sensor is designed to be worn during bathing and swimming within the manufacturer’s water-exposure limitations.
What should I do if my sensor starts peeling?
Avoid pulling it unnecessarily. Follow Abbott’s current sensor adhesion guidance. If it comes completely off, contact the manufacturer for support and follow the instructions supplied with your product.
Can I use lotion before applying the sensor?
It is better to keep lotion, moisturizer, and oily products away from the application area before sensor placement because they can interfere with adhesion.
Can I put the sensor over a scar?
Abbott advises avoiding scars, moles, stretch marks, and lumps when selecting the application site.
Should I use the same arm every time?
It is better to rotate suitable application sites rather than repeatedly applying the sensor to the exact same area. This gives the skin time to recover and can help reduce irritation.
How to Restart Dexcom G7 Sensor
If you have searched for “how to restart Dexcom G7 sensor,” you may be hoping to continue using the same sensor after its normal wear period. This is a common question, especially when a sensor still appears to be attached securely or seems to be working normally.
However, there is an important point to understand before trying anything: the standard Dexcom G7 system is not designed to be restarted after its sensor session ends. Dexcom states that the G7 sensor provides readings for up to 10 days, followed by a 12-hour grace period, and that restarts are not allowed after that period.
This guide from Alfa Healthcare Supply Inc. explains what “restart” means, what you can safely do when your sensor expires, how to replace it, and what to do if your G7 stops working unexpectedly.
Can You Restart a Dexcom G7 Sensor?
No. A standard Dexcom G7 sensor cannot be restarted after its 10-day session and 12-hour grace period.
Dexcom specifically states that no restarts are allowed. Once the grace period has finished, the sensor needs to be replaced with a new sensor to continue receiving glucose readings and alerts.
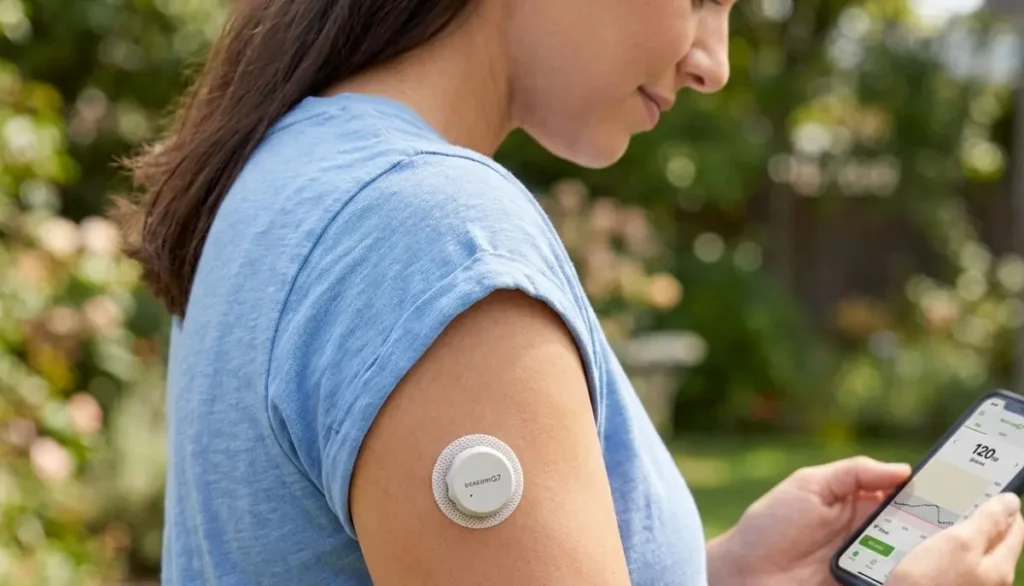
This is different from simply restarting your phone, restarting the Dexcom app, or turning a receiver off and back on.
A device restart may solve a communication or software issue, but it does not extend the life of an expired G7 sensor. Dexcom also explains that powering off the receiver does not extend sensor life.
What Does “Restart Dexcom G7 Sensor” Mean?
People can mean several different things when they search for how to restart Dexcom G7 sensor.
For example, you might be asking:
- Can I use the same G7 sensor for another 10 days?
- Can I restart a sensor that has just expired?
- Can I restart the Dexcom app?
- Can I restart the receiver?
- What should I do if my sensor stops communicating?
- Can I stop a session and start it again?
- Can I make an expired sensor work again?
These situations are not the same.
If your G7 sensor has reached the end of its approved session, Dexcom’s instructions are to replace it rather than restart it.
If your problem is an app, receiver, pairing, or communication issue, the troubleshooting steps can be different.
How Long Does a Dexcom G7 Sensor Last?
The standard Dexcom G7 sensor is designed for:
Up to 10 days of sensor use + a 12-hour grace period.
The grace period is provided to give you additional time to replace your sensor at a convenient time. During the grace period, the sensor continues to operate as it did during the sensor session.
For example, if your sensor reaches the end of its normal 10-day session in the evening, you may have another 12 hours before the system requires replacement.
This can be helpful if you are:
- At work
- Traveling
- Sleeping
- Away from your supplies
- Waiting until morning
- Trying to change your sensor at a convenient time
The important distinction is that the grace period is part of the Dexcom-designed sensor experience—not a sensor restart.
Can I Restart Dexcom G7 After the 10-Day Period?
No.
According to Dexcom’s current guidance, the G7 sensor cannot be restarted after 10 days. Once the 12-hour grace period has ended, you need a new sensor to continue receiving glucose readings and alerts.
This means you should not rely on unofficial methods that claim to reset the sensor’s internal timer.
You may find online discussions describing different techniques involving apps, Bluetooth settings, removing and reapplying sensors, or manipulating the sensor session. Those methods are not the manufacturer’s approved way to extend the G7 sensor session.
For diabetes technology, following the manufacturer’s instructions is particularly important because the sensor provides information that may be used as part of diabetes management.
What Should You Do When Your Dexcom G7 Expires?
Instead of trying to restart the old sensor, follow the normal replacement process.
Step 1: Check the Sensor Status
In the Dexcom G7 app, you can check your sensor information through the sensor settings.
Dexcom indicates that the remaining sensor time can be viewed through the app’s sensor information, while the receiver provides sensor information through its menu.
If your sensor is still within its normal session or grace period, you may continue using it according to the instructions.
Step 2: Wait for the Grace Period or Replace Earlier
You don’t necessarily have to wait until the grace period ends.
Dexcom allows you to end the sensor session early if you are ready to replace the sensor. Step 3: Remove the Old Sensor
When the sensor session is finished, remove the sensor according to the manufacturer’s instructions.
Dexcom describes removing the G7 by peeling the adhesive patch away from the skin.
Take your time if the adhesive is firmly attached. Avoid aggressively pulling at the skin.
Step 4: Prepare a New Sensor
Use a new Dexcom G7 sensor and applicator.
Prepare the new insertion site according to the instructions supplied with your system. Dexcom recommends cleaning the new site and allowing it to dry before insertion.
Step 5: Insert the New Sensor
Follow the instructions provided with your G7 system for sensor insertion.
Don’t try to reuse an old applicator.
Step 6: Enter or Scan the New Sensor Information
When starting a new sensor, follow the app or receiver instructions and use the pairing information associated with the new sensor.
Dexcom’s replacement instructions describe entering the pairing code from the new sensor applicator.
Step 7: Wait for Warm-Up
Once the new sensor is paired, the system will begin its warm-up period.
The app or receiver will show the progress and notify you when readings are available.
How to Replace a Dexcom G7 Instead of Restarting It
If you’re searching how to restart Dexcom G7 sensor because your current sensor has expired, the correct approach is replacement.
The basic process is:
- End the old sensor session.
- Remove the old sensor.
- Prepare a new insertion site.
- Insert a new G7 sensor.
- Enter the new pairing code.
- Pair the new sensor.
- Complete warm-up.
- Confirm that glucose readings are appearing normally.
Dexcom’s official replacement guidance supports this approach.
Can I Stop a Dexcom G7 Sensor and Start It Again?
Stopping a sensor session is different from restarting it.
For example, Dexcom provides an option to stop a sensor session. Once you stop the session, the system will no longer provide sensor glucose readings from that sensor, and you need to insert and pair a new sensor to continue.
In the app, Dexcom provides options such as:
- Replace Sensor
- Stop Sensor Session
If you want to immediately move to a new sensor, the replacement option is intended for that purpose.
So, don’t select “Stop Sensor Session” expecting to reset the old sensor’s clock.
What If I Restart My Dexcom G7 Receiver?
Restarting or powering off your receiver is not the same as restarting the sensor.
Dexcom explains that the receiver’s Power Off option temporarily shuts down communication between the receiver and sensor. It does not extend the sensor’s life.
If your receiver is temporarily turned off, you can turn it back on and allow it to reconnect.
But if your sensor has already reached the end of its approved session, restarting the receiver will not give the sensor another wear period.
What If My Dexcom G7 Sensor Is Not Working Before 10 Days?
This situation is different from an expired sensor.
If your G7 stops working unexpectedly before the end of its normal session, don’t assume that it needs to be restarted.
Possible reasons for an interruption can include:
- Sensor communication problems
- Sensor errors
- Adhesive problems
- Sensor displacement
- Phone or receiver connection problems
- App issues
- Environmental or physical factors
First, check the message displayed in your Dexcom app or receiver and follow the troubleshooting instructions provided by Dexcom.
If the system reports a sensor failure, contact Dexcom support for guidance.
Avoid attempting to physically modify the sensor or trying to force an expired or failed sensor back into operation.
What If My Sensor Falls Off Early?
A sensor that falls off before the end of its session is not the same as a sensor that has reached its normal expiration.
Dexcom’s patient counseling material states that if a sensor comes off, it must be replaced with a new one.
If your sensor becomes loose:
- Don’t attempt to reinsert the used sensor.
- Don’t try to glue or modify the sensor itself.
- Check the instructions for securing the replacement sensor.
- Contact Dexcom if you believe the sensor failed prematurely.
If the sensor has fallen off and you need assistance, keep the applicator and relevant packaging if possible. These details may be useful when discussing the issue with customer support.
Why Does Dexcom Use a Fixed Sensor Session?
A CGM sensor is designed and tested for a specified wear period.
The G7 is not simply a reusable electronic device that can be reset indefinitely. Its approved sensor session is part of the system’s design and labeling.
For the standard G7, Dexcom states:
10-day sensor session + 12-hour grace period.
Once the sensor reaches the end of its approved session and grace period, the manufacturer’s instructions call for replacement.
That is why trying to find a way to “reset the timer” is not the same as troubleshooting a normal technical problem.
Is the Dexcom G7 Grace Period the Same as a Restart?
No.
This is one of the most important points for anyone searching how to restart Dexcom G7 sensor.
The grace period is an official part of the Dexcom G7 system.
A restart would mean trying to use the same sensor beyond its intended session.
Dexcom states that the sensor continues to work during the 12-hour grace period, giving users extra time to replace it.
So you can think of it this way:
| Situation | What it means |
| Normal 10-day session | Standard G7 sensor use |
| 12-hour grace period | Additional manufacturer-provided replacement time |
| Sensor session ended | Replace the sensor |
| Grace period ended | Replace the sensor |
| Restarting expired sensor | Not allowed |
| Turning receiver off/on | Does not extend sensor life |
How to Prepare for Dexcom G7 Sensor Replacement
A little preparation can make sensor changes much less stressful.
Keep your replacement supplies together in a convenient location.
You may want to have:
- New Dexcom G7 sensor
- Compatible smartphone or receiver
- Alcohol wipe
- Skin-preparation supplies if recommended for you
- Overpatch, when appropriate
- Clean storage area for supplies
Before removing your current sensor, make sure you know where your replacement sensor is.
This can be especially useful if your sensor is approaching the end of its grace period.
Choosing a New Sensor Location
Follow the insertion-site recommendations included with your particular Dexcom G7 system.
The skin should be prepared properly before applying the sensor.
Dexcom’s educational materials recommend that the sensor site be clean, dry, and suitable for the sensor. They also advise avoiding areas where the skin folds or where waistbands may repeatedly rub against the patch.
Good site preparation can help the adhesive remain attached throughout the intended wear period.
If you have questions about approved placement for your specific age group or version of the G7 system, consult the current Dexcom instructions for use.
Can You Use a Dexcom G7 Sensor Longer Than 10 Days?
For the standard Dexcom G7, Dexcom indicates a sensor session of up to 10 days, followed by a 12-hour grace period.
Therefore, users should not assume that because a sensor remains physically attached it is approved for continued use.
The adhesive staying on your skin and the sensor being authorized to provide readings are two different things.
Once the approved period has ended, use a new sensor.
What About the Dexcom G7 15 Day System?
It’s also important not to confuse the standard G7 with the Dexcom G7 15 Day CGM System.
Dexcom now provides separate information for the G7 15 Day system. Its sensor is designed for up to 15 days, with a 12-hour grace period.
That means information about one version should not automatically be applied to another.
Always check the exact product and instructions you are using.
If your box says Dexcom G7 15 Day, use the instructions specifically provided for that system.
What If the App Says “Start New Sensor”?
When your G7 session ends, the app can notify you that it is time to start a new sensor.
Dexcom explains that after the grace period ends, users receive an alert to start a new sensor.
At this point:
- Remove the old sensor.
- Get a new sensor.
- Follow the app’s replacement instructions.
- Enter or scan the new sensor’s pairing information.
- Insert the new sensor.
- Complete the warm-up period.
This is the manufacturer’s intended transition from one sensor to another.
What If I Accidentally Ended My Sensor Early?
Don’t panic.
Ending a session early doesn’t mean you have to restart the same sensor.
If you intentionally select Replace Sensor, Dexcom provides the option to move directly to a new sensor.
If you accidentally stopped a session, follow the instructions displayed in your app or receiver. If the system does not allow you to start another sensor or gives an error message, contact Dexcom technical support rather than trying unofficial reset methods.
How to Avoid Sensor Replacement Problems
A few simple habits can make your sensor changes easier.
Keep track of your expiration time
Don’t wait until the last possible moment to discover that you need another sensor.
Keep a replacement sensor available
Having a new sensor ready can reduce gaps in CGM use.
Follow the app notifications
The Dexcom app provides alerts as the sensor session and grace period approach their end.
Prepare your skin carefully
A clean, dry site can help the adhesive perform properly.
Use the correct pairing code
Each new sensor has its own pairing information. Dexcom advises using the code associated with that sensor rather than a code from another sensor.
Don’t rely on unofficial restart techniques
If Dexcom says the sensor cannot be restarted, use the replacement process instead.
Dexcom G7 Restart vs. Troubleshooting: What’s the Difference?
This distinction can save you a lot of confusion.
Restarting the app
You may close and reopen an app when troubleshooting an app problem.
Restarting the receiver
You can power the receiver off and on. This does not extend sensor life.
Restarting Bluetooth or connectivity
This may sometimes be relevant to communication troubleshooting, depending on the device and error.
Restarting an expired sensor
This is not supported for the standard Dexcom G7.
If the sensor has completed its 10-day session plus 12-hour grace period, replace it.
When Should You Contact Dexcom Support?
Consider contacting Dexcom technical support when:
- Your sensor fails unexpectedly.
- The app displays a sensor error you don’t understand.
- You cannot pair a new sensor.
- Your sensor stops providing readings unexpectedly.
- The sensor falls off prematurely.
- You have a repeated technical problem.
- Your receiver or app is behaving unexpectedly.
- You have questions about a replacement sensor.
Dexcom provides official user guides and support resources for its G7 systems.
For safety-related decisions, follow your healthcare professional’s instructions and the manufacturer’s labeling.
What If My Glucose Reading Doesn’t Match How I Feel?
A CGM is an important diabetes-management tool, but your symptoms and readings should not be ignored.
If your symptoms don’t match what your CGM is showing, follow the instructions provided with your Dexcom system regarding blood glucose meter testing and treatment decisions.
Dexcom educational material notes that fingerstick testing may be required for treatment decisions when symptoms or expectations do not match CGM readings.
If you are experiencing symptoms of severe hypoglycemia, severe hyperglycemia, or another medical emergency, seek appropriate medical help rather than attempting to troubleshoot the sensor.
Final Thoughts: How to Restart Dexcom G7 Sensor
If you searched how to restart Dexcom G7 sensor because your sensor has reached the end of its life, the key message is simple: don’t try to reset or reuse an expired standard G7 sensor.
Dexcom states that the standard G7 provides sensor readings for up to 10 days, followed by a 12-hour grace period, and no sensor restarts are allowed after that period.
The safer approach is to:
- Use the official grace period when needed.
- Prepare a replacement sensor before expiration.
- End the old session correctly.
- Remove the old sensor.
- Insert a new sensor.
- Pair the new sensor using its own pairing information.
- Follow the warm-up instructions.
- Contact Dexcom support if you experience an unexpected sensor failure.
At Alfa Healthcare Supply Inc., we understand that diabetes supplies are part of everyday life, not simply products on a shelf. Having the right supplies available when you need them can make sensor changes feel much less stressful.
For official product instructions, always refer to the current Dexcom user guide and the instructions supplied with your specific G7 system. Dexcom maintains a dedicated library of G7 user guides and support materials.
Frequently Asked Questions About How to Restart Dexcom G7 Sensor
Can I restart my Dexcom G7 after 10 days?
No. Dexcom states that the standard G7 sensor cannot be restarted after its 10-day session. It has a 12-hour grace period, after which the sensor should be replaced.
Can I restart the G7 during the 12-hour grace period?
The grace period is not a restart. It is additional time built into the system for replacing the sensor. The sensor continues to operate during that period.
Does restarting my phone restart the Dexcom sensor?
No. Restarting your phone can sometimes help with general device or application issues, but it does not reset or extend the G7 sensor’s approved wear period.
Does restarting my Dexcom receiver extend sensor life?
No. Dexcom specifically states that powering the receiver off does not extend the sensor’s life.
Can I reuse a Dexcom G7 sensor that fell off?
Dexcom’s patient guidance says that if a sensor comes off, it must be replaced with a new sensor.
What happens when my Dexcom G7 expires?
The sensor eventually stops providing readings after its approved session and grace period. You should remove the old sensor and start a new sensor according to the manufacturer’s instructions.
Can I stop the sensor early?
Yes. Dexcom provides an option to end the sensor session early through the app or receiver.
How long is the standard Dexcom G7 sensor designed to last?
The standard Dexcom G7 sensor lasts up to 10 days, followed by a 12-hour grace period.
Is Dexcom G7 15 Day the same as standard G7?
No. Dexcom provides separate instructions for the G7 15 Day system. The 15 Day version is designed for up to 15 days plus a 12-hour grace period.
Medical disclaimer: This article is for general educational information and is not a substitute for the Dexcom instructions for use or advice from your healthcare professional. Product instructions can change, and different Dexcom G7 versions may have different labeling. Follow the instructions provided with your specific system.
FreeStyle Libre 3 Buy Online USA:
If you are searching for “freestyle libre 3 buy online usa,” you are probably looking for a convenient way to get a continuous glucose monitoring (CGM) sensor without spending hours visiting different stores or pharmacies. For people managing diabetes, having dependable access to glucose-monitoring supplies can make everyday life feel a little easier.
The FreeStyle Libre family has become well known for providing continuous glucose information through a small sensor worn on the body. Instead of relying only on occasional fingerstick checks, a CGM can provide glucose information and trends throughout the day.
However, there is an important update that shoppers in the United States should know before placing an order. Abbott currently states that the original FreeStyle Libre 3 sensor is being discontinued and is encouraging users to transition to the newer FreeStyle Libre 3 Plus sensor. The Libre 3 Plus offers up to 15 days of wear and is designed for people age 2 and older, subject to the applicable product indications.
This guide explains what to know when looking for a FreeStyle Libre 3 or the newer Libre 3 Plus online in the USA, how prescriptions and insurance can work, what to check before ordering, and how a medical supply company such as Alfa Healthcare Supply Inc. can help patients and caregivers navigate their medical-supply needs.
What Is the FreeStyle Libre 3 System?
The FreeStyle Libre 3 is a continuous glucose monitoring system designed to help people with diabetes monitor glucose levels and understand glucose trends.
The system uses a small sensor that is worn on the back of the upper arm. Depending on the specific sensor and approved use, glucose information can be transmitted to a compatible smartphone or viewed using an appropriate reader.
Abbott describes the FreeStyle Libre 3 system as a real-time CGM with optional glucose alarms. The original Libre 3 sensor was indicated for people age 4 and older.
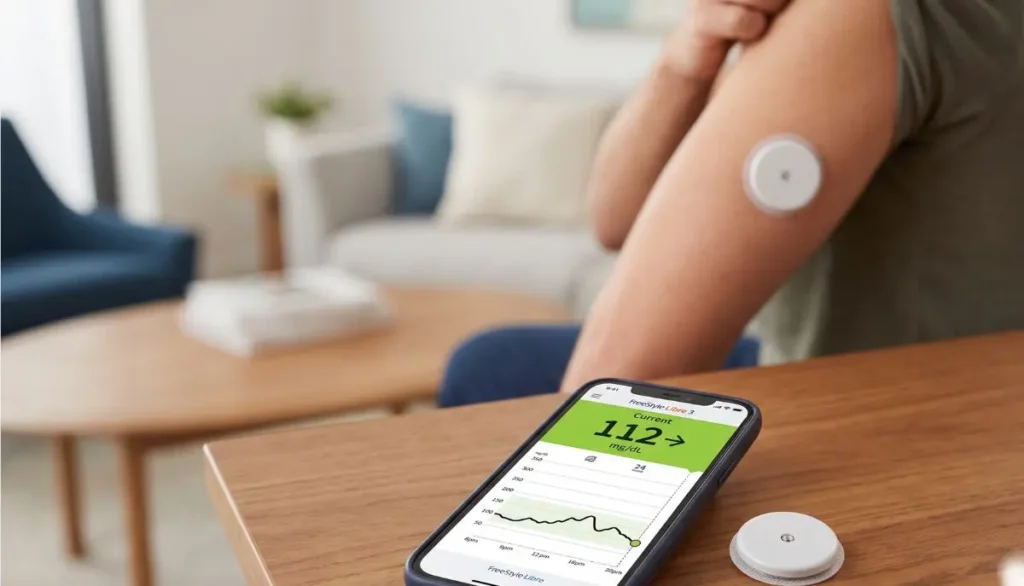
The newer FreeStyle Libre 3 Plus sensor is Abbott’s current-generation option within the Libre 3 family. Abbott states that it can be worn for up to 15 days and automatically sends glucose readings to a compatible smartphone.
For someone who searches “freestyle libre 3 buy online usa,” this distinction is important. You may still see websites using the words “FreeStyle Libre 3,” but the exact product available today may be the Libre 3 Plus rather than the original Libre 3 sensor.
Can You Buy FreeStyle Libre 3 Online in the USA?
Yes, people in the United States can obtain FreeStyle Libre systems through appropriate pharmacies and durable medical equipment (DME) suppliers, but these are prescription medical devices.
Abbott’s U.S. information states that consumers should talk with their healthcare provider, obtain a prescription, and then fill the prescription through a pharmacy or DME supplier.
That means buying a CGM online should not be treated like purchasing an ordinary household product.
A safe process generally looks like this:
- Discuss CGM use with your healthcare provider.
- Obtain the appropriate prescription.
- Confirm which Libre sensor your prescription specifies.
- Check your insurance or self-pay options.
- Choose a legitimate pharmacy or DME supplier.
- Confirm product availability.
- Complete the order.
- Follow the manufacturer’s instructions for use.
When searching “freestyle libre 3 buy online usa,” always look beyond price. Product authenticity, prescription handling, insurance processing, expiration information, shipping practices, and customer support can all matter.
FreeStyle Libre 3 vs. FreeStyle Libre 3 Plus
One of the most important questions for today’s online shoppers is whether they should purchase the original Libre 3 sensor or the newer Libre 3 Plus sensor.
Abbott currently says the FreeStyle Libre 3 sensor is being discontinued and recommends transitioning to the FreeStyle Libre 3 Plus sensor.
FreeStyle Libre 3 Sensor
The original FreeStyle Libre 3 sensor:
- Was designed as a real-time CGM.
- Provided glucose readings automatically.
- Had optional glucose alarms.
- Was indicated for people age 4 and older.
- Had a 14-day wear period.
- Is now being discontinued according to Abbott.
FreeStyle Libre 3 Plus Sensor
The newer Libre 3 Plus sensor:
- Provides real-time glucose monitoring.
- Can provide readings automatically to a compatible smartphone.
- Can be worn for up to 15 days.
- Is indicated for people age 2 and older.
- Includes optional glucose alarms.
- Can be used with compatible automated insulin delivery systems.
Because product availability can change, shoppers should verify the exact product before purchasing.
Why People Search for “FreeStyle Libre 3 Buy Online USA”
There are several reasons people prefer online medical supply shopping.
1. Convenience
Managing diabetes already involves appointments, medications, monitoring, meals, exercise, and other daily responsibilities. Ordering supplies online can reduce the need for unnecessary trips.
2. Easier Product Research
Online shopping allows patients and caregivers to compare product information before ordering.
You can review:
- Sensor type
- Wear duration
- Compatibility
- Prescription requirements
- Insurance information
- Shipping options
- Supplier policies
- Customer support
3. Home Delivery
For many people, receiving medical supplies at home is more convenient than visiting a store.
Abbott also notes that Libre systems may be obtained through pharmacies or DME suppliers, depending on the patient’s situation and coverage.
4. Helpful for Caregivers
Family members and caregivers may also search for “freestyle libre 3 buy online usa” when helping someone manage diabetes.
Having a reliable supplier can make recurring medical-supply needs easier to organize.
Do You Need a Prescription for FreeStyle Libre 3?
Yes. In the United States, the FreeStyle Libre 3 system is a prescription product.
Abbott’s current U.S. product information identifies the FreeStyle Libre system as prescription-only.
If you are interested in using a Libre CGM, talk with your doctor or other qualified healthcare provider. Your healthcare professional can determine whether a CGM is appropriate and which version is suitable for you.
Do not purchase a CGM from an unknown source simply because the seller says that no prescription is needed.
A legitimate medical-supply purchasing process should respect prescription requirements.
How to Buy a FreeStyle Libre System Online in the USA
If your healthcare provider has prescribed a Libre CGM, the online purchasing process can be straightforward.
Step 1: Talk With Your Healthcare Provider
Start by discussing your glucose-monitoring needs.
Your healthcare provider can determine whether a CGM is appropriate and identify the correct product.
Step 2: Get Your Prescription
Make sure the prescription contains the appropriate product information.
If you previously used an original Libre 3 sensor, ask whether your prescription should now be updated to the Libre 3 Plus sensor because of the product transition.
Step 3: Choose a Reliable Supplier
Look for an established pharmacy or DME supplier that handles prescription medical equipment.
A legitimate supplier should provide clear information about the product, prescription process, payment, insurance, and shipping.
Step 4: Check Insurance Coverage
Your insurance plan may cover some or all of the cost depending on your medical situation and plan requirements.
Abbott explains that coverage can vary among private insurance, Medicare, Medicaid, VA/TRICARE, and uninsured patients.
Step 5: Confirm the Exact Product
Before completing your purchase, check whether you are ordering:
- FreeStyle Libre 3 sensor
- FreeStyle Libre 3 Plus sensor
- Libre reader
- Compatible Libre app
- Other Libre accessories
This step is particularly important because the original Libre 3 sensor is transitioning out of the U.S. market.
Step 6: Complete Your Order
After the prescription and payment or insurance requirements have been handled, the supplier can process the order and arrange delivery.
Buying FreeStyle Libre 3 Through a DME Supplier
A DME supplier can be an important option for people who obtain CGM supplies through medical equipment benefits.
DME stands for durable medical equipment. DME suppliers work with patients, healthcare providers, and insurance companies to coordinate certain medical equipment and supplies.
Abbott’s Medicare guidance specifically explains that eligible patients may obtain Libre systems through DME suppliers and that coverage requirements can apply.
For Medicare patients, the process can involve additional documentation and coverage requirements.
That is why it can be helpful to work with a supplier familiar with prescription medical supplies and insurance procedures.
FreeStyle Libre 3 and Insurance Coverage
One of the most common concerns when searching “freestyle libre 3 buy online usa” is price.
The actual amount a patient pays can vary significantly.
Factors may include:
- Insurance company
- Insurance plan
- Deductible
- Copayment
- Coinsurance
- Medicare eligibility
- Medicaid coverage
- Medical necessity requirements
- Pharmacy benefit
- DME benefit
- Prescription details
Abbott states that Libre system coverage depends on the patient’s insurance and that Medicare coverage can depend on the type of Medicare plan and eligibility criteria.
Never assume that a particular online price will be your final out-of-pocket cost.
Instead, ask the supplier to verify your coverage whenever possible.
Can Medicare Cover FreeStyle Libre?
Medicare coverage may be available for eligible patients, but specific requirements apply.
Abbott states that Libre systems are widely covered by Medicare for people managing diabetes with insulin, while also noting that coverage depends on the patient’s specific plan and circumstances.
Medicare Advantage plans can have different requirements from Original Medicare.
If you are a Medicare patient, ask:
- Is the Libre system covered?
- Is it covered through pharmacy or DME?
- What documentation is required?
- What is my expected copayment?
- Which Libre sensor is currently covered?
- Does my prescription need to specify the reader?
- Does the supplier work with my plan?
These questions can prevent surprises later.
What Should You Check Before Buying a Libre Sensor Online?
Before you order a CGM online, take a few minutes to check the following.
Product Name
Make sure you know exactly which Libre sensor you are purchasing.
Do not assume every product labeled “Libre 3” is the same.
Prescription Requirement
Confirm that the supplier follows U.S. prescription requirements.
Expiration Date
For medical devices, check expiration information and make sure the product has adequate remaining shelf life.
Packaging
Look for properly sealed manufacturer packaging.
If packaging appears damaged, opened, or unusual, contact the supplier before using the product.
Smartphone Compatibility
If you plan to use your smartphone, confirm that your phone model and operating system are compatible with the appropriate Libre app.
Abbott specifically recommends checking smartphone and operating-system compatibility before using its apps.
Insurance
If you plan to use insurance, verify coverage before assuming that the online cash price applies.
How Does the FreeStyle Libre 3 Work?
A CGM uses a small sensor placed under the skin to measure glucose in interstitial fluid.
The sensor collects glucose information and communicates readings to a compatible device.
The FreeStyle Libre 3 system was designed to provide real-time glucose information without requiring users to repeatedly scan the sensor. Abbott’s current Libre 3 Plus system similarly provides automatic readings to a compatible smartphone.
For many people, the biggest advantage is the ability to see glucose information throughout the day.
This can help users and healthcare professionals identify patterns involving:
- Meals
- Physical activity
- Sleep
- Stress
- Medication
- Daily routines
However, CGM readings should always be interpreted according to the manufacturer’s instructions and guidance from your healthcare professional.
How Long Does a Libre 3 Sensor Last?
The original FreeStyle Libre 3 sensor was designed for up to 14 days of wear.
The newer FreeStyle Libre 3 Plus sensor can be worn for up to 15 days.
This difference is another reason to confirm the exact product before ordering.
If you search “freestyle libre 3 buy online usa,” you may encounter older articles or product listings that describe the original 14-day sensor. Always check the current manufacturer’s information for the product you are actually receiving.
Is FreeStyle Libre 3 Easy to Use?
One reason CGM systems are popular is their convenience.
The Libre sensor is designed to be applied to the back of the upper arm. Abbott describes the Libre 3 Plus sensor as easy to apply and wear.
However, first-time users should carefully read the manufacturer’s instructions before applying a sensor.
Your healthcare professional can also help you understand:
- Where to apply it
- How to prepare your skin
- How to start the sensor
- How to use alarms
- How to interpret glucose trends
- What to do when readings appear unusual
Safety Matters When Buying Medical Devices Online
The convenience of online shopping should never replace product safety.
Avoid purchasing CGM sensors from questionable sources, unauthorized sellers, social-media marketplaces, or websites that cannot clearly explain their prescription process.
A legitimate supplier should be transparent about the product and ordering requirements.
You should also avoid using a sensor if:
- The packaging is damaged.
- The product appears tampered with.
- The sensor is expired.
- You received the wrong product.
- The product was not stored or shipped according to applicable requirements.
- You are unsure whether it is genuine.
When in doubt, contact the manufacturer or your medical supplier before using the device.
Important FreeStyle Libre Safety Information
The original Libre 3 sensor has specific safety considerations.
Abbott states that taking more than 500 mg of vitamin C per day may affect Libre 3 sensor readings and could cause a person to miss a severe low-glucose event.
The newer Libre 3 Plus has different vitamin C labeling; Abbott states that more than 1,000 mg per day may falsely raise sensor readings.
This is another reason not to assume that information about the original Libre 3 applies exactly to the Libre 3 Plus.
Always follow the current user manual and safety information for your specific sensor.
What If the Sensor Reading Does Not Match How You Feel?
Sometimes a person may feel that their glucose level does not match what the sensor is showing.
Do not ignore symptoms simply because a CGM displays a particular number.
Follow the manufacturer’s instructions and your healthcare provider’s recommendations for situations involving unexpected readings or symptoms.
Abbott provides customer support for sensor errors, sensors falling off, and readings that appear different than expected.
If you have questions about treatment decisions, contact your healthcare professional.
Why Choose Alfa Healthcare Supply Inc.?
When looking for “freestyle libre 3 buy online usa,” patients often want more than a product page. They want a supplier they can feel comfortable working with.
Alfa Healthcare Supply Inc. is a medical supply and DME supplier serving patients and caregivers with a range of healthcare products.
You can learn more about Alfa Healthcare Supply through the company’s website:
Alfa Healthcare Supply focuses on medical supply needs and provides products across categories such as diabetes supplies, DME equipment, orthopedic supplies, incontinence supplies, home-care products, and other healthcare items.
For someone shopping for diabetes supplies, having access to a supplier familiar with medical products can make the ordering experience more comfortable.
What Makes a Good Medical Supply Supplier?
A good medical supplier should make the buying process clear rather than confusing.
When choosing where to purchase your CGM supplies, look for:
Clear Product Information
You should be able to understand what product you are ordering.
Prescription Support
The supplier should follow applicable prescription requirements.
Insurance Assistance
If insurance is accepted, the supplier should explain what information is needed to process an order.
Reliable Delivery
Medical supplies are often needed on a recurring basis, so dependable shipping can be valuable.
Customer Support
Questions about prescriptions, product availability, insurance, or orders should have a clear path to assistance.
Authentic Products
Patients should receive legitimate manufacturer products in appropriate packaging.
These qualities are more important than choosing a supplier based only on the lowest advertised price.
Tips for Ordering Libre Supplies Online
Here are some simple tips to make your next medical-supply order easier.
Tip 1: Keep your prescription current.
If your prescription is for an older Libre product, ask your healthcare provider whether you should transition to the newer sensor.
Tip 2: Check compatibility.
Before relying on a smartphone app, verify that your device is supported.
Tip 3: Order before your current supply runs out.
Avoid waiting until your final sensor is nearly finished.
Tip 4: Check your delivery address carefully.
A small address error can delay an important medical supply.
Tip 5: Inspect the package when it arrives.
Make sure the product and packaging match your order.
Tip 6: Keep your receipts and order information.
These documents can be useful for insurance questions, returns, or product support.
Tip 7: Read the current manufacturer’s instructions.
Product information can change, especially when a newer sensor replaces an older model.
FreeStyle Libre 3 Buy Online USA: What About Home Delivery?
Home delivery is one of the biggest advantages of online medical supply shopping.
Instead of making a separate trip to a store, an eligible patient may be able to have prescribed medical supplies delivered to their home.
Abbott’s coverage information notes that Libre systems can be filled through pharmacies or DME suppliers, depending on the patient’s circumstances.
For patients who use CGM sensors regularly, delivery can help make supply planning easier.
However, delivery time can vary. If you depend on a sensor for ongoing glucose monitoring, it is smart to order early enough to account for prescription processing, insurance verification, and shipping.
FreeStyle Libre 3 for Caregivers
CGM technology can also be useful for caregivers supporting someone with diabetes.
Parents, spouses, adult children, and other caregivers may be involved in ordering supplies, tracking prescriptions, or helping with device setup.
Abbott’s Libre system includes features designed to support data sharing with caregivers through compatible applications.
However, caregivers should understand that glucose data is not a substitute for professional medical advice.
If you are caring for a child or another person who relies on you for diabetes support, speak with their healthcare team about appropriate monitoring and emergency plans.
Final Thoughts: Finding FreeStyle Libre 3 Online in the USA
Searching for “freestyle libre 3 buy online usa” is often the first step toward finding a convenient way to manage recurring CGM supplies.
But today’s shoppers should pay close attention to the product name. Abbott has announced that the original FreeStyle Libre 3 sensor is being discontinued and recommends transitioning to the FreeStyle Libre 3 Plus sensor.
The best approach is not simply to search for the lowest price. Instead, look for a legitimate medical supply provider, confirm your prescription, verify insurance coverage when applicable, check product compatibility, and make sure you understand which Libre sensor you are receiving.
For patients and caregivers, the goal is simple: make access to necessary diabetes supplies as convenient, reliable, and understandable as possible.
If you are looking for diabetes supplies or other home medical equipment, Alfa Healthcare Supply Inc. can be a resource for exploring available medical supply options.
Visit the official Alfa Healthcare Supply website to learn more about its medical supply and DME services:
Frequently Asked Questions
1. Can I buy FreeStyle Libre 3 online in the USA?
Yes, prescribed Libre systems can be obtained through appropriate U.S. pharmacies and DME suppliers. However, the original Libre 3 sensor is currently being discontinued, so shoppers should ask whether the newer Libre 3 Plus is the appropriate replacement.
2. Does FreeStyle Libre 3 require a prescription?
Yes. Abbott identifies the FreeStyle Libre system as a prescription product in the United States.
3. Is FreeStyle Libre 3 still available?
Abbott currently states that the FreeStyle Libre 3 sensor is being discontinued and recommends transitioning to FreeStyle Libre 3 Plus.
4. How long does the FreeStyle Libre 3 Plus sensor last?
The Libre 3 Plus sensor can be worn for up to 15 days according to Abbott.
5. Can I use insurance to buy a Libre sensor?
Potentially. Coverage depends on your insurance plan, eligibility, and applicable requirements. Abbott provides separate information for private insurance, Medicare, Medicaid, VA/TRICARE, and uninsured patients.
6. Can Medicare cover FreeStyle Libre?
Eligible Medicare beneficiaries may qualify for coverage, but specific requirements apply. Coverage can differ between Original Medicare and Medicare Advantage.
7. Can I get Libre supplies delivered to my home?
Depending on your prescription, supplier, insurance, and location, home delivery may be available through appropriate pharmacies or DME suppliers.
8. Can I use any smartphone with FreeStyle Libre?
No. Libre apps require compatible smartphones and operating systems. Check Abbott’s current compatibility information before relying on a smartphone for your CGM.
9. What should I do if my Libre sensor gives an unexpected reading?
Follow the product’s instructions and contact your healthcare professional when necessary. Abbott also provides sensor-support resources for sensor errors and readings that appear different than expected.
10. Is FreeStyle Libre 3 Plus the same as the original Libre 3?
They are related products within the Libre 3 family, but they are not identical. The newer Libre 3 Plus has a 15-day wear period and different product indications and safety information.
Medical Disclaimer: This article is for general educational and informational purposes only. It is not a substitute for medical advice, diagnosis, or treatment. FreeStyle Libre products are prescription medical devices in the United States. Always follow the current manufacturer’s instructions and speak with your healthcare provider about whether a particular CGM is appropriate for you. Product availability, insurance coverage, pricing, indications, and specifications can change.
Alcohol Prep Pad Use Screen Protector:
Applying a screen protector sounds easy until you see dust, fingerprints, oil, or tiny bubbles trapped underneath the glass. One of the most common questions people ask is whether an alcohol prep pad can be used to clean a phone, tablet, medical device, glucose reader, or other screen before applying a screen protector.
The answer is generally yes, an alcohol prep pad can be useful for cleaning a compatible glass or hard screen surface before installing a screen protector, but there is an important detail: you should always follow the cleaning instructions from the device and screen-protector manufacturer first.
The phrase “alcohol prep pad use screen protector” can refer to using an alcohol-based pad to remove fingerprints, skin oils, and surface residue before applying a protective film or tempered glass. Many screen-protector installation kits include an alcohol wipe for exactly this purpose. Manufacturer installation guides commonly recommend cleaning the screen with an alcohol wipe, drying it with a microfiber cloth, and removing remaining dust before application.
For people who already keep sterile alcohol prep pads at home for diabetes care, injections, or other appropriate medical routines, it is natural to wonder whether the same type of pad can help prepare a device screen.
This guide explains what alcohol prep pads are, how they can be used when appropriate, what to avoid, and how to install a screen protector with fewer bubbles and less dust.
What is an Alcohol Prep Pad?
An alcohol prep pad is a small, individually packaged pad containing an alcohol solution. Many medical alcohol prep pads use 70% isopropyl alcohol as the active ingredient.
Medical alcohol prep pads are primarily labeled for preparing the skin before injections, rather than specifically for cleaning electronic screens. For example, DailyMed labeling for sterile alcohol prep pads identifies 70% isopropyl alcohol as the active ingredient and lists skin preparation before injection as the intended use.
That distinction is important.
A medical alcohol prep pad is not automatically a universal electronics-cleaning product. Before using one on a screen, check the instructions for your device and screen protector.
At the same time, many screen-protector manufacturers provide alcohol wipes as part of their installation kits. These wipes are designed to remove oils and residue from the screen before the adhesive protector is applied.
Why is Screen Cleaning Important Before Applying a Screen Protector?
A screen protector needs a clean surface to adhere properly.
Your phone or device screen can collect:
- Fingerprints
- Skin oils
- Dust
- Makeup residue
- Food particles
- Lotion
- Smudges
- Adhesive residue from an old protector
- Fine particles that may not be visible at first
Even a small piece of dust can create a visible bubble underneath a screen protector.
Oil can also interfere with the adhesive bond. That is why screen-protector installation instructions commonly recommend cleaning the display before application. Some manufacturers specifically recommend an alcohol wipe followed by a microfiber cloth and dust-removal sticker.
A few minutes spent preparing the screen can make a noticeable difference in the final result.
Alcohol Prep Pad Use Screen Protector: Can You Use One?
In many situations, an alcohol pad can be used to clean a compatible device screen before applying a screen protector.
However, the safest approach is to use the cleaning method recommended by the manufacturer.
If the screen-protector kit includes an alcohol wipe, use that wipe according to the included instructions.
If you are considering a medical alcohol prep pad instead, first check whether the device manufacturer permits alcohol-based cleaning on the display.
This is especially important for:
- Medical devices
- Glucose meters
- CGM readers
- Tablets
- Touchscreen controllers
- Specialized displays
- Devices with special coatings
- Devices with exposed ports or openings
The purpose of cleaning before installation is not to soak the screen. The goal is simply to remove surface oils and residue and leave the display clean and dry.
How to Use an Alcohol Prep Pad Before Installing a Screen Protector
If the manufacturer allows alcohol-based cleaning, the following general process can help.
Step 1: Wash and Dry Your Hands
Start with clean, dry hands.
Your fingers can transfer oil directly back onto the screen after you have cleaned it. Washing your hands first reduces the chance of leaving new fingerprints behind.
If possible, work on a clean, stable table.
Step 2: Turn Off the Device
Turn off the phone, tablet, reader, or other electronic device before cleaning.
This can make the installation easier and allows you to see dust and fingerprints more clearly against a dark display.
Disconnect charging cables and other accessories.
Step 3: Remove the Old Screen Protector
If there is already a screen protector installed, remove it carefully.
Old adhesive, dust, or pieces of glass can remain on the display.
Do not rush this step. If a tempered-glass protector has cracked, handle it carefully to avoid cuts.
Step 4: Open a Fresh Alcohol Pad
If the cleaning instructions permit an alcohol wipe, open a fresh pad immediately before use.
Do not use a pad that has dried out or has damaged packaging.
Medical alcohol prep pads are generally intended for single use, and their labeling may specify external use and other precautions.
Step 5: Wipe the Screen Gently
Wipe the display carefully to remove fingerprints and oily residue.
You do not need to scrub aggressively.
Move across the surface in a controlled manner and pay attention to areas where fingerprints are visible.
Avoid deliberately pushing liquid into:
- Charging ports
- Speakers
- Microphone openings
- Buttons
- Seams
- Cameras
- Other openings
The goal is to clean the display surface, not to wet the device.
Step 6: Let Excess Alcohol Evaporate
Do not immediately apply the screen protector while the surface is wet.
The display should be dry before the adhesive protector is applied.
Step 7: Use a Clean Microfiber Cloth
After the alcohol wipe, many screen-protector instructions recommend using a lint-free or microfiber cloth to remove remaining moisture and polish the screen.
Use gentle pressure.
A microfiber cloth can help remove streaks without leaving lint behind.
Step 8: Remove Remaining Dust
This is one of the most important steps.
Even after cleaning, tiny dust particles may remain on the display.
Use the dust-removal sticker included with the screen protector if one is provided. Several installation guides recommend this step before placing the protector.
Avoid wiping the screen repeatedly with a dusty cloth.
Step 9: Align the Screen Protector
Before removing the final adhesive film, check the alignment.
Look at:
- Camera cutouts
- Speaker openings
- Edges
- Buttons
- Corners
Make sure the protector matches the correct device model.
Step 10: Apply the Protector
Carefully place the adhesive side onto the clean screen.
Many modern tempered-glass protectors are designed to bond gradually from the center outward.
Follow the installation method supplied with your particular product.
Step 11: Push Out Air Bubbles
If small bubbles appear, do not panic.
Use the supplied installation card or a clean microfiber cloth and gently move the bubbles toward the edge.
Some manufacturers specifically recommend pressing from the center toward the edges to remove trapped air.
Why Does Alcohol Help Before Screen Protector Installation?
The main benefit is surface cleaning.
Skin naturally produces oils. Every time you touch your phone, some oil and residue can transfer to the glass.
Alcohol-based cleaning wipes can help remove oily fingerprints and surface residue. This leaves the display cleaner before the adhesive protector is placed.
That is why alcohol wipes are commonly included with screen-protector kits.
For example, screen-protector instructions from several manufacturers describe a similar sequence:
Alcohol wipe → dry/microfiber cloth → dust removal → screen protector installation.
This simple preparation routine can help reduce dust and installation problems.
Alcohol Prep Pad Use Screen Protector for Phones
For smartphones, the process is usually straightforward when the manufacturer permits alcohol-based cleaning.
A typical installation can include:
- Remove the phone case if necessary.
- Turn off the phone.
- Remove the old protector.
- Clean the display with the recommended wipe.
- Dry it with a microfiber cloth.
- Remove remaining dust.
- Align the new screen protector.
- Apply it gently.
- Push remaining bubbles toward the edges.
A clean, dust-free workspace is especially helpful.
If you have pets, carpets, fans, or strong airflow nearby, dust can easily land on the screen during installation.
Can Alcohol Prep Pads Be Used on Tablets?
The same basic idea may apply to tablets, but you should check the tablet manufacturer’s cleaning instructions first.
Tablet screens can have special coatings designed to reduce fingerprints or improve touch performance.
An alcohol-based cleaner may not be recommended for every surface or coating.
If the tablet manufacturer specifically provides cleaning instructions, those instructions should take priority over general advice.
Alcohol Prep Pad Use Screen Protector for Medical Devices
This topic becomes more important when the screen belongs to a medical device.
Some medical devices have touchscreen displays, including certain glucose readers, controllers, pumps, monitors, and other healthcare equipment.
Do not assume that a medical alcohol prep pad is automatically appropriate for every medical-device screen.
Instead:
- Identify the device model.
- Read the manufacturer’s cleaning instructions.
- Check whether alcohol is permitted.
- Use the recommended cleaning product.
- Keep liquid away from openings.
- Allow the screen to dry before installing the protector.
- Follow the screen-protector manufacturer’s installation instructions.
This is particularly important because medical equipment can have specific cleaning and maintenance requirements.
The fact that a pad is sterile does not mean it is approved for every electronic surface.
What About a Glucose Meter or CGM Reader?
People who use diabetes supplies may already have alcohol prep pads at home.
This makes the question “alcohol prep pad use screen protector” especially relevant when protecting the screen of a glucose reader or other diabetes-related device.
However, you should distinguish between skin preparation and device cleaning.
A sterile alcohol prep pad may be labeled for preparing skin before an injection.
A screen protector, on the other hand, requires a clean surface that is compatible with the adhesive.
Before using a medical prep pad on a glucose reader or CGM receiver, check the device manufacturer’s cleaning directions.
If alcohol is allowed, use only enough to clean the surface without allowing liquid to enter openings.
Can Alcohol Remove Fingerprints From a Screen?
Alcohol-based wipes can help remove oily fingerprints and residue from compatible surfaces.
However, you should not assume that stronger alcohol concentration is always better.
The goal is effective cleaning without damaging the screen or its coatings.
Follow the device manufacturer’s recommended cleaning method.
A screen that looks clean to your eyes may still contain a thin layer of oil. This is one reason screen-protector kits often include cleaning wipes.
Can Alcohol Prep Pads Remove Dust?
Alcohol is mainly useful for removing oils and residue. It is not a replacement for a dust-removal sticker or clean microfiber cloth.
A better installation process is:
Clean → Dry → Remove Dust → Apply Protector
Trying to wipe visible dust away with an alcohol pad may simply move the particles around.
A dust-removal sticker can be especially useful immediately before installation.
Alcohol Wipe vs. Microfiber Cloth
These two cleaning tools serve different purposes.
Alcohol Wipe
An alcohol wipe can help remove:
- Oils
- Fingerprints
- Greasy residue
- Surface marks
Microfiber Cloth
A clean microfiber cloth can help:
- Dry the display
- Remove streaks
- Polish the surface
- Pick up some remaining residue
Dust Sticker
A dust sticker is useful for:
- Small particles
- Lint
- Dust that remains after wiping
Using the three appropriately can create a much cleaner surface for screen-protector installation.
Common Mistakes to Avoid
1. Applying the Protector Too Quickly
Do not apply the protector while the screen is still wet.
Make sure the surface is dry.
2. Touching the Adhesive
Avoid touching the adhesive side of the protector.
Fingerprints on the adhesive can interfere with a clean installation.
3. Cleaning With a Dirty Cloth
A dirty microfiber cloth can put dust and oil back onto the screen.
Use a clean, lint-free cloth.
4. Ignoring Dust
A single dust particle can create a small bubble.
Use a dust-removal sticker immediately before application.
5. Using Too Much Liquid
More liquid does not mean better cleaning.
Keep moisture controlled and away from device openings.
6. Scrubbing Too Hard
Modern displays can have coatings that require gentle care.
Follow the device manufacturer’s cleaning instructions.
7. Using an Unapproved Cleaner
Do not assume every household cleaner is safe for a touchscreen.
Avoid experimenting with window cleaner, bleach, harsh chemicals, or other products unless the manufacturer specifically approves them.
8. Reusing a Medical Prep Pad
A used alcohol prep pad should not be reused.
Use a fresh pad when a cleaning procedure calls for one.
Is a Sterile Alcohol Prep Pad Better for a Screen Protector?
Not necessarily.
“Sterile” refers to the product’s medical packaging and intended use; it does not automatically mean that the pad is better for electronic-screen cleaning.
If you are installing a phone screen protector, the most important question is whether the cleaning product is compatible with the device and recommended by the manufacturer.
For medical procedures, sterility can be important.
For screen-protector installation, surface compatibility and proper cleaning technique are more important considerations.
This distinction helps prevent confusion.
Safety Tips When Using Alcohol Prep Pads
Alcohol prep pads commonly contain isopropyl alcohol and require sensible handling.
Keep these precautions in mind:
- Use only as directed on the product label.
- Keep alcohol away from flames and ignition sources.
- Do not use medical alcohol prep pads in the eyes.
- Do not use them on irritated skin unless directed by a healthcare professional.
- Keep them away from children.
- Do not swallow the contents.
- Do not allow excessive liquid to enter electronic openings.
- Check the device manufacturer’s cleaning instructions.
- Stop using a product if it causes an unexpected reaction or damage.
Medical alcohol prep-pad labeling commonly warns that isopropyl alcohol is flammable and intended for external use.
How to Get a Bubble-Free Screen Protector Installation
Nobody wants to spend money on a screen protector only to see bubbles underneath it.
Here is a simple routine:
Prepare Your Workspace
Choose a clean table with good lighting.
A low-dust environment can make installation easier.
Clean Your Hands
Wash and dry your hands before beginning.
Clean the Screen
Use the manufacturer-approved wipe.
Dry the Screen
Use a clean microfiber cloth.
Remove Dust
Use the included dust sticker.
Align Before Sticking
Take a moment to check alignment.
Apply Slowly
Do not rush.
Allow the adhesive to contact the screen as instructed.
Remove Bubbles
Gently push bubbles toward the edges.
This approach is consistent with screen-protector installation guidance from several manufacturers.
How Often Should You Clean Your Screen?
There is no single schedule that applies to every device.
Clean your screen when it becomes visibly dirty or before installing a new screen protector.
For everyday cleaning, follow the device manufacturer’s instructions.
For a new screen-protector installation, the important part is making sure the surface is clean and dry immediately before application.
Can You Use an Alcohol Prep Pad on the Screen After the Protector Is Installed?
This depends on the screen protector.
Some protectors may tolerate alcohol-based cleaning, while others may have special coatings or manufacturer-specific cleaning recommendations.
Check the instructions for the protector.
Do not assume that because alcohol was acceptable before installation, every alcohol product is suitable for repeated cleaning afterward.
A gentle microfiber cloth may be sufficient for routine fingerprints, depending on the manufacturer’s guidance.
Where Can You Buy Alcohol Prep Pads?
If you need alcohol prep pads for appropriate healthcare-related uses, choosing a reputable medical-supply provider can make the purchasing process easier.
Alfa Healthcare Supply Inc. provides medical supplies for patients, caregivers, and home healthcare needs. Its selection includes sterile alcohol prep pads and other diabetes and home-care supplies.
For medical use, always check the product label, intended use, packaging, and expiration information before using a product.
You can explore healthcare supplies through Alfa Healthcare Supply Inc. at its official website.
Why Choose Alfa Healthcare Supply Inc.?
Finding the right medical supplies is not always just about buying a product. People often want to know that the supplier understands everyday healthcare needs.
Alfa Healthcare Supply Inc. is a medical supply provider serving customers with a range of healthcare products, including diabetic supplies and other home medical equipment.
The company focuses on making healthcare supplies easier to access and offers products for patients and caregivers who manage medical routines at home.
When buying alcohol prep pads, look at important product details such as:
- Alcohol concentration
- Sterile or non-sterile designation
- Pad size
- Individual packaging
- Intended use
- Manufacturer
- Expiration information
- Storage instructions
Taking a few seconds to check these details can help you select a product that fits your needs.
Alcohol Prep Pad Use Screen Protector: The Key Takeaway
The phrase “alcohol prep pad use screen protector” describes a practical question with a simple but important answer.
An alcohol wipe may be appropriate for cleaning a compatible screen before applying a screen protector, but you should first follow the device and screen-protector manufacturer’s cleaning instructions.
Many screen-protector manufacturers recommend an alcohol wipe followed by drying and dust removal before installation.
At the same time, medical alcohol prep pads are generally labeled for specific medical uses, such as skin preparation before injections.
So, do not confuse a medical pad’s intended skin use with approval for every electronic screen.
For the best installation:
Check the instructions → clean gently → dry completely → remove dust → align carefully → apply the protector slowly.
A little preparation can make the difference between a screen protector covered with bubbles and one that looks clean and professional.
For healthcare-related alcohol prep pads and other medical supplies, Alfa Healthcare Supply Inc. can be a convenient source for patients, caregivers, and home healthcare needs.
Final Thoughts: Alcohol Prep Pad Use Screen Protector
Installing a screen protector does not have to be frustrating. The secret is good preparation.
Start with clean hands, use an appropriate cleaning method, remove oils and fingerprints, dry the screen, remove every visible particle of dust, and then apply the protector carefully.
If you are using a medical alcohol prep pad, remember that its primary labeled purpose may be skin preparation rather than electronics cleaning. For a screen, manufacturer instructions always come first.
Whether you are protecting a smartphone, tablet, glucose reader, or another touchscreen device, taking a few extra minutes to prepare the surface can help you achieve a cleaner and smoother installation.
For medical alcohol prep pads and other healthcare supplies, Alfa Healthcare Supply Inc. provides products designed to support everyday healthcare needs for patients and caregivers.
Frequently Asked Questions: Alcohol Prep Pad Use Screen Protector
1. Can I use an alcohol prep pad before applying a screen protector?
In many cases, an alcohol wipe can be used to clean a compatible screen before applying a protector. However, always check the device and screen-protector manufacturer’s instructions first.
2. What does an alcohol prep pad do before screen protector installation?
It can help remove fingerprints, oils, and surface residue. A microfiber cloth and dust-removal sticker can then help prepare the surface further.
3. Is 70% isopropyl alcohol safe for every screen?
No. Do not assume every screen is compatible with 70% isopropyl alcohol. Follow the manufacturer’s cleaning instructions.
4. Should I dry the screen after using an alcohol pad?
Yes. The screen should be dry before you apply the protector. Many installation instructions recommend using a microfiber cloth after the alcohol wipe.
5. Can an alcohol prep pad remove dust?
It may remove some surface residue, but it is not the best tool for loose dust. Use the dust-removal sticker supplied with your screen protector when available.
6. Can I use a sterile alcohol prep pad on my phone?
Only if the phone manufacturer’s cleaning instructions allow that type of alcohol-based cleaning. A medical pad being sterile does not automatically mean it is approved for every electronic surface.
7. Can I use alcohol on a glucose reader screen?
Check the glucose reader manufacturer’s cleaning instructions first. Medical devices may have specific requirements for cleaning and maintenance.
8. Why are bubbles appearing under my screen protector?
Bubbles can result from trapped air, dust, improper alignment, or an unclean screen. Cleaning the surface carefully and removing dust immediately before installation can help.
9. Can I reuse an alcohol prep pad?
No. Medical alcohol prep pads are generally designed for single use. Follow the product label.
10. Can I use an alcohol prep pad on a cracked screen?
Use caution. A cracked display may have exposed or damaged areas, and liquid should not be allowed to enter openings. Follow the device manufacturer’s instructions and consider professional repair if the screen is damaged.
11. Is an alcohol prep pad the same as a screen-cleaning wipe?
Not necessarily. A medical alcohol prep pad may be labeled specifically for skin preparation, while a screen-cleaning wipe may be designed for electronics. Always check the intended use.
12. Where can I buy sterile alcohol prep pads?
Alfa Healthcare Supply Inc. offers sterile alcohol prep pads among its healthcare products. Always review the product label and intended use before purchasing or using any medical supply.