


Pure Comfort Alcohol Prep Pads:
When you manage diabetes, give routine injections, or keep medical supplies at home, small healthcare products can make a big difference. One of those simple but useful products is Pure Comfort alcohol prep pads.
These individually packaged alcohol pads are designed for convenient skin preparation. Pure Comfort Alcohol Pads are listed as 2-ply pads saturated with 70% isopropyl alcohol, with 100 individually packed pads per box and an external-use designation.
For someone who regularly uses insulin, prepares an injection site, or maintains a well-organized home medical supply kit, having alcohol prep pads available can make a routine feel easier and more organized.
In this guide, we will explain what Pure Comfort alcohol prep pads are, how they are used, their important features, safety considerations, storage tips, and what to look for when buying alcohol prep pads in the USA.
What are Pure Comfort Alcohol Prep Pads?
Pure Comfort alcohol prep pads are pre-moistened pads containing 70% isopropyl alcohol. They are designed for topical use and are commonly used to prepare skin before an injection.
The pads are individually packaged, which makes them convenient for home use, travel, clinics, offices, and other healthcare settings. The manufacturer information identifies Pure Comfort Alcohol Pads as a 100-count product, with each pad individually packaged.
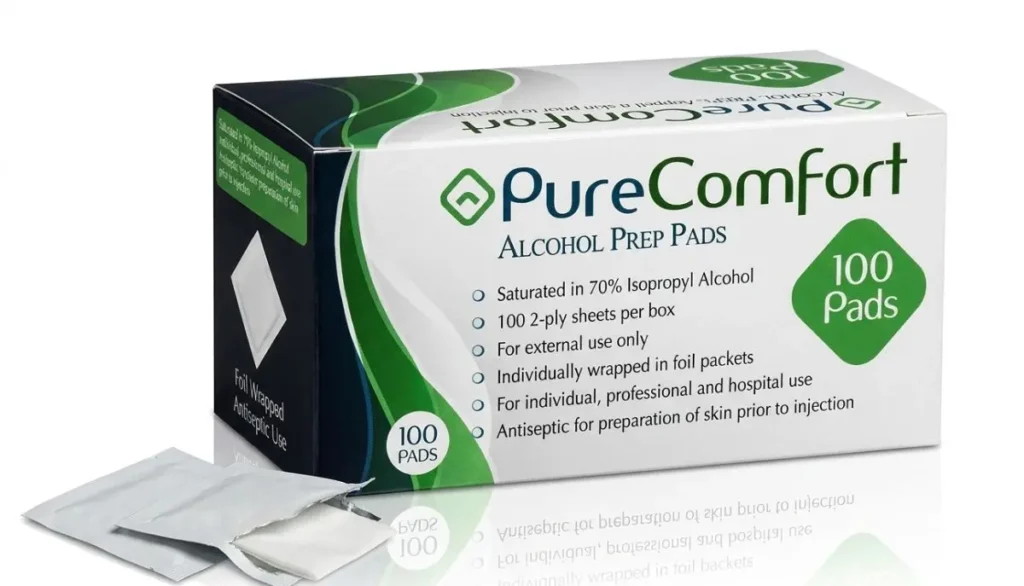
Instead of opening a bottle of liquid alcohol and using cotton or gauze, an individual alcohol prep pad is ready when needed. This can be especially convenient for people who perform regular injections or blood glucose-related routines.
Key Features at a Glance
Pure Comfort alcohol prep pads are described with the following features:
- 70% isopropyl alcohol
- 2-ply pad construction
- Individually packaged
- 100 pads per box
- Intended for external use
- Designed for skin preparation
- Convenient for individual and healthcare use
The product is also listed in the FDA’s AccessGUDID database under Home Aide Diagnostics, Inc., with the device description identifying it as a skin-cleaning wipe.
Why is 70% Isopropyl Alcohol Used?
One of the most important features of Pure Comfort alcohol prep pads is the 70% isopropyl alcohol formulation.
People often assume that a higher percentage of alcohol must always mean better cleaning. That is not necessarily true. Alcohol formulations are selected for specific purposes, and 70% isopropyl alcohol is commonly used in antiseptic products designed for skin preparation.
The important point is to use the product according to its labeling rather than assuming it can be used for every cleaning or disinfecting job.
For alcohol prep pads, the intended use is generally associated with preparing the skin before an injection. Similar 70% isopropyl alcohol prep products carry directions for topical skin preparation and warnings for external use.
What Are Pure Comfort Alcohol Prep Pads Used For?
The primary purpose of Pure Comfort alcohol prep pads is convenient skin preparation.
They can be particularly useful as part of an injection routine. For example, a person who uses insulin may keep alcohol prep pads with their other diabetes supplies so that everything needed for the routine is in one place.
Depending on the product labeling and healthcare instructions, alcohol prep pads may be used for:
1. Preparing Skin Before an Injection
This is one of the most common reasons people keep alcohol prep pads at home.
An alcohol prep pad can be used to prepare the selected injection area according to the instructions provided by the healthcare professional and product labeling.
After use, the pad should be discarded rather than reused.
2. Diabetes Care Routines
People living with diabetes may have several supplies at home, including glucose meters, test strips, lancets, insulin products, pen needles, and other accessories.
A box of Pure Comfort alcohol prep pads can be stored with these supplies when alcohol skin preparation is part of the person’s care routine.
Keeping supplies together can reduce the chance of reaching for the wrong item when it is time to perform a routine task.
3. Home Medical Supply Kits
Alcohol prep pads can also be included in a basic home medical supply kit when appropriate.
Their individual packaging makes them easy to organize in a drawer, travel bag, diabetes supply case, or medical cabinet.
4. Clinical and Professional Settings
Individually packaged alcohol pads are also convenient for healthcare environments where single-use supplies are needed.
The Pure Comfort product is commercially distributed and listed as a skin-cleaning wipe in AccessGUDID.
How to Use Pure Comfort Alcohol Prep Pads
Using an alcohol prep pad is straightforward, but it is still important to follow the product label and your healthcare professional’s instructions.
A typical skin-preparation routine may include the following steps:
Step 1: Wash Your Hands
Begin with clean hands. Hand hygiene is an important part of many healthcare routines.
Step 2: Choose the Correct Area
Use the injection site recommended by your healthcare professional.
If you are unsure about where an injection should be given, ask your doctor, nurse, pharmacist, or other qualified healthcare professional.
Step 3: Open One Pad
Open a fresh individually packaged Pure Comfort alcohol prep pad.
Avoid touching the pad unnecessarily.
Step 4: Wipe the Skin
Use the pad to clean the intended area according to the instructions provided with your medication or injection procedure.
Do not use the pad in your eyes, mouth, or other areas where the product is not intended to be used.
Step 5: Allow the Area to Dry
Let the skin dry as directed before proceeding with the injection.
Avoid immediately wiping the area with another material unless your healthcare instructions specifically tell you to do so.
Step 6: Discard the Used Pad
Alcohol prep pads are designed for single use. Dispose of the used pad appropriately after use.
Do not save a used pad for another injection.
Pure Comfort Alcohol Prep Pads and Diabetes Care
For many people with diabetes, daily care involves several small steps. Checking glucose, preparing medication, changing supplies, and keeping everything organized can become part of a normal routine.
That is why convenient products matter.
A box of Pure Comfort alcohol prep pads provides individually packaged pads that can be kept close to diabetes supplies.
For someone who travels to work, school, or appointments, individual packets can also be easier to carry than a bottle of liquid alcohol.
Of course, alcohol prep pads are only one part of diabetes care. They do not replace blood glucose monitoring, medication, healthy eating, physical activity, or medical advice.
Your diabetes care plan should always be based on instructions from your healthcare professional.
Are Pure Comfort Alcohol Prep Pads Sterile?
This is an area where shoppers should pay attention to the specific product labeling.
Some online product listings describe Pure Comfort Alcohol Pads as sterile, while the current AccessGUDID record for the Pure Comfort product indicates that the device is not packaged as sterile.
Because product packaging, labeling, and regulatory records can change, customers should check the actual package they receive and follow the current manufacturer’s labeling.
This is an important example of why medical-supply information should not rely on a single online description.
If sterility is specifically required for your medical procedure, ask your healthcare professional which product is appropriate.
Pure Comfort Alcohol Prep Pads vs. Ordinary Cotton and Alcohol
At first glance, it may seem that a cotton ball and a bottle of alcohol could do the same job.
There are, however, practical differences.
Individually Packaged Convenience
A pre-moistened pad is ready to use. You do not need to open a bottle and apply alcohol to another material.
Less Mess
Individually packaged pads can help reduce spills compared with handling a bottle of liquid alcohol.
Easy to Carry
A few individual packets can fit conveniently into a medical supply pouch or travel bag.
Consistent Product Format
Each packet is prepared as a ready-to-use pad, rather than requiring you to estimate how much liquid alcohol to apply.
For people who have a regular injection routine, these small conveniences can be meaningful.
How Should You Store Pure Comfort Alcohol Prep Pads?
Proper storage helps you maintain the condition of your medical supplies.
Keep your Pure Comfort alcohol prep pads in their original packaging and follow the storage directions printed on the product.
General good practices include:
- Keep the box in a clean, dry location.
- Protect the individual packets from unnecessary damage.
- Keep the product away from excessive heat.
- Keep alcohol products away from flames and ignition sources.
- Do not use packets that are opened, damaged, or leaking.
- Check the expiration date when applicable.
- Keep medical products away from children.
Because isopropyl alcohol is flammable, it should be kept away from fire, sparks, and other ignition sources. Similar alcohol prep pad labels specifically warn that the product is flammable and should be kept away from fire or flame.
Can You Use Pure Comfort Alcohol Prep Pads on Broken Skin?
Do not assume that an alcohol prep pad is appropriate for every type of wound or skin problem.
A product intended for preparing intact skin before an injection is not automatically a treatment for an open wound, burn, rash, or serious injury.
The appropriate use depends on the product labeling and the situation.
If you have an open wound, significant skin irritation, infection, or another skin problem, ask a healthcare professional what product should be used.
This distinction is important because skin preparation and wound care are not the same thing.
Can Alcohol Prep Pads Be Used to Clean Electronics?
This is another common question.
People sometimes use alcohol wipes on phones, keyboards, glasses, screens, or other household objects. However, you should not automatically assume that a medical alcohol prep pad is appropriate for every device or surface.
Pure Comfort alcohol prep pads are intended for their labeled use. The product information identifies them as external-use skin-cleaning wipes.
For electronics, follow the device manufacturer’s cleaning instructions. Some screens and coatings can be damaged by certain cleaning products.
If you are specifically looking for an alcohol pad for cleaning electronics, choose a product designed and labeled for that purpose.
Are Pure Comfort Alcohol Prep Pads Good for Travel?
Their individual packaging can make alcohol prep pads practical for travel.
If you regularly use injections, keeping a small supply in your medical travel kit may be convenient.
Consider creating a simple travel pouch containing the supplies you regularly need. Depending on your treatment plan, this might include:
- Medication
- Injection supplies
- Blood glucose testing supplies
- Alcohol prep pads
- Sharps container or appropriate disposal solution
- Backup supplies
- Relevant healthcare information
When traveling, keep medications and important medical supplies organized and accessible.
For air travel or interstate travel, follow the current transportation rules and your medication manufacturer’s storage requirements.
What Should You Look For When Buying Alcohol Prep Pads?
When shopping for alcohol prep pads, don’t choose based only on the lowest price.
Consider several factors.
1. Alcohol Concentration
Check the label to confirm the alcohol concentration.
Pure Comfort Alcohol Pads are identified as containing 70% isopropyl alcohol.
2. Package Count
Pure Comfort is listed as a 100-count box.
A larger box may be useful if you use pads frequently.
3. Individual Packaging
Individually wrapped pads are convenient for maintaining an organized supply and carrying individual doses of the product.
4. Pad Construction
Pure Comfort is described as a 2-ply pad.
The pad construction can affect handling and absorbency.
5. Intended Use
Always check what the product is actually labeled for.
A medical product should not be used for a purpose simply because someone online says it works for that purpose.
6. Manufacturer and Product Information
Look for a clearly identified manufacturer, product information, lot information, and expiration information when applicable.
Reliable product information helps consumers make informed choices.
Pure Comfort Alcohol Prep Pads for Home Healthcare
Home healthcare often depends on simple supplies that are easy to overlook.
A person may have a sophisticated medical device or treatment plan, but everyday accessories can still make routines more manageable.
For example, someone who takes regular injections may appreciate having a box of individually packaged alcohol pads in the same cabinet as their other supplies.
This is where products such as Pure Comfort alcohol prep pads can fit naturally into a home medical supply system.
The goal isn’t to make healthcare complicated. It is to make necessary routines organized, consistent, and easier to manage.
How Many Pure Comfort Alcohol Prep Pads Come in a Box?
The standard Pure Comfort Alcohol Pads product is listed as 100 pads per box. Each pad is individually packaged.
A 100-count package can be useful for people who regularly use alcohol prep pads.
For example, if someone uses one pad each day, a 100-count box could represent a substantial supply. Actual consumption will depend on individual medical routines.
Always follow the instructions provided for your specific medication or procedure.
Important Safety Tips
Although alcohol prep pads are simple products, safe use still matters.
Remember these basic precautions:
For External Use Only
Pure Comfort product information specifies external use.
Do not ingest the alcohol or use the pad internally.
Avoid the Eyes
Keep the product away from the eyes.
If accidental contact occurs, follow appropriate first-aid guidance and seek medical advice if needed.
Keep Away From Flames
Isopropyl alcohol is flammable.
Do not use or store alcohol products near flames, sparks, or sources of ignition.
Stop if Significant Irritation Occurs
If the skin becomes unusually irritated, painful, or develops another concerning reaction, stop using the product and speak with a healthcare professional.
Do Not Reuse
Use a fresh pad when needed. Do not reuse an opened or previously used pad.
Keep Away From Children
Store medical supplies in a secure location away from children.
What Makes Pure Comfort Alcohol Prep Pads Convenient?
There is nothing complicated about an alcohol prep pad—and that is part of the appeal.
The product is ready when you need it.
With Pure Comfort alcohol prep pads, users get a simple combination of:
- Pre-moistened pad
- 70% isopropyl alcohol
- 2-ply construction
- Individual packaging
- 100-count box
- Convenient storage
- Simple disposal after use
For a person who performs regular injections, removing one packet from a box can be much easier than preparing liquid alcohol each time.
Buying Pure Comfort Alcohol Prep Pads From a Medical Supply Store
When buying healthcare products online, shoppers should look beyond the product name.
A good medical supply website should provide clear product information, straightforward purchasing options, and access to customer support when questions arise.
Alfa Healthcare Supply Inc. is a medical supply company serving customers in New York and surrounding areas, with a focus on home medical equipment and healthcare supplies.
If you are looking for Pure Comfort alcohol prep pads, you can explore medical supply options through Alfa Healthcare Supply’s website:
Before purchasing, confirm the product name, package quantity, current availability, and product details shown on the product page.
Why Choose a Medical Supply Provider?
Buying healthcare supplies from an established medical supply provider can make the shopping process easier.
A medical supplier can be useful when you need more than one type of product.
For example, a customer may need:
- Diabetes supplies
- Incontinence supplies
- Orthopedic products
- DME equipment
- Home-care products
- Mobility products
- Alcohol prep pads
- Other healthcare accessories
Instead of searching for each item separately, customers can often manage several healthcare supply needs through one supplier.
For people managing ongoing medical routines, convenience matters.
Final Thoughts: Pure Comfort Alcohol Prep Pads
Healthcare does not always come down to large medical devices or complicated equipment. Sometimes, it is the small supplies that help a daily routine run smoothly.
Pure Comfort alcohol prep pads provide a convenient, individually packaged option for skin preparation. They are listed as 2-ply pads saturated with 70% isopropyl alcohol and supplied in a 100-count box.
For people who regularly use injections or maintain home medical supplies, having the right products available can provide an extra level of convenience and organization.
At the same time, it is important to use every medical product for its intended purpose. Read the current package label, follow your healthcare professional’s instructions, observe safety precautions, and do not assume that an alcohol prep pad is suitable for wounds, electronics, or other uses that are not stated on the label.
If you are searching for Pure Comfort alcohol prep pads in the USA, Alfa Healthcare Supply Inc. can be one place to explore medical supply options and related healthcare products.
Good healthcare supply management is not about having the most products. It is about having the right products, knowing how to use them, and keeping them available when you need them most.
Frequently Asked Questions About Pure Comfort Alcohol Prep Pads
What are Pure Comfort alcohol prep pads?
Pure Comfort alcohol prep pads are individually packaged 2-ply pads saturated with 70% isopropyl alcohol. They are intended for external use and are commonly used for skin preparation.
How many pads come in Pure Comfort Alcohol Pads?
The commonly listed Pure Comfort package contains 100 individually packaged pads per box.
What alcohol is in Pure Comfort alcohol prep pads?
Pure Comfort Alcohol Pads are listed as being saturated with 70% isopropyl alcohol.
Are Pure Comfort alcohol pads individually wrapped?
Yes. Product information describes the pads as individually packaged.
Can I use Pure Comfort alcohol prep pads before an injection?
The product is intended for external skin preparation, and alcohol prep pads are commonly used to prepare skin before injections. Follow the instructions for your specific medication and the product label.
Can I reuse a Pure Comfort alcohol pad?
No. Use a fresh pad and discard the used pad after use.
Can alcohol prep pads be used on wounds?
Do not assume that an alcohol prep pad intended for skin preparation is appropriate for an open wound. Follow the product labeling and ask a healthcare professional if you need wound-care advice.
Can I use Pure Comfort alcohol pads on my face?
Only use the product in accordance with its labeling and avoid sensitive areas such as the eyes. If you are considering use on facial skin for a purpose not stated on the label, ask a healthcare professional first.
Are Pure Comfort alcohol prep pads sterile?
There is conflicting information across online sources. Some product listings describe them as sterile, while the current AccessGUDID record indicates that the device is not packaged as sterile.
For procedures where sterility is specifically required, verify the current package labeling and consult your healthcare provider.
Are Pure Comfort alcohol prep pads good for diabetes supplies?
They can be a convenient part of a diabetes-care supply kit when alcohol skin preparation is appropriate for the person’s routine. They do not replace proper diabetes monitoring or medical treatment.
Where can I buy Pure Comfort alcohol prep pads?
You can check medical supply retailers such as Alfa Healthcare Supply Inc. for product availability and current ordering information.
iLet Bionic Pancreas Reviews
If you are searching for ilet bionic pancreas reviews, you are probably looking for something more useful than a simple star rating. An insulin pump can become part of everyday life, so it is natural to want to know how the device works, what real users like about it, what they find difficult, and whether it may fit their diabetes management routine.
The iLet Bionic Pancreas is an automated insulin delivery system developed by Beta Bionics. Unlike a traditional insulin pump that may require users to enter detailed carbohydrate information and adjust several settings, the iLet is designed to simplify insulin dosing. The system uses an algorithm to make insulin-delivery decisions based on continuous glucose monitoring information and meal announcements.
The U.S. Food and Drug Administration cleared the iLet ACE Pump and iLet Dosing Decision Software in 2023 for people 6 years of age and older with type 1 diabetes, when used with a compatible integrated continuous glucose monitor (iCGM).
However, there is an important point that should not be overlooked when reading ilet bionic pancreas reviews: experiences can be very different from one person to another. Clinical studies provide useful evidence, while individual reviews can reveal everyday advantages and frustrations that may not appear in a clinical trial.
There are also important recent safety developments involving the manufacturer that patients and healthcare professionals should discuss before choosing the system. The FDA issued a warning letter to Beta Bionics in January 2026 concerning deficiencies identified during an inspection, including complaint handling and risk-management issues involving reported device problems.
This article explains both sides so readers can make a more informed decision with their healthcare team.
What is the iLet Bionic Pancreas?
The iLet Bionic Pancreas is an automated insulin delivery system intended to help manage blood glucose in people with type 1 diabetes.
The system combines:
- The iLet ACE insulin pump
- iLet Dosing Decision Software
- A compatible integrated continuous glucose monitor
- Insulin
- Infusion supplies
The major idea behind the iLet is to reduce some of the daily decision-making involved in insulin dosing.
The FDA describes the iLet system as using an algorithm to determine and command insulin delivery based on information from a compatible CGM.
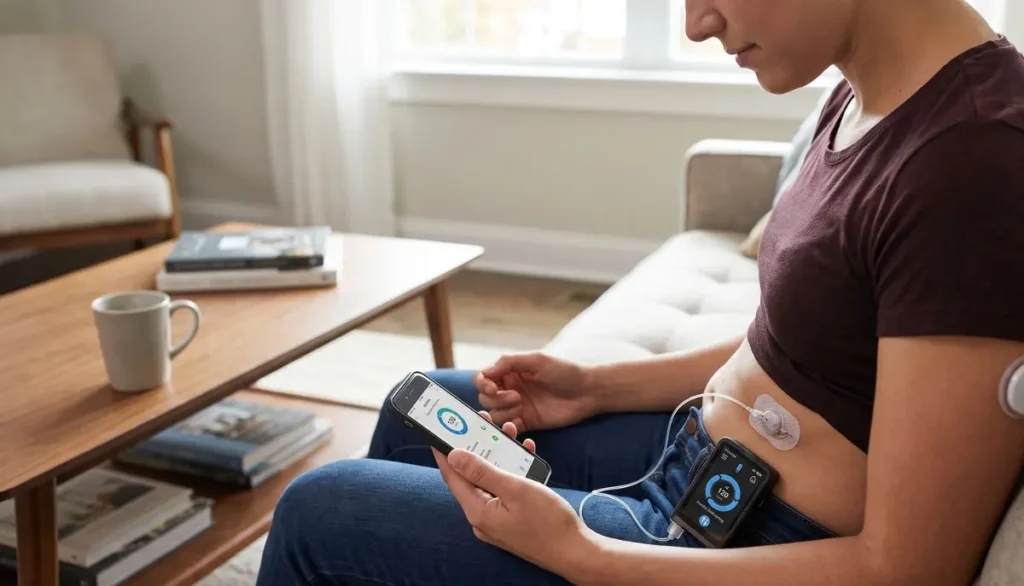
That approach is different from conventional pump therapy, where a person may need to manage multiple settings, calculate carbohydrates, determine correction doses, and make other dosing decisions.
The iLet is designed to automate much of this process.
That does not mean the person disappears from diabetes management. Users still need to monitor their diabetes, respond to alerts, announce meals as instructed, maintain the pump and infusion set, keep appropriate backup supplies available, and follow their healthcare provider’s recommendations.
Why are People Searching for iLet Bionic Pancreas Reviews?
Choosing an insulin pump is a personal decision.
People commonly search for ilet bionic pancreas reviews because they want answers to practical questions such as:
- Is the iLet easy to use?
- Does it really reduce the need for carbohydrate counting?
- How well does it control glucose?
- What do users like about it?
- What problems do users report?
- Is the pump comfortable?
- How often do supplies need to be changed?
- Is it suitable for someone who has difficulty managing diabetes?
- How does it compare with other automated insulin delivery systems?
- What happens if the pump or infusion set has a problem?
- Is it safe?
These are reasonable questions.
A good review should not simply say that a medical device is “good” or “bad.” Instead, it should explain the evidence, recognize limitations, and remind readers that diabetes technology should be selected with an appropriate healthcare professional.
iLet Bionic Pancreas Reviews: What Users Like
One of the most frequently discussed benefits of the iLet is its simplified approach to insulin dosing.
1. Less emphasis on carbohydrate counting
Traditional diabetes management can involve significant mental effort.
A person may need to estimate carbohydrates, calculate an insulin-to-carbohydrate ratio, consider current glucose, think about recent insulin, and decide whether a correction is necessary.
The iLet takes a different approach.
Instead of requiring detailed carbohydrate counting for every meal, the user announces a meal and provides an indication of its size relative to their usual meals.
For some people, this can make diabetes management feel less complicated.
Real-world discussions show that some users appreciate this simplified meal-announcement system, particularly people who find detailed carbohydrate counting difficult or exhausting.
At the same time, other experienced pump users report that they miss having more control over the exact amount of insulin delivered for meals. This is one of the most important differences to consider.
2. Automated insulin adjustments
The iLet is designed to continuously make insulin-delivery decisions using CGM information.
For someone who spends a lot of time thinking about glucose corrections, automated adjustments may reduce some of that burden.
Clinical evidence is important here.
In a pivotal randomized trial, researchers studied the iLet system in adults and children with type 1 diabetes. Beta Bionics reports that the study included 440 participants at 16 diabetes centers and lasted 13 weeks.
The company’s published results reported improvements in time in range and HbA1c compared with standard care in the study population. Individual results, however, can vary considerably.
That distinction matters.
A clinical trial average is not a promise about what one individual will experience.
3. Potentially less daily decision-making
Living with diabetes can involve hundreds of small decisions.
What should I eat?
Should I give insulin now?
Do I need a correction?
Why is my glucose rising?
Should I change my pump settings?
For some people, automated insulin delivery can reduce some of these decisions.
This is one reason the iLet concept is attractive to people who experience diabetes management fatigue.
4. Some users report improved glucose control
Online user experiences are mixed, but there are also positive reports.
Some users describe improved time in range and less mental effort after becoming accustomed to the system.
For example, recent community discussions include users reporting substantial improvements in glucose control and satisfaction after an initial learning period.
These reports are useful for understanding everyday experiences, but they should not be treated as clinical evidence. Individual experiences may be affected by diabetes history, insulin needs, diet, activity, CGM performance, infusion-site management, and many other factors.
iLet Bionic Pancreas Reviews: Common Complaints
A balanced review also needs to discuss the disadvantages.
1. Less manual control
This is perhaps one of the biggest issues for experienced insulin-pump users.
The iLet is intentionally designed to automate dosing.
That can be an advantage for someone who wants simplicity.
But it can also be frustrating for someone who prefers to control every insulin calculation.
Some users report difficulty adjusting to the iLet because they cannot manage insulin dosing in exactly the same way they did with another pump.
This creates an important question:
Do you want more automation, or do you want more manual control?
Neither answer is automatically better.
It depends on the person.
2. The meal-announcement system takes time to learn
The simplified meal system may sound easy, but “easy” does not always mean “instant.”
People who have spent years counting carbohydrates may initially find it strange to stop entering detailed carbohydrate amounts.
Some users report a learning curve while the system adapts to their insulin needs and eating patterns.
That means expectations should be realistic.
The first few days or weeks may not necessarily represent the long-term experience.
3. Tubing can be inconvenient
The iLet uses an infusion set, meaning tubing is part of the system.
For some users, tubing is not a major problem.
For others, it can get caught on clothing, furniture, door handles, or other objects.
The National Institute of Diabetes and Digestive and Kidney Diseases has also highlighted that tubing can be one of the disadvantages some people experience with bionic-pancreas technology.
If you strongly prefer a tubeless system, this is something to discuss with your diabetes care team before making a decision.
4. Infusion-set problems can affect insulin delivery
An automated pump still depends on physical insulin delivery.
A problem with an infusion set, cannula, connector, cartridge, or pump can interfere with insulin delivery.
This is why users need to understand troubleshooting instructions and maintain appropriate backup insulin supplies.
Recent FDA information is especially important here.
In its January 2026 warning letter to Beta Bionics, the FDA described deficiencies related to complaint investigations and identified reports involving issues such as cartridge or connector leaks, infusion-set failures, and other device problems.
The FDA letter also described reports involving motor failures and other problems.
This does not mean every iLet device will experience these problems. It does mean that consumers should not ignore recent regulatory information when evaluating the system.
A Very Important 2026 Safety Update
Anyone researching ilet bionic pancreas reviews today should look beyond older reviews.
In January 2026, the FDA issued a warning letter to Beta Bionics following an inspection of the company’s Irvine facility.
The FDA identified concerns involving the company’s handling and investigation of complaints, risk-management processes, and reported device issues. The letter described complaints involving faulty motors, insulin delivery problems, cartridge and connector leaks, infusion-set failures, and other reported events.
The FDA’s letter is not the same thing as saying that the iLet system has been universally recalled or that every user will experience a problem.
Patients should therefore avoid interpreting the warning letter in an overly broad way.
Instead, it is a reason to:
- Read the latest manufacturer safety information.
- Talk with your diabetes healthcare team.
- Understand troubleshooting procedures.
- Keep backup insulin available as instructed.
- Know how to recognize unexplained hyperglycemia.
- Follow your healthcare provider’s instructions for suspected pump or infusion problems.
- Report device problems through the appropriate channels.
The FDA’s public safety information should always take priority over an anonymous online review.
What About Reported Device Failures?
The FDA’s MAUDE database contains individual medical-device adverse-event reports.
For example, a 2026 report involving an iLet system described repeated motor-stall alerts associated with failure to infuse and hyperglycemia; the report stated that the patient used insulin by pen as backup therapy.
Another report described hyperglycemia associated with concerns about insulin delivery, although the precise cause was unclear.
These reports are important, but they must be interpreted correctly.
A medical-device report does not automatically establish that the device caused the reported medical outcome in every case. The FDA database contains reports submitted for investigation and surveillance.
That is why consumers should consider these reports as part of the overall safety picture rather than treating every report as proof of a specific cause.
Is the iLet Bionic Pancreas Easy to Use?
“Easy” is subjective.
For a person who dislikes carbohydrate calculations and wants more automation, the iLet may feel simpler.
For someone who enjoys controlling pump settings and calculating doses, the same system may feel restrictive.
This is an important lesson from ilet bionic pancreas reviews.
The best insulin pump is not necessarily the pump with the most automation.
It is the pump that fits the person’s medical needs, lifestyle, preferences, insulin requirements, technology comfort level, and ability to safely use the system.
Who May Like the iLet?
The iLet may be appealing to people who:
- Have type 1 diabetes and meet the system’s approved age and usage requirements
- Want an automated insulin delivery approach
- Prefer less carbohydrate-counting responsibility
- Find diabetes calculations tiring
- Want the system to make many insulin-delivery decisions automatically
- Are comfortable using a CGM
- Can follow pump and infusion-set instructions
- Have access to appropriate diabetes education and clinical support
The system is indicated for people with type 1 diabetes age 6 and older, for home use, with a compatible iCGM and prescription.
Who May Prefer Another Insulin Pump?
The iLet may not be the ideal choice for someone who strongly prefers:
- Detailed manual insulin calculations
- Extensive pump-setting customization
- A tubeless pump
- Complete control over meal boluses
- A specific insulin concentration or regimen that is not compatible with the system
- A particular CGM or pump ecosystem
Compatibility and insulin requirements should be discussed with a healthcare provider before changing therapy.
iLet Bionic Pancreas vs. Traditional Insulin Pump
A traditional insulin pump can offer considerable customization.
Users may have different basal rates, carbohydrate ratios, correction factors, and other settings.
The iLet takes a different approach by trying to simplify insulin management through automated dosing.
Traditional pump approach
A traditional pump may require the user to:
- Enter carbohydrate information
- Review glucose
- Calculate or confirm boluses
- Manage multiple settings
- Make more treatment decisions
iLet approach
The iLet is designed to:
- Use CGM information
- Automate insulin dosing decisions
- Simplify meal announcements
- Reduce dependence on detailed carbohydrate counting
Neither approach is automatically superior.
The right choice depends on the individual’s diabetes management needs.
What Do Clinical Studies Say?
User reviews can tell us what daily life feels like, but clinical studies provide another type of evidence.
The pivotal iLet study included 440 participants and evaluated automated insulin delivery over 13 weeks. Beta Bionics reports that participants were treated at 16 diabetes centers.
The published evidence found improvements in important glucose measures compared with standard care in the studied population.
However, people should remember three things:
First, clinical trials measure groups.
A positive average result does not guarantee the same result for every patient.
Second, technology does not replace diabetes care.
Users still need medical support, monitoring, supplies, education, and backup plans.
Third, newer safety information matters.
Older clinical-trial results should be considered alongside current post-market safety information.
What Real Users Say About the iLet
Online reviews show a wide range of experiences.
Some users describe the iLet as a major improvement in their diabetes routine. They appreciate not having to calculate every carbohydrate amount and report less mental effort.
Other users report significant frustration with glucose control, limited manual correction options, or the transition from a highly customizable pump.
This difference is exactly why people should be careful when reading online reviews.
One person’s “life-changing” experience can coexist with another person’s “not for me” experience.
Both can be genuine.
Diabetes is highly individual.
Questions to Ask Your Healthcare Provider
Before choosing the iLet, consider asking:
“Is the iLet appropriate for my type of diabetes?”
The current FDA indication is important, and your healthcare provider can determine whether it fits your situation.
“Is my CGM compatible?”
The iLet requires a compatible iCGM.
“Is my insulin compatible?”
Ask your healthcare professional which insulin products and concentrations are appropriate for the specific system.
“What should I do if my glucose rises unexpectedly?”
Have a clear troubleshooting plan.
“What should I do if the pump stops working?”
You should know how to transition to your backup insulin plan if necessary.
“What supplies should I keep at home?”
Ask about backup infusion sets, insulin, glucose-monitoring supplies, batteries or charging needs, and other recommended supplies.
“How will I know whether the system is working well for me?”
Your healthcare team can help you evaluate time in range, glucose patterns, hypoglycemia, hyperglycemia, A1C, and other appropriate measures.
Is the iLet Bionic Pancreas Worth It?
There is no universal yes or no answer.
For some people, the iLet’s simplified automated approach may be very attractive.
For others, the limited manual control may be frustrating.
The clinical evidence supports the potential benefits of automated insulin delivery, while user experiences demonstrate that the day-to-day experience varies.
And because there are current regulatory safety concerns involving the manufacturer, people considering the device should review the latest safety information rather than relying only on older positive reviews.
The most reasonable conclusion is:
The iLet Bionic Pancreas may be a useful option for some people with type 1 diabetes, but it is not automatically the right insulin pump for everyone.
Buying Diabetes Supplies From a Trusted Medical Supplier
When managing diabetes, having reliable access to supplies matters.
Alfa Healthcare Supply Inc. is a medical supply company serving patients and caregivers with a range of diabetes and home medical supplies.
Before ordering an insulin pump or related prescription device, patients should confirm prescription requirements, product compatibility, insurance coverage, and availability.
For prescription medical devices such as the iLet, federal law and manufacturer requirements may restrict sales to or on the order of a physician. Beta Bionics states that the iLet Bionic Pancreas is a prescription device.
A medical supplier can help with product and supply questions, but decisions about insulin therapy should remain with the patient’s qualified healthcare team.
Final Thoughts on iLet Bionic Pancreas Reviews
Searching for ilet bionic pancreas reviews is a smart first step when you are considering diabetes technology, but reviews should be read with an open mind.
The iLet has an interesting goal: make insulin management more automated and reduce some of the daily calculations that can make diabetes exhausting.
Clinical research supports the potential benefits of the technology, and many users report positive experiences. At the same time, other users describe a learning curve, frustration with reduced manual control, tubing concerns, or difficulties with glucose management.
Most importantly, current safety information should be part of any modern review. The FDA’s January 2026 warning letter concerning Beta Bionics identified issues involving complaint handling and risk management, including reports of device and infusion-related problems.
That does not mean the iLet is unsuitable for every patient. It means consumers should make an informed decision based on clinical evidence, current safety information, personal diabetes needs, and professional medical advice.
For someone who wants less manual calculation and is comfortable with an automated approach, the iLet may be worth discussing with a diabetes specialist.
For someone who wants extensive manual control or a tubeless design, another system may be a better fit.
The best choice is the one that can be used safely, consistently, and comfortably as part of an individual’s overall diabetes care plan.
Frequently Asked Questions About iLet Bionic Pancreas Reviews
Is the iLet Bionic Pancreas good?
The iLet can be a useful automated insulin delivery option for appropriate patients with type 1 diabetes. Clinical studies have demonstrated improvements in glucose measures, but individual results vary.
Does the iLet require carbohydrate counting?
One of the main features of the iLet is its simplified meal-announcement approach, which reduces the need for traditional detailed carbohydrate counting.
However, users still need to understand how to announce meals correctly and follow their healthcare team’s instructions.
Does the iLet automatically give insulin?
The iLet is designed to automatically adjust insulin delivery using its dosing algorithm and information from a compatible CGM.
Can children use the iLet?
The FDA cleared the iLet system for people 6 years of age and older with type 1 diabetes, subject to the device’s approved use requirements.
Is the iLet a real artificial pancreas?
It is commonly described as a bionic or artificial-pancreas-type system because it combines automated insulin delivery with continuous glucose monitoring.
However, it does not reproduce every function of a biological pancreas.
What are the biggest disadvantages of the iLet?
Potential disadvantages include tubing, the learning curve, less manual control over dosing compared with some traditional pumps, dependence on compatible CGM technology, and the need to manage infusion supplies.
Current FDA regulatory information also makes it important for prospective users to understand reported device and complaint-management concerns.
Do iLet reviews say everyone gets better blood sugar?
No.
User experiences are mixed. Some report excellent results, while others report problems with glucose control or dislike the limited manual control.
Should I switch to the iLet because of a positive online review?
No.
Online reviews can help you prepare questions, but an insulin pump is a medical device. Discuss your individual circumstances with your endocrinologist or diabetes care team.
What should I do if the iLet is not delivering insulin?
Follow the manufacturer’s troubleshooting instructions and your healthcare provider’s backup plan. If you have unexplained high glucose or symptoms suggesting a serious problem, seek appropriate medical assistance promptly.
Do not assume that an automated pump is working simply because the screen appears normal.
Medical Disclaimer: This article is for general educational and informational purposes only. It is not medical advice and does not replace guidance from a physician, endocrinologist, diabetes educator, or other qualified healthcare professional. Do not change insulin doses or discontinue diabetes treatment based solely on this article or online reviews. Always follow the current prescribing information and manufacturer safety instructions for your device.
FreeStyle Libre 3 Plus Reader Near Me
If you are searching for “freestyle libre 3 plus reader near me,” you are probably looking for a reliable way to view your glucose readings without depending entirely on a smartphone. For many people living with diabetes, having a dedicated glucose reader can make everyday diabetes management easier, especially when a phone is unavailable, incompatible, low on battery, or not convenient to use.
The FreeStyle Libre 3 system from Abbott includes a dedicated FreeStyle Libre 3 Reader that can be used with the FreeStyle Libre 3 Plus sensor. Abbott states that the FreeStyle Libre 3 Plus sensor works with the FreeStyle Libre 3 Reader and the compatible Libre app.
For patients and caregivers, the important question is not simply, “Where can I find a reader?” It is also, “Am I buying the correct reader for my sensor, and can I get dependable support if I have questions?”
That is where choosing an established medical supply provider can make a difference.
What is the FreeStyle Libre 3 Plus Reader?
The phrase “FreeStyle Libre 3 Plus Reader” can sometimes cause confusion.
The device is generally referred to as the FreeStyle Libre 3 Reader, while the sensor is called the FreeStyle Libre 3 Plus Sensor.
Abbott’s current information confirms that the FreeStyle Libre 3 Plus Sensor is compatible with the FreeStyle Libre 3 Reader.
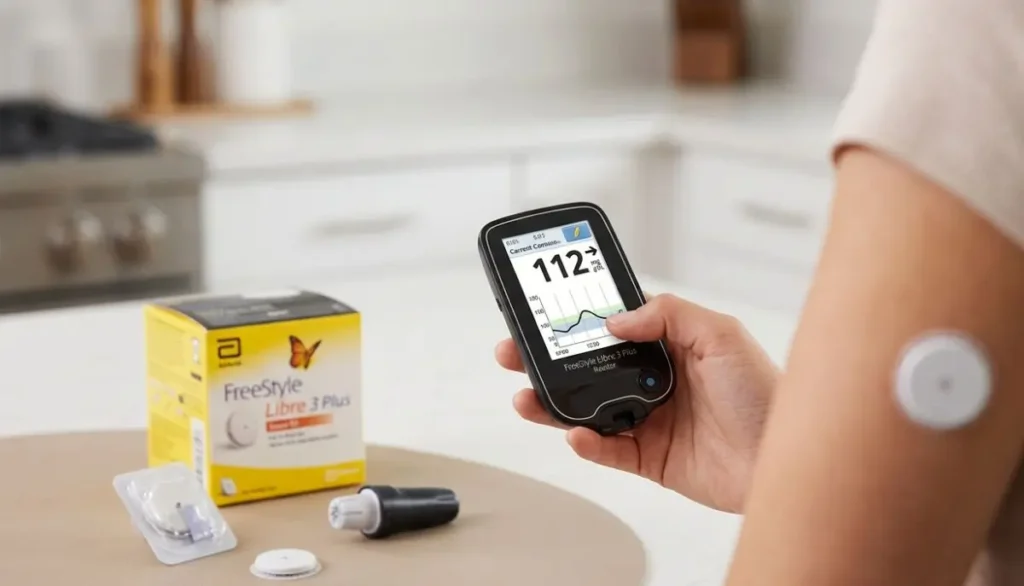
The reader is a dedicated device that allows you to view glucose information from a compatible FreeStyle Libre sensor. Instead of relying solely on a smartphone, you can use the reader as part of your glucose-monitoring routine.
This can be especially useful for:
- People who do not want to use a smartphone for glucose monitoring
- Older adults who prefer a dedicated medical device
- Caregivers helping someone manage diabetes
- People whose smartphones are not compatible
- People who prefer keeping medical information separate from their personal phone
- Patients who want a simple, dedicated screen for glucose information
However, compatibility matters. Buying a random FreeStyle Libre reader because it looks similar is not recommended.
Why People Search for “FreeStyle Libre 3 Plus Reader Near Me”
When someone searches “freestyle libre 3 plus reader near me,” they may have several different needs.
You may be:
- Starting a FreeStyle Libre system for the first time.
- Switching from an older glucose-monitoring system.
- Replacing a damaged or lost reader.
- Looking for a reader that works with the FreeStyle Libre 3 Plus Sensor.
- Trying to find a medical supply store that can help with your order.
- Looking for a local supplier instead of waiting for shipping.
- Trying to determine whether your insurance may cover the product.
The search is therefore about more than finding the nearest store.
It is about finding the right device from a trustworthy source.
FreeStyle Libre 3 Plus Sensor and Reader Compatibility
One of the most important things to understand before purchasing is compatibility.
Abbott says the FreeStyle Libre 3 Plus Sensor can be used with the FreeStyle Libre 3 Reader. The current FreeStyle Libre system also includes the Libre 3 Plus Sensor, Libre 3 Sensor, compatible apps, and the Libre 3 Reader.
This means you should check the exact sensor and reader combination before ordering.
Can I use the FreeStyle Libre 3 Plus Sensor with the FreeStyle Libre 3 Reader?
Yes.
Abbott confirms compatibility between the FreeStyle Libre 3 Plus Sensor and FreeStyle Libre 3 Reader.
Can I use just any FreeStyle Libre reader?
No.
FreeStyle Libre products have different generations and compatibility requirements. A reader designed for an older FreeStyle Libre system should not automatically be assumed to work with a newer sensor.
Always check the product labeling and current Abbott compatibility information before purchasing.
What Is Different About the FreeStyle Libre 3 Plus Sensor?
The FreeStyle Libre 3 Plus Sensor is an updated version of the FreeStyle Libre 3 system.
According to Abbott, the FreeStyle Libre 3 Plus Sensor provides:
- Up to 15 days of sensor wear
- Real-time glucose information
- Compatibility with selected automated insulin delivery systems
- Expanded age indication
- Compatibility with the FreeStyle Libre 3 Reader and compatible app technology
The extended wear period can be particularly convenient because fewer sensor changes may mean fewer interruptions to your normal routine.
For someone managing diabetes every day, convenience matters.
Where Can I Find a FreeStyle Libre 3 Plus Reader Near Me?
If you are searching for a freestyle libre 3 plus reader near me, you have several options.
1. Local Medical Supply Stores
A medical supply company may be a good starting point because these businesses commonly work with diabetes supplies, durable medical equipment, and other healthcare products.
For example, Alfa Healthcare Supply Inc. provides diabetes-related medical supplies and lists the FreeStyle Libre 3 Reader among its products. Its online diabetes supply category currently lists the FreeStyle Libre 3 Reader.
Visit Alfa Healthcare Supply Inc.
A medical supply provider can also be helpful if you have questions about ordering, prescriptions, insurance, or related diabetes products.
2. Pharmacies
Some pharmacies may carry or order FreeStyle Libre products.
Availability can vary by location, so calling before visiting can save you a trip.
Ask specifically for:
“The FreeStyle Libre 3 Reader compatible with the FreeStyle Libre 3 Plus Sensor.”
This is better than simply asking for a “Libre reader.”
3. DME Suppliers
Durable medical equipment suppliers may also provide diabetes-related products.
Abbott states that FreeStyle Libre 3 Plus and FreeStyle Libre 2 Plus sensors are available through retail pharmacies, DME suppliers, mail-order companies, and government pharmacies with a valid prescription.
4. Online Medical Supply Providers
If you cannot find the reader locally, an established online medical supply company may be another option.
Online ordering can be convenient, particularly when you need supplies delivered to your home.
Alfa Healthcare Supply Inc. and Diabetes Supplies
For patients looking for a dependable medical supply provider, Alfa Healthcare Supply Inc. is a medical supply and DME company serving customers with healthcare equipment and supplies.
The company’s diabetes supply selection includes products such as glucose monitoring systems, test strips, CGM-related products, and the FreeStyle Libre 3 Reader.
Alfa Healthcare Supply Inc. Diabetes Supplies
Alfa Healthcare Supply can be a useful option for people who prefer working with a medical supply provider rather than searching from store to store.
For any prescription-required product, insurance-covered item, or medically necessary device, patients should confirm the current ordering requirements before purchasing.
FreeStyle Libre 3 Plus Reader Near Me: What Should I Check Before Buying?
Finding a nearby reader is only the first step.
Before placing an order, consider these important questions.
1. Is it the correct reader?
Confirm that the reader is the FreeStyle Libre 3 Reader and that it is compatible with your FreeStyle Libre 3 Plus Sensor.
2. Is the product new and authentic?
Medical monitoring equipment should come from a legitimate healthcare supplier or authorized source.
Avoid questionable listings that do not clearly identify the product.
3. Do I need a prescription?
FreeStyle Libre products may have prescription and payer requirements depending on the specific product and your circumstances.
Abbott’s U.S. materials identify FreeStyle Libre systems as prescription products and note that Medicare and other payer criteria may apply.
4. Does my insurance cover it?
Coverage can differ significantly between insurance plans.
Ask your insurance company or medical supply provider about eligibility and documentation requirements.
5. Can the supplier help if I have a problem?
A good medical supply company should make it easier to get assistance when you have questions about ordering or product use.
How Does the FreeStyle Libre 3 Reader Work?
The basic idea is straightforward.
A compatible sensor is applied according to the manufacturer’s instructions. The reader is then used to obtain and display glucose information.
Abbott’s getting-started information explains that after applying the FreeStyle Libre 3 Plus Sensor, the user starts the sensor with either the compatible app or reader. The selected device then receives glucose information and, where applicable, alarms.
One important detail is that the same sensor cannot simply be started interchangeably between the reader and app.
Abbott explains that if you start a FreeStyle Libre 3 Plus Sensor with the app, you cannot then use the reader to scan that same sensor for glucose readings, and vice versa.
This is an important point to understand before starting a new sensor.
Reader or Smartphone: Which Is Better?
There is no single answer for everyone.
Both options can be useful, depending on your lifestyle and compatible devices.
Using the Reader
A dedicated reader may be preferable if:
- You do not own a compatible smartphone.
- You prefer a separate medical device.
- You want to keep glucose monitoring separate from your phone.
- You are helping an older family member.
- Your phone battery is often low.
- You want a straightforward device specifically for glucose monitoring.
Using the App
A smartphone may be convenient if:
- Your phone is compatible.
- You prefer carrying fewer devices.
- You want app-based features.
- You are comfortable managing glucose information on your phone.
Abbott notes that the app and reader have similar but not identical features, so users should review the applicable instructions before deciding which device best fits their needs.
Can I Use the FreeStyle Libre 3 Plus Sensor With My Phone and Reader at the Same Time?
This is an important question.
According to Abbott’s U.S. getting-started guide, you cannot use both the FreeStyle Libre 3 Reader and Libre app to scan the same FreeStyle Libre 3 Plus Sensor for glucose readings.
The device used to start the sensor becomes the device used for glucose readings from that sensor.
So, before starting your sensor, decide whether you intend to use the reader or compatible smartphone app.
If you are unsure, speak with your healthcare professional or review the manufacturer’s current instructions.
Benefits of Having a Dedicated FreeStyle Libre Reader
For many users, a reader offers practical benefits.
Simple and Focused
The reader is designed specifically around the FreeStyle Libre system.
You do not have to navigate through unrelated smartphone applications every time you want to check your glucose information.
Useful for People Without Compatible Phones
Not every smartphone supports every medical app.
A dedicated reader can provide another way to use the system when a compatible smartphone is unavailable.
Helpful for Caregivers
Parents, family members, and caregivers may appreciate having a dedicated device for glucose monitoring.
No Dependence on Phone Battery
If your phone battery is dead, you may not be able to use your phone-based glucose app.
A dedicated reader gives you another device for your monitoring routine.
Is the FreeStyle Libre 3 Reader Easy to Use?
The system is designed to provide glucose information in a relatively simple format, but every medical device has a learning curve.
When receiving a new reader, take time to understand:
- How to charge it
- How to start a sensor
- How to view glucose information
- How to interpret trend information
- How to set appropriate alerts when supported
- How to review glucose history
- How to follow the manufacturer’s safety instructions
Abbott provides reader quick-start information, reference guides, and a user manual through its FreeStyle Libre support resources.
Reading the instructions before starting your first sensor can prevent many common mistakes.
Important Safety Information
A CGM is an important diabetes-management tool, but it does not replace medical care.
Abbott advises users to discuss how sensor glucose information should be used with their healthcare professional.
You should also pay attention to situations where the system instructs you to confirm glucose with a blood glucose test.
For example, Abbott states that during the first 12 hours of sensor wear, users may see a symbol indicating the sensor may be inaccurate and should confirm readings with a blood glucose test before making treatment decisions when instructed.
If your glucose reading does not match how you feel, follow the manufacturer’s safety instructions and contact your healthcare professional when appropriate.
Do not change insulin doses or other diabetes treatment solely because of an online article.
What If My FreeStyle Libre Reader Is Lost or Damaged?
If your reader is lost, damaged, or stops working, avoid buying an incompatible replacement simply because it has “FreeStyle Libre” in the name.
First identify:
- Your sensor model
- Your reader model
- Whether your current sensor is already active
- Whether you use a smartphone app
- Whether your replacement device needs to be compatible with your current sensor
Then contact the manufacturer or your medical supply provider for guidance.
Abbott provides customer support and reader support resources for FreeStyle Libre users.
What If I Cannot Find a FreeStyle Libre 3 Plus Reader Near Me?
Do not assume that “out of stock nearby” means you have no options.
You can try:
- Calling local medical supply stores
- Checking DME suppliers
- Asking your pharmacy whether they can order it
- Checking reputable online medical supply companies
- Asking your healthcare provider where to obtain the appropriate device
- Contacting Abbott for product-support information
The key is to verify compatibility before buying.
Why Buying From a Medical Supply Company Can Be Helpful
Shopping for medical equipment is different from buying an ordinary consumer product.
You may have questions about:
- Prescription requirements
- Insurance
- Product compatibility
- Replacement supplies
- Delivery
- Documentation
- Related diabetes products
A medical supply company understands that patients may need more than a product box.
They may also need clear answers.
For someone searching “freestyle libre 3 plus reader near me,” that human support can be just as important as proximity.
FreeStyle Libre 3 Plus Reader Near Me: Questions to Ask a Supplier
Before ordering, consider asking:
“Do you carry the FreeStyle Libre 3 Reader?”
“Is this reader compatible with the FreeStyle Libre 3 Plus Sensor?”
“Do I need a prescription?”
“Can you check my insurance eligibility?”
“Is the reader currently in stock?”
“Do you offer delivery?”
“What should I do if I have trouble setting it up?”
These simple questions can help you avoid ordering the wrong product.
Final Thoughts: Finding the Right FreeStyle Libre 3 Plus Reader Near Me
Searching for “freestyle libre 3 plus reader near me” may begin as a simple location search, but finding the right device requires a little more attention.
The most important step is confirming that the reader is compatible with your specific sensor. For the FreeStyle Libre 3 Plus Sensor, Abbott identifies the FreeStyle Libre 3 Reader as a compatible reader.
You can explore local pharmacies, DME suppliers, and medical supply providers, or choose a reputable online supplier when local availability is limited.
For patients who want a dedicated device instead of relying completely on a smartphone, the FreeStyle Libre 3 Reader can be a practical part of a daily glucose-monitoring routine.
If you are looking for diabetes supplies, Alfa Healthcare Supply Inc. offers a range of diabetes products and currently lists the FreeStyle Libre 3 Reader among its available products.
Most importantly, take your time, verify compatibility, follow the manufacturer’s instructions, and speak with your healthcare professional when you have questions about using glucose information for diabetes treatment.
Frequently Asked Questions
What reader works with the FreeStyle Libre 3 Plus Sensor?
The FreeStyle Libre 3 Reader is compatible with the FreeStyle Libre 3 Plus Sensor. Abbott’s current information confirms this compatibility.
Can I use an older FreeStyle Libre reader?
Do not assume that an older reader will work with the FreeStyle Libre 3 Plus Sensor. Always verify compatibility with Abbott’s current product information.
Can I use the FreeStyle Libre 3 Plus Sensor with the Libre app?
Yes. Abbott states that the FreeStyle Libre 3 Plus Sensor can work with the compatible Libre app and FreeStyle Libre 3 Reader.
Can I use the reader and smartphone app together?
You should carefully follow Abbott’s instructions when starting a sensor. Abbott’s U.S. guide says the same Libre 3 Plus Sensor cannot be started with one device and then used for readings on the other.
How long does the FreeStyle Libre 3 Plus Sensor last?
Abbott currently describes the FreeStyle Libre 3 Plus Sensor as providing up to 15 days of wear.
Is the FreeStyle Libre 3 Reader prescription-only?
FreeStyle Libre systems are prescription products in the United States, and insurance or payer requirements may apply. Confirm the current requirements for your specific product and situation.
Where can I buy a FreeStyle Libre 3 Reader?
You can check pharmacies, DME suppliers, medical supply companies, and reputable online healthcare suppliers. Availability varies by location.
Can Alfa Healthcare Supply help with FreeStyle Libre products?
Alfa Healthcare Supply Inc. lists the FreeStyle Libre 3 Reader in its diabetes supplies category.
Disclaimer: This article is for general educational purposes and is not a substitute for medical advice, diagnosis, or treatment. Product availability, compatibility, prescription requirements, insurance coverage, and manufacturer recommendations can change. Always check current manufacturer instructions and consult your healthcare professional for individual medical decisions.
Pro Comfort Pen Needles:
For people who use insulin pens regularly, the needle attached to the pen may seem like a small part of diabetes care. In reality, choosing the right pen needle can make everyday insulin injections easier, more comfortable, and more convenient.
Pro Comfort pen needles are disposable pen needles designed for use with compatible insulin delivery systems. They are available in different needle lengths, including commonly used 4 mm, 5 mm, and 6 mm options. Official U.S. device records describe Pro Comfort Pen Needles as single-use disposable needles, with 100-count boxes available for several sizes.
For someone who takes insulin every day, having the right needle size and using it correctly can make a meaningful difference. A short, fine needle can help make injections feel less intimidating, while the disposable design supports good injection hygiene.
At Alfa Healthcare Supply Inc., we understand that medical supplies are not simply products on a shelf. They are part of someone’s daily routine. Whether you are managing diabetes yourself, helping a family member, or caring for a patient, having dependable supplies available when you need them can provide peace of mind.
What Are Pro Comfort Pen Needles?
Pro Comfort pen needles are small, sterile, disposable needles designed to attach to compatible insulin pens or other compatible pen-based medication delivery systems.
Unlike a traditional insulin syringe, an insulin pen uses a pen-shaped device containing medication. A pen needle attaches to the end of the device so the medication can be delivered under the skin.
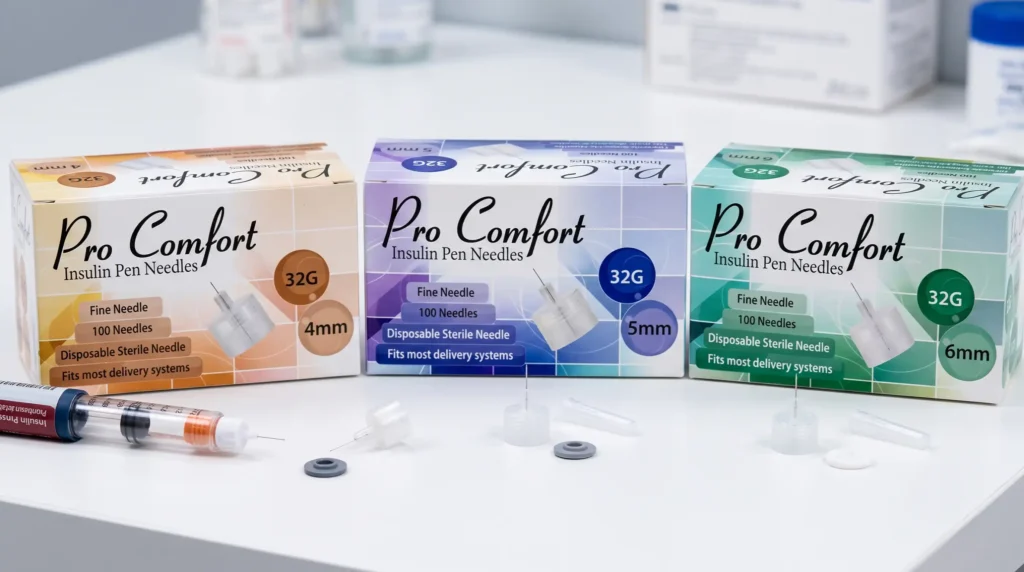
Pro Comfort Pen Needles are listed in the U.S. National Library of Medicine’s AccessGUDID database. The database identifies 4 mm, 5 mm, and 6 mm Pro Comfort versions as single-use disposable pen needles, with 100 individually wrapped sterile needles per box for the listed products.
The available sizes can be useful because people have different injection needs. However, the best needle length is not necessarily the same for everyone.
Your healthcare professional can help determine which needle size is appropriate for you.
Why Needle Size Matters
When you look at a pen needle package, you may notice numbers such as:
- 32G x 4 mm
- 32G x 5 mm
- 32G x 6 mm
These numbers describe the needle’s gauge and length.
The G stands for gauge. In general, a higher gauge number represents a thinner needle.
The measurement in millimeters (mm) describes the needle’s length.
For example:
- 32G x 4 mm means a 32-gauge needle that is 4 millimeters long.
- 32G x 5 mm means a 32-gauge needle that is 5 millimeters long.
- 32G x 6 mm means a 32-gauge needle that is 6 millimeters long.
Pro Comfort Pen Needles are documented in several of these sizes. The 5 mm version is listed as 32G x 3/16 inch, while the 6 mm version is listed as 32G x 5/16 inch.
The important point is that needle length should not be selected only because one size sounds more comfortable. Your healthcare provider can help you choose the size that works appropriately for your insulin injection technique and individual needs.
Pro Comfort Pen Needles 4 mm
The Pro Comfort Pen Needles 4 mm option is a short pen needle designed for compatible insulin delivery systems.
The official device record lists the 4 mm version as a 32G x 5/32-inch single-use disposable pen needle. The listed package contains 100 individually wrapped sterile needles.
Shorter pen needles are commonly considered when a person wants a small needle for subcutaneous medication delivery. However, the correct injection technique still matters.
If you are unsure whether 4 mm is appropriate for you, ask your healthcare professional rather than changing needle length on your own.
Pro Comfort Pen Needles 5 mm
The Pro Comfort Pen Needles 5 mm option is another commonly available size.
The U.S. device database identifies the product as a 32G x 3/16-inch single-use disposable pen needle. The listed box contains 100 sterile needles individually wrapped.
For people who use insulin pens regularly, a 100-count box can be convenient because it provides an organized supply of individually packaged needles.
Remember that a new needle should be used for each injection. The FDA specifically advises insulin pen users to put a new needle on the pen each time they give an injection.
Pro Comfort Pen Needles 6 mm
The Pro Comfort Pen Needles 6 mm option provides another length for people using compatible insulin delivery systems.
The U.S. device database describes the 6 mm version as a 32G x 5/16-inch single-use disposable pen needle. It is listed as a 100-count box with individually wrapped sterile needles.
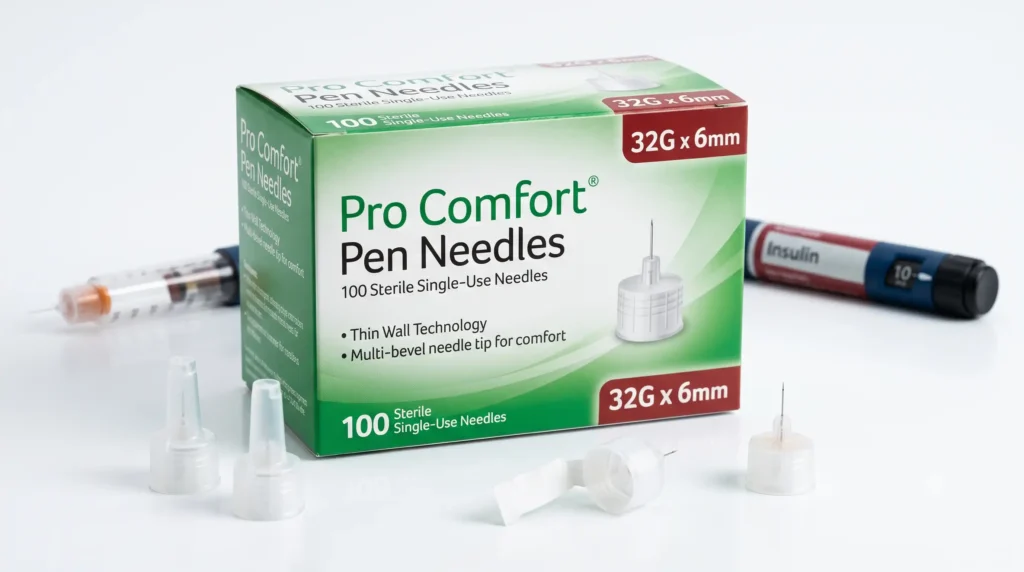
A 6 mm needle may be appropriate for some people, but it should be selected based on professional guidance and the instructions for the medication and pen being used.
Are Pro Comfort Pen Needles Compatible With Insulin Pens?
Pro Comfort Pen Needles are described in the U.S. device database as being intended for use with most insulin delivery systems.
However, “most” does not mean every possible device.
Before purchasing or using a pen needle, check:
- The insulin pen manufacturer’s instructions.
- The pen needle packaging.
- The needle connection or compatibility requirements.
- Instructions from your healthcare professional or pharmacist.
If you are switching from another pen needle brand, do not assume compatibility simply because the needle looks similar.
When in doubt, ask a pharmacist or healthcare provider.
How Do Pro Comfort Pen Needles Work?
Using a compatible insulin pen generally involves attaching a new pen needle, preparing the pen according to its instructions, selecting the prescribed dose, and administering the medication as directed.
The needle provides the pathway through which insulin travels from the pen into the body.
Because insulin is intended to be injected under the skin, proper technique matters.
The FDA recommends asking a doctor or nurse to demonstrate safe insulin injection technique. It also recommends washing your hands before an injection and rotating injection locations rather than repeatedly injecting in exactly the same spot.
This is especially important for people who inject insulin frequently.
Why Use a New Pen Needle for Every Injection?
One of the most important rules of insulin pen use is simple:
Use a new needle for every injection.
It may be tempting to reuse a needle, particularly when someone is trying to save supplies. However, reuse is not recommended.
MedlinePlus states that insulin needles should not be reused or shared and advises removing the needle from an insulin pen immediately after the injection.
The FDA also advises insulin pen users to put a new needle on the pen each time they give an injection.
Using a fresh needle helps support proper hygiene and reduces the risks associated with repeated needle use.
Can You Share Pro Comfort Pen Needles?
No.
Pen needles should never be shared between people.
Even if the needle appears clean or unused, sharing injection equipment can create serious health risks.
The FDA specifically advises people not to share insulin needles, syringes, pens, or cartridges.
This rule applies in households, healthcare environments, and anywhere else insulin injections are administered.
Each person should have their own appropriate medical supplies.
How to Use a Pen Needle Safely
The exact steps for using an insulin pen depend on the specific pen, medication, and instructions provided by the manufacturer.
A general process includes:
1. Wash Your Hands
Clean your hands before preparing your insulin injection.
Good hand hygiene is a basic but important part of safe medication administration.
2. Check Your Supplies
Make sure you have:
- Your prescribed insulin pen
- A new compatible Pro Comfort pen needle
- Alcohol prep supplies if recommended by your healthcare professional
- A suitable sharps disposal container
3. Check the Insulin
Follow the medication instructions for checking the insulin before use.
The FDA advises not to use insulin if it looks cloudy or contains something floating in it when it is not supposed to look that way.
Different types of insulin have different appearances, so always follow the specific product instructions.
4. Attach a New Needle
Remove the protective packaging from a new pen needle and attach it to the compatible insulin pen according to the pen manufacturer’s instructions.
Never use a needle that has damaged packaging or appears compromised.
5. Prepare the Pen
Follow the manufacturer’s instructions for priming the pen and setting the prescribed dose.
Do not guess the dose.
Your insulin dose should come from your healthcare professional’s treatment plan.
6. Choose the Injection Site
Insulin is generally administered into fatty tissue beneath the skin.
Your healthcare professional can teach you appropriate injection sites and technique.
The FDA recommends rotating injection locations rather than repeatedly using exactly the same spot because repeated injections in one location can cause the skin to become thick or thin.
7. Give the Injection
Use the technique demonstrated by your healthcare professional and follow the instructions for your specific insulin pen.
8. Remove and Dispose of the Needle
After the injection, remove the used needle from the pen and dispose of it safely.
Do not leave a used needle attached to an insulin pen.
MedlinePlus specifically advises removing the needle after the injection and placing used needles in a puncture-resistant container.
Choosing Between 4 mm, 5 mm, and 6 mm
One of the most common questions people have is:
Which Pro Comfort pen needle size should I choose?
There is no single answer that works for everyone.
Pro Comfort Pen Needles are available in multiple lengths, including 4 mm, 5 mm, and 6 mm versions documented in U.S. device records.
Your healthcare professional may consider factors such as:
- Your injection technique
- Your individual body characteristics
- Your medication
- Your insulin pen
- Your comfort level
- Your treatment routine
Do not change needle length simply because another size is advertised as more comfortable.
If your injections are painful, you notice repeated skin irritation, or you are concerned that the needle is not working correctly, talk with your healthcare provider.
Gauge vs. Length: What’s the Difference?
The terms gauge and length can be confusing at first.
Think of it this way:
Gauge = thickness
Millimeters = length
For example, a 32G x 5 mm pen needle has:
- 32-gauge thickness
- 5 mm length
The Pro Comfort line includes 32-gauge options in several lengths.
Understanding these numbers makes shopping for replacement pen needles much easier.
If your prescription or healthcare provider specifies a particular size, use that information when ordering.
Are Pro Comfort Pen Needles Sterile?
The listed Pro Comfort Pen Needle products are described as sterile, individually wrapped, single-use disposable needles.
Sterility is important because the needle passes through the skin.
Before use, inspect the packaging. If the package is open, damaged, wet, or otherwise compromised, do not use the needle. Contact the supplier or pharmacist for guidance.
What Should You Look for When Buying Pen Needles?
When purchasing Pro Comfort pen needles, consider more than the brand name.
Check the Needle Size
Make sure the gauge and length match what your healthcare professional has recommended.
Check Compatibility
Confirm that the needle is compatible with your insulin pen or delivery system.
Check Packaging
Look for individually packaged, sterile, unused needles.
Check Quantity
Pro Comfort Pen Needles are available in 100-count boxes for several documented sizes.
If you inject several times each day, having enough needles available can make your routine easier.
Buy From a Reliable Medical Supply Provider
Medical supplies should come from a reputable source.
A dependable supplier can help you find the correct product and understand the available options.
Pro Comfort Pen Needles and Everyday Diabetes Care
Diabetes management is not one large event. It is made up of many small daily decisions.
Checking glucose.
Taking medication.
Planning meals.
Staying active.
Keeping appointments.
Refilling supplies.
Using a fresh pen needle.
Each step contributes to the bigger picture.
For someone who takes insulin every day, having a reliable supply of compatible pen needles can remove one more source of stress from the routine.
That is why choosing a practical, easy-to-use medical supply matters.
Safe Disposal of Used Pen Needles
Used pen needles are considered sharps and should be handled carefully.
Do not throw loose needles where another person could accidentally touch them.
The FDA recommends placing used needles in a hard, puncture-resistant container with a secure lid. The container should be kept away from children.
Local rules for disposing of sharps can vary, so check the recommendations where you live.
A healthcare professional, pharmacy, local health department, or waste management service may be able to explain the appropriate disposal options in your area.
Common Mistakes to Avoid
Even experienced insulin users can occasionally make mistakes. A few simple habits can help.
Reusing a Needle
Use a new needle for each injection.
Sharing Supplies
Never share insulin pens, needles, cartridges, or other injection equipment.
Leaving the Needle Attached
Remove the needle after the injection according to the pen manufacturer’s instructions.
Using the Wrong Size
Do not automatically switch between 4 mm, 5 mm, and 6 mm without appropriate guidance.
Injecting in Exactly the Same Spot
Rotate injection locations as instructed by your healthcare professional.
Ignoring Damaged Packaging
Do not use a pen needle if the sterile package appears damaged or compromised.
Guessing Your Insulin Dose
Use the dose prescribed by your healthcare professional.
These basic habits can make insulin administration safer and more organized.
How Can Alfa Healthcare Supply Inc. Help?
At Alfa Healthcare Supply Inc., our goal is to make finding everyday medical supplies easier for patients, caregivers, and families.
As a medical supply provider serving customers in New York, we understand that people often need supplies that fit into a regular healthcare routine without unnecessary confusion.
Our product range includes diabetes supplies and other home healthcare products. When you are looking for Pro Comfort pen needles, having clear information about sizes, quantities, and compatibility can help you make a more informed purchasing decision.
You can explore available medical supplies through the Alfa Healthcare Supply Inc. website.
If you are unsure which pen needle is appropriate for your insulin pen, medication, or injection routine, speak with your pharmacist or healthcare provider before ordering.
Final Thoughts: Pro Comfort Pen Needles
Choosing the right Pro Comfort pen needles may seem like a small part of diabetes care, but for someone who uses insulin regularly, small details matter.
Understanding gauge and needle length, selecting a compatible product, using a new needle for every injection, rotating injection locations, and disposing of used needles properly can help make your insulin routine safer and more organized.
Pro Comfort Pen Needles are available in multiple sizes, including documented 4 mm, 5 mm, and 6 mm 32G options.
Most importantly, do not feel that you have to figure everything out by yourself. Your pharmacist, diabetes educator, nurse, or healthcare provider can help you select the appropriate needle and demonstrate the correct injection technique.
At Alfa Healthcare Supply Inc., we believe medical supplies should be easier to understand and easier to access. If you are searching for Pro Comfort pen needles or other diabetes supplies, start by confirming the exact size and compatibility recommended for your insulin pen.
Medical Disclaimer: This article is for general educational purposes and is not a substitute for medical advice, diagnosis, or treatment. Always follow the instructions supplied with your medication and insulin pen, and speak with your healthcare professional before changing your needle size, injection technique, medication, or insulin dose.
Frequently Asked Questions About Pro Comfort Pen Needles
What are Pro Comfort pen needles used for?
Pro Comfort Pen Needles are disposable needles designed for use with compatible insulin delivery systems. U.S. device records list several Pro Comfort sizes, including 4 mm, 5 mm, and 6 mm options.
Are Pro Comfort pen needles disposable?
Yes. The listed Pro Comfort Pen Needle products are identified as single-use disposable needles.
How many Pro Comfort pen needles come in a box?
Several Pro Comfort versions are listed as 100-count boxes with individually wrapped sterile needles.
Are Pro Comfort pen needles 32G?
Several documented Pro Comfort Pen Needle versions are 32 gauge, including 4 mm, 5 mm, and 6 mm products.
What sizes are available?
Documented Pro Comfort options include 4 mm, 5 mm, and 6 mm lengths. Other Pro Comfort pen needle sizes may also be available depending on the product line and supplier.
Can I reuse a Pro Comfort pen needle?
No. Pen needles are designed for single use. MedlinePlus advises never reusing insulin needles or syringes.
Can two people use the same insulin pen needle?
No. Needles should never be shared. The FDA also advises against sharing insulin pens or cartridges.
Which is better: 4 mm, 5 mm, or 6 mm?
There is no universally best size. The appropriate needle length depends on the individual and the injection technique. Ask your healthcare provider which size is appropriate for you.
Can Pro Comfort pen needles fit my insulin pen?
Pro Comfort Pen Needles are described as being compatible with most insulin delivery systems, but you should verify compatibility with your specific pen before use.
Where should used pen needles go?
Used needles should be placed in an appropriate puncture-resistant sharps container. Follow your local disposal requirements.
Diabetic Shoes Port Morris NY:
Finding the right footwear can become an important part of everyday diabetes care. If you live in Port Morris, the Bronx, or nearby New York communities and are searching for diabetic shoes Port Morris NY, it helps to choose footwear designed with comfort, fit, support, and foot protection in mind.
Diabetes can affect the feet in different ways. Some people experience numbness or tingling, while others may develop calluses, pressure areas, swelling, or changes in foot shape. Because of this, ordinary shoes may not always provide the space and protection that a person with diabetes needs.
Alfa Healthcare Supply Inc. provides diabetic and orthopedic footwear solutions for patients throughout New York, including the Bronx. Its footwear collection includes therapeutic diabetic shoes, orthopedic footwear, and insert options designed for different foot-care needs. The company serves patients and healthcare providers across the Bronx, Queens, Brooklyn, Long Island, and Westchester.
For someone searching for diabetic shoes Port Morris NY, the goal should not simply be to find a shoe that looks good. The better goal is to find footwear that fits properly, provides enough room, feels comfortable, and works with your healthcare provider’s recommendations.
Why Diabetic Footwear Matters
Diabetes can increase the risk of foot problems, particularly when a person has nerve damage, poor circulation, a history of ulcers, or other diabetes-related foot conditions.
Reduced sensation can make it harder to notice a small problem inside a shoe. A rubbing seam, tight toe area, or pressure point may not be immediately noticeable. Over time, repeated pressure or friction can contribute to skin problems.

That is why footwear deserves attention as part of a broader foot-care routine.
Good therapeutic footwear may provide:
- More room around the toes
- Extra depth for inserts
- Cushioning and support
- Reduced pressure in sensitive areas
- Space for certain foot shapes or deformities
- Compatibility with therapeutic inserts
- A more comfortable fit for daily walking
However, shoes are not a replacement for medical care. If you notice a wound, blister, discoloration, swelling, drainage, or another concerning change in your foot, contact your healthcare professional promptly.
What Are Diabetic Shoes?
Diabetic shoes, sometimes called therapeutic shoes, are specially designed footwear intended to help protect the feet of eligible people with diabetes and certain diabetes-related foot conditions.
They are different from ordinary athletic or casual shoes because therapeutic footwear may have features such as extra depth, appropriate width options, removable inserts, and construction intended to accommodate therapeutic inserts.
Alfa Healthcare Supply’s diabetic and orthopedic footwear collection includes A5500 therapeutic diabetic shoes, custom insert options, orthopedic footwear, and post-operative or healing footwear.
The exact shoe a person needs depends on their foot condition, medical requirements, size, width, and recommendations from their healthcare professional.
What to Look for in Diabetic Shoes Port Morris NY
If you are comparing diabetic shoes Port Morris NY, consider more than the appearance of the shoe.
1. Proper Fit
A shoe should fit comfortably without squeezing the toes or creating unnecessary pressure.
The length and width both matter. A shoe that is too short may press against the toes, while a shoe that is too narrow can create pressure along the sides of the foot.
2. A Wide Toe Area
A roomy toe box can provide additional space for the toes and may be especially helpful when a person has certain foot conditions.
Your healthcare provider or qualified footwear professional can help determine what type of toe area is appropriate for your feet.
3. Appropriate Depth
Some therapeutic shoes provide additional internal depth. This can be useful when an individual needs therapeutic inserts or has a foot shape that requires more room.
Medicare’s requirements for depth shoes include specific construction criteria, including additional depth intended to accommodate qualifying inserts.
4. Removable Inserts
Some therapeutic shoes are designed to work with removable inserts.
Depending on your medical needs, your healthcare provider may recommend particular inserts to provide cushioning or help redistribute pressure.
5. Secure Closure
Shoes should stay securely on the feet while walking.
Laces, adjustable straps, or other suitable closure systems can help achieve a more secure fit. The best choice depends on your mobility, hand function, foot shape, and personal needs.
6. Comfortable Interior
A smooth and comfortable interior can help reduce unnecessary rubbing and irritation.
This is particularly important for people who have reduced sensation because they may not immediately feel friction or pressure.
Diabetic Shoes Are About More Than Comfort
When people hear the term “diabetic shoes,” they may think only about comfort.
Comfort is certainly important, but therapeutic footwear can have a larger purpose.
People with diabetes may have an increased risk of foot complications. According to Medicare, therapeutic shoes and inserts may be covered under Part B for eligible people with diabetes and severe diabetes-related foot disease.
Medicare identifies several conditions that can support eligibility, including previous foot ulceration, pre-ulcerative calluses, peripheral neuropathy with callus formation, poor circulation, foot deformity, and certain amputations.
This does not mean every person with diabetes automatically qualifies for therapeutic footwear.
Eligibility and medical necessity must be established according to the applicable requirements.
Who May Need Therapeutic Diabetic Shoes?
Your doctor or foot-care professional may recommend therapeutic footwear if you have diabetes together with certain foot-related risks or conditions.
Examples can include:
- Diabetic peripheral neuropathy
- Reduced protective sensation
- Previous foot ulcers
- Pre-ulcerative calluses
- Certain foot deformities
- Poor circulation
- History of amputation
- Foot swelling or structural changes
- A need for therapeutic inserts
The appropriate footwear should be selected based on your individual condition rather than simply choosing the most expensive or most heavily cushioned shoe.
Diabetic Shoes and Foot Inserts
A diabetic shoe and a therapeutic insert often work together.
An insert can provide additional cushioning or help distribute pressure across the foot. Some people may need custom-molded or other qualifying inserts based on their condition.
Medicare currently describes coverage for either one pair of extra-depth shoes with additional qualifying inserts or one pair of custom-molded shoes with inserts and additional inserts, when eligibility requirements are met.
CMS also provides detailed coding and documentation requirements for therapeutic shoes and inserts.
This is one reason it is important to work with qualified healthcare professionals and a supplier familiar with therapeutic footwear requirements.
Choosing the Right Size for Diabetic Shoes
Buying diabetic shoes in the correct size is essential.
Do not assume that your usual shoe size will always be the correct size for therapeutic footwear.
Feet can change over time. Swelling, deformities, previous injuries, and changes related to diabetes can affect how a shoe fits.
When selecting footwear, consider:
- Length
- Width
- Toe-box space
- Heel fit
- Arch support
- Internal depth
- Insert compatibility
- Overall walking comfort
If possible, follow professional sizing guidance instead of relying only on the size printed inside your old shoes.
Alfa Healthcare Supply provides sizing guidance and footwear support as part of its therapeutic footwear services.
How to Check Your Feet Before Wearing New Shoes
Before putting on new footwear, take a moment to check your feet.
Look for:
- Red areas
- Blisters
- Cuts
- Cracks
- Swelling
- Calluses
- Bruising
- Skin breakdown
- Drainage
- Areas that look different from usual
People with reduced sensation may not feel an injury right away, so visual inspection can be especially important.
Medicare also recognizes diabetes-related foot care for eligible people with diabetic peripheral neuropathy and loss of protective sensation.
If you find a concerning problem, do not simply cover it with a new shoe and continue walking. Ask your healthcare professional for advice.
Breaking in New Diabetic Shoes
Even a well-designed therapeutic shoe may feel different from your old footwear.
Instead of immediately wearing new shoes for an entire day, follow the instructions provided by your healthcare professional or footwear provider.
Pay attention to how your feet feel and look after wearing the shoes.
If you notice repeated rubbing, pressure, redness, or discomfort, stop and have the fit evaluated.
A shoe should not be causing persistent pressure or injury.
Why Local Patients Search for Diabetic Shoes Port Morris NY
When someone searches for diabetic shoes Port Morris NY, they are often looking for convenient access to appropriate footwear without having to travel far from home.
Port Morris is located in the Bronx, and patients may also search surrounding neighborhoods when looking for diabetic footwear, DME products, or other healthcare supplies.
A local-focused medical supply provider can make the process easier by helping patients understand available products, sizing, documentation, ordering, and delivery options.
Alfa Healthcare Supply Inc. is based in Floral Park, New York, and its website states that it serves the Bronx along with Queens, Brooklyn, Long Island, and Westchester.
Alfa Healthcare Supply Inc. for Diabetic Footwear
Alfa Healthcare Supply Inc. provides medical supplies and durable medical equipment for patients, caregivers, and healthcare providers throughout New York.
Its footwear selection includes brands such as Dr. Comfort, Anodyne, and Propet, along with therapeutic diabetic shoes, orthopedic footwear, and insert options.
The company’s website also describes professional sizing support and assistance with documentation related to therapeutic footwear.
For patients who need more than footwear, Alfa’s broader catalog includes diabetic supplies, incontinence supplies, orthopedic supplies, DME equipment, respiratory supplies, urological supplies, and other healthcare products.
Looking for a Hospital Supply Store Port Morris NY?
People searching for a hospital supply store Port Morris NY may need more than one healthcare product.
For example, a patient recovering at home may need mobility equipment, respiratory equipment, diabetic supplies, orthopedic products, or other home-care items.
Alfa Healthcare Supply offers a broad range of DME and medical supplies, including mobility aids, respiratory devices, orthopedic supports, diabetic supplies, and incontinence products.
This can be useful for patients and caregivers who prefer working with one healthcare supply provider for multiple needs.
Medical Supply Store Port Morris NY for Home Healthcare Needs
A medical supply store Port Morris NY search may also come from patients managing long-term health needs at home.
Home healthcare often requires reliable access to everyday products.
Depending on the individual’s needs, these may include:
- Blood glucose meters
- Test strips
- Lancets
- CGM supplies
- Diabetic footwear
- Compression products
- Orthopedic supports
- Mobility equipment
- Incontinence products
- Respiratory equipment
- Urological supplies
Alfa Healthcare Supply’s product catalog includes these types of healthcare categories and is designed to serve patients across multiple New York communities.
Surgical Supply Store Port Morris NY: What Patients Should Know
A search for surgical supply store Port Morris NY may relate to recovery after an operation, injury, or medical procedure.
Surgical and post-operative needs can vary significantly from one patient to another. Some people may need specialized footwear, mobility equipment, wound-care products, or other supplies recommended by their healthcare team.
Alfa’s footwear collection includes post-operative and healing shoes for certain situations, alongside orthopedic and therapeutic footwear.
The right product should always be based on the instructions of the treating healthcare professional.
Does Medicare Cover Diabetic Shoes?
This is one of the most common questions patients have.
Medicare Part B can cover therapeutic shoes and inserts for eligible people with diabetes and severe diabetes-related foot disease. However, specific eligibility, documentation, prescribing, fitting, and supplier requirements apply.
Medicare says the doctor who treats your diabetes must certify that you need therapeutic shoes or inserts. A podiatrist or another qualified doctor must order them, and the footwear must be obtained through a qualified provider.
Coverage is not automatic simply because someone has diabetes.
Before ordering, ask your healthcare provider and supplier to confirm:
- Whether you meet the clinical requirements.
- Whether the footwear is a covered therapeutic item.
- Whether the required documentation is complete.
- Whether the supplier participates in Medicare.
- What your expected out-of-pocket cost will be.
Medicare currently states that, after the Part B deductible, eligible patients generally pay 20% of the Medicare-approved amount when the supplier accepts assignment.
Insurance rules can change, so patients should confirm current benefits before placing an order.
What Documentation May Be Needed?
Therapeutic diabetic footwear has specific documentation requirements.
CMS emphasizes that proper medical documentation is important for Medicare claims. Its current policy includes requirements related to diabetes, qualifying foot conditions, physician documentation, orders, and timing of visits.
This is important because a patient may qualify medically but still experience a claim problem if required documentation is missing or incomplete.
A qualified supplier can help explain the process, but your healthcare provider is responsible for the applicable clinical certification and medical documentation.
How to Get Diabetic Shoes in Port Morris, NY
If you are looking for diabetic shoes Port Morris NY, the process can be simple when you follow the correct steps.
Step 1: Talk With Your Doctor
Discuss your foot health and ask whether therapeutic footwear is appropriate.
Step 2: Have Your Feet Evaluated
Your provider can identify conditions such as neuropathy, calluses, deformities, circulation problems, or previous ulcers.
Step 3: Obtain the Required Prescription or Order
If therapeutic footwear is medically necessary, follow your provider’s instructions regarding the required order and documentation.
Step 4: Choose a Qualified Supplier
Look for a supplier experienced with diabetic footwear and insurance requirements.
Step 5: Get Properly Sized
Do not choose footwear based only on appearance. Proper length, width, depth, and insert compatibility matter.
Step 6: Check Your Feet Regularly
After receiving your shoes, continue your regular foot-care routine and monitor for pressure or skin changes.
Questions to Ask Before Buying Diabetic Shoes
Before purchasing therapeutic footwear, consider asking:
- Are these shoes appropriate for my foot condition?
- Do I need extra-depth shoes?
- Do I need custom or therapeutic inserts?
- What size and width should I use?
- Can my existing orthotics fit inside the shoes?
- Does my insurance cover the footwear?
- What documentation is required?
- Is a prescription required?
- Does the supplier participate in my insurance plan?
- What should I do if the shoes cause pressure or rubbing?
Getting answers before ordering can help prevent avoidable problems.
Comfort, Protection, and Confidence
Living with diabetes can sometimes make ordinary activities feel more complicated.
Something as simple as choosing shoes can involve questions about pressure, fit, inserts, insurance, and foot health.
The good news is that you do not have to make the decision alone.
Your doctor, podiatrist, and qualified medical footwear supplier can help you understand what is appropriate for your feet.
The right footwear should feel like part of your everyday routine—not something you have to constantly think about.
Why Choose Alfa Healthcare Supply Inc.?
Alfa Healthcare Supply Inc. focuses on medical supplies, durable medical equipment, and therapeutic healthcare products for patients and healthcare professionals throughout New York.
The company states that it is listed in the NPI registry and partners with Parachute Health for secure ordering.
For diabetic footwear, Alfa offers therapeutic diabetic shoes, orthopedic shoes, inserts, and several established footwear brands. Its service area includes the Bronx and other New York communities.
Patients looking for diabetic footwear can explore the available options and discuss their specific requirements with their healthcare provider and supplier.
Final Thoughts
Finding diabetic shoes Port Morris NY does not have to be difficult.
The most important thing is to choose footwear based on your individual foot health, not simply on appearance or price. Proper fit, adequate space, appropriate inserts, and professional guidance can all be important when selecting therapeutic footwear.
If you are also searching for a hospital supply store Port Morris NY, medical supply store Port Morris NY, or surgical supply store Port Morris NY, consider a healthcare supplier that can support more than one part of your care routine.
Alfa Healthcare Supply Inc. provides diabetic and orthopedic footwear along with a broad range of medical supplies and DME products for patients throughout the Bronx and New York.
Before purchasing therapeutic footwear, speak with your doctor or podiatrist about your specific foot-care needs and confirm insurance requirements with your supplier.
Your feet carry you through every part of your day. Giving them the right support is a small step that can make everyday life more comfortable and confident.
Frequently Asked Questions About Diabetic Shoes Port Morris NY
1. Where can I find diabetic shoes near Port Morris, NY?
Patients in Port Morris and the Bronx can explore therapeutic footwear through medical supply providers serving the Bronx and greater New York area. Alfa Healthcare Supply Inc. offers diabetic and orthopedic footwear and serves patients throughout the Bronx.
2. Are diabetic shoes different from regular shoes?
Yes. Therapeutic diabetic shoes may provide additional depth, appropriate width, removable inserts, and other features intended to accommodate certain diabetes-related foot needs.
3. Does everyone with diabetes need diabetic shoes?
No. Not everyone with diabetes automatically needs or qualifies for therapeutic footwear. Your healthcare provider should evaluate your foot health and determine whether therapeutic footwear is appropriate.
4. Does Medicare cover diabetic shoes?
Medicare Part B covers therapeutic shoes and inserts for eligible people with diabetes and severe diabetes-related foot disease, subject to specific requirements.
5. How many diabetic shoes does Medicare cover?
For eligible patients, Medicare’s benefit generally allows either one pair of extra-depth shoes with three additional pairs of qualifying inserts or one pair of custom-molded shoes with two additional pairs of qualifying inserts per calendar year.
6. Do I need a prescription for diabetic shoes?
Therapeutic footwear covered by Medicare requires an order from a qualified physician or practitioner and certification of medical need by the doctor managing the patient’s diabetes.
7. Can diabetic shoes help with foot pressure?
Therapeutic footwear and appropriate inserts may be designed to accommodate the foot and redistribute pressure. However, the correct product depends on your individual condition and should be selected with professional guidance.
8. What should I do if my new diabetic shoes hurt?
Stop wearing them if they are causing significant or persistent pressure, rubbing, or skin irritation and contact your healthcare professional or footwear provider for evaluation.
9. Can I use my own inserts with diabetic shoes?
Sometimes, but it depends on the shoe and the insert. Ask your healthcare professional or qualified footwear provider before using an existing insert.
10. Does Alfa Healthcare Supply offer other medical supplies?
Yes. Alfa Healthcare Supply’s catalog includes diabetic supplies, DME equipment, orthopedic supplies, incontinence products, respiratory supplies, urological supplies, and other healthcare products.
Medical Disclaimer
This article is for general educational purposes only. It is not a substitute for medical diagnosis, treatment, or personalized advice from a physician, podiatrist, or other qualified healthcare professional. Medicare and insurance coverage depends on individual eligibility and current program requirements. Always confirm coverage and medical suitability before purchasing therapeutic footwear.
Ascensia CONTOUR NEXT EZ Blood Glucose Monitoring System:
Managing diabetes is not only about taking medication or following a meal plan. For many people, checking blood glucose is an important part of everyday life. A reliable glucose meter can make that routine feel easier, especially when the device is simple to understand and does not add unnecessary steps.
The Ascensia CONTOUR NEXT EZ blood glucose monitoring system is designed with simplicity in mind. It uses CONTOUR NEXT blood glucose test strips, requires a small blood sample, provides results in about five seconds, and includes No Coding® technology. The system also includes features intended to help reduce wasted test strips and make regular glucose testing more convenient.
For people who prefer a straightforward blood glucose meter rather than a highly connected device, the CONTOUR NEXT EZ can be an appealing option. Alfa Healthcare Supply Inc. provides diabetes and medical supply products to help patients and caregivers access everyday healthcare supplies.
Important: This article is for general educational information. It does not replace advice from your doctor, diabetes educator, pharmacist, or other qualified healthcare professional. Always follow the user guide supplied with your specific meter and test strips.
What is the Ascensia CONTOUR NEXT EZ Blood Glucose Monitoring System?
The Ascensia CONTOUR NEXT EZ blood glucose monitoring system is a blood glucose meter designed to help people measure their blood sugar using a small blood sample.
The system is made for people who want a relatively simple testing process. The meter uses compatible CONTOUR NEXT test strips, and the testing process generally involves inserting the strip, obtaining a blood sample with a lancing device, applying the sample to the strip, and waiting for the result.
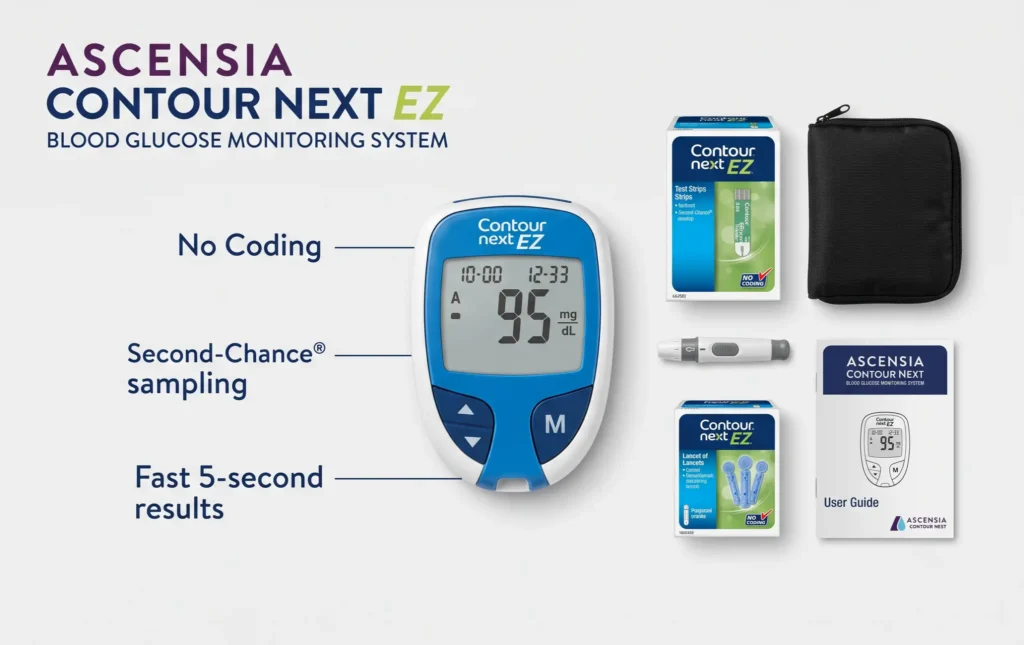
According to the manufacturer, the CONTOUR NEXT EZ features an easy-to-read display, No Coding technology, and Second-Chance® Sampling technology.
The American Diabetes Association’s Consumer Guide also lists the CONTOUR NEXT EZ as a blood glucose meter from Ascensia Diabetes Care and highlights its easy-to-read display, five-second results, 0.6 µL blood sample requirement, and No Coding technology.
For someone testing regularly, these small conveniences can make a meaningful difference.
Why Simplicity Matters When Checking Blood Glucose
Diabetes management can sometimes feel like a long list of daily responsibilities.
You may need to remember medications, meals, exercise, appointments, test strips, lancets, and glucose readings. A glucose meter should ideally make testing easier rather than add more work.
This is one reason straightforward meters continue to be useful.
The CONTOUR NEXT EZ focuses on essential blood glucose testing without relying on smartphone connectivity. It has physical controls, a clear display, and a simple testing process.
For a person who simply wants to check a blood glucose reading and record it, this can be convenient.
The manufacturer describes the CONTOUR NEXT EZ as being designed around simplicity and provides features such as No Coding and Second-Chance Sampling.
Key Features of the Ascensia CONTOUR NEXT EZ
Several features make the ascensia contour next ez blood glucose monitoring system worth considering.
1. No Coding® Technology
One of the most useful features is No Coding technology.
Older blood glucose meters sometimes required users to manually enter a code or calibrate the meter when opening a new package of test strips. Forgetting this step could potentially contribute to testing errors.
The CONTOUR NEXT EZ automatically codes itself when a compatible CONTOUR NEXT test strip is inserted.
This removes one step from the testing routine.
Ascensia states that No Coding technology is designed to eliminate errors associated with user miscoding.
For someone who tests frequently, removing even one extra step can make the routine feel much simpler.
2. Small Blood Sample
The CONTOUR NEXT EZ requires approximately 0.6 µL of blood for testing.
That is a relatively small sample and can be helpful for people who prefer a less complicated fingerstick routine.
However, users should always follow the instructions for obtaining and applying the sample. A blood glucose meter should not be used differently from the manufacturer’s instructions simply because the required sample is small.
3. Results in About Five Seconds
The CONTOUR NEXT EZ provides a five-second countdown during testing. Manufacturer documentation lists a five-second test result time.
When you are checking your glucose before breakfast, before a meal, after exercise, or at another scheduled time, waiting only a few seconds can make the process more convenient.
4. Second-Chance® Sampling
Another helpful feature is Second-Chance Sampling.
Sometimes a test strip may not receive enough blood during the initial application. The CONTOUR NEXT EZ can allow additional blood to be added to the same strip within the manufacturer’s specified testing window.
This feature can help reduce unnecessary strip waste. Ascensia specifically promotes Second-Chance Sampling as a way to help prevent wasted strips.
For people who test regularly, avoiding unnecessary waste can be useful.
5. Memory for Previous Results
The CONTOUR NEXT EZ stores previous test results.
Manufacturer specifications indicate that the meter can store the most recent 480 test results.
This can be useful when you want to look back at previous readings instead of writing down every number immediately.
The meter also supports averages over different time periods according to manufacturer information.
Keeping a record of glucose readings can help you and your healthcare professional identify patterns over time.
6. Easy-to-Read Display
When checking blood glucose, the number on the screen needs to be easy to see.
The CONTOUR NEXT EZ is designed with an easy-to-read display. The American Diabetes Association Consumer Guide specifically lists the easy-to-read display as one of its product features.
A simple display can be especially helpful for people who prefer a straightforward meter without unnecessary visual complexity.
What Test Strips Does the CONTOUR NEXT EZ Use?
This is an important question to answer before purchasing any blood glucose meter.
The CONTOUR NEXT EZ is specifically designed to work with CONTOUR NEXT blood glucose test strips. Ascensia recommends using CONTOUR NEXT test strips with CONTOUR NEXT meters for optimal performance.
Do not assume that every glucose test strip will work with every glucose meter.
Always check the compatibility information on the meter, test-strip packaging, and manufacturer’s instructions.
At Alfa Healthcare Supply Inc., CONTOUR NEXT test strips are listed among the diabetic supplies offered through the company’s website.
What Comes With the CONTOUR NEXT EZ System?
Package contents can vary depending on the seller and package configuration, so checking the product listing before purchasing is important.
The manufacturer’s current product listing describes a CONTOUR NEXT EZ Blood Glucose Monitoring System package containing:
- CONTOUR NEXT EZ blood glucose meter
- MICROLET NEXT lancing device
- 10 MICROLET lancets
The package is intended to provide the basic equipment needed to begin testing, although compatible CONTOUR NEXT test strips are required for blood glucose testing.
If you are purchasing a package from a medical supply store, confirm what is included before placing your order.
How Does the Ascensia CONTOUR NEXT EZ Work?
The basic testing process is straightforward.
Step 1: Prepare Your Supplies
Before testing, gather:
- CONTOUR NEXT EZ meter
- Compatible CONTOUR NEXT test strip
- Lancing device
- New lancet
- Tissue or gauze if needed
Keep your testing area clean and organized.
Step 2: Wash and Dry Your Hands
Wash your hands with soap and water and dry them thoroughly.
This is an important part of the testing routine. Moisture, food residue, or other substances on your fingers can potentially affect a glucose reading.
Step 3: Insert the Test Strip
Insert a compatible CONTOUR NEXT test strip into the meter according to the manufacturer’s instructions.
The meter will activate and prepare for testing.
Step 4: Obtain a Blood Sample
Use your lancing device according to its instructions.
Avoid changing the recommended technique without speaking with a healthcare professional.
Step 5: Apply the Blood to the Test Strip
Apply the blood sample to the test strip’s sample area as instructed.
The CONTOUR NEXT test strip is designed to draw blood into the sample tip. The manufacturer specifically advises users not to simply drop blood onto the flat surface of the strip or press the strip against the finger.
Step 6: Wait for the Result
The meter provides a five-second countdown before displaying the blood glucose result.
Read the number carefully and follow your personal diabetes management plan.
Step 7: Dispose of Used Supplies Safely
Test strips and lancets are intended for single use.
Dispose of used lancets and other sharps according to local safety recommendations.
How Accurate Is the CONTOUR NEXT EZ?
Accuracy is one of the most important factors when choosing a blood glucose meter.
The CONTOUR NEXT EZ is designed to provide blood glucose measurements when used with compatible CONTOUR NEXT test strips and according to the manufacturer’s instructions.
The manufacturer documentation states that the meter complies with the electromagnetic requirements specified in ISO 15197:2013.
However, no home glucose meter should be treated as a replacement for professional medical evaluation.
If a reading seems very different from how you feel, follow your healthcare professional’s instructions for confirming or responding to the result.
Incorrect testing technique, expired or improperly stored test strips, contamination on the hands, environmental conditions, or other factors can affect glucose testing.
Proper Storage of CONTOUR NEXT Test Strips
Test-strip care is extremely important.
According to the CONTOUR NEXT EZ user guide, test strips should remain in their original bottle, and the bottle should be tightly closed immediately after removing a strip. Exposure to room humidity can damage the strips and contribute to inaccurate results.
Remember these simple habits:
- Keep strips in their original container.
- Close the container immediately.
- Do not use expired strips.
- Do not use damaged strips.
- Keep strips away from excessive moisture.
- Follow the storage temperature instructions.
- Do not reuse a test strip.
Good storage habits can help protect your testing supplies.
How Long Does the CONTOUR NEXT EZ Battery Last?
The CONTOUR NEXT EZ uses two lithium batteries.
Manufacturer specifications list an estimated battery life of approximately 1,000 tests, or around one year based on average use. Actual battery life can vary depending on use and other factors.
If your meter displays a low-battery warning, replace the batteries according to the instructions.
Does the CONTOUR NEXT EZ Connect to a Smartphone?
One important difference between CONTOUR NEXT models is connectivity.
The CONTOUR NEXT EZ is designed as a straightforward meter and does not have Bluetooth app pairing like connected models such as the CONTOUR NEXT ONE or CONTOUR NEXT GEN.
Alfa Healthcare Supply’s educational guide also notes that the CONTOUR NEXT EZ does not support app pairing because it does not include Bluetooth connectivity.
This can actually be an advantage for someone who does not want to manage smartphone apps or wireless connections.
If smartphone synchronization is important to you, compare the CONTOUR NEXT EZ with connected CONTOUR models before choosing a meter.
CONTOUR NEXT EZ vs. Connected Glucose Meters
Every person has different preferences.
A connected glucose meter may be useful for someone who wants readings automatically transferred to a smartphone.
A traditional meter may be better for someone who wants a simple device with physical controls and no smartphone setup.
The CONTOUR NEXT EZ focuses on the latter approach.
It provides:
- Simple testing
- No Coding technology
- Five-second results
- 0.6 µL blood sample
- 480-result memory
- Second-Chance Sampling
- Easy-to-read display
- No Bluetooth requirement
By comparison, some newer CONTOUR NEXT models include Bluetooth connectivity, larger memories, and additional visual features. Ascensia’s comparison information shows that the CONTOUR NEXT EZ has 480-result memory, while newer CONTOUR NEXT GEN and CONTOUR NEXT ONE models offer larger memories and additional connected features.
The best choice depends on how you prefer to manage your glucose information.
Who May Appreciate the CONTOUR NEXT EZ?
The ascensia contour next ez blood glucose monitoring system may be worth considering for people who want a simple blood glucose meter for routine testing.
It may be particularly appealing to:
- People who prefer a simple interface
- Adults who do not want smartphone connectivity
- People new to blood glucose monitoring
- Caregivers helping someone with routine testing
- People who want No Coding technology
- Users who value a small blood sample
- People who want stored test results
- Users who want Second-Chance Sampling
Of course, whether a particular glucose meter is appropriate depends on individual needs and recommendations from a healthcare professional.
Common Mistakes to Avoid When Using a Glucose Meter
Even a simple meter can produce unexpected readings if it is not used properly.
Testing With Wet Hands
Always dry your hands completely after washing.
Using Expired Test Strips
Check the expiration date before testing.
Leaving the Test Strip Bottle Open
Humidity can damage test strips. Close the container immediately after removing a strip.
Using the Wrong Test Strips
The CONTOUR NEXT EZ is designed for CONTOUR NEXT test strips.
Reusing Lancets or Test Strips
Follow the manufacturer’s instructions and use supplies as intended.
Ignoring Unexpected Results
If a result seems unusual or does not match how you feel, do not automatically assume the meter is wrong or that the reading is correct. Follow your healthcare professional’s guidance for checking unexpected results.
How to Keep Your Blood Glucose Testing Routine Simple
Diabetes care does not need to feel like a complicated project every day.
A small routine can help.
Keep your meter and supplies together in one location. Check your test-strip supply before you run out. Store strips properly. Keep extra lancets available. Follow the testing schedule recommended by your healthcare professional.
Most importantly, understand what your healthcare team wants you to do with your readings.
The number itself is only one piece of the bigger picture.
Your meals, medication, activity, illness, stress, sleep, and other factors can influence blood glucose. Your healthcare professional can help you understand what your readings mean for your individual treatment plan.
Why Buy Diabetes Supplies From a Medical Supply Store?
Choosing a medical supply store can make healthcare shopping more convenient.
A knowledgeable supplier can help patients locate common diabetes supplies, testing products, mobility equipment, orthopedic products, and other home healthcare items.
Alfa Healthcare Supply Inc. offers diabetic supplies along with other medical supply categories and serves customers across areas including Queens, Brooklyn, the Bronx, and Long Island.
For people managing diabetes, having a dependable source for meters, test strips, lancets, and other supplies can make routine care more convenient.
Ascensia CONTOUR NEXT EZ at Alfa Healthcare Supply Inc.
Alfa Healthcare Supply Inc. lists the Ascensia CONTOUR NEXT EZ Blood Glucose Monitoring System among its diabetic supply products. The company’s online diabetic-supplies section currently lists the product along with CONTOUR NEXT test strips and other glucose-management products.
If you are looking for a blood glucose meter, consider what matters most to you before ordering.
Do you want smartphone connectivity?
Do you prefer a basic meter?
Do you want a small blood sample?
Do you need memory for previous readings?
Do you want a meter that does not require manual coding?
Answering these questions can help you select a system that fits your daily routine.
Final Thoughts: Ascensia CONTOUR NEXT EZ Blood Glucose Monitoring System
The ascensia contour next ez blood glucose monitoring system is built around a simple idea: make routine blood glucose testing easier.
Its No Coding technology removes a step from testing. Its 0.6 µL sample requirement helps keep the blood sample small. Its five-second testing time makes routine checks quick, while its 480-result memory provides a useful record of previous readings. Second-Chance Sampling can also help reduce wasted strips.
Not everyone needs a Bluetooth-enabled meter or smartphone app. For someone who prefers a straightforward blood glucose meter with essential features, the CONTOUR NEXT EZ may be a practical option.
At Alfa Healthcare Supply Inc., patients and caregivers can explore diabetic supplies and other healthcare products designed to support everyday health needs. Before purchasing, make sure the meter and test strips are appropriate for your testing needs and follow your healthcare professional’s recommendations.
A glucose meter is a tool—not a replacement for your healthcare team. Used correctly and as part of an individualized diabetes-care plan, it can help you keep track of your blood glucose and make everyday diabetes management more organized.
Frequently Asked Questions: Ascensia CONTOUR NEXT EZ Blood Glucose Monitoring System
What is the Ascensia CONTOUR NEXT EZ blood glucose monitoring system?
The Ascensia CONTOUR NEXT EZ is a blood glucose meter designed for routine blood sugar testing. It uses CONTOUR NEXT test strips and features No Coding technology, a 0.6 µL blood sample requirement, five-second results, and memory for up to 480 test results.
Does the CONTOUR NEXT EZ require coding?
No. The meter uses No Coding technology, which automatically codes compatible test strips when they are inserted.
How much blood does the CONTOUR NEXT EZ need?
The CONTOUR NEXT EZ requires approximately 0.6 µL of blood for testing.
How fast does the CONTOUR NEXT EZ provide a result?
The meter provides a result using a five-second countdown.
What test strips work with the CONTOUR NEXT EZ?
The CONTOUR NEXT EZ is specifically designed to work with CONTOUR NEXT blood glucose test strips.
Does the CONTOUR NEXT EZ have Bluetooth?
No. The CONTOUR NEXT EZ does not provide Bluetooth smartphone pairing. Some other CONTOUR NEXT models, such as CONTOUR NEXT ONE and CONTOUR NEXT GEN, offer connected features.
How many results can the CONTOUR NEXT EZ store?
The meter can store the most recent 480 test results according to manufacturer specifications.
What is Second-Chance Sampling?
Second-Chance Sampling allows additional blood to be applied to the same test strip when the initial sample is insufficient, helping reduce wasted strips.
Is the CONTOUR NEXT EZ easy to use?
The meter is designed around simplicity and includes an easy-to-read display, straightforward test-strip insertion, No Coding technology, and five-second results.
Can I use any glucose test strip with the meter?
No. You should use compatible CONTOUR NEXT test strips with the CONTOUR NEXT EZ. Always check the manufacturer’s compatibility information before purchasing or using test strips.
For reliable diabetes supplies, medical equipment, and home healthcare products, Alfa Healthcare Supply Inc. is committed to helping patients and caregivers find products that support their everyday healthcare needs.
Dexcom G7 Receiver How to Use:
If you are searching for “dexcom g7 receiver how to use,” you are probably looking for a simple explanation of how the receiver works, how to connect it to a Dexcom G7 sensor, how to read glucose information, and what to do when the sensor needs to be replaced.
The Dexcom G7 is a continuous glucose monitoring (CGM) system designed to provide glucose readings without requiring frequent fingerstick checks. The receiver gives users a dedicated screen for viewing glucose readings, trends, alerts, and other information.
For someone using a CGM for the first time, the receiver can seem confusing at first. The good news is that most of the setup is guided directly on the receiver. Dexcom also provides official G7 receiver guides and training resources.
This guide from Alfa Healthcare Supply Inc. explains the basic process in easy-to-understand language. It is intended for general education and should not replace the instructions supplied with your device or advice from your healthcare professional.
What is the Dexcom G7 Receiver?
The Dexcom G7 Receiver is a dedicated display device that can receive glucose information from a compatible Dexcom G7 sensor.
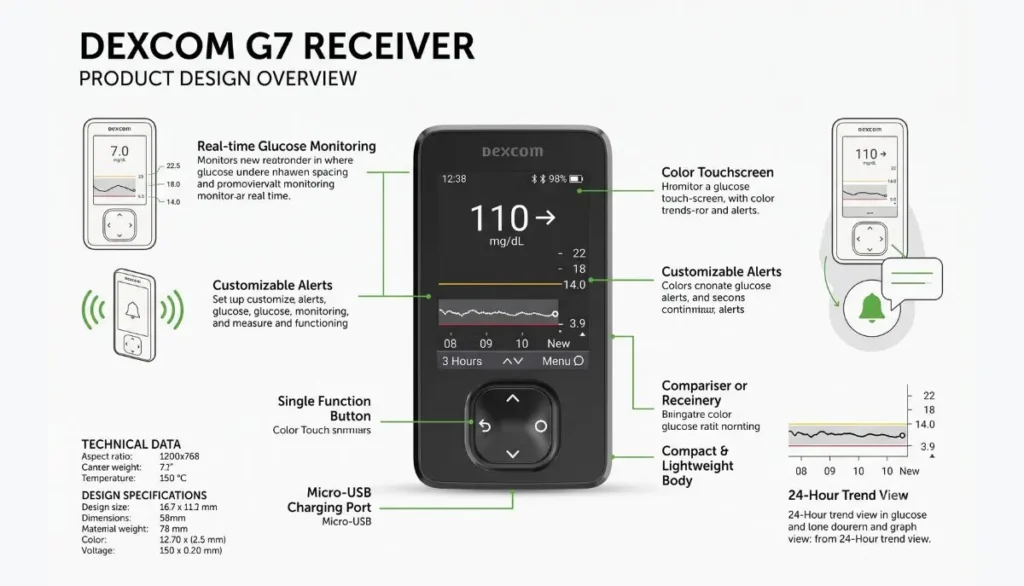
Instead of relying only on a smartphone, a person can use the receiver to view their glucose information.
The receiver can display information such as:
- Current glucose readings
- Glucose trends
- Trend arrows
- High and low glucose alerts
- Sensor status
- Sensor session information
- Certain reports and events
- Receiver settings
Dexcom provides a receiver-specific setup process that walks the user through pairing and sensor warm-up.
For people who prefer a dedicated medical device instead of using a smartphone for glucose monitoring, a receiver can be a convenient option.
Dexcom G7 Receiver How to Use: Getting Started
The easiest way to understand the dexcom g7 receiver how to use process is to divide it into several simple stages:
- Prepare the receiver.
- Insert the G7 sensor according to the official instructions.
- Turn on the receiver.
- Complete the initial setup.
- Enter the sensor’s pairing code.
- Wait for pairing.
- Allow the sensor to warm up.
- Review your glucose information.
- Set appropriate alerts.
- Replace the sensor when the session ends.
Let’s look at each step in more detail.
1. Check Your Dexcom G7 Receiver Kit
Before beginning, make sure you have the necessary components.
The Dexcom G7 receiver kit includes the receiver, USB cable, and power adapter, according to Dexcom’s setup instructions.
You will also need your Dexcom G7 sensor and its applicator.
Before using any component, check the packaging and instructions supplied with your particular product.
If something appears damaged, do not use it until you have confirmed what to do with the manufacturer or your healthcare provider.
2. Charge the Receiver
It is a good idea to make sure the receiver has enough battery power before beginning setup.
A low battery during initial setup can be frustrating, especially if you are trying to start a new sensor.
Connect the receiver using the supplied charging equipment and allow it to charge as needed.
Keep the receiver and charging accessories somewhere convenient. A consistent charging routine can make everyday CGM use easier.
3. Turn On the Dexcom G7 Receiver
The receiver has physical navigation buttons.
According to Dexcom’s setup instructions, you can turn the receiver on by pressing and holding the Select button for approximately three seconds.
When the receiver starts for the first time, it guides you through the setup process.
You do not have to memorize every step.
Simply read each screen carefully and follow the instructions shown.
4. Complete the Initial Receiver Setup
During the first setup, the receiver may ask you to complete several basic settings.
These can include:
- Accepting applicable terms of use
- Reviewing privacy information
- Setting the date
- Setting the time
- Reviewing educational information
Take your time during this stage.
If you are new to CGM technology, the built-in educational screens can be particularly helpful. Dexcom says the receiver tutorial covers subjects such as glucose readings, trend arrows, alerts, treatment decisions, and the home screen.
A simple tip
Do not rush through the tutorial just because you want to see your first glucose number.
Understanding what the arrows and alerts mean can help you use the receiver more confidently.
5. Insert Your Dexcom G7 Sensor
The sensor must be inserted before the receiver can receive glucose information from it.
Sensor placement should always follow the current instructions for your specific Dexcom G7 system, age group, and region.
For the standard G7 system, Dexcom’s U.S. instructions identify the back of the upper arm as an approved site for people age 7 and older. Dexcom’s labeling can differ by age and product version, so always check the instructions that came with your sensor.
Before inserting the sensor:
- Wash and dry your hands.
- Choose the approved sensor location.
- Avoid irritated or damaged skin.
- Clean the site according to the instructions.
- Allow the site to dry.
- Follow the applicator instructions carefully.
Dexcom also advises avoiding areas where the sensor could be bumped, pushed, compressed during sleep, or placed too close to an infusion or injection site.
6. Confirm That Your Sensor Has Been Inserted
After inserting the sensor, return to the receiver.
The receiver will ask you to confirm that the sensor has been inserted.
Follow the on-screen instructions.
This tells the receiver that you are beginning a new sensor session.
At this point, you will also need the sensor’s four-digit pairing code.
7. Find the Dexcom G7 Pairing Code
One of the most important parts of learning dexcom g7 receiver how to use is understanding the pairing code.
The G7 sensor has a four-digit pairing code associated with that sensor.
Dexcom’s setup instructions state that the pairing code can be found on the applicator used to insert the sensor.
When the receiver asks for the code:
- Look at the G7 applicator.
- Find the four-digit code.
- Enter the numbers into the receiver.
- Double-check the numbers before confirming.
Why is this important?
Every new sensor needs to be paired correctly.
Entering the wrong code can prevent the receiver from connecting with the sensor as expected.
Do not guess the code. Use the code associated with the sensor you are currently applying.
8. Wait for the Sensor to Pair
After entering the four-digit code, the receiver attempts to communicate with the sensor.
This is the pairing stage.
Dexcom recommends keeping the receiver close to the sensor during pairing and warm-up. Its setup guidance states to keep the phone/receiver within the recommended communication range during this process.
If you are having difficulty pairing:
- Keep the receiver close to the sensor.
- Make sure you entered the correct pairing code.
- Avoid unnecessary obstacles between the sensor and receiver.
- Follow the troubleshooting instructions for your specific G7 system.
Avoid repeatedly entering random codes.
If the receiver continues to show a problem, use the official Dexcom troubleshooting guidance or contact Dexcom support.
9. Wait for Sensor Warm-Up
Once pairing is complete, the sensor enters its warm-up period.
The receiver displays a timer showing when glucose readings and alerts should become available.
Dexcom’s current setup information states that the G7 warm-up can take up to about 30 minutes.
During warm-up, you may not see your normal glucose information yet.
That does not necessarily mean something is wrong.
Think of this period as the sensor getting ready to provide glucose information.
Keep the receiver near the sensor and follow the instructions shown on the screen.
10. Understanding the Dexcom G7 Home Screen
After the warm-up period is complete, the receiver begins displaying glucose information.
The home screen is one of the most important parts of learning dexcom g7 receiver how to use.
You may see:
Current glucose reading
This is the glucose value being reported by your CGM system.
Trend arrow
The trend arrow provides information about the direction and rate at which glucose is changing.
For example, glucose may be:
- Rising
- Falling
- Relatively steady
Do not look at the glucose number alone.
The trend information provides additional context.
Glucose graph
The graph allows you to see glucose information over time.
Looking at the graph can help you and your healthcare professional understand patterns.
Alerts
The receiver can provide alerts for certain glucose conditions and system events, depending on your settings.
Why Trend Arrows Matter
Imagine that your glucose reading is currently within your target range.
You might see that the number is relatively stable.
In another situation, the current number could be similar, but the trend arrow may indicate that glucose is changing quickly.
This is why understanding the trend arrow is important.
However, you should not make treatment decisions based solely on a number or trend arrow without understanding your personal diabetes treatment plan.
Dexcom’s safety information emphasizes following the system’s instructions and using a blood glucose meter when CGM readings or alerts do not match symptoms or expectations.
How to View Alerts on the Dexcom G7 Receiver
Alerts are an important part of CGM technology.
Depending on your settings, the receiver can notify you about certain glucose conditions and system situations.
Dexcom provides alert customization through the receiver’s settings. Its setup instructions identify Menu → Settings → Alerts as the location for changing applicable alert settings.
Your healthcare professional can help you decide which alert settings are appropriate for you.
Do not ignore important alerts
An alert is designed to get your attention.
If you receive an alert that concerns you, follow the instructions in your diabetes management plan.
If you experience symptoms that do not agree with the CGM reading, follow the safety instructions supplied with your Dexcom system.
Can You Change the Dexcom G7 Alert Settings?
Yes, applicable alert settings can be customized.
The available options depend on your system and settings.
Dexcom’s receiver information indicates that users can change alert settings and other notification behaviors through the Settings menu.
You may also have options related to sounds and vibration, depending on the device and software version.
A practical suggestion
Do not change alert settings simply because an alert is inconvenient.
If alerts are waking you frequently or becoming difficult to manage, talk with your healthcare professional about appropriate settings rather than disabling important safety notifications without guidance.
How to Read the Dexcom G7 Graph
The graph is useful because one glucose number tells only part of the story.
For example, you might see:
Glucose → relatively stable
This suggests that the glucose level is not changing rapidly.
Or you may see an arrow indicating that glucose is moving upward or downward.
Looking at the graph can help you see the bigger picture.
Over time, this information can also help your healthcare professional understand patterns in your glucose levels.
How to Use the Dexcom G7 Receiver for Everyday Monitoring
Once your sensor is working, using the receiver becomes much simpler.
A normal routine might look like this:
Morning
Check the receiver when you wake up.
Look at:
- Current glucose
- Trend arrow
- Graph
- Any alerts
During the day
Check the receiver when appropriate according to your diabetes management plan.
Pay attention to alerts and changes in glucose trends.
Before meals
If your healthcare professional has recommended checking your glucose around meals, use the receiver as instructed.
Before exercise
Follow your personal diabetes plan and consider your glucose information and trends as instructed by your healthcare team.
Before sleep
Review the receiver and make sure important alerts are configured appropriately.
Your individual routine should always be based on your healthcare professional’s recommendations.
How Long Does a Dexcom G7 Sensor Last?
For the standard Dexcom G7 system, Dexcom states that the sensor lasts up to 10 days, followed by a 12-hour grace period.
Dexcom also offers a G7 15 Day system in some markets, so it is important to check which version you have.
Do not assume that every G7 sensor has the same wear duration.
Check the packaging and instructions for your specific product.
What Happens When the Dexcom G7 Sensor Expires?
As the sensor session approaches its end, the receiver provides alerts.
For the standard G7 system, the sensor can continue during the stated 12-hour grace period after the initial 10-day session.
You can replace the sensor during the appropriate period according to the instructions.
When it is time to start a new sensor, the receiver guides you through the replacement process.
How to Replace a Dexcom G7 Sensor Using the Receiver
When the sensor session is ending, you will need to remove the old sensor and apply a new one.
Dexcom provides two relevant receiver menu options:
- Replace Sensor — used when you want to start a new sensor.
- Stop Sensor Session — used when you want to stop the current session without immediately starting another one.
For continuous monitoring, the replacement option is generally the relevant choice.
After removing the old sensor:
- Prepare the new sensor site.
- Insert the new G7 sensor.
- Confirm the sensor has been inserted.
- Enter the new sensor’s four-digit pairing code.
- Wait for pairing.
- Allow the new sensor to warm up.
- Confirm that glucose readings are available.
Dexcom’s replacement guidance describes this general process.
Common Dexcom G7 Receiver Problems
Even a simple device can sometimes cause confusion.
Here are some common situations.
Receiver Does Not Pair
Check the following:
- Is the receiver close enough to the sensor?
- Did you enter the correct four-digit pairing code?
- Is the sensor properly inserted?
- Is the receiver powered on?
- Are you following the current instructions for your G7 version?
If the issue continues, use Dexcom’s official troubleshooting resources.
No Glucose Reading During Warm-Up
This can be normal.
The sensor needs to complete its warm-up period before readings and alerts become available.
Dexcom states that the G7 warm-up can take up to approximately 30 minutes.
If the warm-up takes longer than expected or the receiver displays a specific error, follow the instructions shown on the receiver.
What If the Receiver Says There Is a Signal Problem?
A signal or communication problem means the receiver is temporarily having difficulty receiving information from the sensor.
Try keeping the receiver near the sensor.
Also check that the sensor is properly attached and that you are following the device’s communication guidance.
If the problem continues, consult the official Dexcom troubleshooting instructions rather than repeatedly restarting or changing settings without guidance.
What If the Dexcom Reading Does Not Match How You Feel?
This is an important safety point.
CGM readings and symptoms do not always appear to agree.
If your Dexcom G7 reading or alert does not match your symptoms or expectations, Dexcom advises using a blood glucose meter to make treatment decisions.
Never ignore concerning symptoms simply because the receiver shows a number that appears reassuring.
When in doubt, follow your healthcare professional’s instructions and the safety information supplied with your Dexcom system.
Can You Use the Dexcom G7 Receiver Instead of a Phone?
A receiver can provide a dedicated way to view your CGM information.
Dexcom offers separate guidance for people using the G7 receiver, and its product information explains that compatible display devices and system configurations can vary.
If you prefer not to depend on a smartphone for your primary CGM display, a dedicated receiver may be useful.
However, compatibility and available features depend on the specific Dexcom system and region.
Important Tips for New Dexcom G7 Receiver Users
If you are using a G7 receiver for the first time, these simple habits can make the experience easier.
1. Keep your receiver charged
A dead battery can prevent you from viewing information when you need it.
2. Keep the receiver accessible
Store it somewhere you can easily reach it.
3. Protect your pairing code information
Always use the correct pairing code for the sensor you are applying.
4. Read the trend arrow
Don’t focus only on the glucose number.
5. Pay attention to alerts
Alerts are an important part of CGM use.
6. Follow your healthcare plan
The receiver provides information; your treatment plan should come from your healthcare professional.
7. Keep the official instructions
Dexcom’s official guides are useful when you need to check a setup or troubleshooting step. Dexcom maintains a current guides and resources page for G7 users.
Dexcom G7 Receiver vs. Smartphone App
Some people prefer a receiver, while others prefer a compatible smartphone.
A receiver can be appealing because it is a dedicated device.
Receiver advantages
- Dedicated CGM display
- No need to use a smartphone as the primary display
- Simple purpose
- Physical navigation controls
- Designed specifically for Dexcom CGM use
Smartphone app advantages
Depending on the compatible system and device, a smartphone may offer additional connected features.
However, compatibility requirements can change, so users should always check Dexcom’s current compatibility information.
The best choice depends on your needs, preferences, healthcare plan, and the specific G7 system you use.
Is the Dexcom G7 Receiver Difficult to Use?
For most beginners, the initial setup is the part that requires the most attention.
Once the sensor is paired and warmed up, the daily process is much simpler.
You generally look at the receiver to see your glucose information, trend, graph, and applicable alerts.
The important thing is not to feel overwhelmed during the first setup.
Take it one screen at a time.
The receiver is designed to guide users through the setup process, including pairing and sensor warm-up.
Final Thoughts: Dexcom G7 Receiver How to Use
Learning dexcom g7 receiver how to use does not have to be complicated.
The process can be summarized simply:
Charge the receiver → turn it on → insert the sensor correctly → confirm the sensor → enter the four-digit pairing code → wait for pairing → complete warm-up → review glucose readings and trends → respond appropriately to alerts → replace the sensor when required.
The first setup may take a little patience, but the receiver is designed to guide you through many of the steps.
At Alfa Healthcare Supply Inc., we understand that medical equipment is not just about a product box. It is about helping people feel more comfortable managing everyday health needs. For someone starting a CGM system, having clear information can make that first experience much less stressful.
If you are purchasing or using a Dexcom G7 Receiver, always follow the latest manufacturer instructions supplied with your specific device. Dexcom’s official resources should be your primary source for product-specific setup, warnings, compatibility, and troubleshooting.
Frequently Asked Questions About Dexcom G7 Receiver How to Use
How do I turn on the Dexcom G7 receiver?
Press and hold the Select button for approximately three seconds. The receiver then guides you through the setup process.
How do I pair a Dexcom G7 sensor with the receiver?
After inserting the sensor, confirm the insertion on the receiver and enter the four-digit pairing code associated with the sensor. Then wait for the receiver and sensor to pair.
How long does Dexcom G7 warm up?
Dexcom states that the G7 warm-up can take up to about 30 minutes.
Where can I find the G7 pairing code?
The four-digit pairing code is provided with the sensor applicator. Use the code associated with the sensor you are currently applying.
Can I change Dexcom G7 alerts?
Applicable alert settings can be changed through the receiver’s settings. Dexcom identifies Menu → Settings → Alerts as the relevant navigation path.
How long does the standard Dexcom G7 sensor last?
The standard G7 sensor is designed for up to 10 days, followed by a 12-hour grace period, according to Dexcom’s replacement guidance.
What should I do if my Dexcom reading does not match my symptoms?
Follow the safety instructions for your Dexcom system. Dexcom advises using a blood glucose meter to make treatment decisions when G7 readings or alerts do not match symptoms or expectations.
Can I use a Dexcom G6 receiver with G7?
Receiver hardware and compatibility matter. Dexcom explains that different G6 receiver versions have different capabilities, and the current G6 touchscreen receiver cannot be upgraded to G7. Always verify your receiver model and compatibility before attempting to use it with a G7 sensor.
Where can I find official Dexcom G7 instructions?
Dexcom provides G7 user guides, receiver start guides, and other training resources through its official guides page.
Disclaimer: This article is for general educational purposes and is not medical advice. Dexcom G7 availability, labeling, approved sensor locations, features, and instructions can vary by product version, age, and country. Follow the instructions supplied with your device and consult your healthcare professional for individual diabetes-management decisions.
Can I Use an Expired Dexcom G7 Sensor?
If you have diabetes and use a continuous glucose monitor (CGM), you know how important your sensor is. A Dexcom G7 sensor helps you see your glucose levels throughout the day and can provide alerts when your glucose is getting too high or too low.
But what happens when you find a Dexcom G7 sensor in your supplies and notice that the expiration date has already passed?
One common question is: can i use an expired Dexcom G7 sensor?
The safest answer is no. You should not intentionally use a Dexcom G7 sensor after the expiration date printed on its packaging. An expiration date is different from the normal 10-day sensor wear period. The package expiration date tells you how long the unopened product is intended to remain within its labeled shelf life. Once that date has passed, the manufacturer no longer recommends using it.
Dexcom also states that its sensors are single-use, disposable products and provides a defined sensor life for the G7. The standard Dexcom G7 sensor is designed for up to 10 days of use, followed by a 12-hour grace period.
This article explains the difference between an expired sensor and an expired sensor session, what you should do if you accidentally used an expired sensor, and how to avoid running out of sensors.
Important: This article is for general educational information and is not a substitute for medical advice. If your glucose readings do not match how you feel, use a blood glucose meter as directed by your healthcare professional and seek appropriate medical help.
What is a Dexcom G7 Sensor?
The Dexcom G7 is a continuous glucose monitoring system designed to provide glucose information without requiring you to perform a traditional fingerstick every time you want to check your glucose.
The system uses a small wearable sensor that measures glucose and sends information to a compatible display device, such as a compatible smartphone or receiver. Dexcom describes the G7 as an all-in-one sensor and transmitter system.
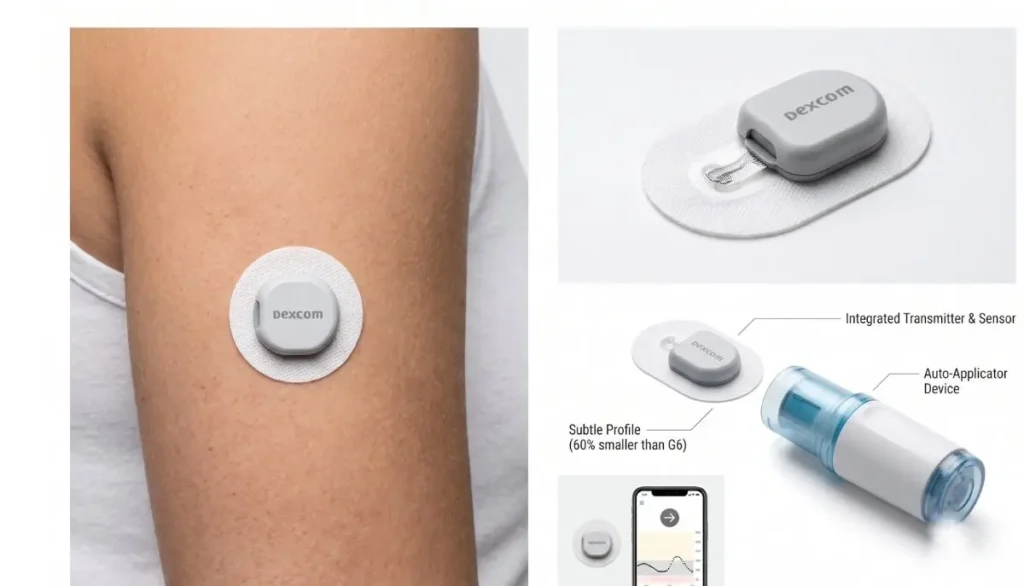
For many people, a CGM can make daily diabetes management easier because glucose information is available regularly rather than only when a person performs a blood glucose test.
The Dexcom G7 is designed for a defined period of use. The standard G7 sensor lasts up to 10 days, followed by a 12-hour grace period.
That does not mean a sensor can be used indefinitely.
There are two different meanings of the word “expired” that are important to understand:
- The sensor package has passed its expiration date.
- The sensor session has reached the end of its approved wear period.
These situations are not the same.
Can I Use an Expired Dexcom G7 Sensor?
If you are asking about an unopened Dexcom G7 sensor whose package expiration date has passed, the safest answer is no.
Do not insert an expired sensor simply because the package looks unopened or because it appears to be in good condition.
The expiration date exists because the manufacturer establishes a shelf life for the product. After that date, the manufacturer cannot assure the same performance expected during the labeled shelf life.
This is particularly important with a glucose-monitoring device because inaccurate glucose information could affect diabetes management decisions.
Dexcom’s safety information emphasizes that using its CGM system incorrectly can potentially result in missing high or low glucose events or making a treatment decision that could cause injury. Dexcom also advises using a blood glucose meter when CGM readings do not match symptoms or expectations.
Why is using an expired sensor a bad idea?
An expired sensor may not perform as intended.
Possible concerns include:
- The sensor may not start correctly.
- The sensor may fail during use.
- The readings may not perform as expected.
- The adhesive or other components may not perform as intended.
- You may receive inaccurate or missing glucose information.
- You could make an important diabetes-management decision using unreliable information.
Because of these concerns, using a fresh, unexpired sensor is the better choice.
Expiration Date vs. 10-Day Wear Period
This is one of the most important points to understand.
A Dexcom G7 sensor has a package expiration date, but once a new sensor is properly started, it also has a defined sensor session life.
These are two separate things.
Package expiration date
The package expiration date applies to the unused sensor.
For example, imagine that a sensor package says it expires in June 2026. If you find that sensor in July 2026, it is already past its labeled expiration date.
You should not intentionally insert it.
Sensor wear period
A new, valid Dexcom G7 sensor has a sensor session of up to 10 days, followed by a 12-hour grace period. Dexcom says the sensor continues to work during that grace period and alerts the user as the session approaches its end.
The grace period is designed to give you additional time to replace the sensor at a convenient time.
It is not an additional shelf-life extension for an expired unopened sensor.
That distinction is extremely important.
How Long Does a Dexcom G7 Sensor Last?
The standard Dexcom G7 sensor is indicated for use for up to 10 days, with a 12-hour grace period at the end of the sensor session.
During the grace period, the sensor continues to provide information in the same way it did during the sensor session, according to Dexcom.
After the grace period ends, you need to replace the sensor to continue receiving glucose readings and alerts from the sensor. Dexcom specifically states that G7 sensors cannot be restarted after the session and grace period have ended.
So, if someone says:
“My Dexcom G7 is expired. Can I keep wearing it?”
The answer depends on what they mean.
If they mean the 10-day sensor session has ended, Dexcom provides a 12-hour grace period.
If they mean the expiration date printed on an unused sensor package has passed, that is different, and the sensor should not be used.
Why Does Dexcom Have an Expiration Date?
Medical devices have expiration dates for a reason.
A manufacturer evaluates how its product performs during its expected shelf life when stored according to the required conditions.
Over time, different components can potentially change. Depending on the product, these may include:
- Sensor components
- Adhesives
- Packaging materials
- Sterility protection
- Electronic components
- Chemical or biological sensing elements
The expiration date provides a defined limit for the manufacturer’s labeled product shelf life.
This is one reason it is better not to think of an expiration date as simply a suggestion.
For a device that provides information used in diabetes management, reliability matters.
Can an Expired Dexcom G7 Sensor Still Work?
It is possible for an expired medical device to appear to function, but that does not mean it is appropriate or reliable to use.
A sensor might start and display readings even though its package expiration date has passed.
That can make the situation confusing.
You might think:
“If it starts, it must be okay.”
But that is not a safe assumption.
The important question is not simply whether the sensor starts. The question is whether the sensor is being used within the manufacturer’s intended and labeled conditions.
For diabetes management, reliable information is especially important.
Dexcom warns that if G7 readings or alerts do not match your symptoms or expectations, you should use a blood glucose meter to make treatment decisions.
What If I Accidentally Used an Expired Dexcom G7 Sensor?
Don’t panic.
If you accidentally inserted a sensor and then realized that its expiration date had passed, the best approach is to stop and evaluate the situation rather than assuming that everything is fine.
Step 1: Check the expiration date
Look at the sensor packaging and confirm the date.
Make sure you are looking at the product expiration date, not the date when your previous sensor session ended.
Step 2: Check your readings
If the sensor is already operating, pay attention to whether the readings appear reasonable.
However, don’t assume that normal-looking numbers prove that an expired sensor is reliable.
Step 3: Compare with a blood glucose meter when appropriate
If your CGM reading does not match how you feel, Dexcom recommends using a blood glucose meter for treatment decisions.
For example, if your CGM shows a low glucose level but you feel completely different, or if you have symptoms that do not match the displayed reading, follow your healthcare professional’s instructions for checking your blood glucose.
Step 4: Contact Dexcom Support
If you have questions about an expired sensor, sensor failure, or possible replacement, contacting Dexcom Product Support can help you determine the appropriate next step.
Dexcom states that it may replace confirmed product failures during the sensor’s intended lifetime and also offers courtesy replacements in some circumstances.
Step 5: Speak with your healthcare professional when needed
If you depend on CGM readings for important treatment decisions and your sensor is unavailable or unreliable, ask your healthcare professional what monitoring method you should use temporarily.
What If My Dexcom G7 Sensor Expires While I’m Wearing It?
This is different from using an expired sensor from your supply.
A properly started Dexcom G7 sensor has a defined sensor session.
According to Dexcom, the standard G7 provides up to 10 days of wear followed by a 12-hour grace period. The device provides alerts as the sensor session or grace period approaches its end.
The grace period is useful because you may not always be able to replace a sensor at the exact moment the 10-day session ends.
For example, your sensor might reach the end of its normal session while you are:
- At work
- Sleeping
- Traveling
- Away from your supplies
- Busy with family responsibilities
- Waiting for a replacement sensor
The grace period gives you additional time.
However, once that grace period has ended, you should replace the sensor.
Dexcom states that the G7 sensor cannot be restarted after the 10-day period and grace period.
Can I Restart a Dexcom G7 After It Expires?
No.
Dexcom specifically states that no restarts are allowed for the G7 sensor after the 10-day sensor period. After the grace period ends, the sensor must be replaced to continue receiving glucose readings or alerts.
This means you should not try to find ways to restart a finished G7 sensor.
The safest approach is to use a new, unexpired sensor according to the manufacturer’s instructions.
What Happens If I Keep Using a Finished G7 Sensor?
A Dexcom G7 sensor is designed for a defined period of use.
Once the sensor session and grace period are over, you should replace it.
Continuing to rely on a finished sensor could leave you without reliable CGM information.
That matters because CGM information may be used to help understand glucose trends and alerts.
If the CGM stops providing readings, use the backup glucose-monitoring method recommended by your healthcare professional until you can start a valid replacement sensor.
Why Accurate CGM Readings Matter
One of the biggest benefits of a CGM is that it gives you information about glucose levels and trends throughout the day.
But the information is useful only when the system is working correctly.
For someone living with diabetes, inaccurate information can create unnecessary worry or potentially lead to inappropriate decisions.
For example, a person could:
- Believe glucose is lower than it really is.
- Believe glucose is higher than it really is.
- Miss an important alert.
- Make a treatment decision based on an unreliable reading.
Dexcom’s safety information specifically warns that improper use can contribute to missed high or low glucose events or treatment decisions that may result in injury.
That is why using an unexpired sensor according to the manufacturer’s instructions is so important.
How to Check Your Dexcom G7 Sensor Before Use
Before starting a new sensor, make it a habit to perform a quick check.
1. Check the expiration date
Look at the date printed on the package.
If the date has passed, do not use the sensor.
2. Check the packaging
Make sure the package is not damaged or compromised.
If something appears unusual about the packaging, don’t use the sensor until you have received appropriate guidance.
3. Check the sensor
Look for obvious damage.
If the sensor or applicator appears damaged, contact the appropriate product support team.
4. Check your supplies
Make sure you have:
- A compatible display device
- Your Dexcom G7 sensor
- The necessary application supplies
- A suitable insertion site
- A backup blood glucose meter if recommended
5. Follow the current instructions
Dexcom provides current G7 user guides and product resources. Following the instructions supplied with your particular system is important because product instructions can change over time.
How Should Dexcom G7 Sensors Be Stored?
Proper storage is another important part of protecting your supplies.
Do not leave medical devices in extreme temperatures or conditions that are outside the manufacturer’s storage recommendations.
Keep your sensors in their original packaging until they are ready to be used, and follow the storage instructions provided with your product.
Proper storage helps protect the sensor during its labeled shelf life.
If you are unsure whether a sensor has been exposed to damaging conditions, contact the manufacturer or your healthcare professional for guidance rather than guessing.
Can I Use a Sensor That Expired Yesterday?
This is a common question.
Even if a sensor expired only one day ago, the safest choice is not to use it.
The expiration date establishes the end of the manufacturer’s labeled shelf life. You should not assume that a sensor is automatically acceptable simply because it is only slightly past the date.
This is especially important for CGM sensors because the information they provide may influence diabetes management.
Instead, use an unexpired sensor and contact the manufacturer or supplier if you have questions about replacement options.
Can I Use a Dexcom G7 Sensor That Expired Last Month?
The answer remains no.
A sensor that expired last month is outside its labeled expiration date.
It may look perfectly normal, but appearance alone cannot establish that it will provide the expected performance.
If you have several expired sensors, do not insert them simply because you do not want to waste them.
Ask Dexcom or your healthcare professional about appropriate disposal and replacement options.
What If I Am Running Out of Dexcom G7 Sensors?
Running out of sensors can be stressful, especially if you rely on CGM information every day.
The best solution is planning ahead.
Keep track of your supply
Instead of waiting until your final sensor is almost finished, check your remaining supply regularly.
Order before you run out
Refill timing depends on your prescription, insurance, supplier, and location.
Try to arrange your next supply before your current supply is exhausted.
Keep a backup glucose meter
A blood glucose meter can be an important backup when CGM information is unavailable or does not match your symptoms.
Ask your healthcare professional which meter and testing schedule are appropriate for you.
Keep your sensors organized
Store sensors in an appropriate location where you can easily see expiration dates.
A simple first-expiring, first-used system can help reduce the chance of discovering an expired sensor at the last minute.
Is an Expired Dexcom G7 Sensor Safe for Children?
You should be especially careful when considering CGM use for a child.
Dexcom G7 indications and approved wear locations depend on age and the particular product. For the standard G7, Dexcom currently states that the sensor may be worn on the back of the upper arm for ages 2 years and older, with the upper buttocks listed for children ages 2–6.
If you have an expired sensor intended for a child, do not use it simply because you have no other sensor available.
Talk with the child’s healthcare professional and follow the manufacturer’s instructions.
What If the Sensor Is Expired but the App Accepts It?
Technology can sometimes make medical-device questions confusing.
If an app or receiver appears to recognize a sensor, that does not necessarily mean the sensor is within its labeled shelf life.
The software’s ability to communicate with a device should not be treated as confirmation that an expired product is appropriate for use.
Always check the physical product and follow the current manufacturer’s instructions.
Can an Expired Sensor Cause Inaccurate Readings?
It is possible that a sensor outside its labeled expiration period may not perform as expected.
The important point is that you should not rely on an expired sensor to provide the same performance expected from an unexpired product.
Dexcom emphasizes the importance of taking action when CGM readings do not match symptoms or expectations. In that situation, Dexcom recommends using a blood glucose meter for diabetes treatment decisions.
If you ever feel that your CGM reading is wrong, don’t ignore your symptoms just because the number appears on your phone or receiver.
Your symptoms matter.
What Should I Do If My G7 Reading Does Not Match How I Feel?
This is one of the most important safety points for anyone using a CGM.
Suppose your Dexcom shows a glucose number that seems unusual, but you feel symptoms that suggest something different.
Don’t simply assume that the CGM number is correct.
Dexcom’s safety information says that when glucose readings or alerts do not match symptoms or expectations, users should use a fingerstick blood glucose value from a blood glucose meter to make treatment decisions.
Follow your healthcare professional’s instructions for what to do with the meter result.
If you have severe symptoms or believe you may be experiencing a serious glucose emergency, seek appropriate medical attention.
How Alfa Healthcare Supply Inc. Can Help With Diabetes Supplies
Finding the right diabetes supplies can make everyday care feel more manageable.
Alfa Healthcare Supply Inc. provides medical supply products and DME supplies for patients and caregivers.
The company serves customers from its Floral Park location and provides medical supplies to communities across New York. Alfa Healthcare Supply Inc. focuses on helping customers find appropriate medical equipment and supplies for their needs.
If you are looking for diabetes-related supplies, it is important to make sure that the product you receive is appropriate for your needs and that you check expiration dates before use.
When purchasing or receiving CGM supplies, consider checking:
- Product name
- Sensor model
- Expiration date
- Packaging condition
- Quantity
- Prescription requirements when applicable
- Compatibility with your device
For Dexcom products, always follow the manufacturer’s instructions and use the appropriate product for your particular Dexcom system.
Final Answer: Can I Use an Expired Dexcom G7 Sensor?
So, can I use an expired Dexcom G7 sensor?
It is best not to.
If the expiration date printed on the unopened sensor package has passed, do not intentionally insert or rely on that sensor. The expiration date is different from the G7’s normal 10-day wear period and 12-hour grace period.
The standard Dexcom G7 sensor is designed for up to 10 days of use, followed by a 12-hour grace period. Once the grace period ends, Dexcom says the sensor must be replaced and cannot be restarted.
If you accidentally use an expired sensor, don’t assume that a displayed number is automatically reliable. Pay attention to your symptoms, follow your healthcare professional’s instructions, and use a blood glucose meter when CGM readings do not match your symptoms or expectations.
A few minutes spent checking the expiration date before insertion can help prevent an avoidable problem later.
For people managing diabetes, reliable information matters. When in doubt, choose an unexpired sensor and ask your healthcare professional or Dexcom Support for guidance.
Frequently Asked Questions:
Can I use an expired Dexcom G7 sensor?
No. You should not intentionally use an unopened Dexcom G7 sensor after the expiration date printed on its packaging. Use a current, unexpired sensor according to Dexcom’s instructions.
Does Dexcom G7 have a grace period?
Yes. The standard Dexcom G7 has a 12-hour grace period after its 10-day sensor session.
Is the 12-hour grace period the same as an expired package?
No. The 12-hour grace period applies to an active sensor session. It does not mean that an unopened sensor can be used after its package expiration date.
Can I restart a Dexcom G7 after the sensor session ends?
No. Dexcom states that G7 sensors cannot be restarted after the sensor session and grace period have ended.
Can an expired sensor still give readings?
A sensor may appear to communicate with a device, but that does not mean it should be used after its expiration date. Do not rely on an expired sensor for diabetes management.
What if I accidentally inserted an expired sensor?
Check the expiration date, monitor the situation carefully, and contact Dexcom Support for guidance. If your CGM readings do not match your symptoms, use a blood glucose meter according to your healthcare professional’s instructions.
Can I use an expired Dexcom G7 sensor if it was stored properly?
Proper storage does not extend the labeled expiration date. If the package expiration date has passed, use a new sensor instead.
How long does a Dexcom G7 sensor last?
The standard Dexcom G7 sensor is designed for up to 10 days, followed by a 12-hour grace period.
Can I wear my Dexcom G7 longer than the grace period?
You should not rely on the sensor beyond its approved session and grace period. Replace it with a new sensor.
Where can I get help with Dexcom G7 questions?
You can use Dexcom’s official product guides and support resources, or speak with your healthcare professional. Dexcom provides G7 user guides, receiver guides, and other educational resources.
Medical Disclaimer
This article is provided for general educational purposes and should not replace professional medical advice, diagnosis, or treatment. Dexcom product specifications, indications, compatibility, and instructions can change. Always review the current manufacturer’s instructions for your specific product. If you experience symptoms of severe low or high blood glucose or another medical emergency, seek immediate medical attention.
If you use a continuous glucose monitor (CGM), one of the most common questions is: how often to change FreeStyle Libre 3 Plus sensor?
The answer is simple for most users: the FreeStyle Libre 3 Plus sensor is designed to be worn for up to 15 days. After the 15-day wear period, the sensor should be removed and replaced with a new sensor according to the manufacturer’s instructions.
Knowing when to change your sensor can make your diabetes monitoring routine easier. It also helps you plan ahead so you are not suddenly left without a working sensor.
At Alfa Healthcare Supply Inc., we understand that diabetes supplies are not just products sitting on a shelf. They are part of someone’s everyday routine. A sensor may help you understand glucose patterns while you are working, sleeping, exercising, eating, or simply going about your day. That is why knowing how to use and replace your sensor properly matters.
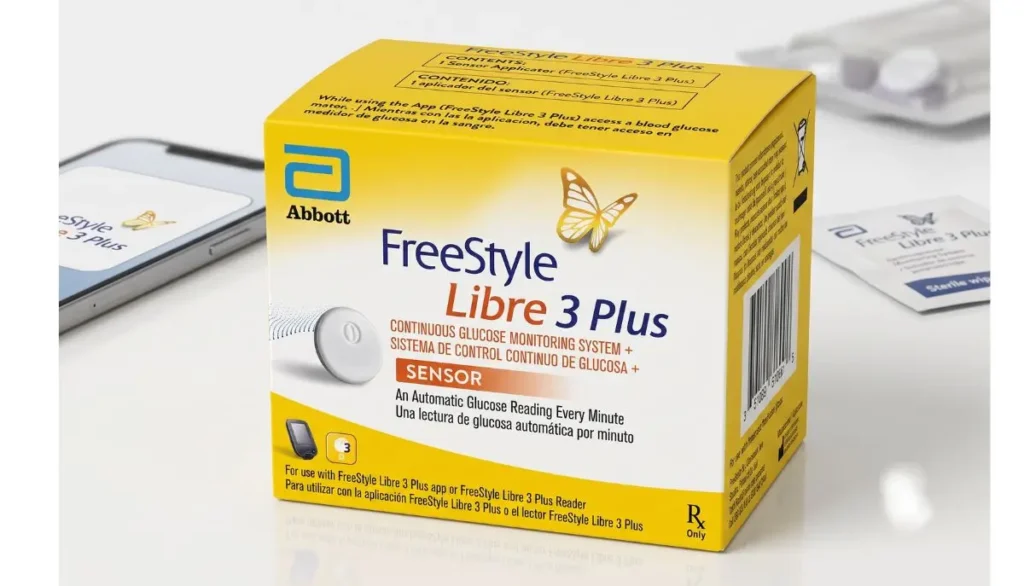
This guide explains how often to change a FreeStyle Libre 3 Plus sensor, what happens when the sensor reaches the end of its wear period, when you may need to replace it sooner, and practical tips for making sensor changes easier.
Important: Always follow the instructions supplied with your specific sensor and the advice of your healthcare professional. Product labeling and availability can vary by country.
How Often to Change FreeStyle Libre 3 Plus Sensor?
The FreeStyle Libre 3 Plus sensor can be worn for up to 15 days under its labeled use.
Once the 15-day wear period is complete, the sensor should be removed and replaced with a new sensor. Abbott describes the Libre 3 Plus as a 15-day real-time CGM sensor that sends glucose readings automatically to a compatible smartphone or reader.
In simple terms:
One FreeStyle Libre 3 Plus sensor = up to 15 days of wear.
That means a person using sensors continuously will generally need approximately:
- 1 sensor for up to 15 days
- 2 sensors for about 30 days
- 6 sensors for about 90 days
- 12 sensors for about 180 days
- Approximately 24 sensors for a full year
The actual number you need can vary because a sensor may sometimes need to be replaced earlier due to accidental removal, adhesion problems, sensor errors, skin irritation, or other issues.
Why Does the FreeStyle Libre 3 Plus Sensor Need to Be Changed?
A CGM sensor is designed for a specific period of use. The FreeStyle Libre 3 Plus is labeled for up to 15 days of wear.
After that period, you should not continue wearing the same sensor simply because it is still attached to your skin.
The sensor is designed as a single-use medical device. It should be removed when its wear period ends and replaced with a new sensor.
Using a new sensor according to the manufacturer’s instructions helps you follow the intended design of the CGM system.
For many people, changing the sensor every 15 days also creates a predictable routine. You can choose a regular day of the week for sensor changes, making it easier to remember.
What Happens When the 15 Days Are Over?
As the FreeStyle Libre 3 Plus sensor reaches the end of its approved wear period, the app or compatible reader can notify you that it is time to replace the sensor.
Abbott’s getting-started information explains that the Libre 3 Plus is designed to remain in place for up to 15 days and that the app or reader can notify the user when it is time for removal.
When your sensor reaches the end of its wear period:
- Check the notification on your compatible device.
- Remove the old sensor according to the manufacturer’s instructions.
- Dispose of the used sensor appropriately.
- Prepare a new sensor.
- Apply the new sensor to an appropriate location.
- Follow the startup instructions for your app or reader.
It is a good idea to have your replacement sensor available before the current sensor expires.
Should You Wait Until the Sensor Falls Off?
No.
You should not wait for the sensor to fall off naturally.
A sensor can remain attached to your skin even after its useful wear period has ended. Being physically attached does not mean it should continue to be used.
The FreeStyle Libre 3 Plus is designed for a specific maximum wear period. Once that period is complete, replace it with a new sensor.
Think of it like replacing a disposable medical supply according to its intended schedule. The adhesive may still be holding, but the device has reached the end of its designed use.
Can You Change the FreeStyle Libre 3 Plus Sensor Earlier Than 15 Days?
Yes, there are situations in which a sensor may need to be removed before 15 days.
For example, you may need to replace the sensor early if:
- The sensor falls off.
- The sensor becomes significantly loose.
- The sensor is damaged.
- The sensor is giving persistent readings that do not match your symptoms.
- The system tells you to replace the sensor.
- There is significant skin irritation.
- The sensor is accidentally knocked off.
- Your healthcare professional tells you to remove it.
Abbott’s safety information says that if a sensor becomes loose or its tip comes out, readings may be unavailable or unreliable, and the sensor should be removed and replaced rather than reinserted.
If a sensor stops working unexpectedly, do not try to repair or reinsert it.
Instead, follow the manufacturer’s troubleshooting and replacement instructions.
What If My FreeStyle Libre 3 Plus Sensor Falls Off Early?
This can be frustrating, especially when you expected the sensor to last the full 15 days.
Sweat, physical activity, clothing, accidental bumps, seat belts, doorways, and other everyday situations can sometimes affect sensor adhesion.
If your sensor falls off before the end of the expected wear period, do not attempt to put the same sensor back into your skin.
Abbott recommends replacing a sensor that falls off before 15 days and contacting its customer support or using its sensor support process when appropriate.
If you frequently experience sensors coming loose, consider reviewing your application technique and discussing the issue with your healthcare professional or the manufacturer’s support team.
How to Make Your FreeStyle Libre 3 Plus Sensor Stay on Longer
Getting the full wear period from a CGM sensor starts with proper application.
Here are some practical tips.
1. Clean the Application Area
Before applying the sensor, follow the manufacturer’s preparation instructions carefully.
The skin should be clean and dry.
Oils, lotions, sweat, or other products on the skin can interfere with adhesion.
Avoid applying lotion directly to the application area before placing the sensor.
2. Let the Skin Dry Completely
After cleaning your skin, allow it to dry before applying the sensor.
A completely dry surface can help the adhesive make proper contact with the skin.
3. Choose the Recommended Location
The FreeStyle Libre 3 Plus sensor is designed to be applied to the back of the upper arm according to Abbott’s labeling.
Avoid areas with:
- Scars
- Moles
- Stretch marks
- Lumps
- Areas that bend or fold excessively
Abbott specifically advises applying the sensor to the back of the upper arm and changing sites between sensors so the skin can recover.
4. Avoid Insulin Injection Sites
If you use insulin, sensor placement matters.
Abbott advises keeping the sensor at least 1 inch away from insulin injection sites.
This is an important practical detail that is easy to overlook.
5. Be Careful With Clothing
When putting on or removing a shirt, jacket, backpack, or other clothing, try not to catch the sensor.
Small accidental pulls can loosen the adhesive.
6. Take Care During Exercise
Exercise can involve sweat and repeated movement.
If you participate in activities that make the sensor more likely to catch on equipment or clothing, take extra care to protect the sensor.
Abbott’s getting-started guide notes that an over-bandage or suitable adhesive product may be used in some circumstances to help with adhesion, while following the manufacturer’s instructions.
Can You Shower or Swim With the FreeStyle Libre 3 Plus Sensor?
The FreeStyle Libre 3 Plus is designed to be worn during normal activities, including bathing, swimming, and exercise, subject to the manufacturer’s water-use instructions.
Abbott’s product information says the sensor can be worn while bathing, swimming, and exercising.
However, water exposure does not mean you should ignore the sensor.
Avoid activities that could pull, hit, or loosen the sensor. After water exposure, gently pat the area dry rather than aggressively rubbing the sensor.
Always check the current product instructions for water-depth and duration limitations.
What Is the Best Day to Change Your Sensor?
There is no universally required day of the week for changing your sensor.
The easiest approach is to create a routine that works for your lifestyle.
For example, you might start a new sensor on a Saturday morning. Approximately 15 days later, you will reach the end of its wear period and can plan your next change.
Some people prefer changing sensors:
- Before the weekend
- On a day off
- In the morning
- After a shower
- Before traveling
- On a day when they have more time to troubleshoot
The most important thing is consistency and following the sensor’s notifications and instructions.
How Many FreeStyle Libre 3 Plus Sensors Do You Need Each Month?
Because each sensor is designed for up to 15 days, two sensors generally provide approximately 30 days of continuous sensor coverage.
A simple planning example is:
| Period | Approximate Sensors |
| 15 days | 1 |
| 30 days | 2 |
| 60 days | 4 |
| 90 days | 6 |
| 180 days | 12 |
| 1 year | About 24 |
These are planning estimates rather than guarantees.
If you experience early sensor failures or accidental sensor removal, you may need additional sensors.
This is one reason it can be helpful to keep an appropriate supply available rather than waiting until your current sensor is nearly finished.
FreeStyle Libre 3 vs. FreeStyle Libre 3 Plus: Is the Wear Time the Same?
No.
This is an important distinction.
The standard FreeStyle Libre 3 sensor is designed for up to 14 days of wear, while the FreeStyle Libre 3 Plus sensor is designed for up to 15 days in the U.S. labeling.
That one-day difference can cause confusion when people search online for information about “Libre 3.”
If you have the Libre 3 Plus, look specifically at the instructions and labeling for the Plus version rather than assuming that information about the standard Libre 3 applies.
Always check the product packaging and instructions for the exact sensor you are using.
Why Sensor Replacement Matters for Glucose Monitoring
A CGM can provide valuable information about glucose patterns throughout the day.
You may use that information to understand how your glucose responds to:
- Meals
- Exercise
- Sleep
- Stress
- Daily activities
- Medications
- Insulin
- Changes in routine
However, a CGM is only useful when the sensor is being used according to its intended instructions.
Replacing the sensor at the appropriate time is part of maintaining your monitoring routine.
It is also important not to make treatment decisions based solely on a reading that does not match how you feel. Abbott’s safety information advises confirming glucose with a blood glucose test when readings or alarms do not match symptoms or expectations.
What If My Sensor Reading Does Not Match How I Feel?
This is an important situation.
Suppose your sensor shows a glucose level that seems unusual, but you feel completely different from what the reading suggests.
Do not automatically assume that the sensor reading is correct or incorrect.
Follow the instructions provided with your CGM system. Abbott advises using a blood glucose test when readings and symptoms do not match or when the system indicates that confirmation is needed.
If you continue to have concerns about sensor accuracy, contact your healthcare professional or the manufacturer’s support team.
Signs You May Need to Replace Your Sensor Early
Although 15 days is the normal maximum wear period for the FreeStyle Libre 3 Plus, certain problems can mean an earlier replacement is necessary.
Watch for:
Sensor is falling off
If the sensor is becoming loose or has fallen off, it should not simply be reattached and reused.
Persistent sensor errors
If your app or reader repeatedly indicates that the sensor is not functioning correctly, follow the troubleshooting instructions.
Unreliable readings
If readings repeatedly appear inconsistent with your symptoms or expectations, follow the manufacturer’s instructions and consider confirming glucose with a blood glucose test.
Skin irritation
Some people may develop irritation from medical adhesives.
If you experience significant irritation around or underneath the sensor, Abbott advises removing the sensor and contacting a healthcare professional before continuing use.
Physical damage
If the sensor is damaged or you have another concern about its condition, follow the manufacturer’s guidance.
How to Remove a FreeStyle Libre 3 Plus Sensor
When the sensor reaches the end of its wear period, removal is generally straightforward.
According to Abbott’s getting-started guide:
- Prepare to remove the sensor.
- Lift the edge of the adhesive.
- Slowly peel the sensor away from your skin.
- Dispose of it according to applicable local requirements.
- Choose a different appropriate area on the back of your upper arm for the next sensor.
Abbott recommends applying the replacement sensor to a different location to help avoid skin irritation. Alternating arms can also be useful.
If the adhesive is difficult to remove or your skin is particularly sensitive, take your time rather than pulling aggressively.
Should You Reuse a FreeStyle Libre 3 Plus Sensor?
No.
The sensor and applicator are intended for single use.
Do not try to remove a sensor and then reinsert it later. Abbott’s safety information specifically warns against reusing sensors because doing so can result in no glucose readings and may increase infection risk.
Once a sensor has been removed, use a new sensor according to the manufacturer’s instructions.
Tips for Planning Your Next FreeStyle Libre 3 Plus Sensor
One of the easiest ways to avoid gaps in glucose monitoring is to plan ahead.
Keep track of your sensor start date
When you apply a new sensor, make a note of the date.
Check your supply regularly
Do not wait until the final day of your current sensor to discover that you need another one.
Keep replacement supplies available
If your healthcare plan or prescription allows, maintain an appropriate supply so an unexpected early replacement does not leave you without a sensor.
Check expiration dates
Abbott advises checking the expiration date on the sensor packaging and using the sensor with the shortest expiration date first when you have multiple sensors.
Store sensors properly
Follow the storage conditions listed on your product packaging.
Abbott’s U.S. safety information specifies storage within the labeled temperature range and advises avoiding freezing and excessive heat.
What Should You Do Before Traveling?
Travel can make sensor replacement a little more complicated.
Before leaving home, consider:
- How many days you will be away
- How many sensors you may need
- Whether you have a backup sensor
- Your compatible phone or reader
- Your charging equipment
- Your other diabetes supplies
- Your prescription or insurance requirements
- How you will store your sensors during travel
Having your replacement supplies organized can make travel less stressful.
If your current sensor is close to the end of its 15-day period, planning a replacement before a long journey may be more convenient than waiting until you are traveling.
Can You Extend the FreeStyle Libre 3 Plus Sensor Beyond 15 Days?
The sensor is designed for up to 15 days of wear.
You should not attempt to extend its use beyond the labeled wear period or develop an unofficial method for resetting or reusing the sensor.
A CGM is a medical device, and the manufacturer’s instructions are there to help ensure it is used as intended.
If you need longer-term continuous monitoring, use a new sensor according to the approved schedule.
Is the FreeStyle Libre 3 Plus Right for Everyone?
A CGM can be an important diabetes-management tool, but the best monitoring system can vary from person to person.
Your healthcare professional may consider factors such as:
- Type of diabetes
- Age
- Current treatment
- Insulin use
- Glucose-management goals
- Smartphone compatibility
- Reader requirements
- Insurance coverage
- Lifestyle
- Personal preferences
- Other diabetes technology
There is no single diabetes-monitoring setup that is perfect for everyone.
The FreeStyle Libre 3 Plus is one option, and discussing your needs with your healthcare professional can help determine whether it fits your diabetes-management plan.
Why Buying From a Reliable Medical Supply Provider Matters
When you purchase diabetes supplies, reliability matters.
You want to know that you are ordering the correct product and that the product information is clear.
Alfa Healthcare Supply Inc. provides medical supplies and durable medical equipment for patients and caregivers. The company serves customers in New York and offers a range of healthcare products, including diabetes supplies.
If you are looking for a FreeStyle Libre 3 Plus sensor, you can visit the Alfa Healthcare Supply website to learn more about available products and ordering options.
Final Thoughts: How Often to Change FreeStyle Libre 3 Plus Sensor
For most users, the answer to “how often to change FreeStyle Libre 3 Plus sensor” is straightforward: replace the sensor after up to 15 days of wear.
The key is not simply remembering the number 15. A good sensor routine also means applying the sensor correctly, protecting it during everyday activities, watching for skin irritation or adhesion problems, replacing it if it fails early, and keeping your next sensor ready.
Diabetes management can already involve many daily decisions. Sensor replacement does not have to become another source of confusion.
A simple routine can help:
Apply → Monitor → Track the wear period → Replace at 15 days → Rotate the application site → Repeat.
If you have questions about your specific CGM, diabetes treatment, glucose readings, or whether a particular sensor is appropriate for you, speak with your healthcare professional and follow the instructions provided with your device.
At Alfa Healthcare Supply Inc., our goal is to make finding medical supplies easier and more convenient for patients, caregivers, and families.
Frequently Asked Questions About How Often to Change FreeStyle Libre 3 Plus Sensor
1. How often do you change a FreeStyle Libre 3 Plus sensor?
The FreeStyle Libre 3 Plus sensor is designed to be worn for up to 15 days. After the 15-day period, remove the sensor and replace it with a new one according to the manufacturer’s instructions.
2. Can I wear my Libre 3 Plus sensor longer than 15 days?
The sensor is designed for up to 15 days of wear. You should follow the manufacturer’s labeled wear period rather than trying to extend the sensor’s use.
3. What happens when my Libre 3 Plus sensor expires?
Your compatible app or reader can notify you when it is time to replace the sensor. Remove the old sensor and apply a new sensor following the manufacturer’s instructions.
4. Can I replace my Libre 3 Plus sensor before 15 days?
Yes. A sensor may need to be replaced early if it falls off, becomes damaged, develops a problem, causes significant skin irritation, or the system instructs you to replace it.
5. Can I reuse a FreeStyle Libre 3 Plus sensor?
No. The sensor is designed for single use and should not be reinserted after removal.
6. Where should the Libre 3 Plus sensor be placed?
The sensor is designed to be applied to the back of the upper arm. Follow the manufacturer’s placement instructions and avoid areas such as scars, moles, lumps, and areas that bend or fold significantly.
7. How far should the sensor be from an insulin injection site?
Abbott advises keeping the sensor at least 1 inch away from insulin injection sites.
8. What if my Libre 3 Plus sensor falls off?
Do not attempt to reinsert the sensor. Replace it with a new sensor and follow the manufacturer’s support instructions if necessary.
9. Can I shower while wearing the Libre 3 Plus?
The Libre 3 Plus is designed to be worn during normal activities such as bathing, swimming, and exercise, subject to the manufacturer’s water-use instructions.
10. Is FreeStyle Libre 3 the same as Libre 3 Plus?
No. The standard Libre 3 sensor and Libre 3 Plus have different labeled wear durations. Abbott’s current U.S. information identifies the Libre 3 Plus as a 15-day sensor, while the standard Libre 3 is listed as a 14-day sensor.
11. How many Libre 3 Plus sensors do I need for a month?
Two sensors generally provide approximately 30 days of coverage because each sensor is designed for up to 15 days. Actual needs can vary if a sensor has to be replaced early.
12. What should I do if my sensor readings do not match how I feel?
Follow the system’s instructions and confirm your glucose with a blood glucose test when readings or symptoms do not match or when the system indicates that confirmation is required. Contact your healthcare professional if you remain concerned.